

Taking backup is a simple process, as it requires you to copy data from one location to a safer location. Backing up important mails are very important as it ensured data safety can be used to recover mails in case of data loss.
The Stellar Outlook Manager software simplifies the process of taking mail backup. The ‘Backup Mailbox’ option of the software allows you to create backup of mails and other items. The software supports taking backup from three different accounts: MS Outlook, Outlook Express, and Windows Mail. In order to save time while backing up huge PST files, the software provides with an option to perform incremental backup. The other two backup options provided by the software are Differential backup and Full backup. Moreover, the software allows you to schedule the backup process.
With an easy-to-use and interactive interface, you can easily perform the backup process using this tool. In order to take mail backup using Stellar Outlook Manager, you need to follow the below mentioned steps.
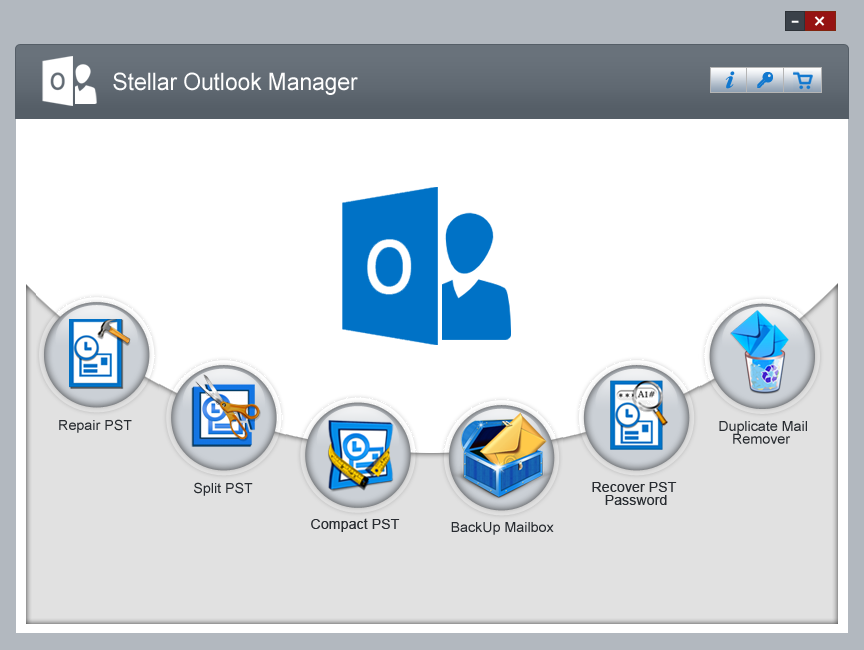
1. Run “Stellar Outlook Manager” software. The software displays the main interface as shown below.
2. Click on the ‘Backup Mailbox’ option to take the backup of your mail data as shown below.
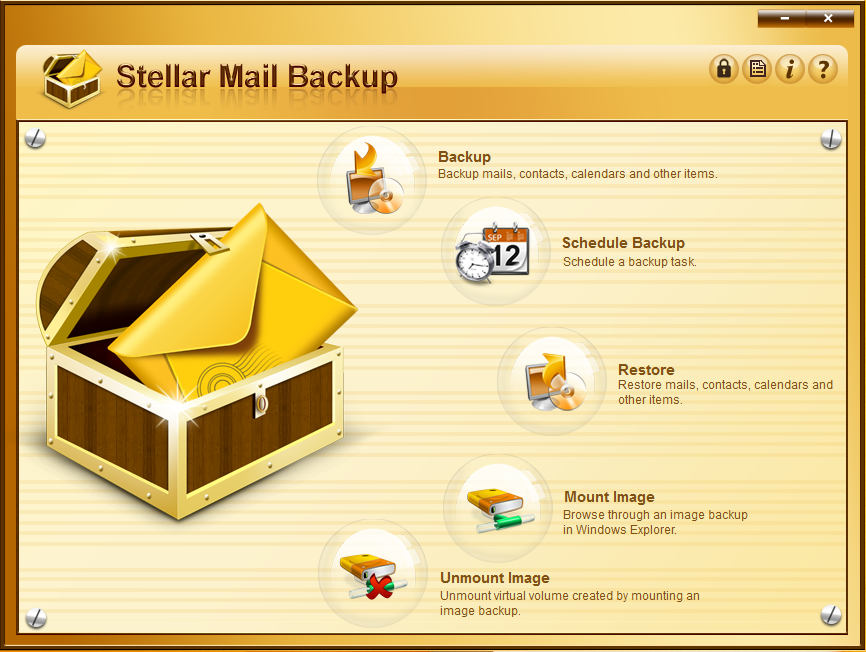
The software provides you with five options to work with: Backup, Schedule Backup, Restore, Mount Image, and Unmount Image.
With the backup option, you can create backup of one or more email profiles. The Schedule Backup option allows you to schedule the backup process automatically at any given time. You can restore the backup image using the ‘restore’ option of this software. The Mount Image and Unmount Image options of the software let you mount and unmount the backup image successfully.
3. Once you have selected the ‘Backup’ option of the software, the software finds all mail folders and the items within them as shown below.
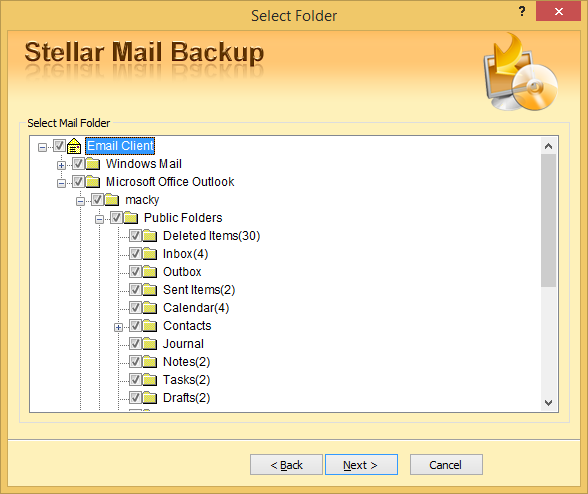
You can either select all the folders or as many as you want to backup.
4. Click ‘Next’ to proceed. The next interface provides you with three different options to work with: Password Protection, Mail Notification, and Image Consolidation & Validation.
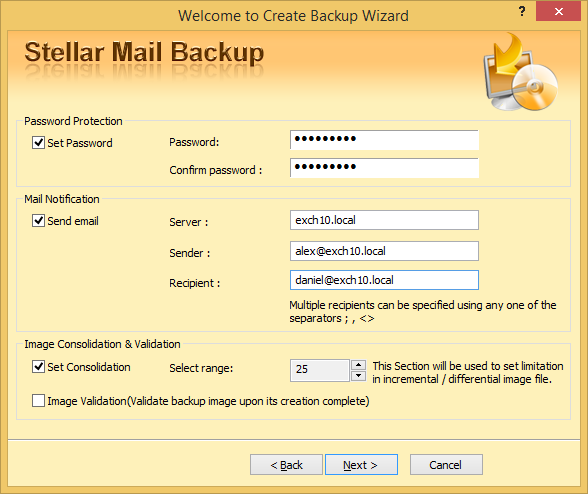
The password protection option allows you to protect your backup image by applying a password. You can use the Mail Notification option to get notified about the backup process completion. The created backup can be validated using the Image Validation option.
5. By clicking ‘Schedule Backup’, the software gives you an option to manage an existing task or schedule a new task as shown below.
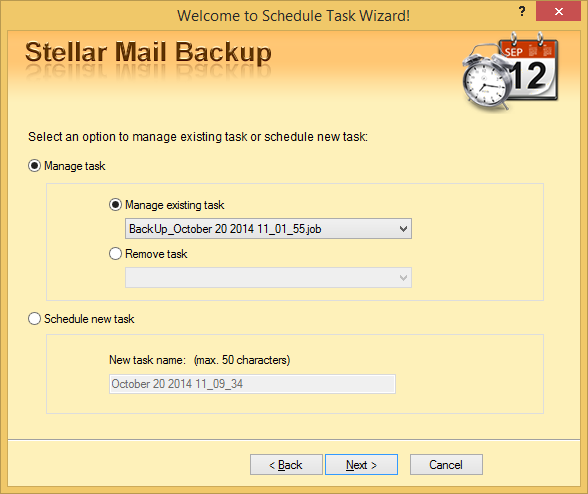
Click ‘Next’ to proceed and complete the schedule backup process.
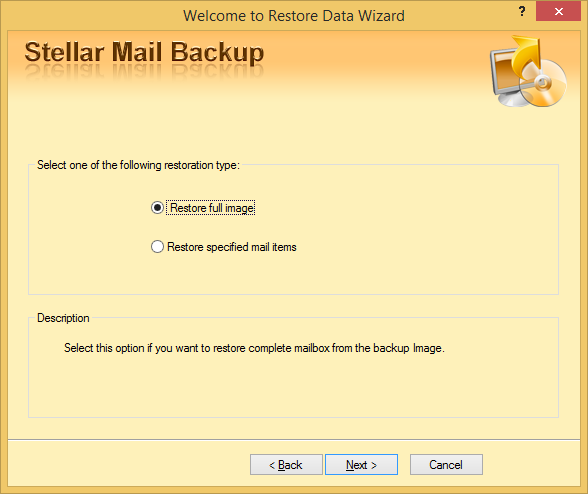
6. By clicking the restore option of the software, you can either restore full image or specific mail items as shown below.
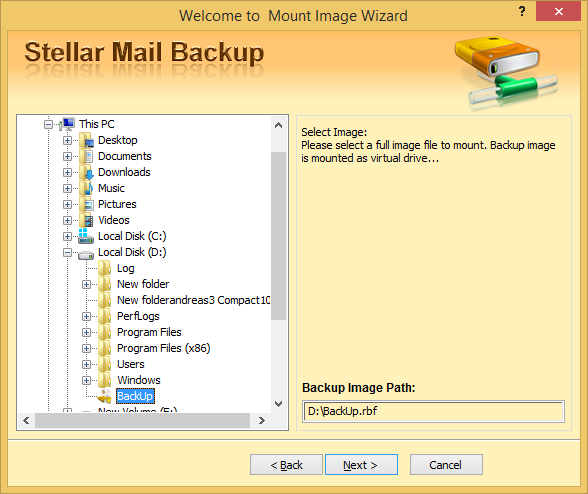
7. The ‘Mount Image’ option of the software lets you select the backup image you want to mount. Then click ’Next’ to complete the process as shown in the below given figure.
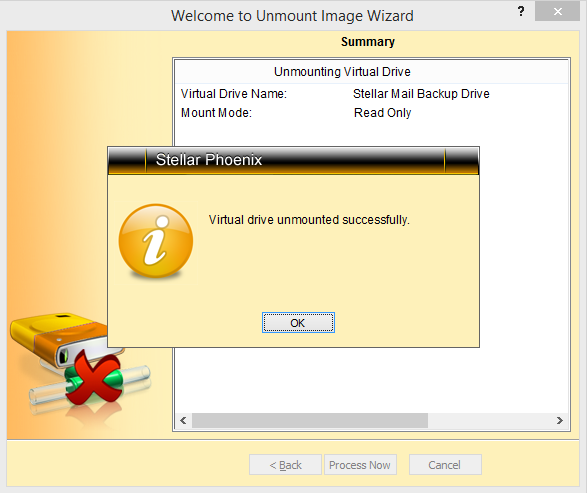
8. You can unmount the already mounted drive using the ‘Unmount’ option of the software. Once done, the software displays a message saying that “Virtual drive unmounted successfully” as shown below.
The Stellar Outlook Manager software simplifies the process of taking mail backup. The ‘Backup Mailbox’ option of the software allows you to create backup of mails and other items. The software supports taking backup from three different accounts: MS Outlook, Outlook Express, and Windows Mail. In order to save time while backing up huge PST files, the software provides with an option to perform incremental backup. The other two backup options provided by the software are Differential backup and Full backup. Moreover, the software allows you to schedule the backup process.
With an easy-to-use and interactive interface, you can easily perform the backup process using this tool. In order to take mail backup using Stellar Outlook Manager, you need to follow the below mentioned steps.
1. Run “Stellar Outlook Manager” software. The software displays the main interface as shown below.
2. Click on the ‘Backup Mailbox’ option to take the backup of your mail data as shown below.
The software provides you with five options to work with: Backup, Schedule Backup, Restore, Mount Image, and Unmount Image.
With the backup option, you can create backup of one or more email profiles. The Schedule Backup option allows you to schedule the backup process automatically at any given time. You can restore the backup image using the ‘restore’ option of this software. The Mount Image and Unmount Image options of the software let you mount and unmount the backup image successfully.
3. Once you have selected the ‘Backup’ option of the software, the software finds all mail folders and the items within them as shown below.
You can either select all the folders or as many as you want to backup.
4. Click ‘Next’ to proceed. The next interface provides you with three different options to work with: Password Protection, Mail Notification, and Image Consolidation & Validation.
The password protection option allows you to protect your backup image by applying a password. You can use the Mail Notification option to get notified about the backup process completion. The created backup can be validated using the Image Validation option.
5. By clicking ‘Schedule Backup’, the software gives you an option to manage an existing task or schedule a new task as shown below.
Click ‘Next’ to proceed and complete the schedule backup process.
6. By clicking the restore option of the software, you can either restore full image or specific mail items as shown below.
7. The ‘Mount Image’ option of the software lets you select the backup image you want to mount. Then click ’Next’ to complete the process as shown in the below given figure.
8. You can unmount the already mounted drive using the ‘Unmount’ option of the software. Once done, the software displays a message saying that “Virtual drive unmounted successfully” as shown below.


