

The external hard drive going unrecognized might be giving you nightmares since you are unable to access your important documents, videos, photos, audio files? Don't worry since this KB article shares a unique solution to recover data from an unmounted or unrecognized drive on macOS Catalina, Mojave, High Sierra, Sierra, El Capitan, Yosemite, Mavericks, Mountain Lion and Lion.
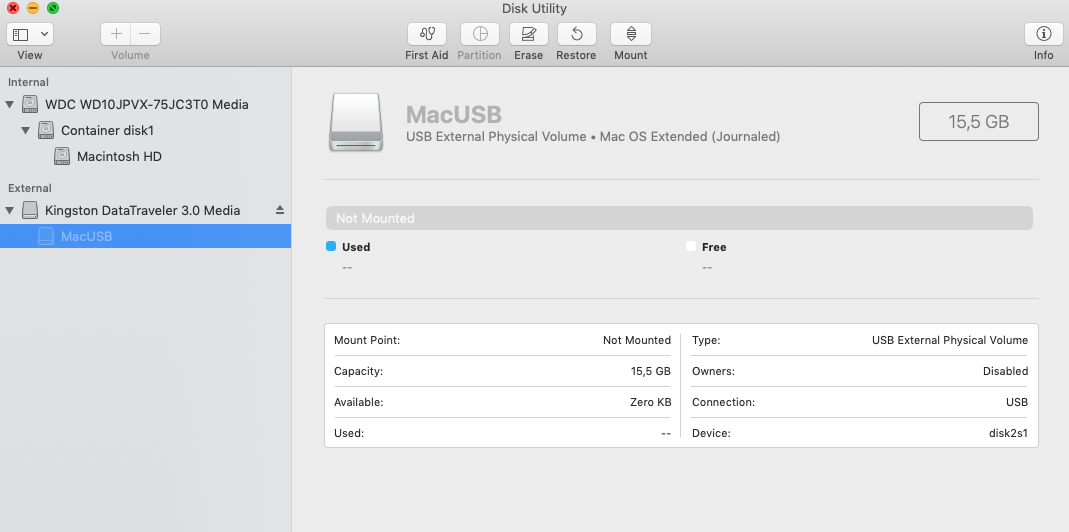
An unmounted drive appears Greyed out in Disk Utility (image only for reference)
First and foremost connect your unmounted drive to Mac. Further, download, install the Stellar Data Recovery Professional software and perform below sequential steps:
Step 1) Launch Stellar Data Recovery Professional on Mac
Step 2) From the interface, select the type of data you want to recover. Click Next.

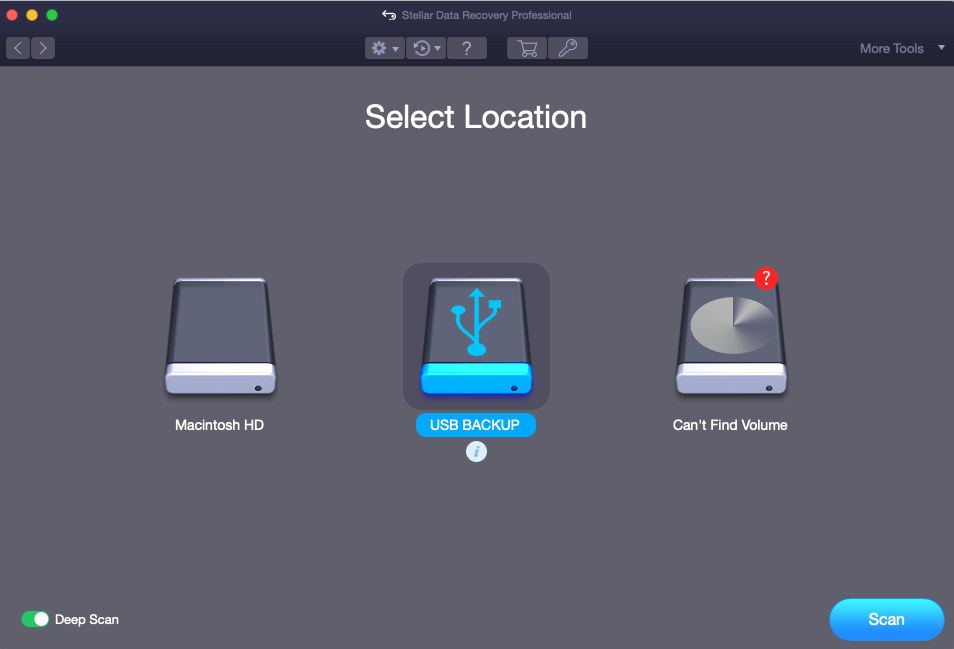
Step 3) Under Select Location window choose your unmounted drive. Click Scan to launch the scan process on an unmounted drive.
After a while, the scanning process completes successfully.
Step 4) Next, from the list of found files and folders listed in – Classic List/ File List / Deleted List, select the desired one to launch its Preview.
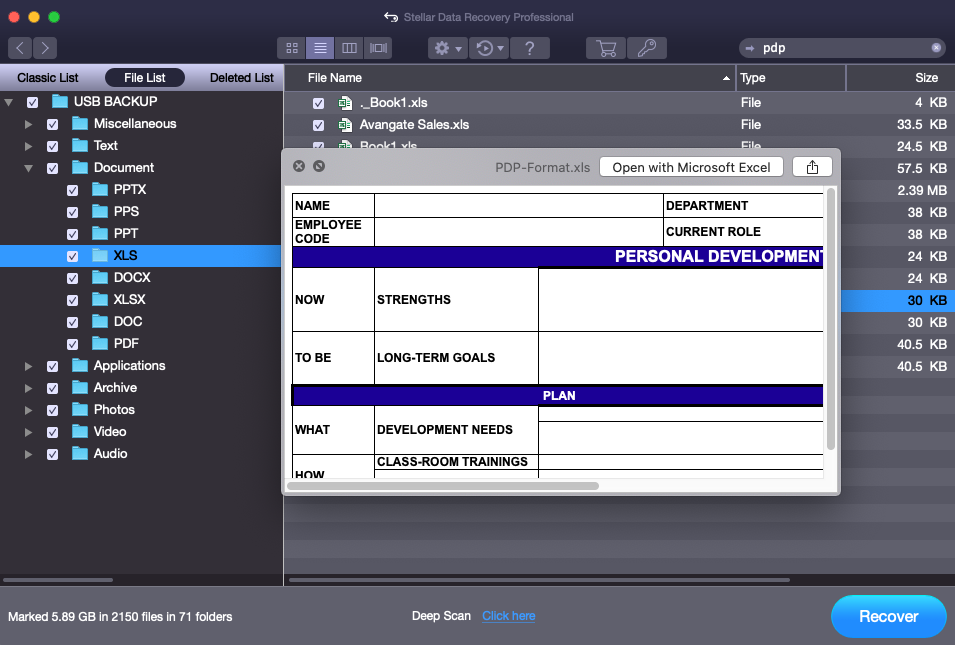
Step 5) Lastly, select all desired files and folders and click Recover to save.
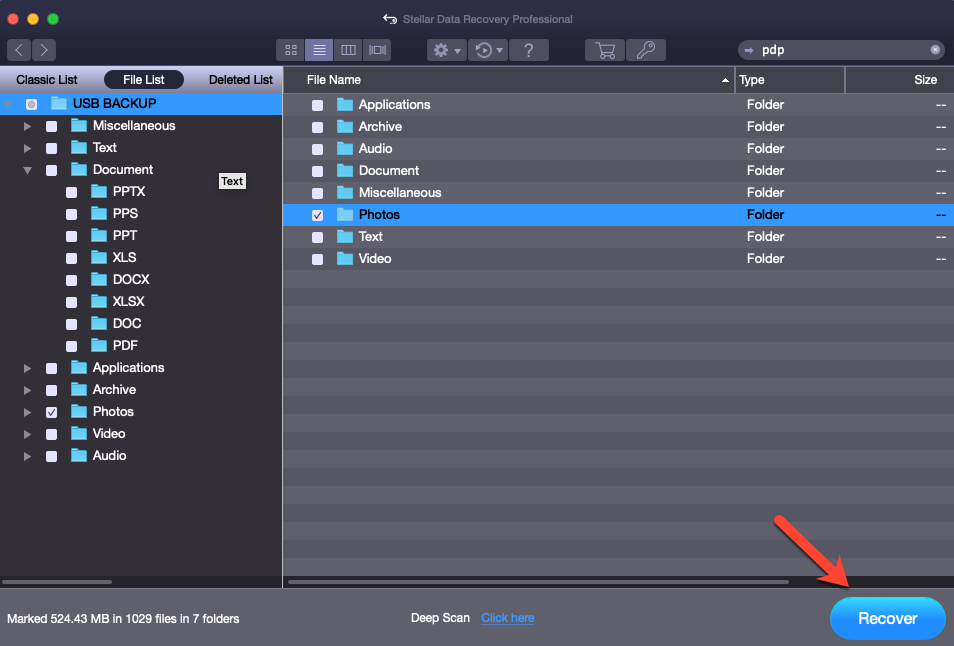
Image for Reference
This completes the data recovery process from an unmounted or unrecognized drive on macOS. Below is the video tutorial for your understanding:-
<iframe width="100%" height="400" src="https://www.youtube.com/embed/e8TG65QMCFI" frameborder="0" allow="accelerometer; autoplay; encrypted-media; gyroscope; picture-in-picture" allowfullscreen></iframe>


