Scanning the entire drive or storage media for lost files is a time taking process. However, Stellar Photo Recovery has provision to customize the recovery process that significantly reduces the scan time. The software has Advanced Settings options through which you can minimize the scan time and speed up the recovery procedure.
Methods to reduce scan time
Method 1: Select specific files from the home screen
Method 2: Select region in hard disk
Method 3: Turn Off Preview
The software offers options to what you exactly want to recover on the home screen.
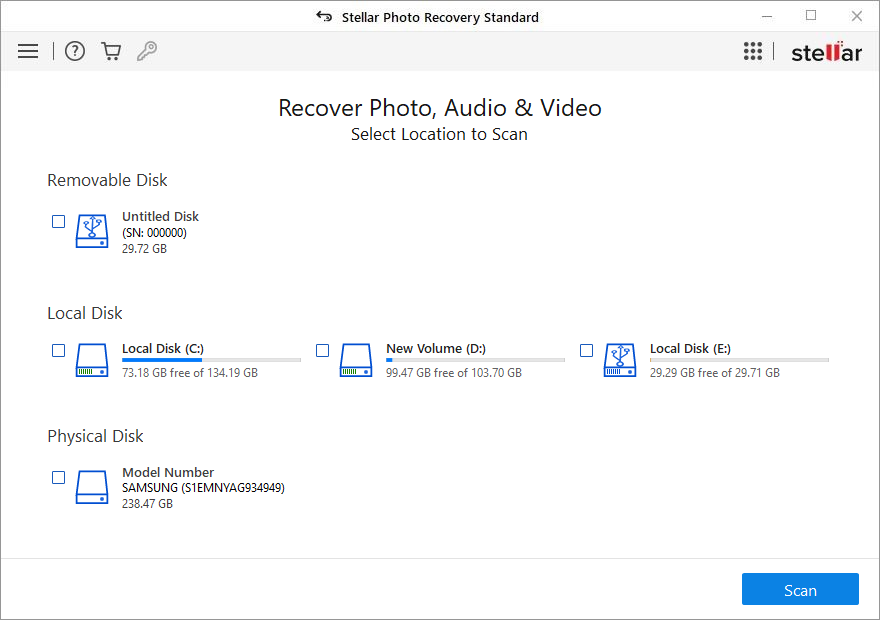
Select a specific drive. Under Advanced Settings, the file list option of Stellar Photo Recovery lists various file types. Select the required file types.
Steps to Select File Type
• Run Stellar Photo Recovery software.
• In the next Select Location screen, click on Advanced Settings icon.
• Click on File List icon.
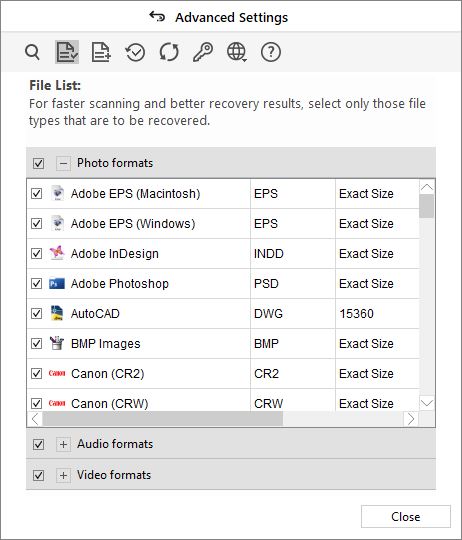
• Select required file types under photos formats, videos formats or audio formats. If the desired file type is not present, add new file type by clicking on the Add File Type button.
• Click Close to shut the Advanced Settings window.
• Click on Scan, followed by Recover, and Save.
Method 2: Select Region in Hard Disk
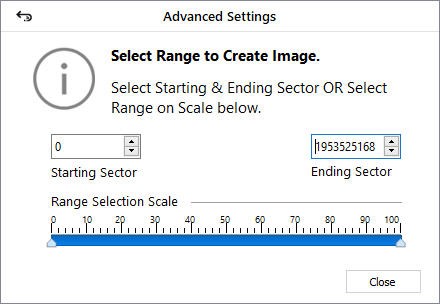
Select a specific region for scan in your hard disk for recovery of media files. The Resume Recovery option lets you Create Image of the select range of the hard drive. This disk image is saved at your chosen location and can be used for recovery. This option is for more technical users who know where exactly the lost files were saved.
Steps to select range of the drive
• Run Stellar Photo Recovery software.
• In the next Select Location screen, click on Resume Recovery icon.
• Select Create Image option from the drop-down.
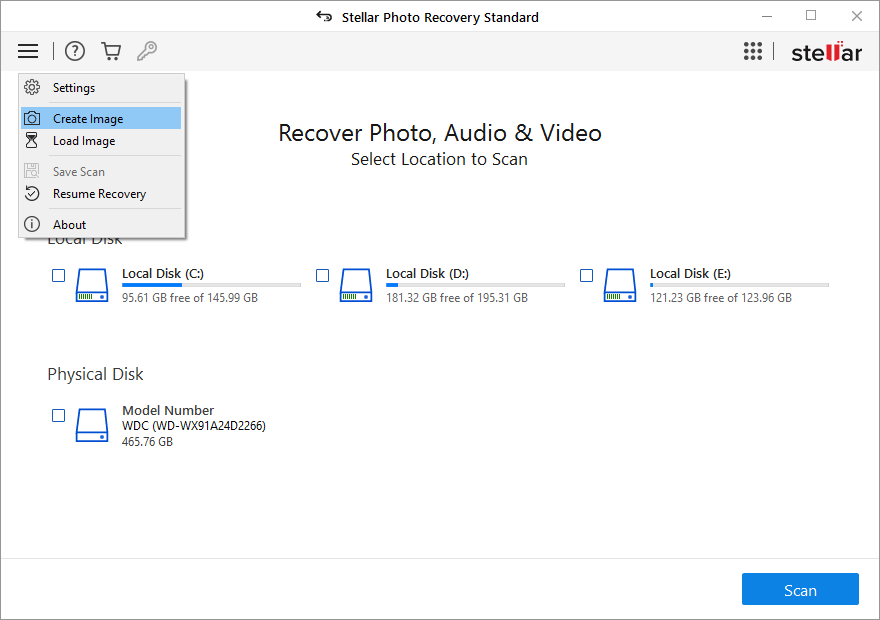
• Select the drive for which you want to create an image.
• Click Advanced Settings to select the range of media to create an image for a specified region.
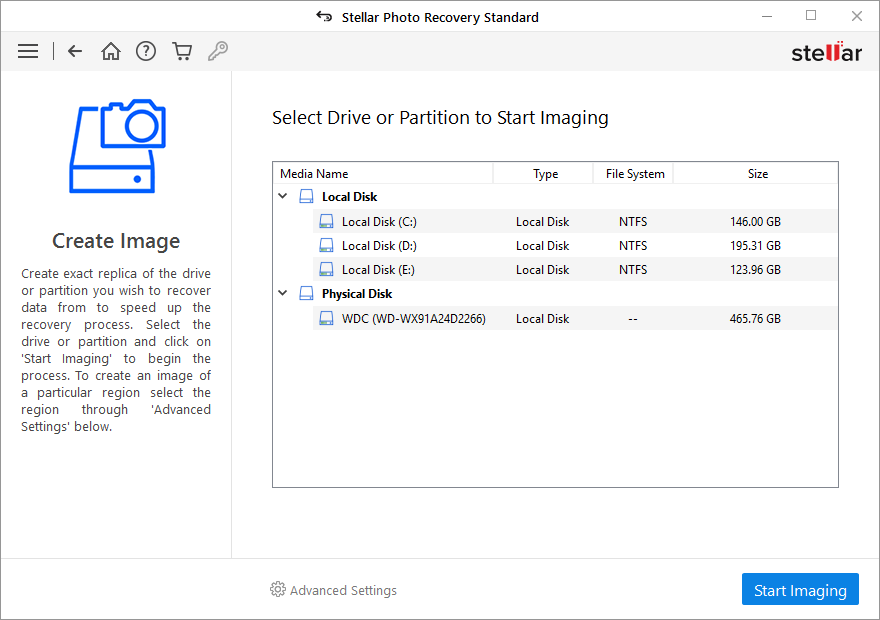
• Select the Range to Create Image in the dialog box and click Close.
• Click Start Imaging in the main Create Image window.
• After the process finishes, the image file is saved at your specified location. Next, recover the photos, videos, or audio files from this disk image from the selected range.
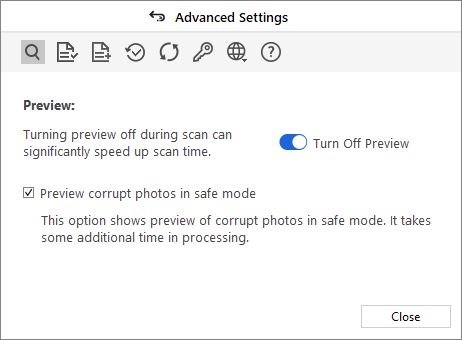
Method 3: Turn-off Preview
You can turn-off Preview of files during the scan. This helps to significantly speed up scanning and hence the recovery process.
Steps to turn-off Preview
• Run Stellar Photo Recovery software.
• In the next Select Location screen, click on Advanced Settings icon.
• Click on the Preview icon under Advanced Settings.
• Toggle off the Preview and click Close.
• Click on Scan, followed by Recover, and Save.