

BitRaser File Eraser is one of the best file erasing software which permanently erases files, folders, internet browsing history, cookies and other sensitive data from your Windows PC. It uses advanced erasure algorithms to erase your unwanted but confidential files permanently beyond any scope of recovery. In this document, we will cover how to use BitRaser File Eraser to permanently erase files in Windows PC.
Follow the steps below to erase files permanently in your PC.
1. Install & Run BitRaser File Eraser.
2. Explore the BitRaser File Eraser screen on your PC [Image 1]. You can view the list of items you can delete using the software in the main menu.
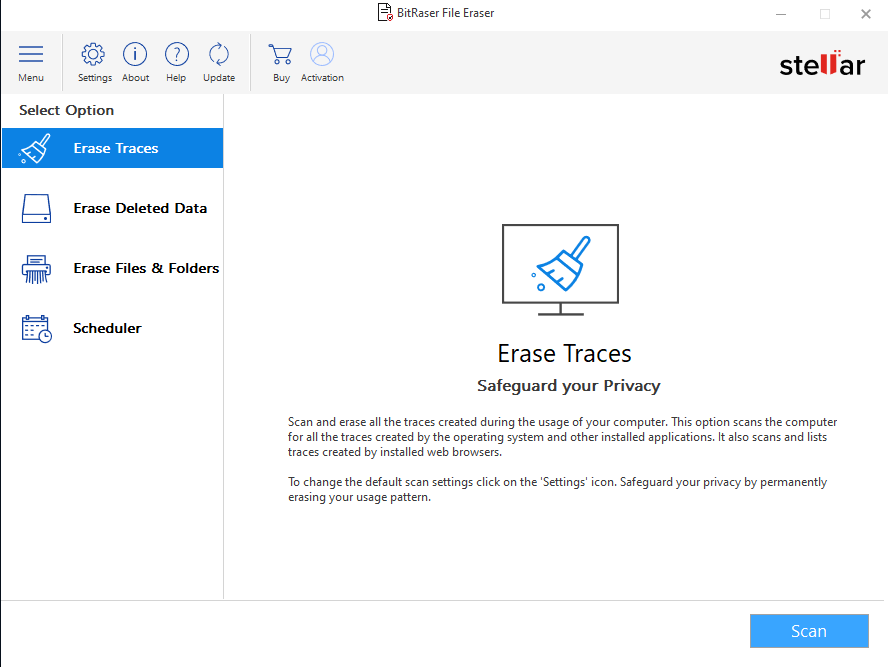
Image 1: BitRaser File Eraser interface
3. Click on Erase File & Folder, the third option on the left pane.
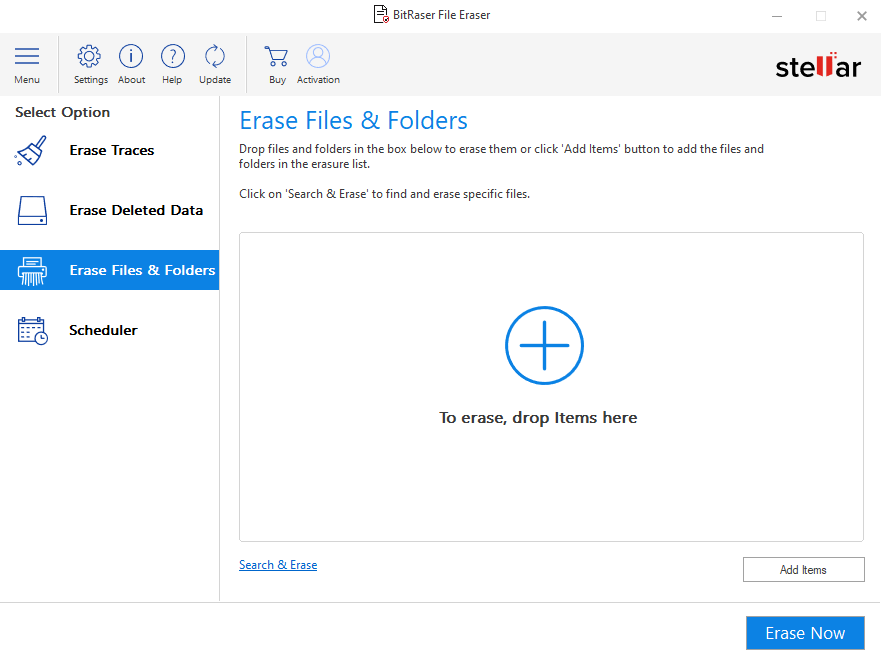
Image 2: Erase Files and Folders feature
4. You can delete files and folders in two ways. You can either search and erase a specific file you want to target or you can manually add them. To use the Search & Erase option, click on Search & Erase link on bottom side of the screen.

Image 3: Search and Erase dialog box
5. Here, enter the File Name and mention the location (by using the browse button).
Image 4: Enter File name and Location and click on Search button
6. Alternatively, you can also add the to-be-erased files by clicking on Add items button (bottom right side of the screen)
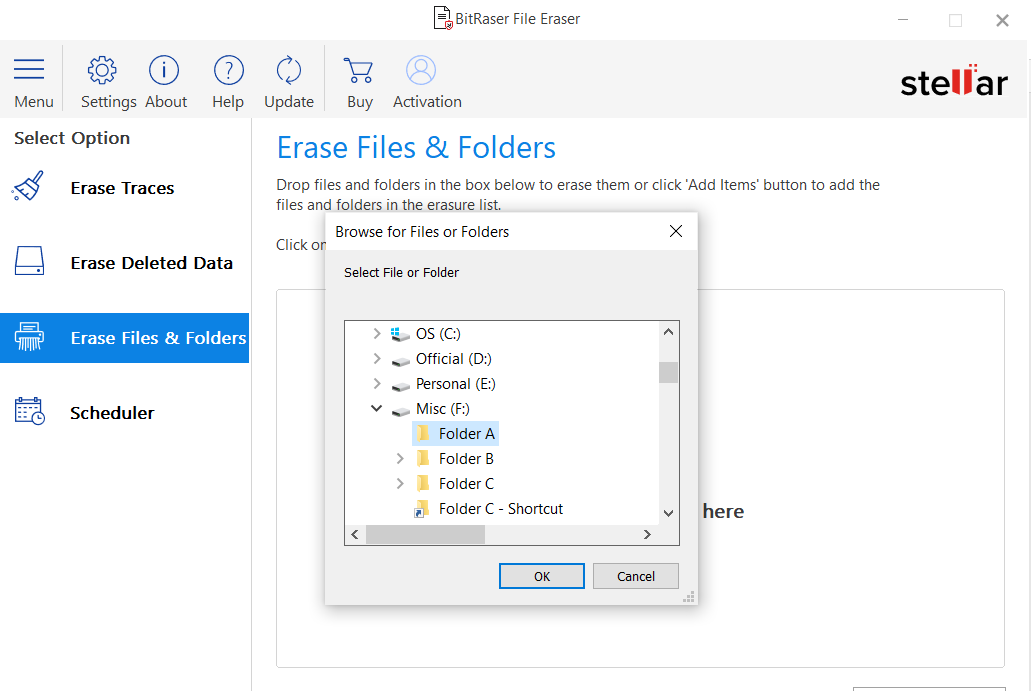
Image 5: Adding items for Erasure
7. Once the selected file displays on the screen, click “Erase Now”
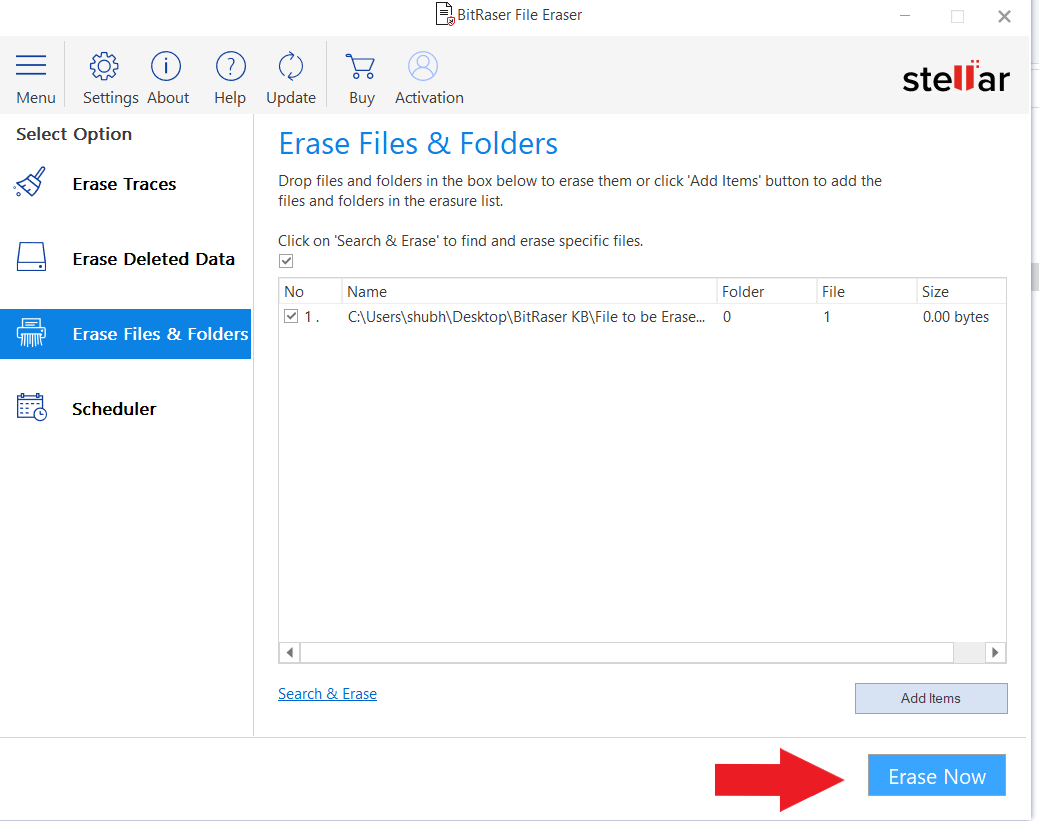
Image 6: Erasing the added files with BitRaser File Eraser
8. A dialog box will appear, asking you to confirm the Erasure process. Click on Proceed.
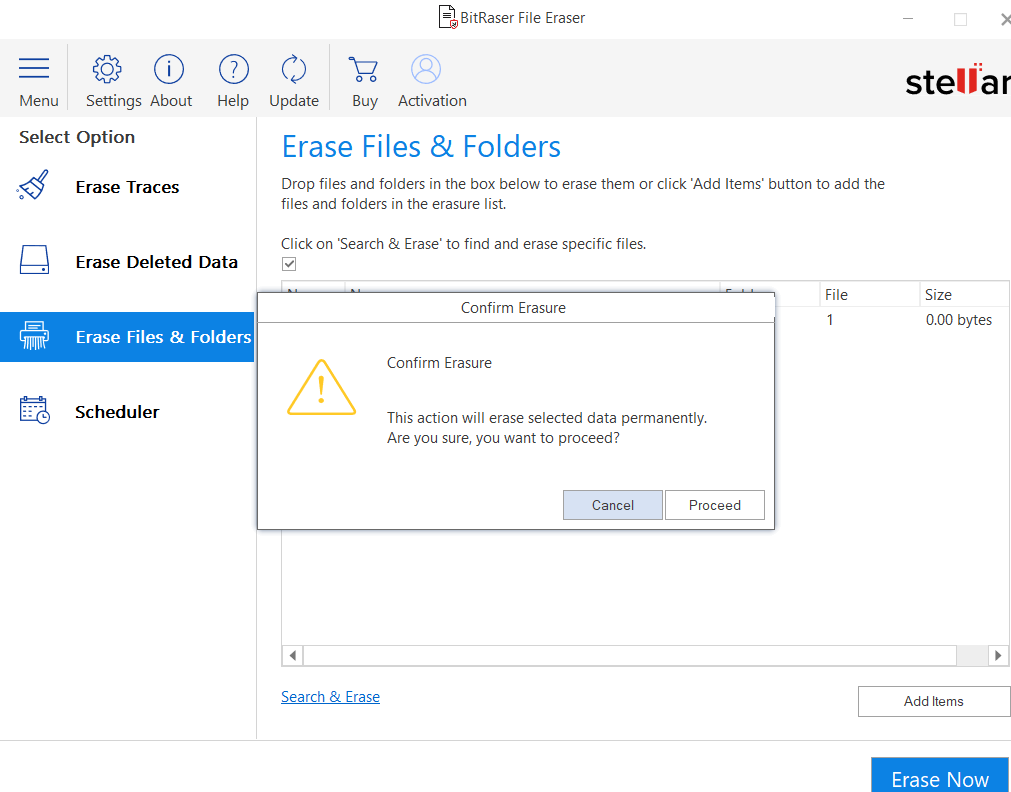
Image 7: Confirm Erasure dialog box
9. The software will complete the Erasure process and you will receive a confirmation screen. Click on Ok button to close the process.
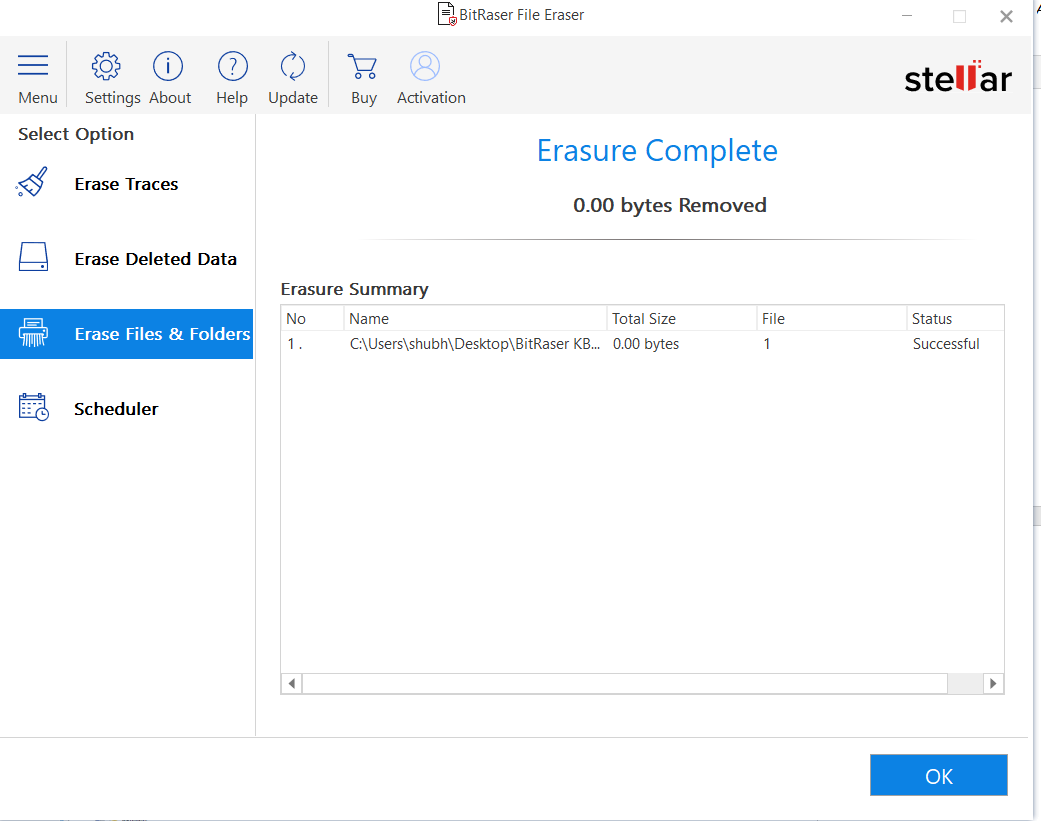
Image 8: Erasure complete confirmation screen.


