

Stellar Recovery for Virtual Machine is efficient in recovering all lost or deleted data from your virtual machine drives. The recovery steps are as easy as counting 1, 2, 3…
Let us have a look at the steps of recovering data with Stellar Recovery for Virtual Machine.
Download and install StellarPhoenixVirtualMachineDataRecovery.exe on the system where you have created the virtual machine drive.
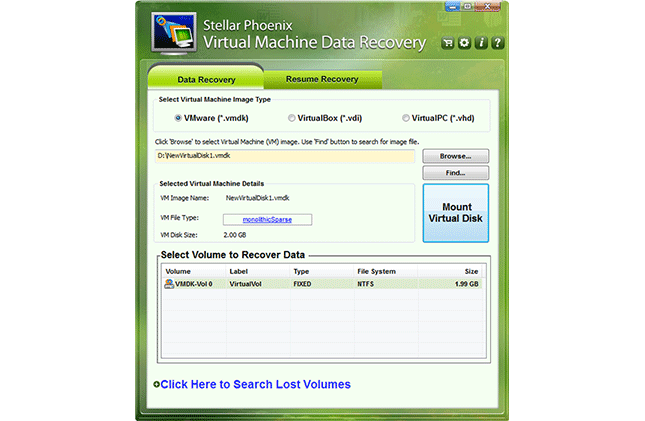
- The main user interface opens up. There you can see two tabs – ‘Data Recovery’ and ‘Resume Recovery’. Stellar Virtual Machine Data Recovery offers recovery support from virtual machine image types – VMware (.vmdk), VirtualBox (.vdk), and VirtualPC (.vhd).

- In the Data Recovery tab under the list of virtual machine image types, you can find the ‘Browse’ and ‘Find’ buttons. Prior to that, select the particular virtual machine image type.
Note: If you need to search any volume entirely lost from the virtual drive, you can click the option – ‘Click Here to Search Lost Volume’.
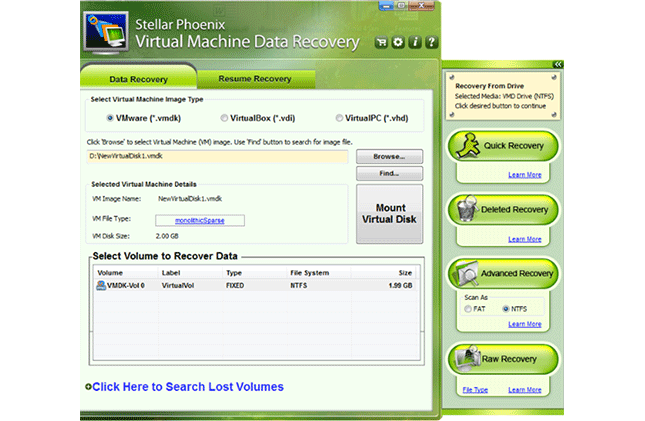
- Now, as you click the virtual disk volume, a flying pane with the various recovery options, such as ‘Quick Recovery’, ‘Deleted Recovery’, ‘Advanced Recovery’, and ‘Raw Recovery’ appear in the right-hand side
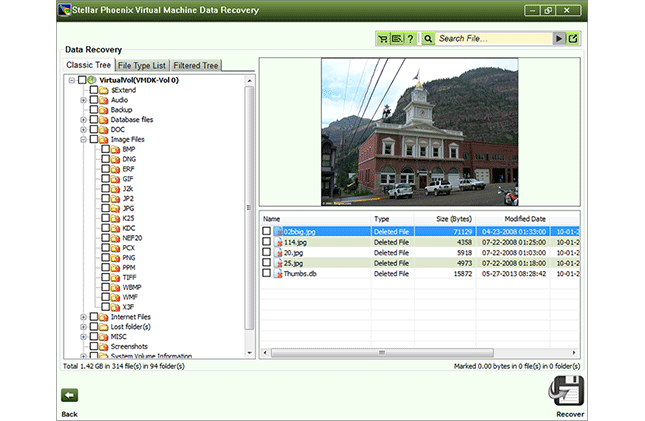
- Select the appropriate recovery mode and the software then scans the volume for recovery of the lost data. All the data fetched by the recovery engine are listed in the left-hand side pane in a tree structure. After the scanning is over, you can click any of the files to see its content in the preview pane. Check-mark the boxes against the files to select them for saving. The save button at the base is highlighted.
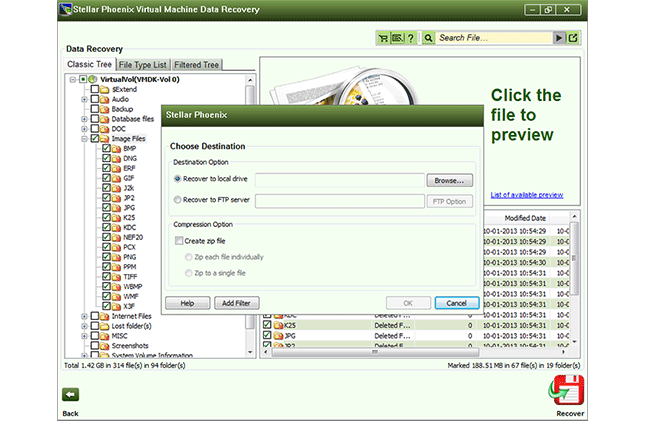
- Click the ‘Save’ button and a ‘Chose Destination’ text box opens up, where you can select the destination folder in your system or a location in the FTP server. Select the destination and click OK.
- After you select the file, the path of the file gets listed in the bar and ‘Mount Virtual Disk’ is enabled. In addition, the details of the image file also appear in the software interface and all the volumes of the virtual drive appear in the ‘Select Volume to Recover Data’ section.
All the data now is saved in the folder specified. Open the containing folder and get back to working without any delay.


