

One of the most common problems that can occur within your computer is the problem with your storage device itself and may prevent you to access your meaningful data. Due to file system corruption, virus/ trojan attack, registry damages and many other, primary hard drive partitions may become RAW.
Same thing can also happens with your external hard drive become RAW, suffering from logical damages. Once the internal or external hard drive turns into RAW, you'll not be able access RAW partition or drives neither able to access your computer. Common fixes include formatting RAW hard drives but it involves risk of permanently erasing your data. Below is the simple error message that can be seen whenever you try to access RAW drives:
Some popular error messages listed below that appears when the drive become RAW:
![]() windows cannot access the disk
windows cannot access the disk
![]() external hard drive not recognized
external hard drive not recognized
![]() the type of the file system is raw
the type of the file system is raw
![]() chkdsk is not available for raw drives
chkdsk is not available for raw drives
Why Drives became RAW?
There are multiple reasons involved in making healthy partition or Drive into RAW. Healthy partition acts as controller of your computer device and monitor all the input and output request. Due to installing malicious third party programs or bad handling file system, drive or partition or file system became RAW.
How to Recover RAW Hard Drive Partitions?
However, >Stellar Windows Data Recovery Professional can perform RAW Data Recovery and recover RAW hard drive partitions as well as gives you a preview of recoverable files in real time. 'Raw Recovery' scan is good at looking through each sector of the selected drive to recover traces of lost or deleted information. It reads file signatures to recover data. All the recovered files are listed in the main interface according to their corresponding file types.
'Raw Recovery' is usually the last resort if your drive is severely corrupt.
Follow the detailed steps given below:
- Run the Stellar Data Recovery Professional for Windows software on your system.
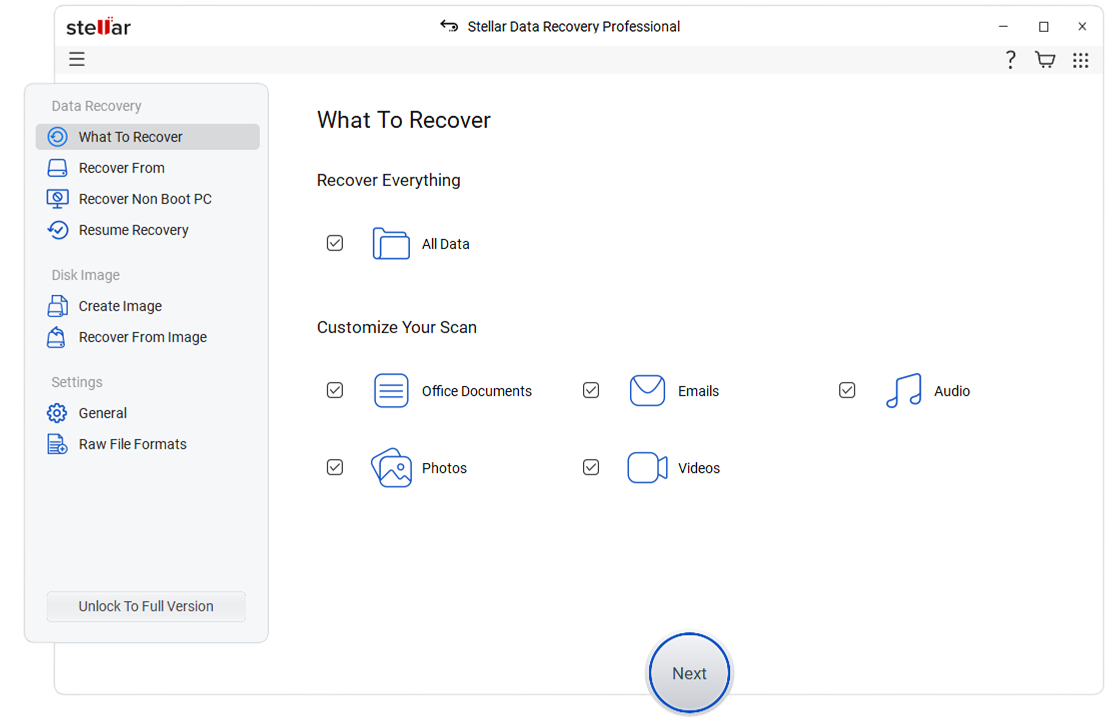
- Click on the ‘Advanced Settings’ option.

- In the ‘Settings’ option, you have to select ‘Add Header’ option.
- Here, you get two options:
1. Whether you can Add Header, if you know it.
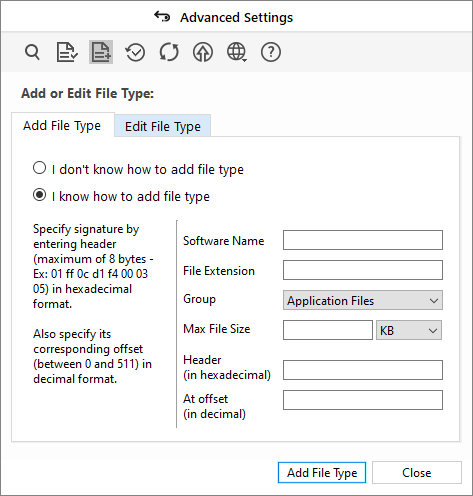
2. Else, you can select I don’t know how to Add Header option.
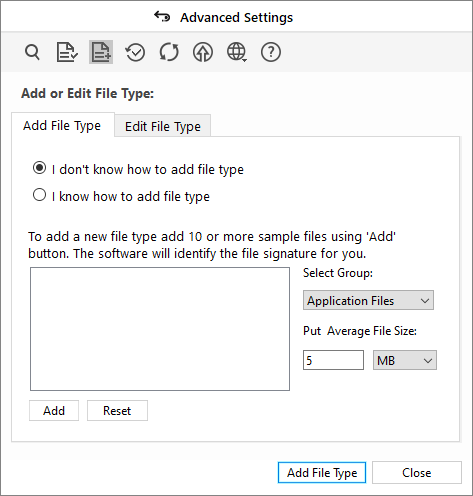
- You can add upto 10 File Signature as per your requirement and resume the recovery process for saving your file for re-use.


