


Data is important to everybody, whether a business, enterprise, or individual user. Everyone consumes, creates, and stores a great volume of data on their computers. However, computers are prone to errors and failures, which puts data at risk. If you have computer backup available, you’re safe. It will act as a bedrock for your data recovery plan. On the other hand, you might fear losing all your data if no backup is available. Hence, it’s always recommended to have a backup of your data regularly.
How do I create a backup of my computer data?
What is the right backup method?
Will I be able to recover all my data from the backup?
So many thoughts may rush into your mind when you’re first introduced to the Data Backup process. Worry not! This article has covered all aspects of backing up your computer data. Let’s begin!
What is Data Backup & Why Do We Need it?
‘Data Backup’ – this term has become synonymous with data protection. It refers to copying data from a primary source to a secondary location to protect data against deletion, drive formatting, corruption, hard drive failure, system crashes, and more. Losing data can cause massive damage and cost you money, energy, and time. Therefore, it is always suggested to create ample data backup to handle any unfortunate event of data loss.
Computer Backup: Best Ways to Follow
There are three ways to computer backup. First, you can go through the instructions given against the methods for creating the backup.
#1 Windows Built—In Backup Utilities
Windows comes with backup utilities, such as File History, Backup & Restore (Windows 7). These utilities can help protect your system data against computer errors, crashes, or other data loss scenarios.
File History
It helps you backup copies of data stored in Documents, Music, Pictures, Videos, and Desktop and OneDrive files saved on the PC offline. When the File History is on, it automatically creates a backup of C drive data. However, if you have stored files in another drive partition, you’d need to add the important files you want to back up to one of these folders. Further, you need to set up removable media, such as hard disk drives, USB drives, etc., or choose a drive over a network. Follow the given steps for backing up data with File History:
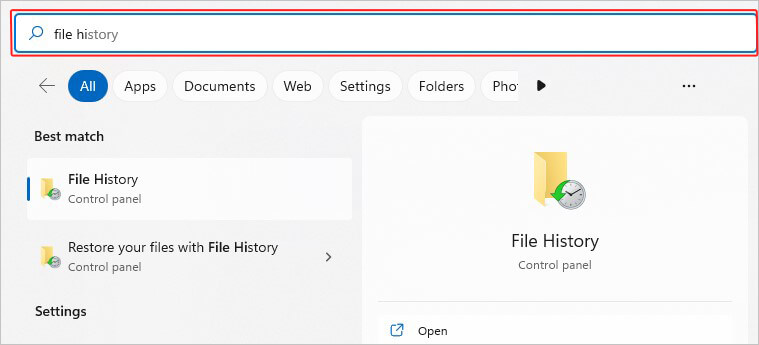
- Go to Windows Search and type File History; there, click Open.
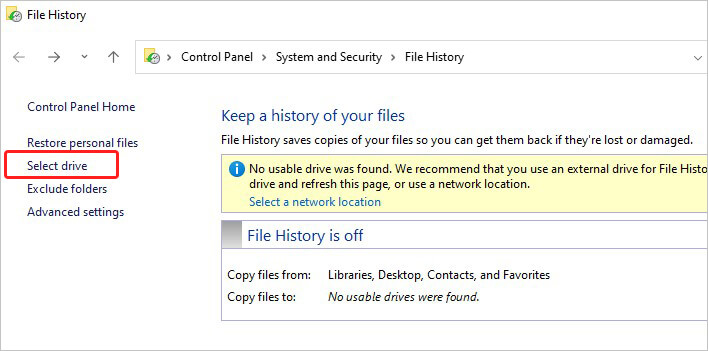
- On the next prompt, click Select drive, given on the left side.
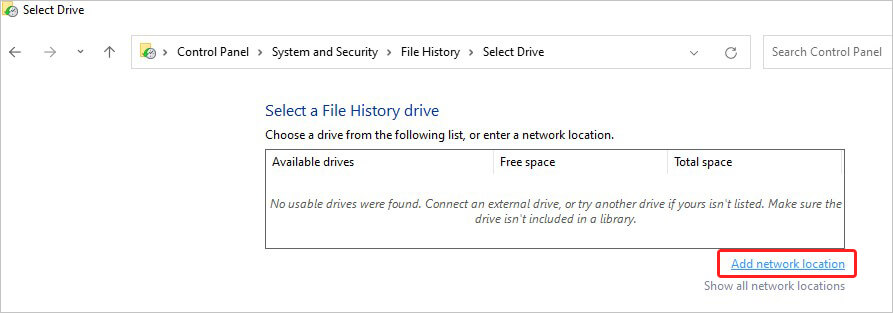
- It will show in the list if you have connected any external storage media, such as HDD, SSD, or USB drive to your system. There, select the drive and proceed.
- If you want to choose a network location instead, click ‘Add network location’ given under the ‘Select a File History drive’ box.
- Finally, turn on File History.
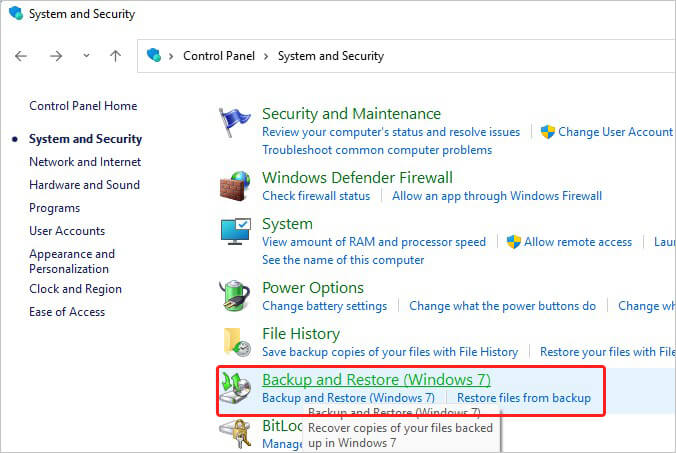
Backup & Restore (Windows 7)
It is also a primary component in Windows systems that helps protect your files against crashes or other PC problems. It supports two types of backup – (I) Files and folder backup and (II) System Images. With Files and Folder backup, you can create backup copies of all files, documents, photos, and more stored on your system. At the same time, the System Image option creates a block-by-block disk image of the complete system and is saved in a VHD file format. However, the System Image backup only applies to the disks formatted with the NTFS file system. Follow the given steps to create a backup for computers with this utility:
Files and Folder Backup:
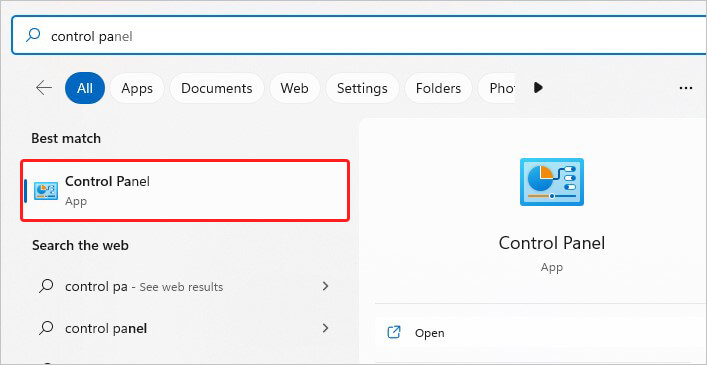
- Go to Windows Search, type Control Panel, and Open it.
- Follow System and Security > Backup and Restore (Windows 7).
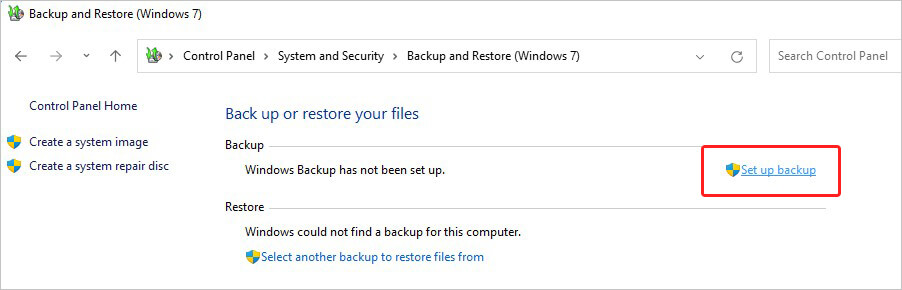
- On the next prompt, click Set up backup.
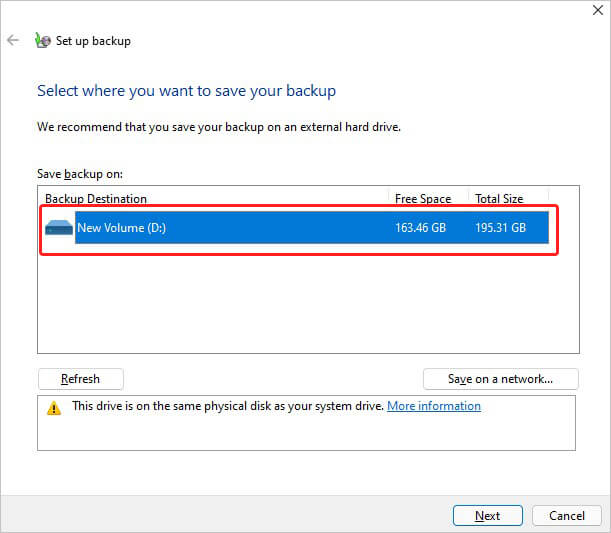
- On the following prompt, you can select a removable media or a different system partition as a location to store the backup files. Click Next to proceed.
- Follow the instructions given on the next prompt to finish setting up a backup.
System Image Backup:
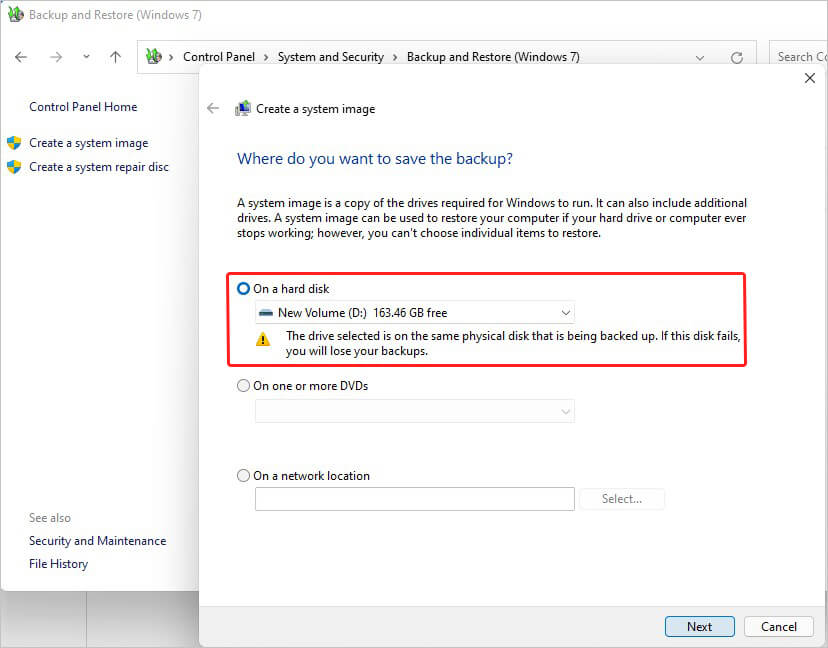
If you want a complete system backup, you can open Control Panel and follow Backup & Restore (Windows 7) > Create a system image. Then, choose the location where you want to take a backup and click Next.
- You’ll be prompted with further instructions to complete the backup process.
#2 Backup Computer to External Hard Drive
You can also choose a removable or external storage media drive as the best way to back up a computer. Multiple options are available, such as Hard Disk Drives (HDDs), Solid-State Drives (SSDs), and USB drives. They are also convenient as you only need to connect these drives to your system and copy-paste your important files, folders, etc., to them. Every hard drive comes with a specific amount of space to store data. Therefore, you can choose the storage drive according to your data volume and preference. To create a computer backup on a hard drive, follow the given steps:
- Connect the external hard drive to your system using a USB cable. So it is for HDDs and SSDs. USB flash or thumb drives can be connected directly to the USB ports in your computer’s CPU.
- Once connected, open File Explorer and check if you can see the removable media.
- If it is connected properly and is accessible, you can select all the files you want to create a backup for and copy-paste them to the external drives.
- Once they’re pasted, you can safely eject the device and remove them from your PC.
#3 Backup on Cloud Storage
Having cloud backup is another great way to secure your system data. You can find multiple cloud storage platforms such as Google Drive, OneDrive, and DropBox. The benefit of a backup computer to the cloud is that you can access your files anywhere on any device. Once enabled, the data will be synced automatically between your computer and the cloud. Cloud backup keeps your data safe against system errors and crashes and lets you access your data even if your backup hard drive dies. It’s also easy and quick to create a backup for computer data. Follow the given steps to back up your data on the below-mentioned platforms:
Backup computer to Google Drive:
You’d need to download Google Drive for Desktop if you already don’t have it in the first place. You can configure Google Drive for data sync with the following steps:
- Log into your Google account and open Google Drive.
- Go to Settings and click Get Drive for desktop.
It will redirect you to the page where you need to download the Google Drive for the desktop. Once downloaded, install the application on your system and run it.
- Open Drive for desktop.
- Click Settings and then Preferences.
- On the left, click Folders from Drive.
- Next, go to "My Drive syncing options" and choose Stream files or Mirror files.
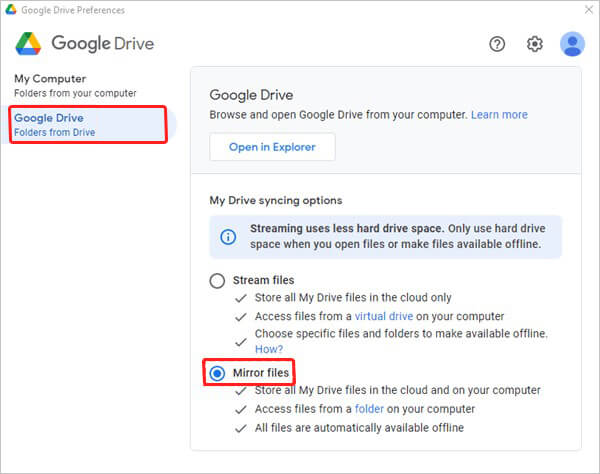
- You can also sync to Google Drive and back up to Google Photos.
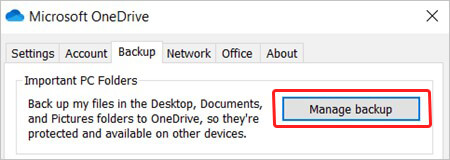
Backup Files on OneDrive
OneDrive lets you turn on the backup to copy and sync your computer data. Know how to backup files and folders on OneDrive below:
- Open OneDrive settings (select the OneDrive cloud icon in your notification area, select the OneDrive Help and Settings icon, then Settings.)

- Follow Backup > Manage backup.
Backup on Dropbox
To set up a backup on Dropbox, you can go through the following steps:
- Open your Dropbox desktop preferences.
- Click the Backups tab.
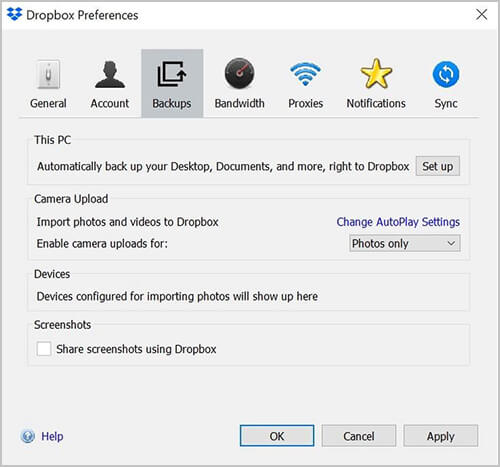
- Click Set up.
- Under Add a backup, select the computer or external hard drive you’d like to back up.
- Click Let’s get started (computer) or Back up [drive name] (external hard drive).
- Check the boxes next to the folders you’d like to back up.
- Click Set up or Back up.
You can also manage and disable your backups on Dropbox easily.
What if the Backup fails?
Although chances are rare, you may not be able to restore complete data using backup every time. Hence, you must keep dedicated data recovery software like Stellar Data Recovery for Windows handy. It is an easy-to-use software that can help you retrieve all data lost due to deletion, drive formatting, corruption, and malware attack.
EndNote:
Setting up your computer for automated and manual backups is quite easy. All the methods discussed in this article can help you easily set up data backup for your computer. These methods are also helpful for those wondering how to back up Windows 10. You need to read the instructions carefully. Windows 10 users can also use the above-described methods to back up their computers.
Moreover, it’s just good sense to have your backups’ backup. Don’t just stick to one copy when backing up your computer data. Instead, create at least three copies of your backup and store them in different locations to be always ahead of data loss events affecting your backups.


 8 min read
 (1)-853.jpg)


