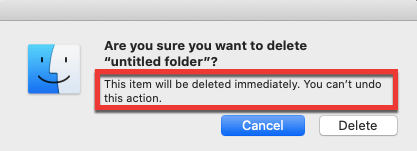
Picture this scenario – one fine day, you decide to clean up the files that have been cluttering your MacBook Pro for ages. You come across tons of old, redundant files, and instead of spending hours sifting through them, you use the Option + Command + Delete hotkey to delete them quickly.
Later, while trying to locate an old file, you realize that you’ve deleted it along with the other files during your clean-up hustle. Not just that one file, several other files have also been deleted. You rummage through the Trash, but since the hotkey deletes the files permanently, you cannot find the files anywhere on the system. To make things worse, you realize you don’t even have a backup of those files!
Believe it or not, this happens to a lot of people. And when it does, it can be quite frustrating.
Before you lose all hope of recovering your lost data on Mac, let us assure you that files deleted from your laptop can be completely recovered. And no, it’s not complicated or expensive to do it either. In most cases, there are numerous simple ways to recover data from MacBook Pro, and in this article, we will share some of these ways with you.
1. Restoring Data on Intel-Based MacBook Pro
If you have an Intel-based MacBook (Pro or Air), macOS Recovery is a built-in recovery system to repair your Mac hard drive and restore data from your Time Machine backup. In case of logical corruption on your startup disk, it’s better to do a factory reset and run the recovery tool to fix any malfunctioning hard drive(s).
Follow these steps to repair and restore MacBook Pro to proper working condition:
Note: Make sure you have a prior backup on Time Machine. If not, you will be at risk of losing all your data.
- To access the macOS Recovery tool, restart your MacBook Pro. When the computer reboots, press and hold Command + R keys until you’re greeted with a startup screen.
- If you see a locked screen, enter your login password.
- In the case of multiple drives, select the drive to be recovered and click on Next.
- In case of a request to login to an administrator account, enter the password and click Continue.
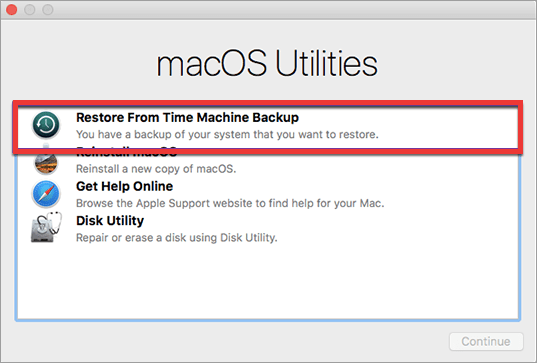
Now that you’ve opened the macOS Recovery window, the first thing you must do is restore data from your Time Machine backup. You can restore your latest Time Machine backup from the macOS recovery application itself with these steps:
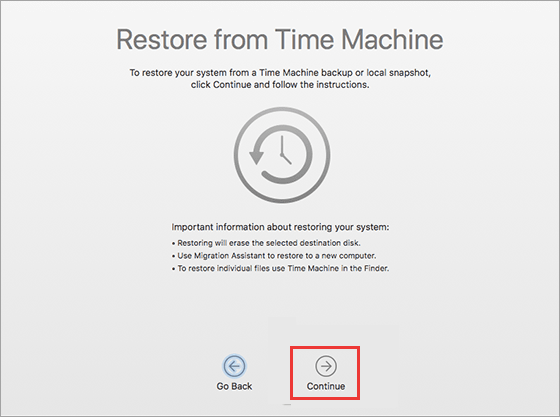
- Select “Restore from Time Machine backup”, and then click Continue.
- In the Time Machine System Restore app, follow the instructions given in the “Restoring Prior backup using Time Machine” section listed below in this article.
Also, if your MacBook has logical errors on the startup disk, then proceed with the “disk-repair” steps described below:
- In the macOS Recovery window that you opened previously, select Disk Utility and then click on Continue. Watch tutorial video:
- When Disk Utility opens, choose View > Show All Devices. Next, in the sidebar, select a volume, and click the First Aid button.
- In the dialog that pops up, click Run, and then follow the on-screen instructions. When the First Aid process is complete, click Done.
- Repeat steps 2 and 3 for each volume and each container on your MacBook Pro.
Even after following the steps above, you may still face issues with your hard drive. In this case, as a best practice, backup all the information on your MacBook Pro, erase your hard drive, and reinstall macOS.
2. Restoring Data on Apple’s M1-Based MacBook Pro
The newer MacBook Pro comes equipped with Apple’s proprietary silicon processor called the M1. The recovery steps are all the same for this version of the MacBook, with just some differences in opening the macOS Recovery window.
Follow these steps to open up macOS Recovery on your M1-based Macbook Pro:
- Choose Apple menu > Shut Down.
- Press and hold the power button on your Mac until you see “Loading startup options”.
- Click Options, and then click Continue.
- Enter the password for administrator account.
Note: If prompted, connect to the WiFi. This is necessary in the case of macOS reinstallation or online backup restoration.
After following these steps, the macOS Recovery window will appear on your screen. Now you can proceed with the same steps as covered in the previous section (Intel-based MacBook) to repair your drives.
3. Accidental File Deletion on MacBook Pro
It isn’t uncommon for MacBook users to accidentally delete files. And even though you may think so, when a file is “permanently” deleted, it isn’t really erased from the hard drive. It’s still very much there; the drive just lists it as free space to be overwritten.
So, with the right tool that knows where to look and how to dig up “seemingly” lost data, you can restore every single bit of information you thought you’d deleted forever.
Here are some ways to restore data from MacBook:
Method 1: Restoring Prior backup using Time Machine
Let’s say you have taken regular backups of your MacBook Pro data using Time Machine, but now you need to access the backup files because of accidental deletion or data corruption of the local system.
These steps can help you restore files using Time Machine -
- On your MacBook, open the location from where you wish to restore the deleted files.
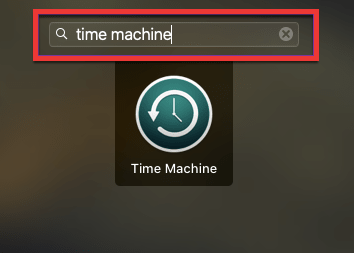
- Use Launchpad to open Time Machine.
- In the Time Machine System Restore app, use arrow keys to browse the local timeline, snapshots and backups.

- Click on any items that you want to restore and click Restore. Now check the opened folder to confirm if the files have been returned.
Note: Let’s say you have accidentally deleted a file that you made edits on, and those edits were not backed up in Time Machine. In such a case, you won’t be able to restore the latest version of that file, but you’ll still be able to restore the last version backed up by the Time Machine.
Method 2: Free MacBook Pro Data Recovery Software
Stellar Data Recovery Free Edition for Mac can help you recover the data that’s been lost from unexpected scenarios such as deletion, accidental formatting, encryption, as well as corruption. It supports MacBook running on macOS Ventura and earlier versions. The software enables the user to scan any drive of any file system, including APFS, HFS+, FAT and NTFS. It’s extremely easy to use and is completely safe and effective.
To recover data you’ve lost from your MacBook Pro, download Stellar Data Recovery Free Edition for Mac from the official website. Next, follow these steps:
Installing Software for MacBook Pro Data Recovery
- Download the software on your MacBook Pro

- Unzip the StellarDataRecovery.dmg.zip file.
- Double-click the dmg file. This will mount a virtual volume –StellarDataRecovery.
- Drag the StellarDataRecovery application from the mounted virtual volume to the Applications folder.
- To launch the software, double-click on StellarDataRecovery in the Applications folder.
- Accept the License Agreement, and then the main window of Stellar Data Recovery software will be displayed.
After installing the software, proceed with the recovery process as shown below:
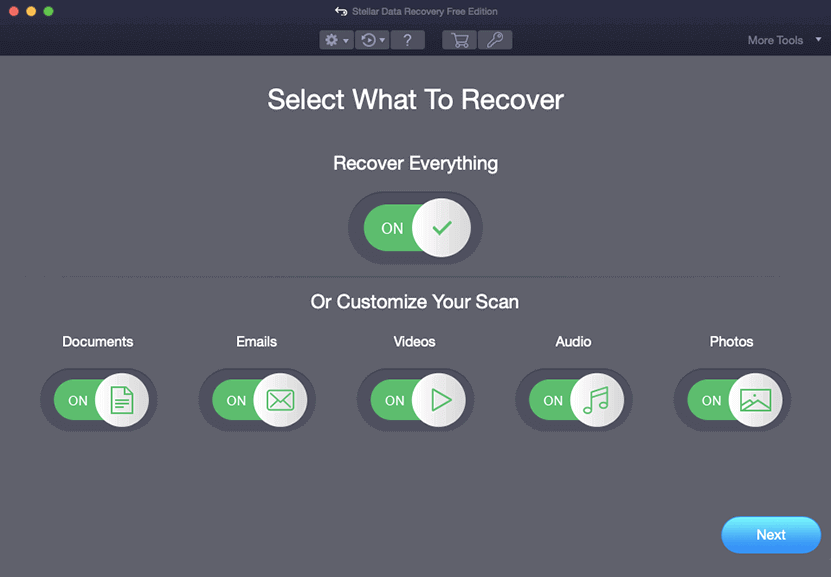
- Launch the software on your MacBook Pro. A simple graphical user interface will be displayed with some toggle buttons.
- Based on the type or format of data that you want to recover, click on the respective toggle buttons and click on ‘Next’.
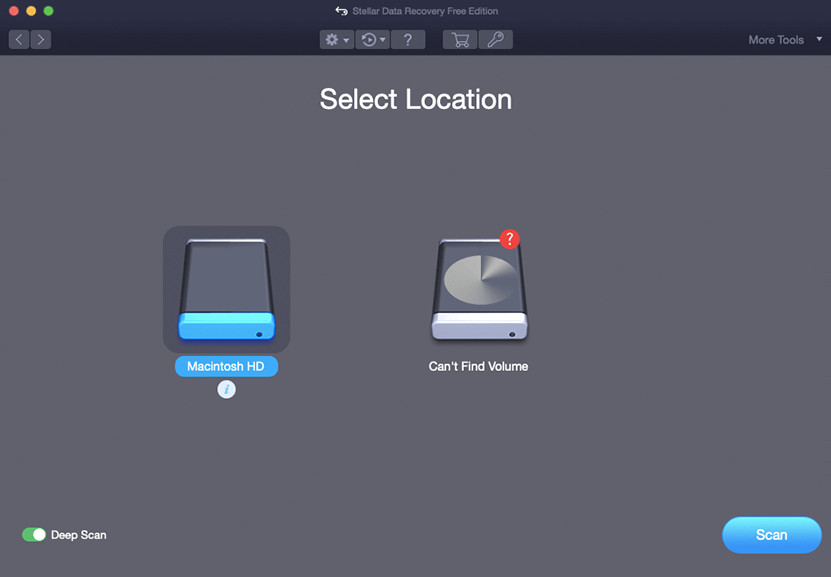
- Select the drive that originally contained the deleted files. On the bottom-left corner, you’ll find a toggle button to turn on “Deep Scan”. This enables an in-depth scan of the MacBook’s hard drive for a thorough recovery. Turn it on if needed, and then click on “Scan” on the bottom-right.
- The drive scanning process will begin, and it might take a while to display all the recoverable files on the application window. When the scan completes, you can preview recoverable files to determine which ones you wish to recover.

To get a more comprehensive understanding of exactly how the software works, check out this video here.
| Now that you’ve restored the deleted data, don’t forget to take regular backups using Time Machine to prevent accidental file deletion in the future. Also, it’s important to remember that the free version of Stellar Data Recovery for Mac allows you to recover up to 1GB of lost data from MacBook Pro. For higher recovery volume, check out Stellar's advanced editions – Professional, Premium, and Technician. |
4. How to Restore Data if MacBook Pro isn’t Booting?
All the methods mentioned above are great if your MacBook Pro is working fine, but have you considered how you’ll perform any of these procedures if your system isn’t booting at all?
If you’re having issues booting up your MacBook Pro, there might be some reasons behind it:
- Drained out battery – Make sure the Mac has enough battery. If your MacBook doesn’t switch on without being plugged to the charger, there might be an issue with the battery. Take it to the nearest MacBook service center to find out the root cause.
- Booting but screen is frozen – Try to boot into “Safe mode” and perform one of the recovery methods mentioned above in the article.
- No boot screen or LED indications – There might be a hardware issue, such as LCD screen issue or faulty hard drives.
If you’ve checked for all these common issues but still can’t boot up your Mac, Stellar Data Recovery Professional for Mac can come in handy. The tool comes equipped with a unique “Create Recovery Drive,” feature which you can use to create a rescue bootable drive and recover crashed MacBook Pro’s data smoothly.
Note: Create Recovery Drive feature is only available in Stellar Data Recovery Version 10 & earlier! The latest version has eliminated the need of any other Mac or external device. User can directly use Stellar Data Recovery through an activated link.
Conclusion
We hope this article helped you discover a couple of useful methods to recover data from MacBook Pro. You can use these techniques to perform recovery process on your MacBook Air as well.
Stellar Data Recovery offers a suite of tools to solve all your Mac data recovery needs easily. But just to be sure that you don’t end up losing important files, it’s always a best practice to take regular backups of your hard drive using Time Machine. We hope these methods will work out for you. But if they don’t, we’d suggest taking your MacBook to a certified data recovery service center and get the drives evaluated.


Data recovery expert on Mac & Windows platforms, with 10-year experience in writing
 6 min read