The excitement of a new macOS will always remain. And, the macOS Big Sur 11 has all the more reasons to be thrilled about. It offers loads of new features and functionalities that you can't resist.
Just like any macOS, Big Sur has an inherent feature to prevent data loss. You can always use Trash to put back your accidentally deleted data. In case you've emptied your Trash, Time Machine backup is your saviour.
But, if you haven't set up your Time Machine or the backup is old, then a data recovery software for Mac can help you salvage your deleted data on macOS Big Sur. The next section describes the data recovery procedure in detail.
Recover Deleted Files on macOS Big Sur Using Mac Data Recovery Software
In the absence of Time Machine backup of your Mac startup disk, leverage a data recovery software for Mac to recover your deleted data on the latest macOS. The steps are as follows:
a) Download and install *the free copy of Stellar Data Recovery Professional for Mac on your MacBook, iMac, or Mac mini.
b) Launch the software. And from the Select What to Recover screen, select the required file type, then click Next.

Image: Select What To Recover Screen
c) From the Select Location screen, select Macintosh HD as the drive location to scan for deleted files, then click Scan.

Image: Select Location Screen
d) In the message box that requests you to allow Stellar Data Recovery Extension, click Next.
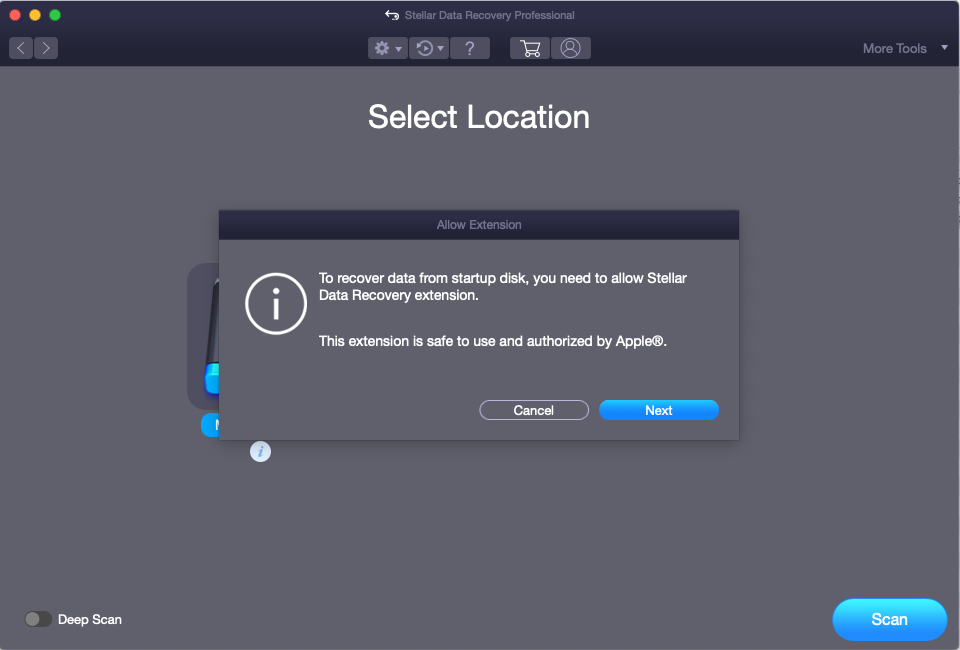
Image: Allow Extension Message Box
e) In the next message box that shows you the complete process to allow the extension, click Next. In the System Extension Blocked dialog window, click Open Security Preferences.
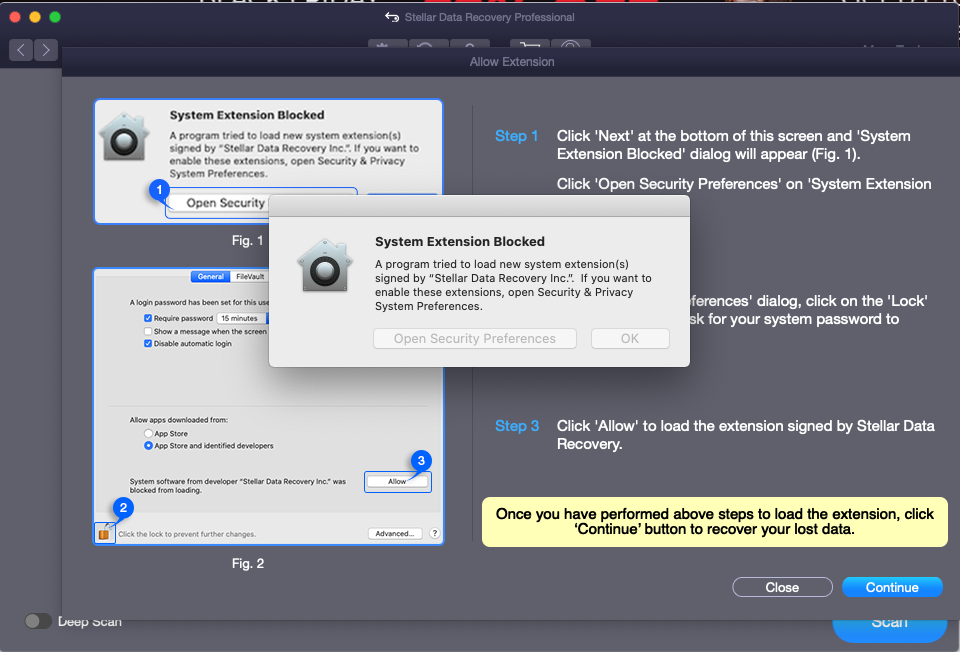
Image: System Extension Blocked Message Box
f) In the Security & Privacy window, click the Lock icon and enter system password, then click Unlock.
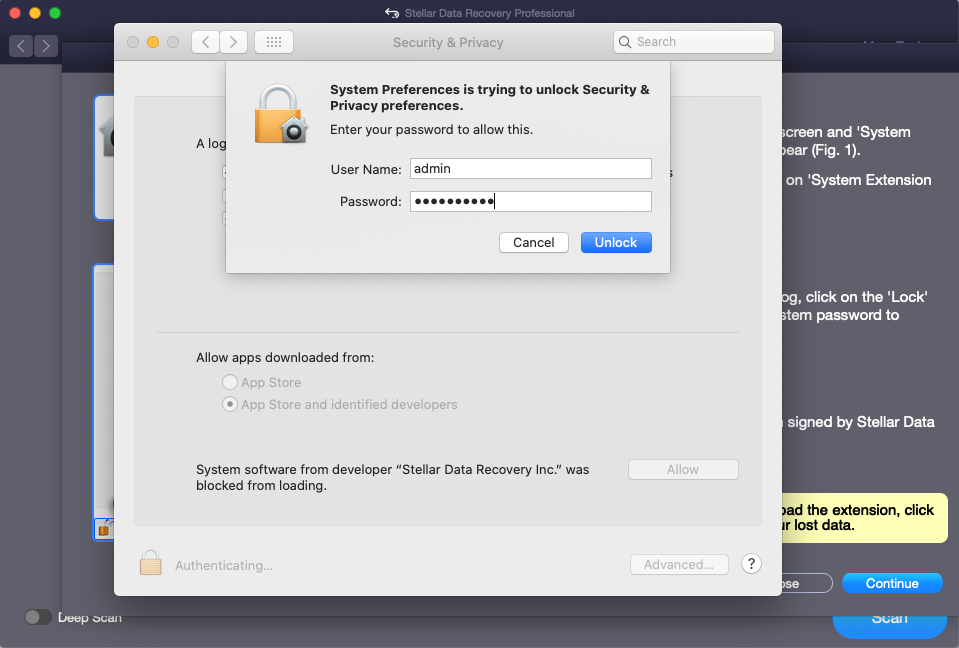
Image: Security & Privacy Window
g) Click Allow to load the extension signed by Stellar Data Recovery. Click the Lock to prevent further changes, then close the Security & Privacy window.
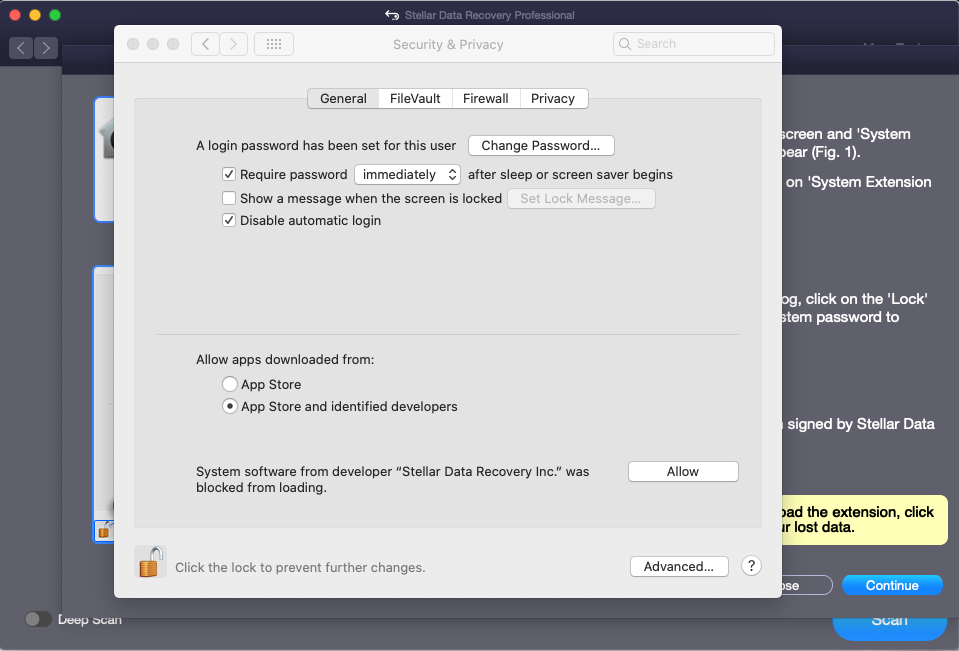
Image: Allow Stellar Data Recovery Extension
h) In the message box, click Continue. The software scans the startup disk.
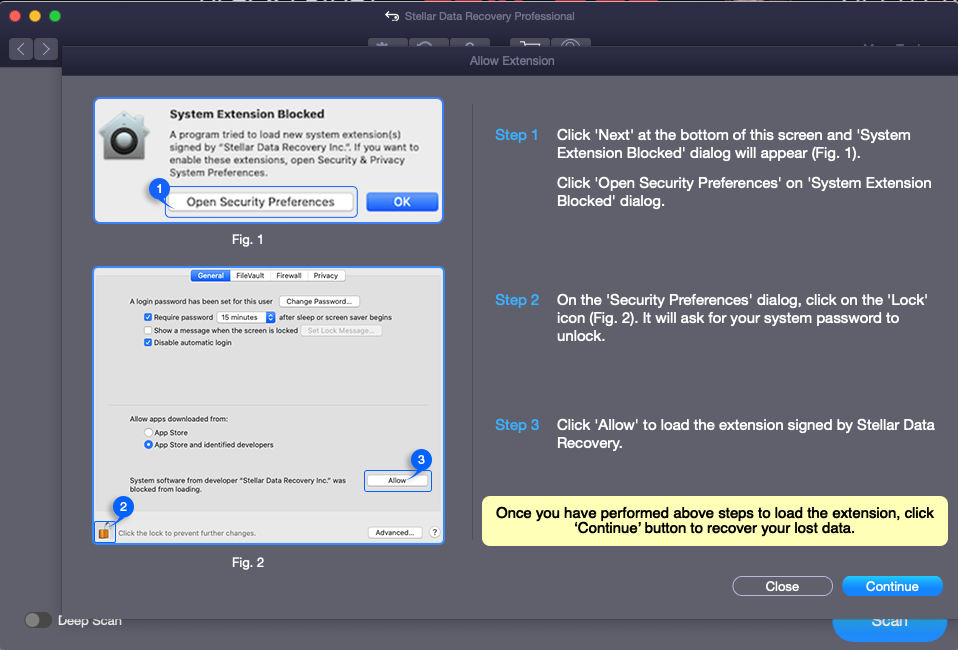
Image: Allow Extension Screen
i) After the scan is over, click the Deleted List tab. Preview your recoverable deleted files and select the required ones, then click Recover.

Image: Data Recovery Screen
j) Click Browse to specify a different volume or an external storage drive as a recovery location, then click Save.
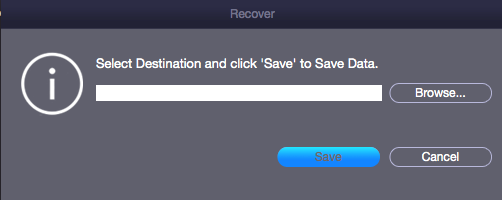
Image: Recover Dialog Window
k) After the file recovery is over, navigate to the save location to view your recovered files.
*The free copy of Stellar Data Recovery Professional for Mac helps you scan your Mac storage drive and preview recoverable files without any cost. But to recover files, you need to activate the software. Also, the software has a 30-day money-back guarantee, so activate with confidence.
Conclusion
If you've deleted your files in macOS Big Sur, you can always open Trash to put back those files. In case the files are not present on Trash as you might have emptied the Trash, then connect your Time Machine backup drive and restore the deleted files from there.
When the Time Machine backup drive isn't set up, or the backup is old, then consider using Stellar Data Recovery Professional for Mac software to recover your deleted files. Also, the software is compatible with macOS Big Sur, Catalina, Mojave, and earlier macOS versions.


Data recovery expert on Mac & Windows platforms, with 10-year experience in writing
 6 min read