Contents
An ACPI BIOS error is a BSOD (Blue Screen of Death) bug that forces your computer to crash and reboot without allowing you to troubleshoot, making your computer’s BIOS incapable of communicating properly with its other components.


The ACPI primarily allows an operating system to communicate with the BIOS on a computer; however, the ACPI BIOS error is a common BSOD error message associated with this standard. Such errors surface for several reasons, including corrupt files or outdated software, and can be fixed by updating the BIOS or reinstalling it entirely.
Getting a BSOD error message doesn’t break your device forever. Most of the time, it’s nothing serious and can be easily fixed by restarting your PC or updating your drivers. However, every BDOS error requires you to follow specific technical instructions to eliminate them before further damage.
The guideline below helps you understand the ACPI function and how to examine several approaches to eliminate the issue.
What is the ACPI function in BIOS?
The Advanced Configuration and Power Interface (ACPI) is an open standard developed by Intel that defines how operating systems should interact with computer hardware. It includes specifications for how computers should perform power management, as well as how they should communicate with other devices like monitors or printers.
Here are the primary functions of the ACPI:
- Decide whether a device should turn on/off.
- Adapt a low power consumption strategy when the battery is dying.
- Block unnecessary programs to reduce battery consumption.
- Lower the clock speed based on an application’s essential requirement.
- Decrease the power requirement of the motherboard by not allowing several devices to activate in advance.
- Enable hibernate mode to allow the computer to function under severe power reduction.
The ACPI function covers a relatively wide ground, and the few above merely represent the primary goal of this standard.
What Causes the ACPI BIOS Error?
The ACPI BIOS error can emerge in multiple situations due to several factors. However, there are two primary reasons why users face this issue; either ACPI in the OS is not fully compliant with the ACPI in the BIOS, or the RAM modules are modified while the computer is in hibernation.
Here’s why the ACPI BIOS error occurs:
- System drivers are outdated or damaged.
- Device drivers malfunction due to inaccurate configuration.
- System instability because of Overclocking settings.
- Driver’s conflict after the installation of new hardware.
- Software modifications have damaged the Windows Registry database.
- Malware has damaged specific system files.
- The hard drive disk (HDD) is impaired.
- RAM modules don’t function suitably.
- Hardware modification occurred during a hibernation session.
Here’s when the ACPI BIOS error might occur:
- During a Windows operating system installation.
- When resuming the device after a period of hibernation.
- While booting the computer.
The ACPI BIOS error is not exclusive to specific computer brands and may happen to all Windows-operated devices. However, some manufacturers have faced such issues more than others; Asus, Dell, HP, Lenovo, Sony, and Acer are a few.
How Do I Fix the ACPI BIOS Error In Windows
Several approaches can help determine and repair the defective piece of hardware/software causing the ACPI BIOS error in Windows. Below are the best ways to eliminate this error for good.
1. Update BIOS
BIOS is the first software that runs when you turn on your computer. It initializes various components in your computer, such as the hard drive or memory, then passes control over to your operating system. An obsolete BIOS is one of the reasons users face the ACPI BIOS error.
Follow the guideline below to update the BIOS:
- Go to your product’s website and locate the Support Page.
- Download the latest compatible BIOS.
- Transfer the software to an empty USB drive.
- Restart the device and press the BIOS key set by your manufacturer.
The rest of the instruction varies depending on your product. You must revisit your product’s Support Page and follow the instructions for your device to update the BIOS correctly.
2. Update The BIOS Driver
The ACPI BIOS error often appears when the BIOS driver is outdated. Drivers play a critical role in the well-being of computers and force them to crash if not maintained correctly. Follow the steps below to update your BIOS driver.
- Go to your product’s website and locate the Support Page.
- Download the latest compatible BIOS driver.
- Transfer the driver to an empty USB drive.
- Restart the device and press the BIOS key set by your manufacturer.
The rest of the instruction varies depending on your product. You must revisit your product’s Support Page and follow the instructions for your device to update the driver correctly.
3. Disable Ahci From the System BIOS
Advanced Host Controller Interface (AHCI) is a specification that describes how host controllers should communicate with storage devices such as hard drives or SSDs. It allows for higher throughput and lower latency when reading or writing data compared to previous standards such as IDE or SATA.
Disabling the AHCI function from your system BIOS can fix the ACPI BIOS error in some cases, and here’s how:
- Restart the device and press the BIOS key set by your manufacturer.
- Move to the Integrated Peripherals settings and set the AHCI Mode to Disabled.


- Save the changes and exit BIOS.
If you’re having difficulty locating the settings above, you must contact your product manufacturer and ask for more specific instructions.
4. Disable JPME1 and Reflash BIOS
Some Motherboard manufacturers allow you to change the settings of your computer by putting jumpers on different pins. These settings control how fast your processor runs or how much RAM it uses at once. Such configurations are practical if you want to overclock or underclock your PC but don’t know how to do it yourself.
This technology, however useful, may cause the ACPI BIOS error to surface, and disabling it fixes the issue. Follow the steps carefully to disable JPME1 and reflash the system BIOS:
- Turn off your device and unplug the power source.
- Open your computer case to access the hardware.
- Locate JPME1 according to your Motherboard map and disable it.
- Reconnect the power source and turn on the PC.
- Press the BIOS key set by your manufacturer to enter the BIOS interface.
- Reflash the system BIOS.
Contact your product manufacturer and ask for more specific instructions regarding your system BIOS.
5. Update All System Drivers
A system driver is a piece of software that acts as an interface between the operating system and the hardware. It allows communication between different parts of the computer and enables system functionalities. Outdated or damaged system drivers can trigger the ACPI BIOS error. So, keeping them up-to-date can avoid encountering such problems.
Here’s how you can update all system drivers:
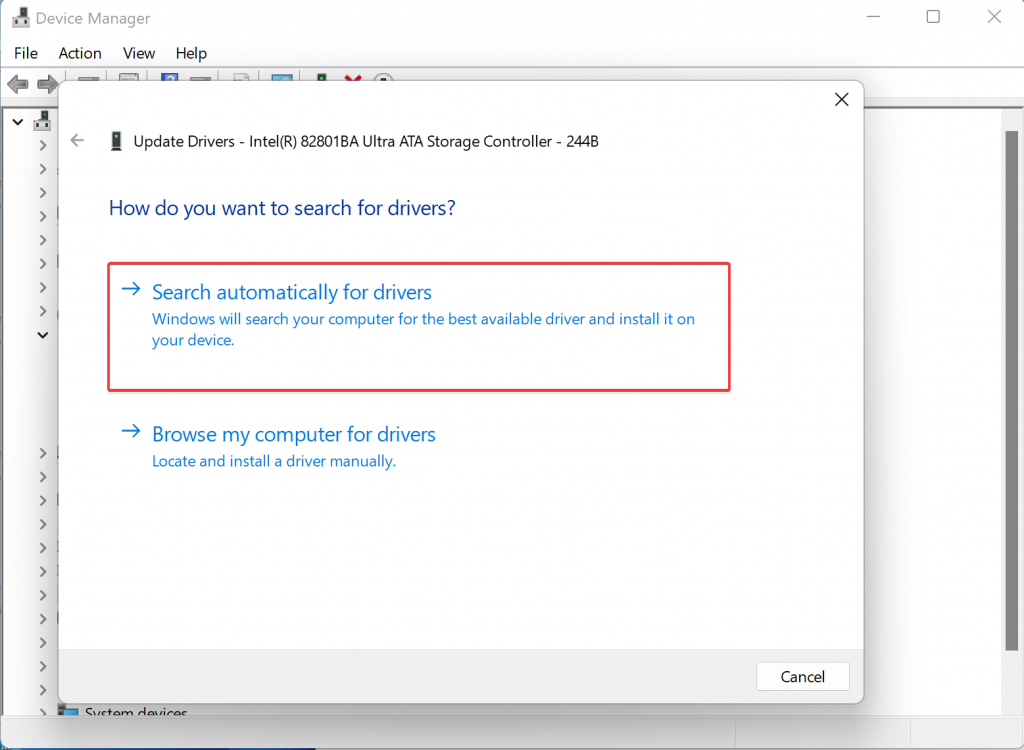
- Right-click on the Start menu, and choose Device Manager.
- Now right-click on the drivers one by one and select Update Driver Software.

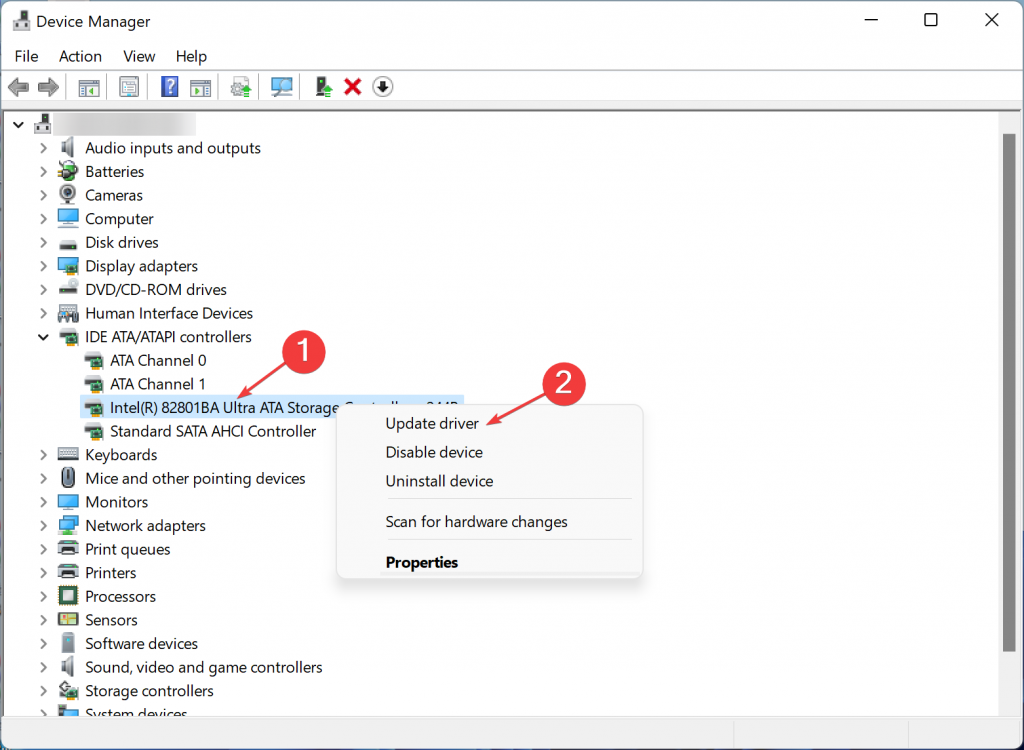
- In the opened window, choose Search automatically for updated driver software to update the driver from the Microsoft Official software library.
- Restart your device when the process finishes.
If you followed the instructions correctly, all system drivers are now up-to-date.
6. Uninstall Microsoft ACPI-Compliant Control Method Battery Driver
In some cases removing the Microsoft ACPI Compliant Control driver fixes the error. Follow the steps below to do so:
- Right-click on the Start menu, and choose Device Manager.
- Open the Battery drop-down list.
- Right-click on Microsoft ACPI-Compliant Control Method Battery and select Uninstall.
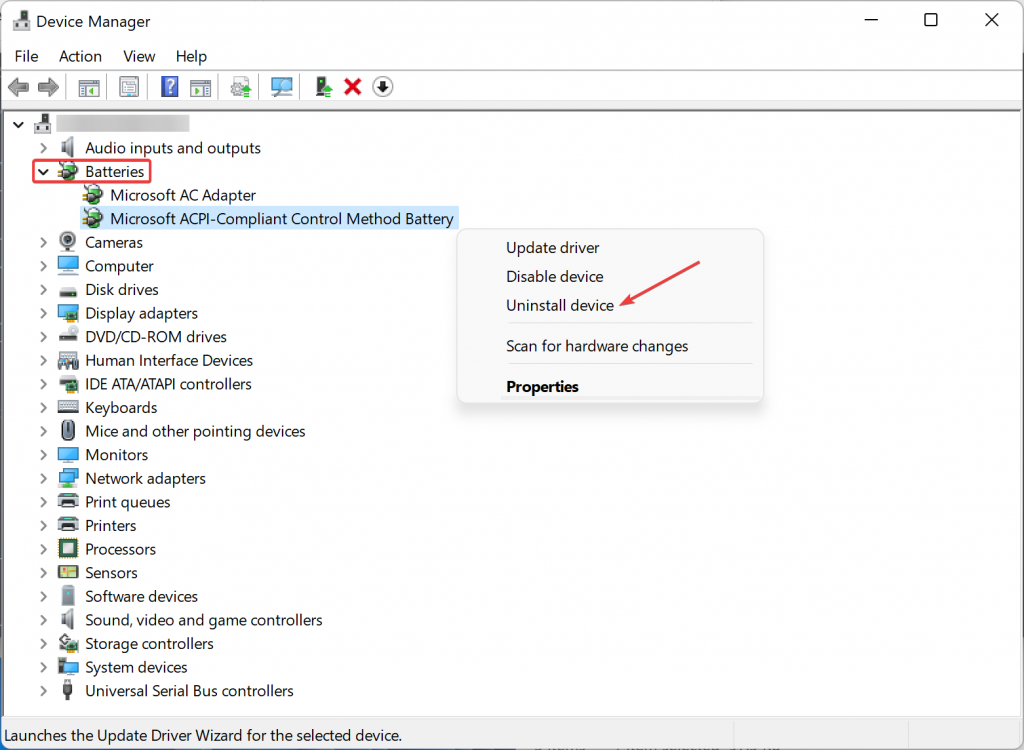
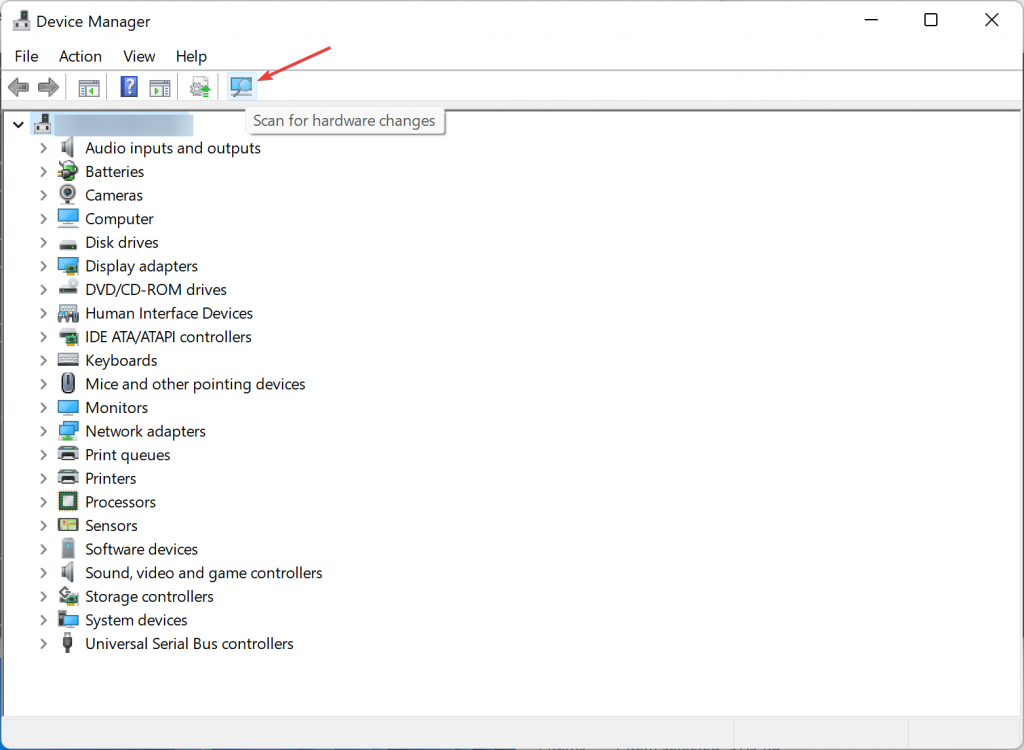
- Then select Scan for hardware changes and wait.
- Restart your device when the process finishes.
7. Set ACPI Mode to S1
Setting the ACPI mode to S1 in the BIOS can also fix the ACPI BIOS error. Follow the instructions step by step:
- Restart the device and press the BIOS key set by your manufacturer.
- Use the arrow keys to navigate to the BIOS Power Settings.
- Locate the Advanced Power Management option, select it using the arrow keys, then press Enter.
- Change the mode to S1.

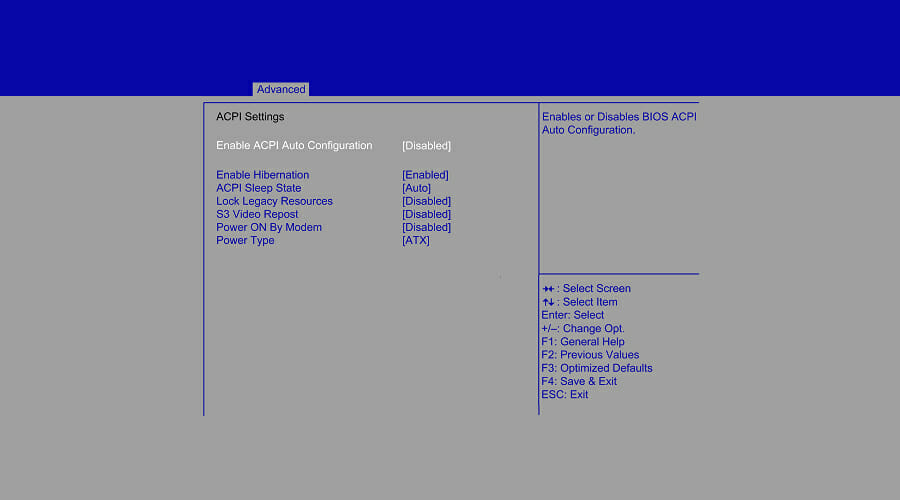
- Save the changes and exit BIOS.
Note that the BIOS settings vary depending on your product manufacturer. If you can’t find the options above, use your product Support Page to fix the issue.
8. Utilize Windows Startup Repair
Windows Startup Repair is a tool that helps fix problems with Windows startup files. You can utilize it if your computer won’t start up correctly or displays error messages when you attempt to start the OS.
The Windows Startup Repair checks your PC for issues and then tries to repair them. Here’s how you can use this tool:
- Insert the Windows installation Disk (DVD or Bootable USB).
- Restart the device and press Enter when prompted.
- Select Troubleshoot after the disk boots.
- Then click on Advanced options.
- Choose Startup Repair and wait for the process to finish.
9. Change Windows Image ID
An OS image ID is a unique number that identifies which version of an operating system you are running. For example, if your computer says it’s running Windows 10, then the OS image ID is probably 701; if your computer says it’s running Windows 8.1, then the OS image ID is possibly 699.
You can change your OS image ID using the instructions below:
- Restart the device and press the BIOS key set by your manufacturer, which could be F1, F2, F10, F12, or DEL.
- Use the arrow keys to navigate to the Advanced Settings section.
- Select System Component and press Enter.
- Move to OS Image ID and change it to Windows.
- Save the changes and exit BIOS.
10. Remove the Overclock Settings
Overclocking is to make a computer processor run faster than the intended or advertised clock rate. The overclocking rate depends on the specific processor model, generally about 10% faster for every 1-degree Celsius reduction in temperature.
Overclocking settings may be another cause of the ACPI BIOS error, and resetting it fixes the issue. Follow the guideline below to do so:
- Restart the device and press the BIOS key set by your manufacturer.
- Move to the Overclocking section.
- Reset all the settings to the default.

- Save the changes and exit BIOS.
11. Reset the System BIOS
Incorrect BIOS settings can force the computer to crash, resulting in the ACPI BIOS error. The instructions below allow you to reset the BIOS settings and fix all system configurations:
- Restart the device and press the BIOS key set by your manufacturer.
- Navigate to the Exit section and select Restore Defaults.

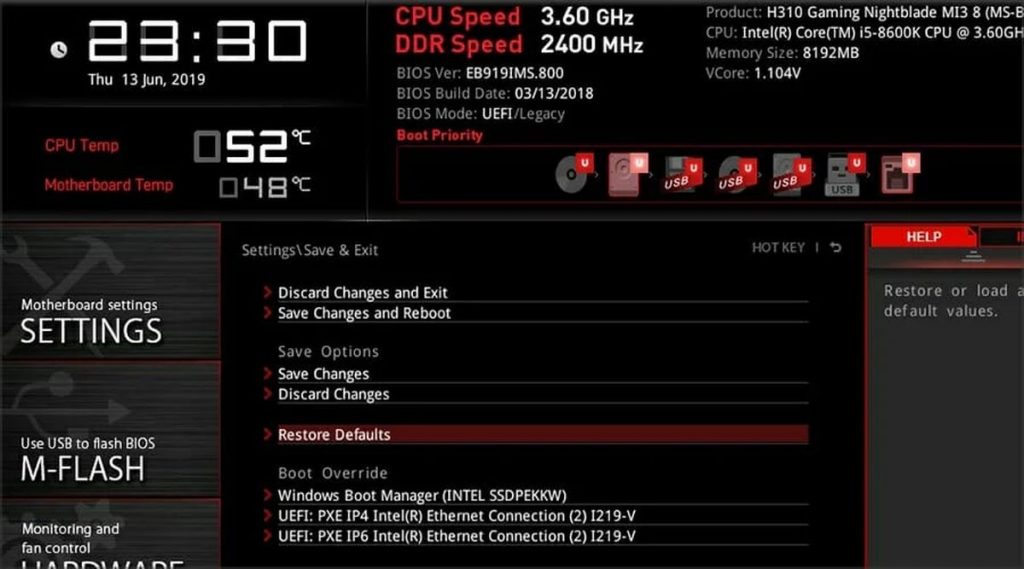
- Save the changes and exit BIOS.
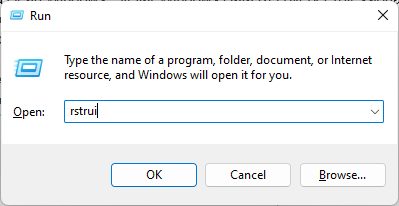
12. Utilize System Restore on Windows 11
System Restore is a utility found in Windows that allows you to go back in time and restore your computer to an earlier point in its history to fix issues like ACPI BIOS errors in Windows. This tool doesn’t delete any of your files or personal information; it just resets certain parts of your computer (like the registry), so it works like it did when it was new. Note that this method only works if you already created a restore point before facing the ACPI BIOS error.
Here’s how to reset programs using the restore feature on Windows 11:
- First, press the Windows + R keys to open Run on your computer.
- Then type rstrui and press Enter.

- Click Next once System Restore opens.
- Choose the desired restore point and click Next.

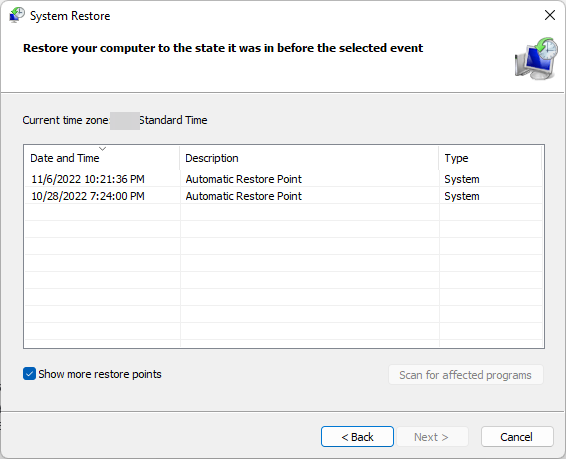
- Confirm the process by selecting Finish.
Retrieve your Files with Stellar Windows Data Recovery
If none of the solutions work, you must recover your information and reinstall a clean Windows. Stellar Windows Data Recovery Professional allows you to recover data even if the OS fails to boot due to BSOD errors.
If your system fails to boot, you can follow the instructions below to create a Bootable Data Recovery Media:
- Download and install Stellar Windows Data Recovery Professional on a bootable computer.
- Plug in an empty USB drive with over 1 GB of storage space.
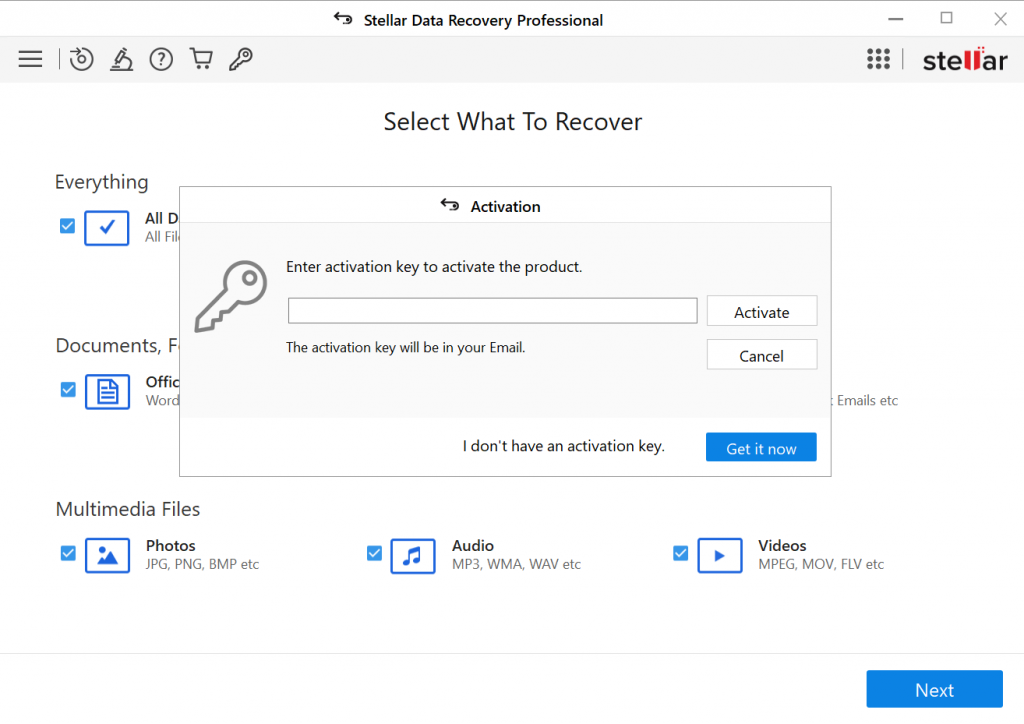
- Click on the Start menu, type Stellar Windows Data Recovery Professional, and press Enter.
- As Stellar Data Recovery Professional launches, enter the Activation Key you received with your purchase.

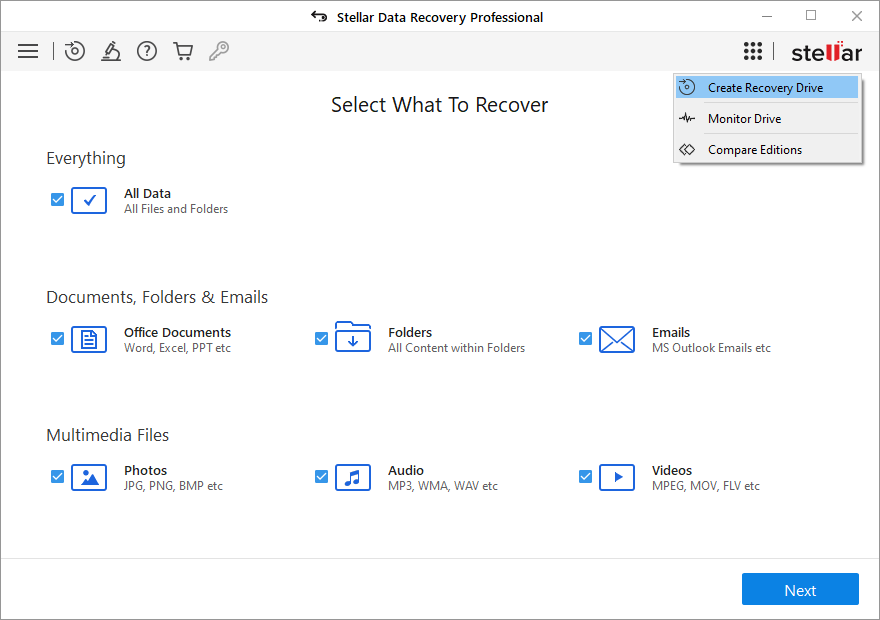
- While on the Select What To Recover page, click on the top-right corner menu and select Create Recovery Drive.

- Open the drop-down menu on the following window, and choose the desired USB drive.
- Click on the Create Recovery Drive button, and select OK to initiate the process.


After the process finishes, you can use the Bootable USB Recovery Media you created before to recover all the data from the unbootable device using the steps below:
- Insert the Bootable USB Recovery Media into the non-functional computer.
- Turn on the device and press the BIOS key set by your manufacturer.
- Select the Bootable USB Recovery Media using the arrow down button on your keyboard and press Enter.
- Once the computer boots the USB drive, you see the Stellar Windows Data Recovery Professional interface.
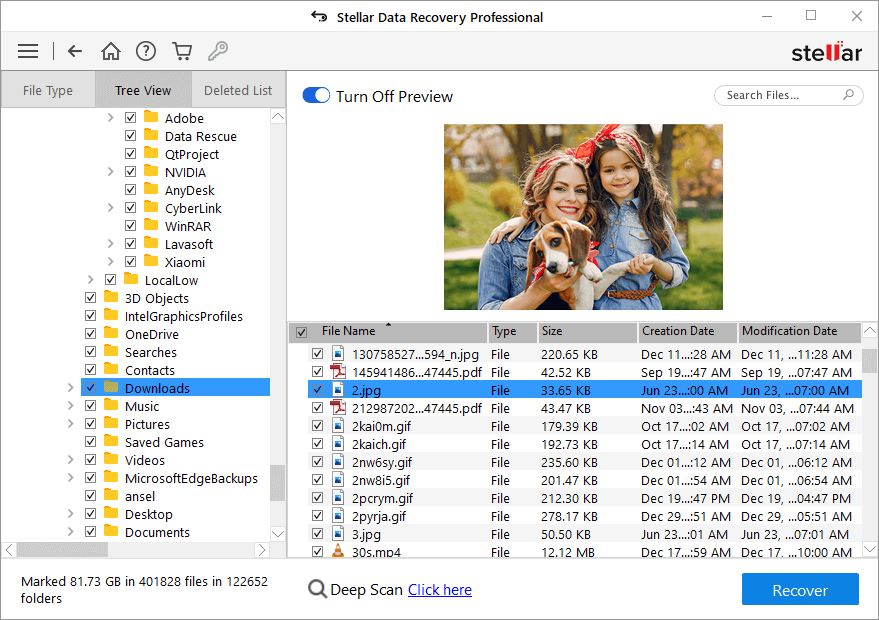
- Pick the class of data you wish to retrieve and click Next.
- Choose the storage location of the missing files and start the Scan.
- Select the desired files from the preview and press Recover.

- While on the Recover page, click on browse and select an external hard drive to save the recovered data, then choose Start Saving.
You have now recovered all the data from your broken device on an external hard drive and can access it on all computers.
Bottom Line
An ACPI BIOS Error in Windows occurs when the computer’s BIOS cannot communicate with its operating system correctly. This issue usually emerges because of outdated or corrupt drivers on your computer, which can cause system crashes and other difficulties.
If you’re experiencing an ACPI BIOS Error In Windows, ensure you have the latest drivers for all your devices, including your motherboard and other components such as graphics cards or hard drives. You may also need to update your BIOS if it’s old or corrupt; check with your manufacturer for instructions on how to do this correctly. If those steps don’t work, contact tech support to receive help resolving this issue.
FAQ
- What is a BIOS error?
A BIOS error is a system failure caused by issues related to a computer’s BIOS software.
- How long does Stellar Windows Data Recovery Professional take to recover my data?
It varies depending on the storage size of your drive and how damaged it is. In most cases, it takes about 30 minutes to recover the data.
- What if Stellar Windows Data Recovery Professional didn’t recover all the lost files?
While on the preview step of the process, click on Deep Scan and allow the software to check for lost data more efficiently.

