Summary: Do you want to move a SQL database from one server instance to another? This blog will demonstrate backing up a database in one SQL Server instance and restoring it to another server instance. If the server, from which you want to back up the database crashes and the database won’t open, try using Stellar Repair for MS SQL software to repair the database. With the SQL repair software at your disposal, you can prevent downtime associated with troubleshooting database corruption issues.


Contents
At times, a situation may arise when you need to backup and restore a SQL database from one server to another. These include:
- Upgrading the current SQL Server version to the latest version
- Making the database available for remote-branch operations
- Configuring database mirroring for the database
- For testing consistency of the database across different servers
Backing Up and Restoring SQL Database from One Server to Another
Prerequisites
Before initiating the process to backup and restore SQL database from one server to another, make sure you have installed the following on your system:
- SQL Server Management Studio (SSMS)
- Any version of SQL Server
How to Back up SQL Database?
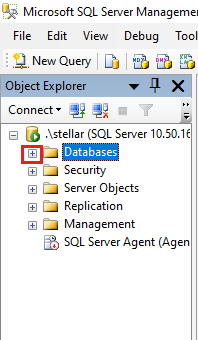
Step 1: Open SSMS and connect to the old SQL Server instance (i.e., SQL Server 2008 R2 in our case). Once connected to the server, expand Databases from the Object Explorer pane.

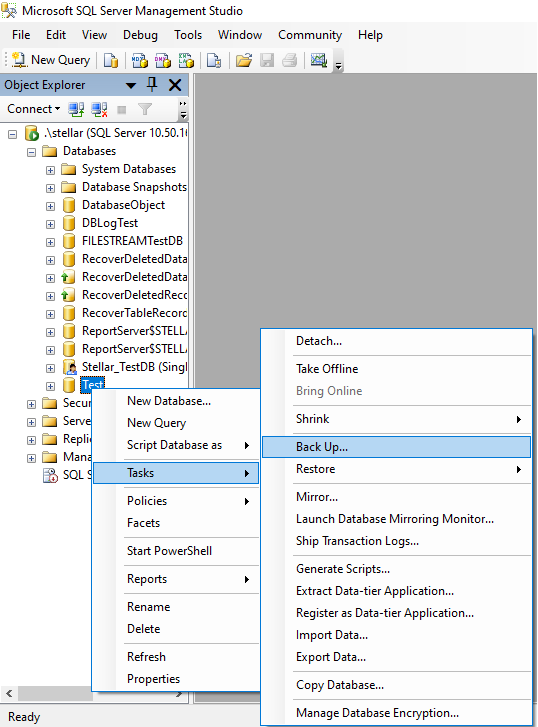
Step 2: Right-click the database you want to back up, and then click on Tasks > Back Up.

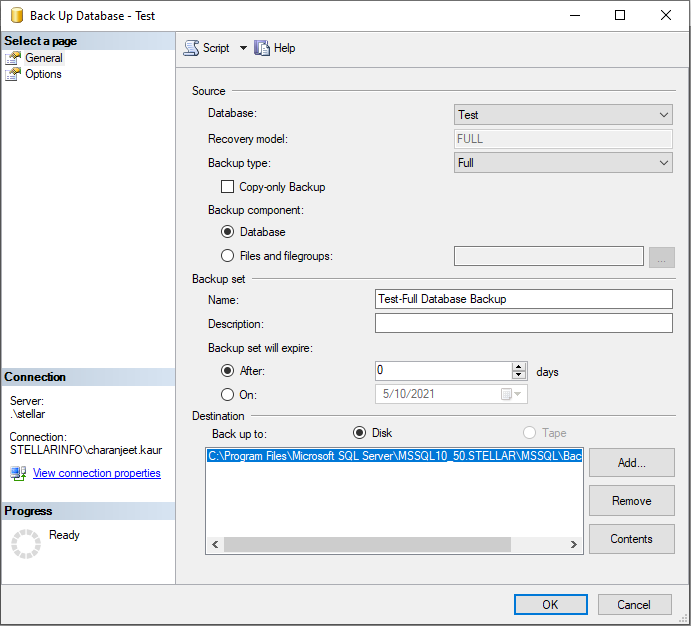
Step 3: In ?Back Up Database? window, choose the Backup type: as Full, and then click OK.

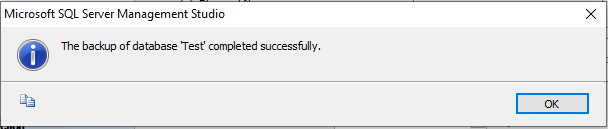
Step 4: Click OK when a message box displaying ?The backup of database ?Test? completed successfully? appears.

Step 5: Now go to the location where the database backup is stored.
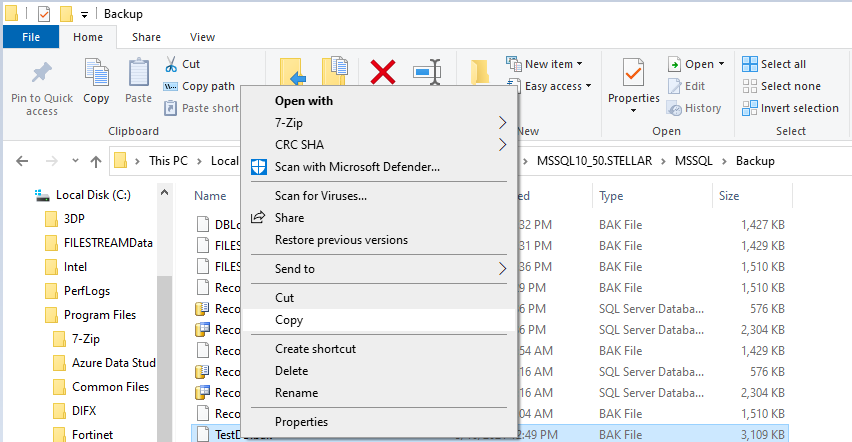
Note: The default location of the backup directory is C:\Program Files\Microsoft SQL Server\MSSQL. n\MSSQL\Backup. Here ?n? is the number of the SQL Server instance you?re connected to. If you can?t locate the backup directory, copy the backup file location by right-clicking on the database, select Tasks and click on Back Up. From the backup database window, click the Add button in the Destination section. Copy the backup file location as shown in the image below.


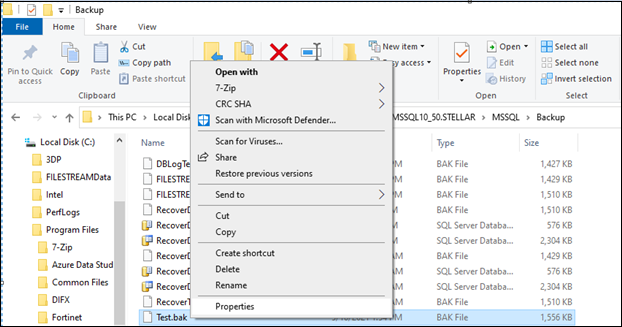
Step 6: Once you?ve located the backup file, i.e. Test.bak, right-click on it, and select Properties.

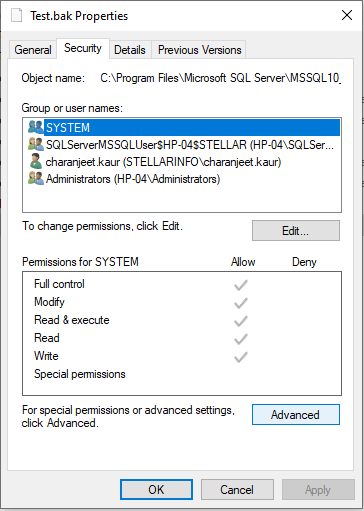
Step 7: From the Test.bak Properties dialog box, click on the Security tab, and then click on the Advanced button.

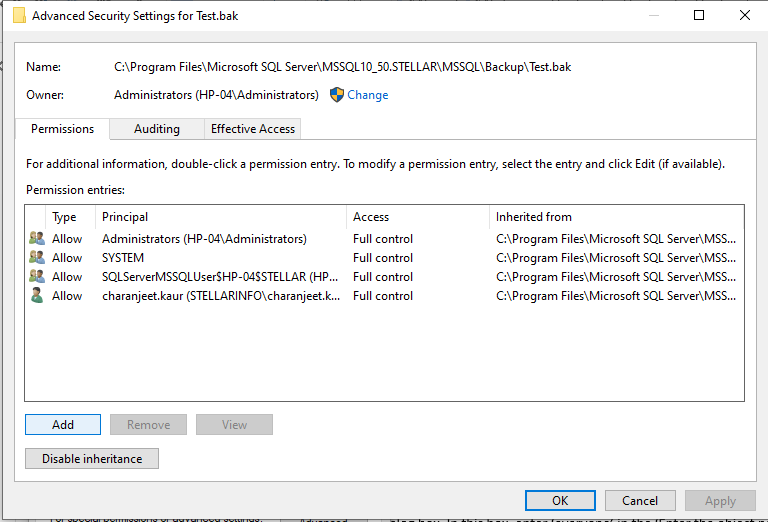
Step 8: In ?Advanced Security Settings? dialog box, you need to change the permission configuration. For this, click on the Add button.

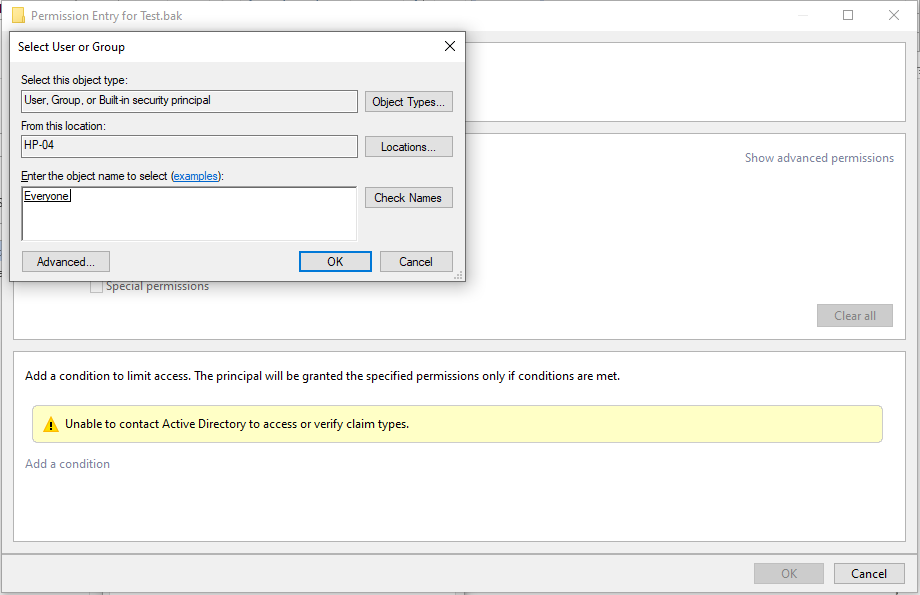
Step 9: You need to set the permission to everyone. To do so, click ?Select a principal? option. This will open a ?Select User or Group? dialog box. In this box, enter ?everyone? in the ?Enter the object name to select? section. Check Names and hit OK.

Step 10: Give full control to users to access the file and click OK.


Step 11: Click Apply and then click OK.
Step 12: Open SSMS again and take the database you have backed up offline.
How to Restore SQL Database Backup from One Server to Another?
In this section, we will discuss the steps to restore the SQL Server 2008 R2 database backup onto the instance of SQL Server 2016.
Note: You can choose to backup and restore the database backup of any SQL Server version.
Step 1: Open SSMS and connect to another SQL Server instance from where you want to restore the backed up database copy of the old server.
Step 2: Create a database with the same name that you want to restore. In our example, we have created a ?Test? database.
Step 3: Go back to the original backup file location and copy the ?Test.bak? file.

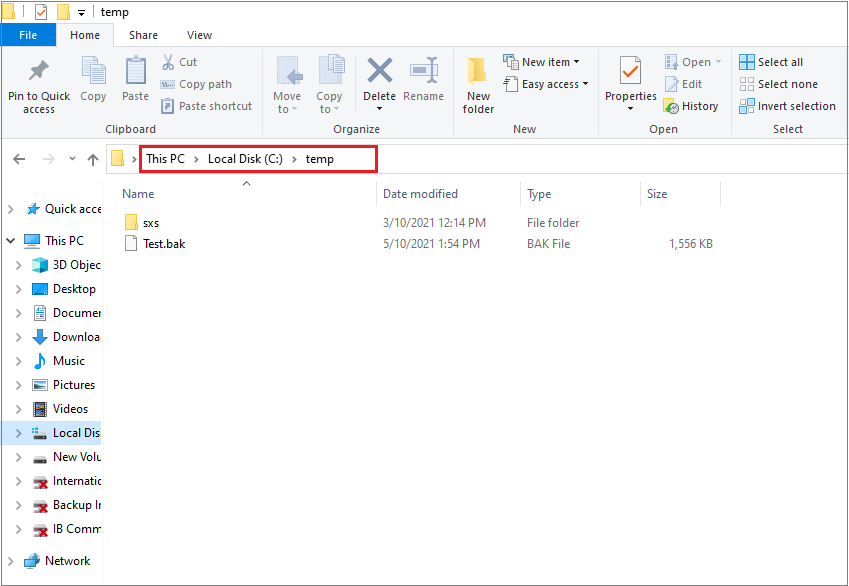
Step 4: Now paste the copied backup file in a temp folder onto Windows Server 2012 (or any other Windows Server where you plan on restoring the database).

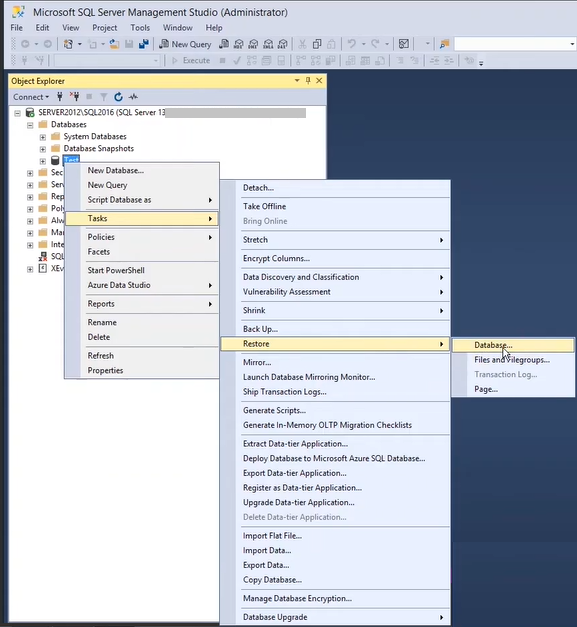
Step 5: Right-click on the Test database, and then select Tasks > Restore > Database.

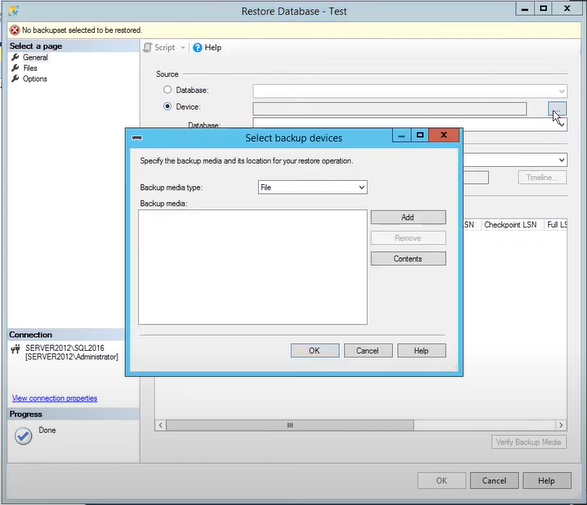
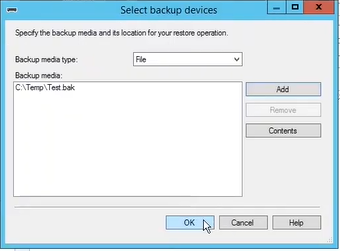
Step 6: In the ‘Restore Database’ window, click on the button with 3 dots. When a ‘Select backup devices’ dialog box opens, click on Add.

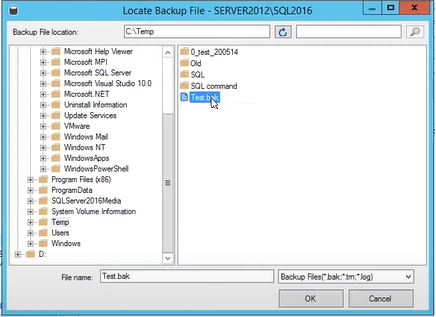
Step 7: In the ?Locate Backup File? dialog box, select the backup file that you want to restore, and hit OK.

Step 8: Hit the OK button once again.

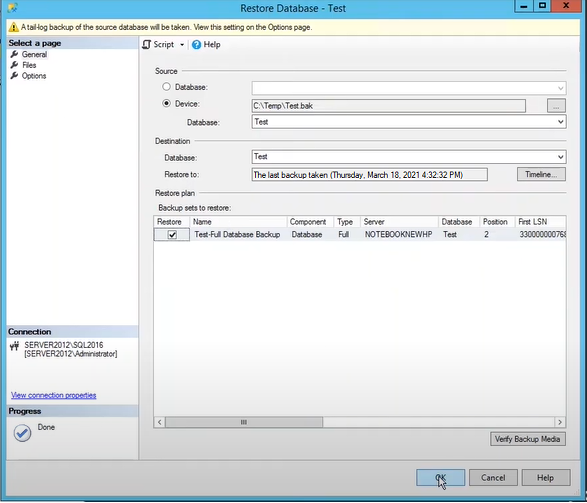
Step 9: The ?Test.bak? file will be added in the ?Restore Database? window. Click OK.

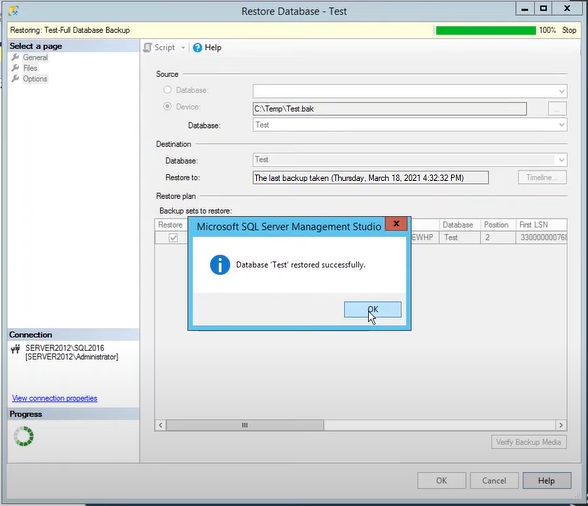
Step 10: Click OK when ?Database restored successfully? message box appears.

After performing these steps, the database backup you have taken in one SQL Server instance will be restored in the destination server instance.
What If the Database Backup and Restore Process Fails?
You may come across situations when the backup you want to restore is corrupted, or the restored database contains missing data. This may happen due to corruption in the SQL database you have selected to restore onto another server. Run the following DBCC CHECKDB to determine corruption in the database:
| DBCC CHECKDB (?Test?) with NO)INFOMSGS, ALL_ERRORMSGS; |
If this command returns consistency errors, it means that the database is corrupted. Run the minimum recommended repair option ?REPAIR_ALLOW_DATA_LOSS? to fix the corruption issue.
Caution! Using the ?REPAIR_ALLOW_DATA_LOSS? option can result in data loss.
A better alternative is to repair the corrupt SQL database using Stellar Repair for MS SQL Technician software. The software helps repair MDF/NDF database files of SQL Server 2019 and earlier versions in a few simple steps. Download the free demo version of the SQL repair tool to repair the database and preview all the recoverable data.


Conclusion
You may need to backup and restore SQL database from one server to another due to several reasons like upgrading SQL Server version, setting up database mirroring, and other reasons outlined in the blog. You can easily back up a database from one SQL server instance and restore the backed up database to another server instance by following the step-wise instructions discussed in the blog. If the backup and restore fails due to corruption in the database, consider using Stellar Repair for MS SQL Technician software to repair and restore the database without downtime.


