Summary: Driver Verifier is a Windows built-in troubleshooting utility that can help you discover the cause behind system corruption and other issues. In this blog, learn how to fix some blue screen errors using Driver Verifier in Windows 10. Also, don’t forget to retrieve data from BSoD affected system with dedicated data recovery software.


Contents
Windows Driver Verifier is a useful troubleshooting utility on Windows. It has been available on Windows since Windows 2000 and XP days and continued on Windows 10. This utility stress tests your PC for any unsigned and misbehaving device drivers that may be causing blue screen of death errors on your device.


Through this blog, we will discuss the Windows Driver Verifier in detail and learn how to fix blue screen errors on a Windows PC using the Driver Verifier tool.
What is Driver Verifier?
In plain words, Driver Verifier is a built-in utility on Windows to check and verify any malfunctioning drivers installed on your PC. Moreover, you can use it to identify the drivers that are not authentic and unsigned. However, this tool is meant for the developers who want to test the drivers they develop. General users can use it if they face any blue screen issue on their Windows 10 PC.
It is pertinent to understand that the Driver Verifier on Windows 10 doesn’t fix the error, but it only helps you narrow down the exact cause behind it. You mustn?t mistake this utility with other scanning utilities of Windows 10, such as SFC Scan, chkdsk command, etc.
Precautions you must take before using Driver Verifier
As the Driver Verifier is a developer?s tool, it is quite sophisticated. You must handle the tool with utmost care. The Driver Verifier can reportedly trigger serious issues if used wrongly. However, you don?t need to worry. If you follow the precautions suggested here, you can avoid any mishaps while using this tool.
- If your PC is running normally or has an issue caused due to something other than the drivers, strictly avoid running Driver Verifier.
- Never run the verifier utility in Windows Safe Mode.
- Make sure you have the Admin privileges for your PC.
- Create an updated backup and restore point to handle any mishap.
- Use the Windows Driver Verifier only if you have no other options left.
- Keep Stellar Data Recovery Professional for Windows handy to avoid data loss.
Enable Minidumps to access reports on misbehaving drivers
This is a critical precaution, as the Driver Verifier might not display the malfunctioning driver always. But it does store all the gathered information as a DMP file. Therefore, you must enable Minidumps before proceeding to run the verifier tool. Minidumps or .DMP files are created by Windows to store the information on a system crash and related events. Here is how you can enable Minidumps on your Windows 10 PC.
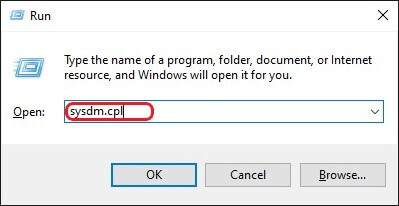
Step 1: Press Windows + R to open the Run utility.
Step 2: Type sysdm.cpl in the search tab and press Enter.

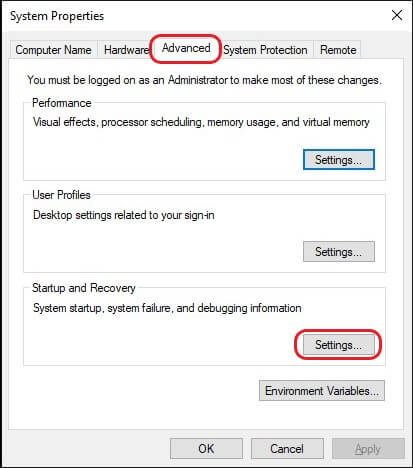
Step 3: Click the Advanced tab in the new System Properties window and click Settings under the Startup and Recovery section.

Step 4: Uncheck the Automatically Restart option and select Small Memory Dump (256 KB) under the Write Debugging Information section.

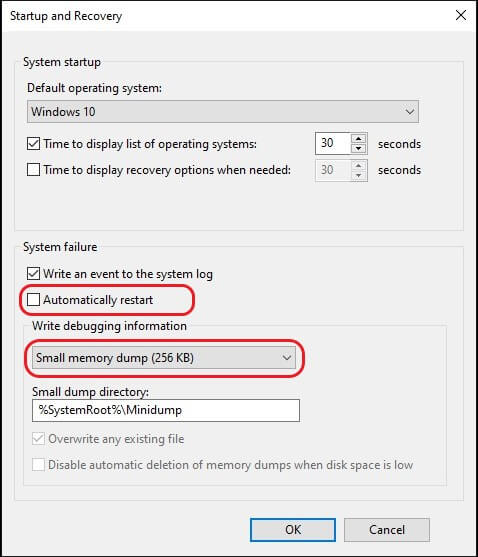
Step 5: Confirm that the Small Dump Directory has the value %SystemRoot%\Minidump and click OK.
Restart your PC for the changes to take effect.
How to diagnose PC using Driver Verifier?
As you have enabled the Minidumps, you can securely run the Windows Driver Verifier tool to diagnose your PC. Once initiated, the tool runs in the background and allows you to work while it completes the diagnosis. Here is how to run the verifier.
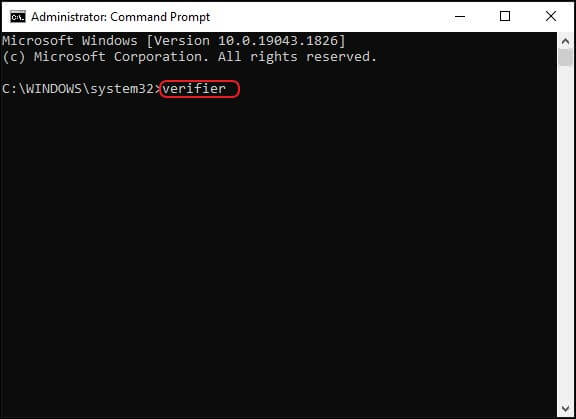
Step 1: Type cmd in the search bar and select Run as Administrator under the Command Prompt app.
Step 2: Type verifier in the command line and press Enter to open the Driver Verifier utility.

Step 3: In the Driver Verifier Manager, select Create custom settings (for code developers) and click Next.


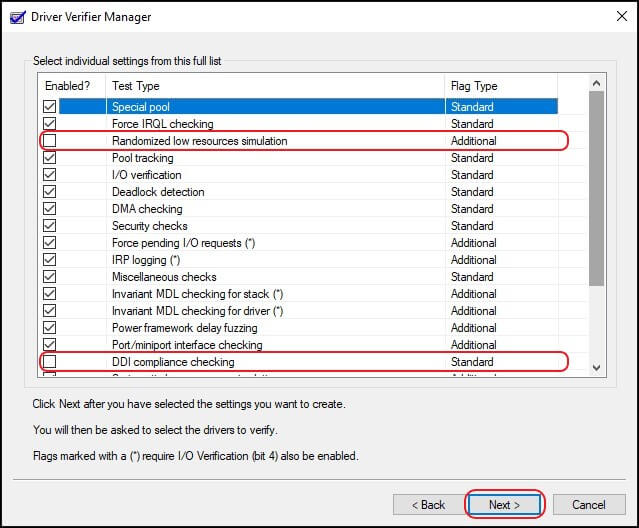
Step 4: Select all the checkboxes except the ones in front of Randomized low resources simulation and DDI compliance checking and click Next.

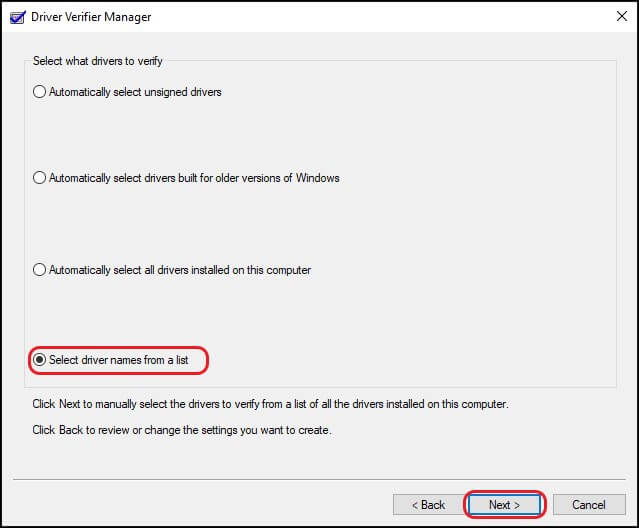
Step 5: Click the Select driver names from a list option and click Next.
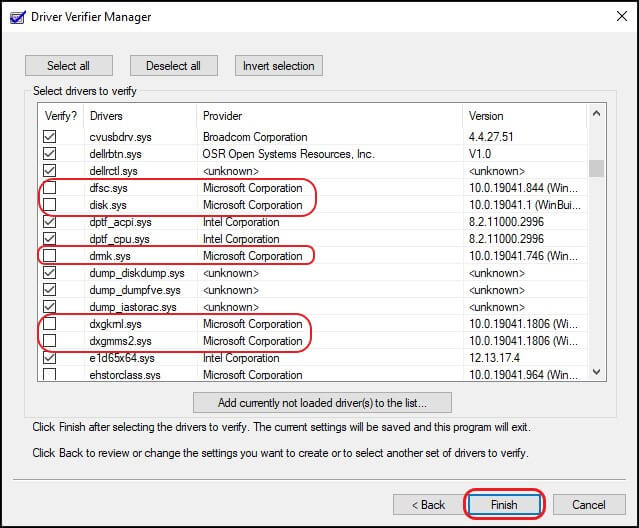
Step 6: Select all the drivers in the list except the ones signed by Microsoft. Click Finish.
Now, reboot your PC. Windows Driver Verifier will run in the background waiting for the system to crash or display a blue screen of death error. It may take several hours as the tool won?t be able to recognize the driver responsible for the error until it appears. So, be patient and keep using your PC normally.
Note: To check if the verifier is running in the background, open Command Prompt with Admin privileges, type verifier/querysettings, and press Enter. If the tool is running, you’ll receive a list of drivers with status in the Command Prompt window.
Read crash report DMP files
Once the system crashes, the Windows Driver Viewer will gather and save the information as a DMP file. The DMP files can?t be read like any other doc on your PC. You’ll need the Dumpchk.exe or Windows Debugger tools to read these files. Once you have installed any of these tools, you can use them to access the DMP file according to the directions on Microsoft?s official site. This method needs an understanding of the command lines to a developer’s level.
If you want an easier way to read the dump file, you can use the Blue Screen View app. Here is how to use it.
Step 1: Download and install the Blue Screen View app.
Step 2: Running the application will automatically load all the DMP files from your C:\ folder (system folder).

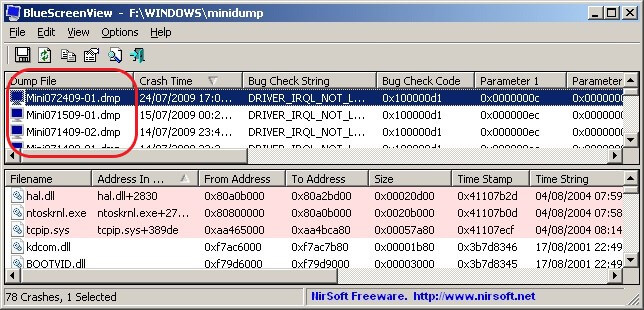
Step 3: Click on the most recent file and scroll horizontally to find the Caused by driver section.


Step 4: Copy the file name and get its details from an online search. You?ll know the device associated with the faulty driver.
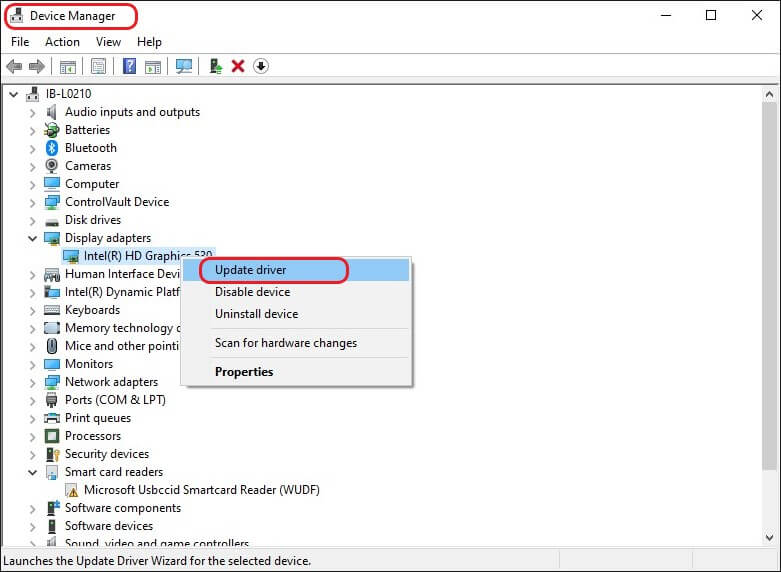
Step 5: Go to the Device Manager on your PC and update or reinstall the culprit driver.

How to disable Driver Verifier on Windows 10?
Sometimes you realize that you don’t want to proceed with the Driver Verifier, but you’ve already got it running. In such a case, you can disable Driver Verifier using Command Prompt on Windows PC. Disabling Driver Verifier is easy, and you can do so by following the steps below.
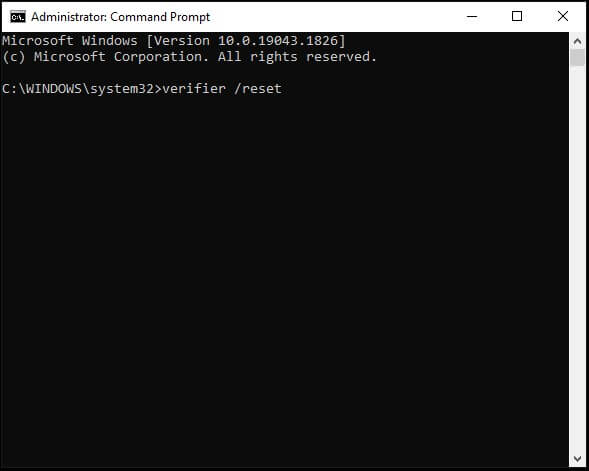
Step 1: Type cmd in the search bar and click Run as Administrator under the Command Prompt app.
Step 2: Type verifier /reset in the command line and press Enter.

Step 3: Restart your PC to implement the changes.
Your PC will normally start without allowing the Windows Driver Verifier to run.
How to recover data in case of data loss?
You might be subject to serious data loss if you commit even a minor mistake. For example, any glitches in the Driver Verifier running procedure may cause failure of a random driver. In such a case, the data related to the concerned application or utility that runs with the support of the failed driver might be lost forever.
If you?ve created a backup, you can use it to get back your data. However, even if you haven?t backed up your data, you can easily recover any data lost on a Windows PC using Stellar Data Recovery Professional for Windows.
The professional data recovery tool is one of the most trusted and efficient solutions. It can retrieve data even from a crashed or non-booting device. Further, it supports Windows 11 and all the previous versions.
The following steps depict this DIY software’s easy yet effective data recovery process.

Conclusion
The Windows Driver Verifier is a highly useful utility, but due to its complexity, it shouldn?t be relied upon for every small error you face. It empowers you to work as a developer and allows you to identify the root cause for blue screen errors or BSODs on your Windows PC.
However, with great power comes great responsibility, and you must use utmost caution while using this tool. If you?ve other alternative methods available to resolve the BSOD on Windows, you should primarily use those methods. Driver Verifier should be the last resort to detect the root cause of blue screen error.
FAQ
1. Is it safe to use Driver Verifier?
The Driver Verifier is mainly a developer’s tool, and you need expertise and high precaution to use it safely. Any mistake could leave your PC in serious trouble. However, if used carefully, it could help identify the root cause of blue screen error on Windows 10.
2. What is the most common fix for a Windows blue screen error?
There are multiple solutions for BSOD or blue screen error, but the SFC scan and CHKDSK command line tool are most commonly used.
3. How long should I run Driver Verifier?
The objective of the Driver Verifier is to stress out the device drivers on your Windows PC to make it finally crash. It needs time to do so, and the approximate time suggested by Microsoft to run the Windows Driver Verifier is at least 36 hours.


