Summary: While so many blogs are floating around the web about Code 19 Error in Windows, we will discuss some effective ways to fix this error in Windows 10. The Code 19 Error may occur due to corrupt/invalid registry entries, corrupt device drivers, or hardware issues. It makes the data stored on the system drive and external drive inaccessible. You may download the trial version of data recovery tool below.


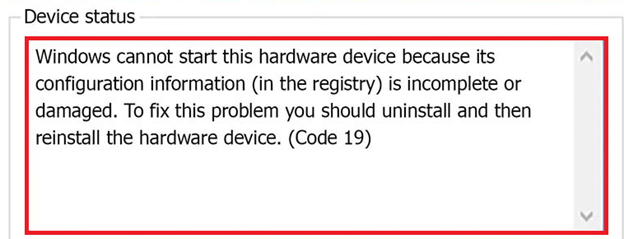
When I connect my hard disk drive to the system and try to access it, it doesn?t run. When I check in the Device Manager, I get this error ?Windows cannot start this hardware device because its configuration information (in the registry) is incomplete or damaged. (Code 19)?. Not only hard drive, but this also seems to be affecting all my USB drives. There is a lot of data on my hard drive. Please tell me how do I recover and fix this issue. Any help will be appreciated!
-Windows User
(See Image 1)


Code 19 errors generally occur due to:
- Incompatible device driver
- Corrupt driver
- Hardware issues
- Corrupt or invalid registry entry
The above reasons lead to Code 19 Error appear on the screen whenever you try to access the drive. This error makes the drives inaccessible and even leads the system to malfunction. In such a situation, you will not be able to access the data. You may use a data recovery tool to recover the lost, inaccessible, or deleted data from a Windows PC. And to fix the Code 19 Error, follow the given troubleshooting methods.
Methods to Fix Code 19 Errors in Windows 10
Method 1: Delete Invalid Registry Entries
Corrupt or invalid UpperFilters and LowerFilters values in the registry may be the cause for Code 19 error in your Windows 10. You may delete these entries by following the given steps:
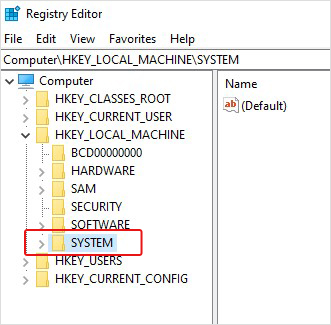
a. Open Registry Editor by pressing Windows + R, typing in regedit and hit Enter.
b. Open HKEY_LOCAL_MACHINE from the left pane, and go to SYSTEM. (See Image 2)

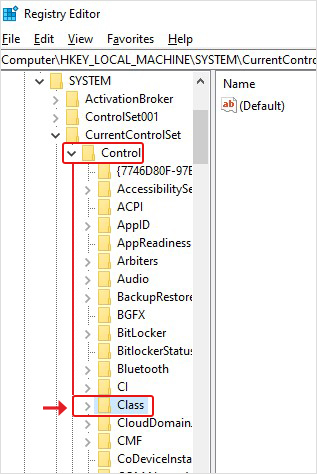
c. Follow System > CurrentControlSet.
d. From the available options, choose Control, and then go to Class. (See Image 3)

e. Right-click on 36FC9E60-C465-11CF-8056-444553540000), and click Delete. (See Image 4)

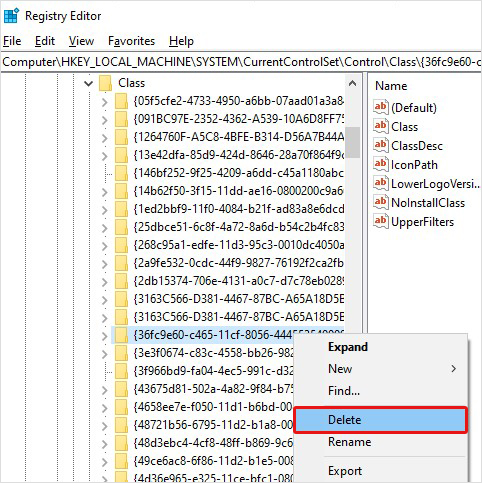
f. On the next prompt, if you see UpperFilters and LowerFilters, delete the entries.
g. Close the Registry Editor, restart your system and check if the error is fixed.
Method 2: Run a Hardware & Device Troubleshooter
If this error occurs due to any hardware issue in the system, you may run the ?Hardware and Device troubleshooter.? It is a Windows built-in troubleshooting utility that helps you fix any issue with the system?s hardware or external drives. Try out the given steps to get rid of the problem:
a. Press Windows + I. The Settings app will open on the screen.
b. Navigate to Update & Security and then move to Troubleshoot.
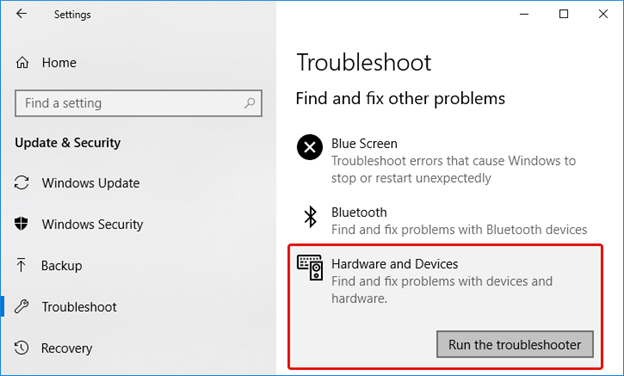
c. Find Hardware and Devices on the right and click Run the troubleshooter. (See Image 5)

d. Exit the app once the process is done. Restart the system to check if the error is fixed.
Method 3: Update Device Driver
Error Code 19 may also occur due to corrupt/faulty or incompatible device drivers. Updating the device drivers may fix the error in this case. To do so, follow the given steps:
a. Press Windows + X to go to Start and go to Device Manager.
b. Locate and choose the category of the devices.
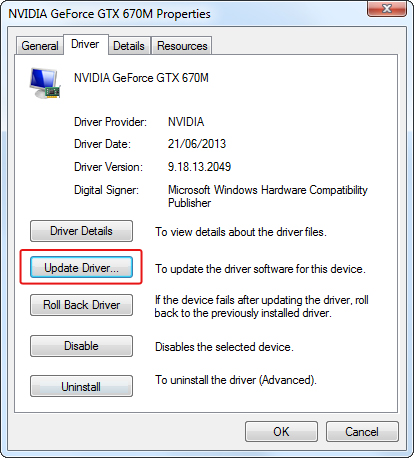
c. Find the name of the devices, right-click on the driver you want to update, and click Properties.
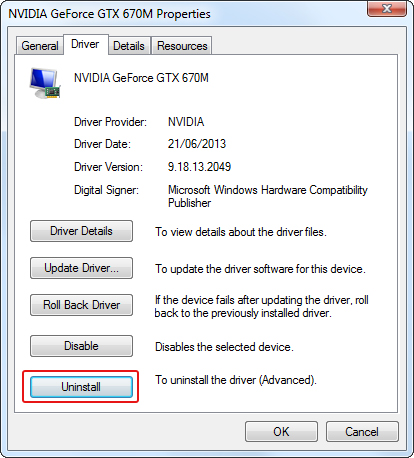
d. Click Update Driver. (See Image 6)

e. On the next prompt, choose Search automatically for updated driver software. (See Image 7)

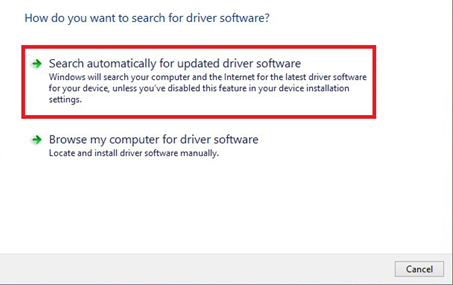
f. Windows will start searching for the latest driver for the device. Update the driver and close the window. Restart the system and check if the error is solved. If the problem is not fixed, you may roll back the update.
Method 4: Roll Back Driver
You may also roll back the driver to the previous version to fix the Code 19 errors in Windows PC. Follow the given steps:
a. Go to Device Manager, select the device category, and see the devices connected to the system.
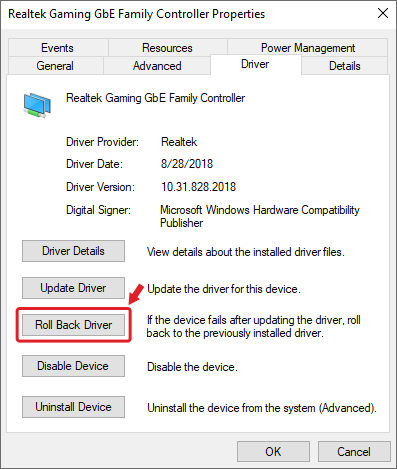
b. Select the device for which you want to roll-back the driver, right-click on it, and go to Properties.
c. Navigate to Driver tab and follow Roll Back Driver > OK. (See Image 8)

Method 5: Uninstall and then Reinstall the Driver
You may also try to fix the code 19 error by uninstalling the corrupt/faulty driver and then installing the compatible driver for the device. To do so, follow the given steps:
a. Open Device Manager and right-click on the device driver that you want to uninstall.
b. If you can see ?Uninstall? option, click on it and wait until the process is done.
Or
If you see the Properties tab, click on it and then click on Uninstall Driver > OK. (See Image 9)

c. Click Delete to remove the driver package from the system.
d. Navigate to Action menu and follow Scan for hardware changes > Reinstall the driver.
e. Once the driver is reinstalled, close the window and reboot the PC. Now see if the problem is solved.
Method 6: Perform System Restore
Perform System Restore if all of these methods fail to fix Code 19 error. This process will bring the system back to its default settings and naturally fix the error. However, restoring to default settings means you will lose all your system data. So remember to take back up of your data before going ahead with this process. Once you have backed up your data, perform the System Restore with the following steps:
a. In Windows search box, type Create a restore point, and open it.
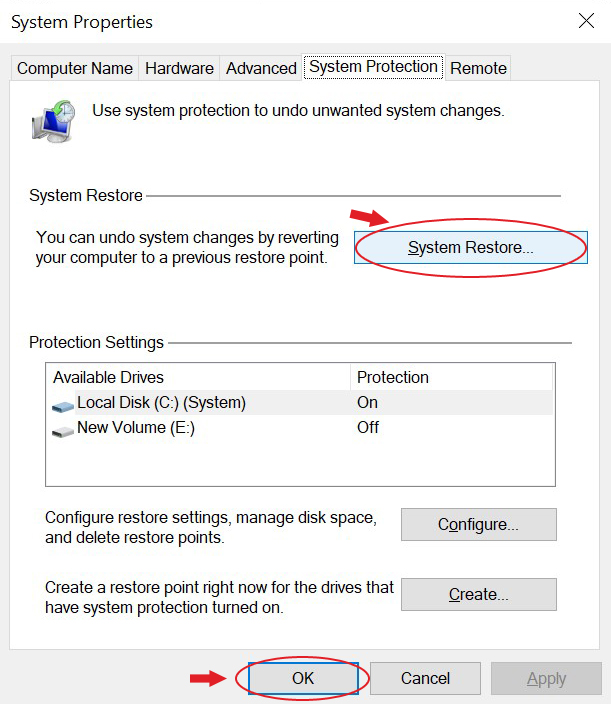
b. In the open window, go to System Protection and click System Restore. (See Image 10)

c. On the next prompt, click Next.
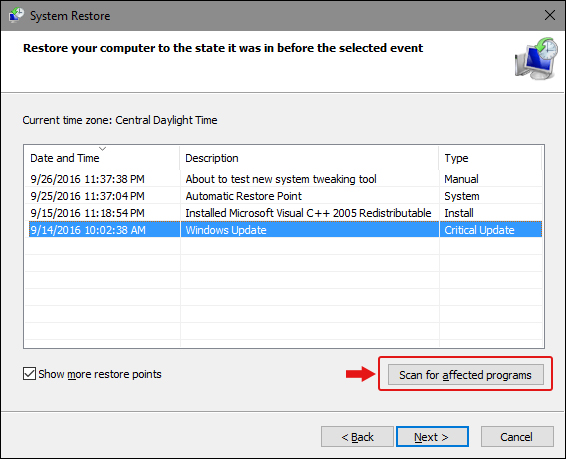
d. Afterward, click Scan for the affected program, and click Next. (See Image 11)

e. Complete the process by clicking Finish. (See Image 12)


d. Once the process is finished, you may restart your PC and check if the error is solved now.
[Note: The above method may cause severe data loss if you forget to take back-up of your data. In case that happens, use an advanced data recovery tool to get back your lost or deleted data].
Can?t access your data due to Code 19 Error?
Recover Data with Data Recovery Tool
If you have lost access to the data due to Code 19 error on Windows PC, you must recover your important data from the drive to keep it safe. You may try using a data retrieval tool, such as Stellar Data Recovery to restore lost documents, email files, photos, videos, and more. This DIY software can efficiently extract the data from a Windows PC and storage media device, such as HDD, SSD, USB, memory cards, and more. The data also be retrieved from formatted, corrupted, or encrypted internal or external devices.
Wrapping Up:
The Code 19 error is one of the most common error codes generated by Device Manager in Windows PC. This error occurs due to corrupt or faulty registry entries, incompatible/corrupt device drivers, or hardware issues with the system. You may try fixing this error by deleting the invalid registry, updating/uninstalling corrupt drivers, and running hardware and device troubleshooter. You may also perform system restore. However, this method can lead to data loss. In such a situation, using data recovery software such as Stellar Data Recovery may be the best way to get back your data. The tool is efficient at extracting any type of data from Windows 10 and different storage devices.

