Summary: If your PC is haunted by the dxgmms2.sys error, you are at the right place. Dxgmms2.sys is a BSOD error on Windows 11 and its predecessors. The issue is caused mainly due to troubled graphics driver. You’ll find the most common causes and 5 foolproof solutions to this issue in this blog.


Contents
- What causes the dxgmms2.sys error on Windows 11?
- How to fix dxgmms2 error on Windows 11?
- Method 1: Handle your Graphics Drivers
- Method 2: Resolve the dxgmms2 error with DirectX Diagnostic tool
- Method 3: Disable the Hardware Acceleration utility
- Method 4: Use Windows Memory Diagnostic to resolve dxgmms error
- Method 5: Update BIOS on your PC
- Bonus Tip: How to recover data lost due to dxgmms2.sys error?
- Conclusion
- FAQ
To fix an issue, you must be well versed with it and the reasons causing it. The dxgmms2.sys is a system file that helps render graphics, especially during gaming sessions on your PC. So, the most obvious reason for the dxgmms2 sys error is the malfunctioning of Graphics driver on a Windows 11 PC. However, it is not the only reason that may have caused the error. There can be other reasons as well.


We will discuss the reasons behind the dxgmms2 sys blue screen error and help you resolve it with multiple DIY methods through this blog.
What causes the dxgmms2.sys error on Windows 11?
As discussed above, the most common reason for the dxgmms2 sys error is the graphics driver problem. Apart from that, some other reasons are:
- Corrupt or outdated graphics driver
- Timeout Detection and Recovery (TDR) issue causing a delay in detection of response problems from the Graphics card.
- Hardware acceleration feature behaving erroneously
- Hard disk or RAM malfunction
- Corrupt BIOS or faulty settings
How to fix dxgmms2 error on Windows 11?
The dxgmms2 issue is a BSOD error, and it causes your PC to restart whenever it appears. However, you can fix it without any expert assistance using the DIY methods discussed here.
Method 1: Handle your Graphics Drivers
Let us start with the most common cause for dxgmms2 error. If you can?t remember the last time you updated your drivers, or if you’ve recently updated the graphics driver and started to face the error, you should either update it or roll back. The simplest way to manage the drivers is using the device manager utility on Windows 11.
Update the Graphics Drivers on Windows 11
You can use the built-in utility Device Manager to update any drivers on your Windows 11 PC. To update the Graphics Drivers, follow the steps below.
Step 1: Right-click the Start icon and select Device Manager from the list.

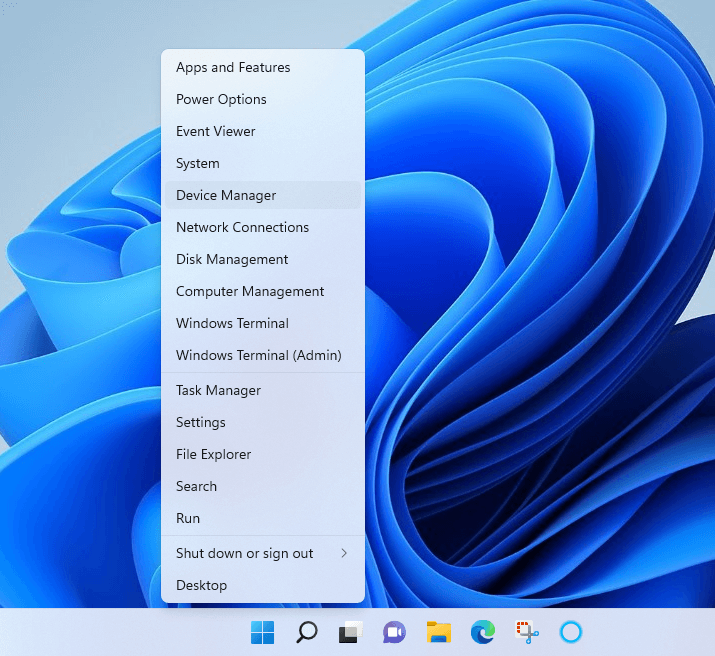
Note: Alternatively, press Windows + R to open the Run utility. Type devmgmt.msc and hit Enter to open Device Manager.
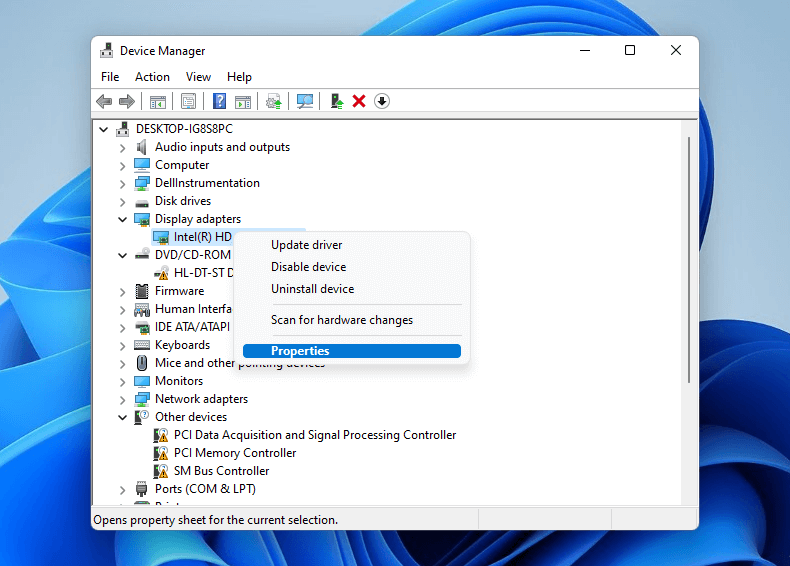
Step 2: Locate the Display adaptors option and click it to expand. The Graphics Drivers will be listed generally with the name of your GPU or manufacturer.
Step 3: Right-click the driver and select Update Driver from the menu.


Step 4: Select Search automatically for drivers on the next screen.

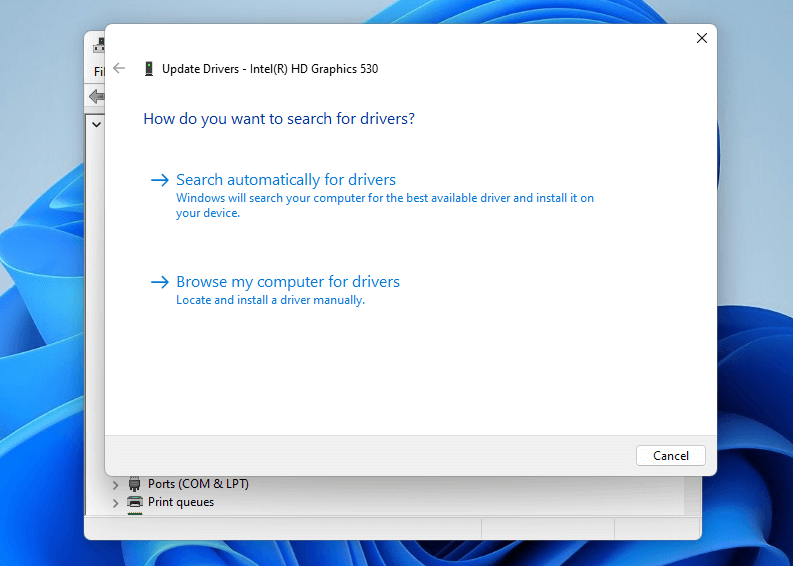
Step 5: Wait for Windows to download and install the drivers and click Finish to complete.
Restart your Windows 11 PC for the changes to take effect.
Roll back the existing driver to the previous version
If the dxgmms2 sys blue screen error appeared immediately after updating your drivers, you need to roll back to a previous version of drivers. You can easily roll back the drivers by following the instructions.
Step 1: Open Device Manager and expand the Display adapters option.
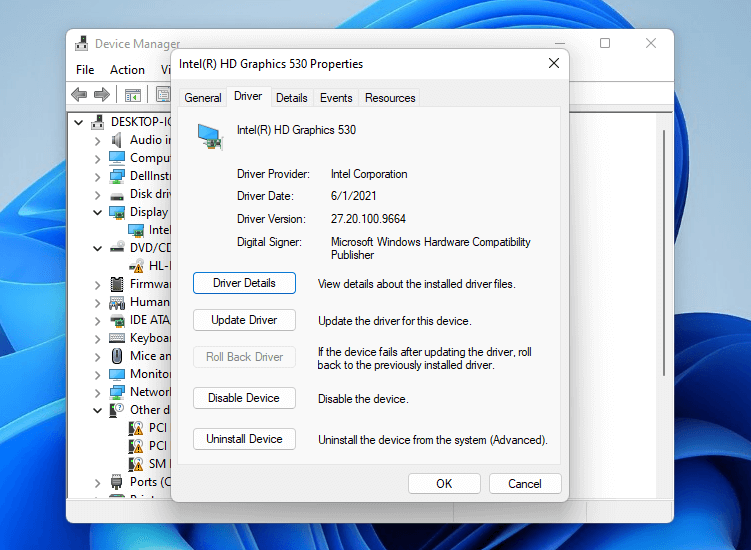
Step 2: Right-click the display driver, select Properties, and click the Driver tab in the new window.

Step 3: Click on the Roll back driver > OK and wait for Windows to install the previous version.

Step 4: Click OK and restart your Windows 11 PC.
Method 2: Resolve the dxgmms2 error with DirectX Diagnostic tool
The dxgmms2 is a short form of DirectX Graphics MMS as it is closely related to the DirectX utility on Windows. The best way to understand and resolve the error is by using the DirectX Diagnostic Tool and getting to the root cause of the dxgmms2 sys blue screen error.
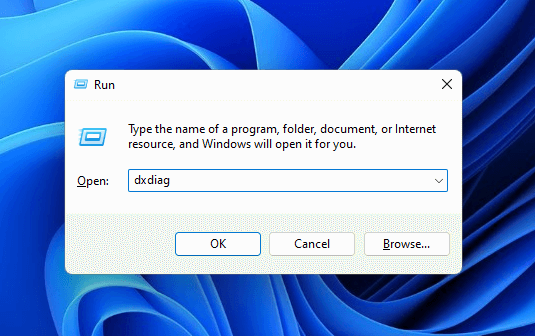
Step 1: Open the Run utility (Windows + R) and type dxdiag in the box. Press Enter to open the DirectX Diagnostic Tool.

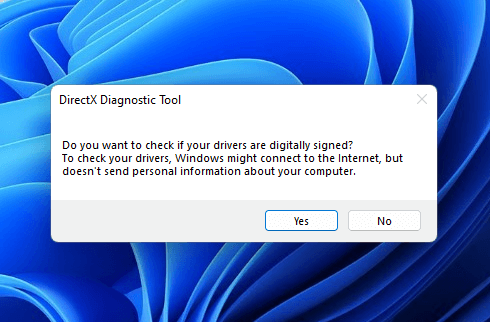
Step 2: Click Yes in the dialog box and wait for the tool to complete diagnosing.

Step 3: Now click the Display tab on top. If the tool finds any error, it will be displayed under the Notes section at the bottom.

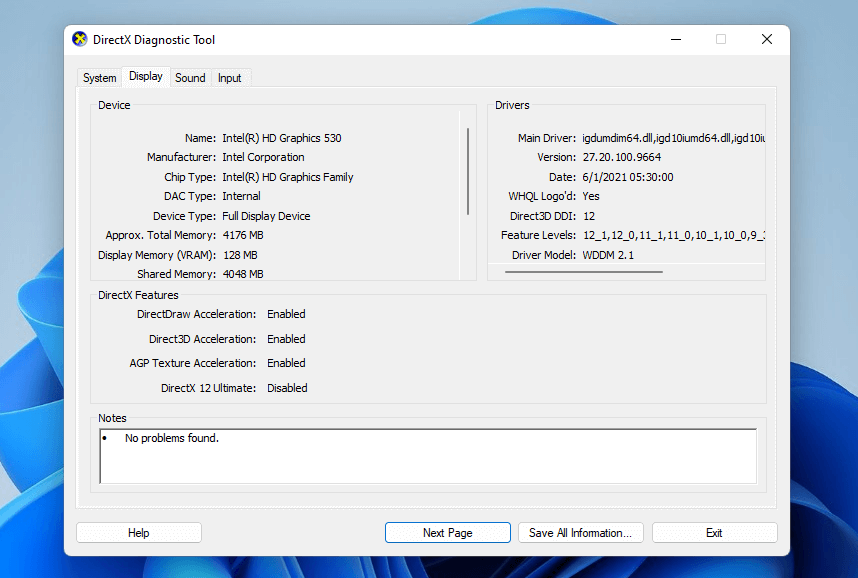
Step 4: If any error is displayed in the Notes section, download the DirectX End-User Runtime Web Installer to reinstall the faulty components.
Method 3: Disable the Hardware Acceleration utility
The Hardware Acceleration utility helps to improve the performance of a Windows PC. It assists your browser in speeding up the graphics-intensive processes by directly accessing the GPU and thus freeing up the CPU.
However, it is one of the prominent reasons causing the dxgmms2.sys error. To resolve the error, disable Hardware Acceleration on your Windows 11 system.
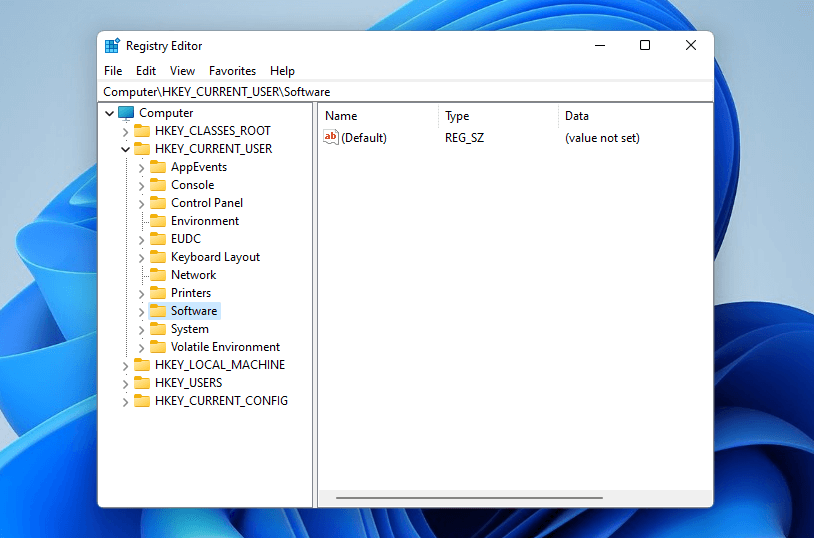
Step 1: Open the Run utility. Type regedit in the box and hit Enter.
Step 2: Allow Windows Registry to make changes by pressing Yes.
Step 3: In the new window, click the ( > ) sign against the HKEY_CURRENT_USER folder to expand it and click Software > Microsoft > Avalon.Graphics in the left pane.

Step 4: Right-click anywhere in the blank space of the right pane and select New > DWORD (32-bit) value. Rename the new value as DisableHWAcceleration.

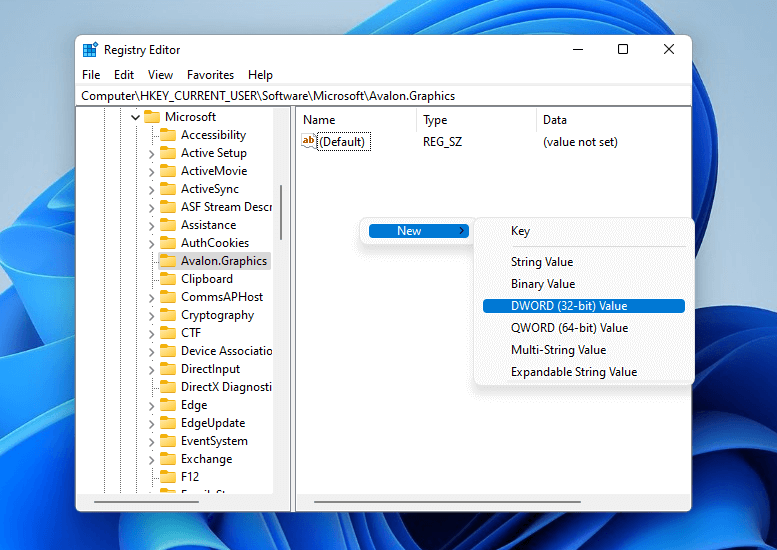
Step 5: Double-click the new entry and type 1 under the Value data section.
Step 6: Click OK. Exit the Registry Editor and restart your PC.
Note: If you?re still facing the dxgmms2.sys BSOD error, follow the above process and change the value data to 0 for DisableHWAcceleration value.
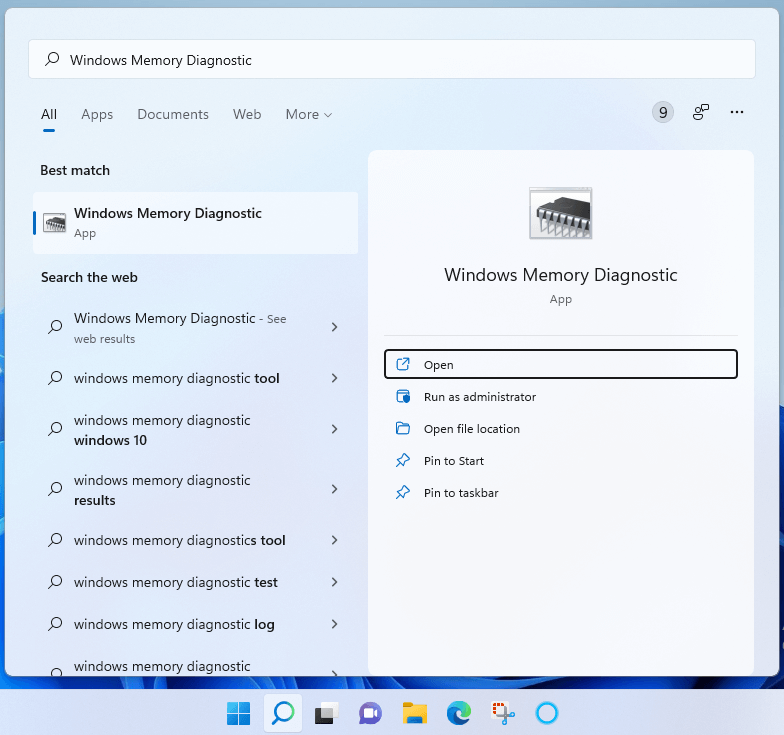
Method 4: Use Windows Memory Diagnostic to resolve dxgmms error
In some instances, the malfunctioning of the memory of RAM of your PC can be responsible for the dxgmms2 sys blue screen error. Windows 11 has a built-in utility to diagnose the problem. Once you have identified the problem, troubleshoot to resolve it. Follow the steps to diagnose the memory-related problem.
Step 1: Type Windows Memory Diagnostic in the Cortana search bar and open it.

Step 2: In the prompt window, select Restart now and check for the problems (recommended) option.

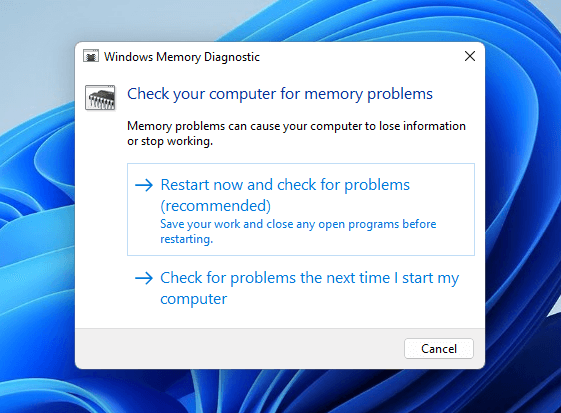
Step 3: If you?ve unsaved work and don’t want your PC to restart immediately, you can choose to Check for problems the next time I start my computer option.
Step 4: Windows 11 will diagnose your memory for any existing issues when your PC restarts.
Once you?ve identified the problem, you can run troubleshoot to resolve it.
Method 5: Update BIOS on your PC
BIOS is responsible for various critical functions on your PC. An updated BIOS ensures proper functioning of those elements. However, an outdated BIOS can trouble you with system errors causing BSOD on Windows 11. One such issue is dxgmms2.sys error. You should update the BIOS to get rid of the error. Here?s how you can do it.
Step 1: Type System Information in the search bar and open it. Check your motherboard model number and manufacturer.
Step 2: Go to your system manufacturer’s website?s download section and get the latest version of BIOS. If the download is in ZIP or RAR format, extract it to a USB.
Note: Make sure there is nothing except the downloaded BIOS files on the USB.
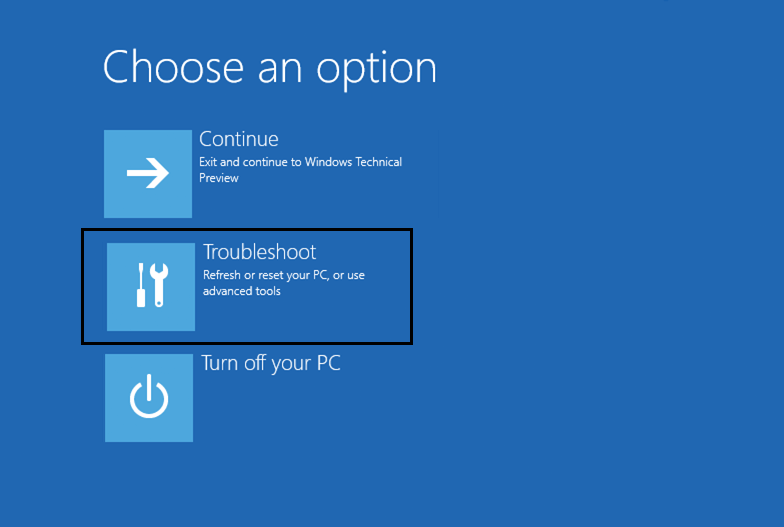
Step 3: Click Start > Power and hold the Shift key. Click Restart while holding the Shift key.
Step 4: In the Choose an Option screen, click Troubleshoot > Advanced options > UEFI Firmware Settings > Restart.

Step 5: Locate the Update option in the BIOS menu and update the BIOS from the USB drive with the latest version of BIOS.
Once the update is complete, restart your Windows 11 PC normally and check if the dxgmms2.sys BSOD error is gone.
Bonus Tip: How to recover data lost due to dxgmms2.sys error?
As dxgmms2.sys error is a BSOD issue; it might cause loss of data. As soon as the error appears, it causes abrupt restart of your PC. In which case, any unsaved data is lost without warning. Moreover, if the problem continues, it may affect the data saved on your device and corrupt the files.
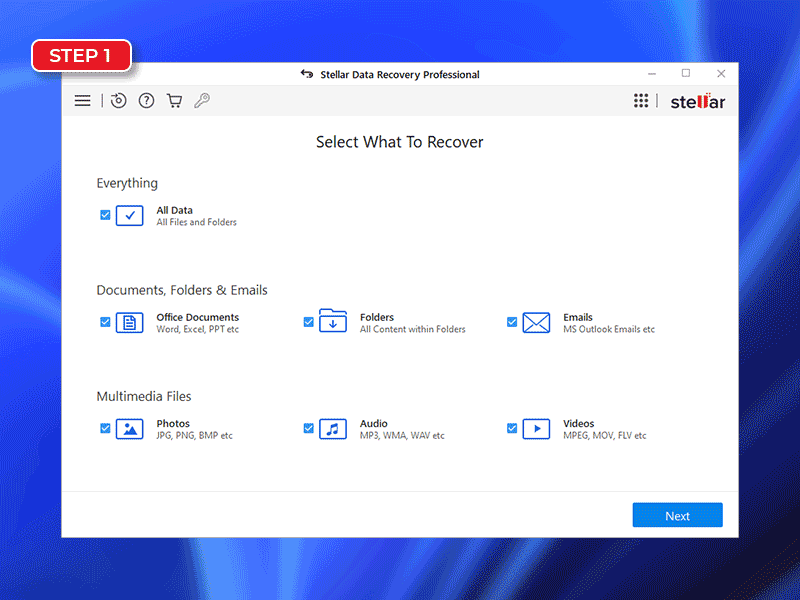
If you have resolved the error using the methods above but lost valuable data in the process, you can recover the data using Stellar Data Recovery Professional for Windows. It is compatible with Windows 11 and previous OS versions.
Furthermore, this powerful data recovery tool efficiently retrieves data in any situation and works effectively even for data recovery on a crashed or non-booting Windows device. The following depiction shows how you can recover lost data in three simple steps.

Conclusion
Any BSOD issue is a nightmare for users as it is not only highly harmful to your data, but can also cause serious errors in the logical and physical components of your computer. You must have resolved the dxgmms2.sys BSOD error on your Windows 11 PC using one of the above methods.
To avoid any such issue in the future, you must constantly check your system’s key elements and conduct data maintenance on a timely basis. Keep your PC up to date by installing the latest Windows updates and stay connected with us for more tech hacks and troubleshoot ideas.
FAQ
1. What is Watchdog.sys?
Watchdog.sys is a Windows BSOD error that generally occurs when you try to boot your PC. The error is reportedly caused due to outdated or corrupt graphics drivers.
2. What is Dxgkrnl.sys?
Dxgkrnl is short for DirectX Graphics Kernel. Dxgkrnl.sys is a system file that supports high graphic engagement activities like playing 3D games. If the file gets corrupt or there is an issue with the graphics driver or DirectX utility, it may cause the dxgkrnl.sys error.
3. What?s the significance of BSOD error on Windows?
BSOD or Blue Screen of Death is a critical system error that causes an abrupt restart or shutdown of your PC without previous warning. BSOD is a way for your OS to alert you that something is seriously wrong with the system and the OS is incapable of rectifying it. Unfortunately, it also means you can?t use the system without a reboot.


