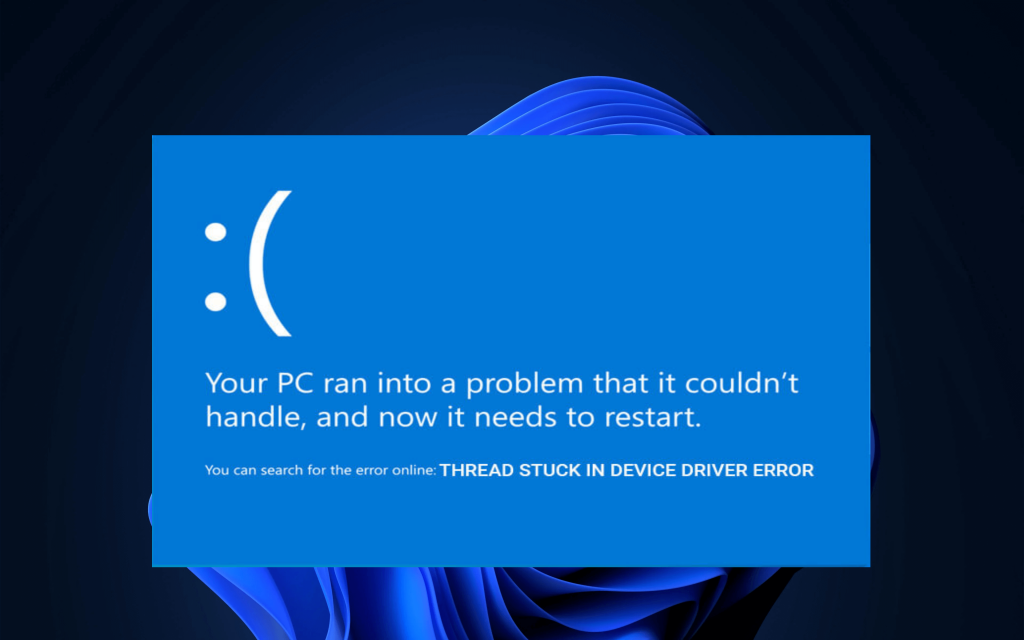
Summary: Sometimes, your PC displays the THREAD STUCK IN DEVICE DRIVER error. The error emanates from a corrupt or faulty driver. If left unattended for a long time, it may result in a BSOD on your PC. Here’s how you can fix the Thread Stuck in Device Driver error.
Contents
It is normal to face an error or two while using your PC to its optimum performance. It?s alright until the error transforms into a critical one causing serious issues like a blue screen on Windows 10/11 or a system crash. One such error is the THREAD STUCK IN DEVICE DRIVER error. If left unattended, it evolves into a system-critical issue.


In this blog, we will discuss the Thread Stuck In Device Driver issue and provide effective DIY solutions.
What is the Thread Stuck In Device Driver error?
The Thread Stuck In Device Driver error is a system issue primarily caused when a driver file is caught in an endless loop due to the unavailability of the hardware’s idle state. This is a software issue and hardly occurs due to a hardware problem. Therefore, it is not impossible or even complex to resolve this issue.
However, if you keep ignoring the error for a long time, it will magnify and cause classic blue screen errors on Windows 10/11. Moreover, it may create troubles like a crashed or non-booting PC, severe data loss, app malfunction, etc. In many ways, the Thread Stuck in Device Driver error is like the System Thread Exception Not Handled BSOD error.
If you?ve only faced the error, but your system hasn’t crashed yet, don’t push it. Instead, immediately start applying the following fixes to avoid Windows BSOD error.

Some facts of Thread Stuck in Device Driver error and its impact
There are certain facts that one must know about this error before going for the fixes. Here is what you need to know.
- Common to all Windows OS versions ? the error message remains the same on Windows 11/10/8/7.
- The error can occur due to GPU device drivers ? especially for AMD-Ryzen processors.
- Thread Stuck in Device Driver Error appears while playing games ? mostly affects the Oculus category.
- It can occur on prominent device driver brands such as Dell, HP, Lenovo, etc.
- Drivers related to OTT platforms and data mining activities also cause this error.
How to resolve the Thread Stuck in Device Driver error?
There are multiple ways to resolve the Thread Stuck In Device Driver Error. Let us discuss them one by one.
1. Run Windows BSOD Troubleshooter
You can use the built-in BSOD Troubleshooter utility of Windows 10/11 to scan and fix the errors causing BSOD on your PC. Here is how to do it.
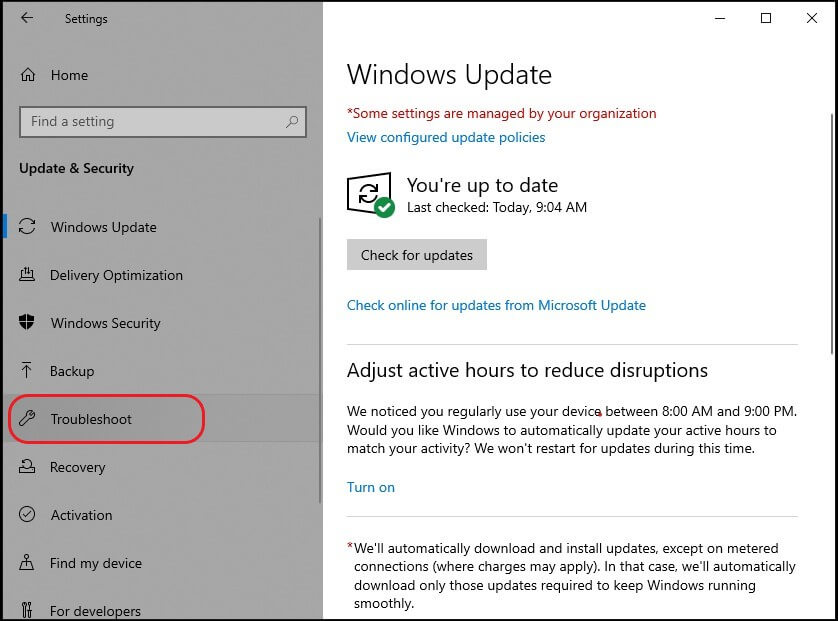
Step 1: Open Settings from the Start menu.
Step 2: Click Update and Security and select Troubleshoot from the left pane.

Step 3: You?ll see the Blue Screen section in the right pane. Click Run the troubleshooter.

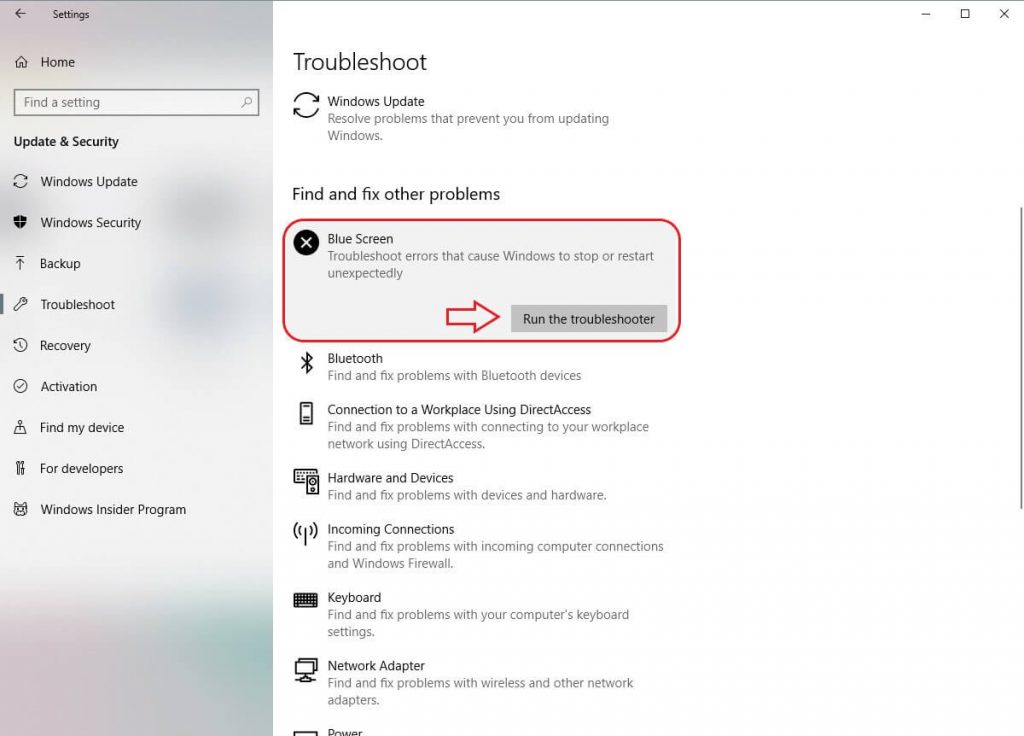
Step 4: Windows will guide you with on-screen instructions to complete the troubleshooting.
Once the process completes, check if the Thread Stuck error still appears.
2. Perform a SMART health check on your PC
Altering the software components may cause permanent changes in your PC. Therefore, it is better to conduct basic checks on your system drive. For example, sometimes, the presence of bad sectors or deteriorating disk health may cause errors on a Windows 11/10 PC. You can use Stellar Drive Monitor to conduct basic checks of the drive’s SMART status and scan it for bad sectors. You can also clone the drive if it appears to be failing to avoid data loss. Here is how you can scan your PC drive for bad sectors.
Step 1: Open Stellar Drive Monitor on your Windows PC and click the Scan Disk option in the left pane.

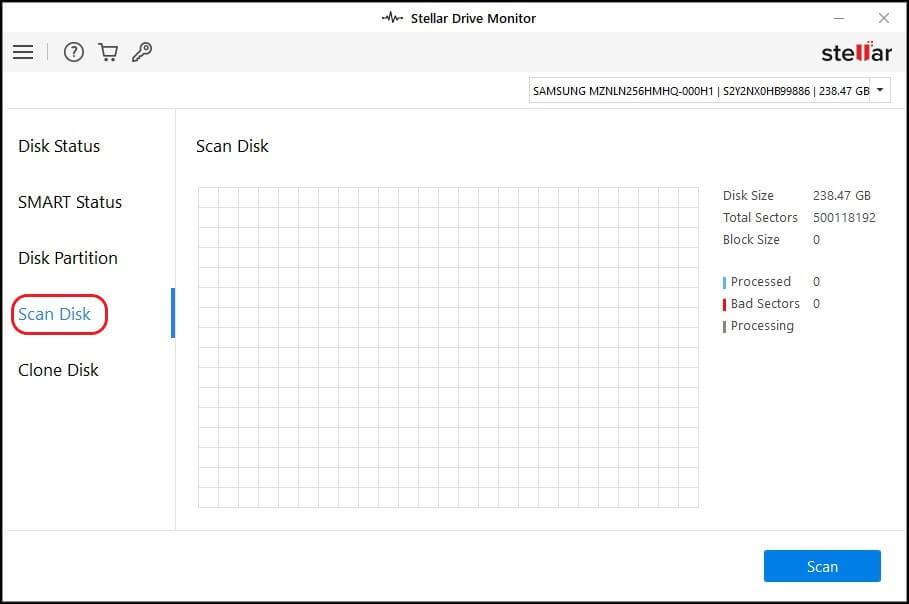
Step 2: Select the disk from the drop-down list on the top-right of the software window.

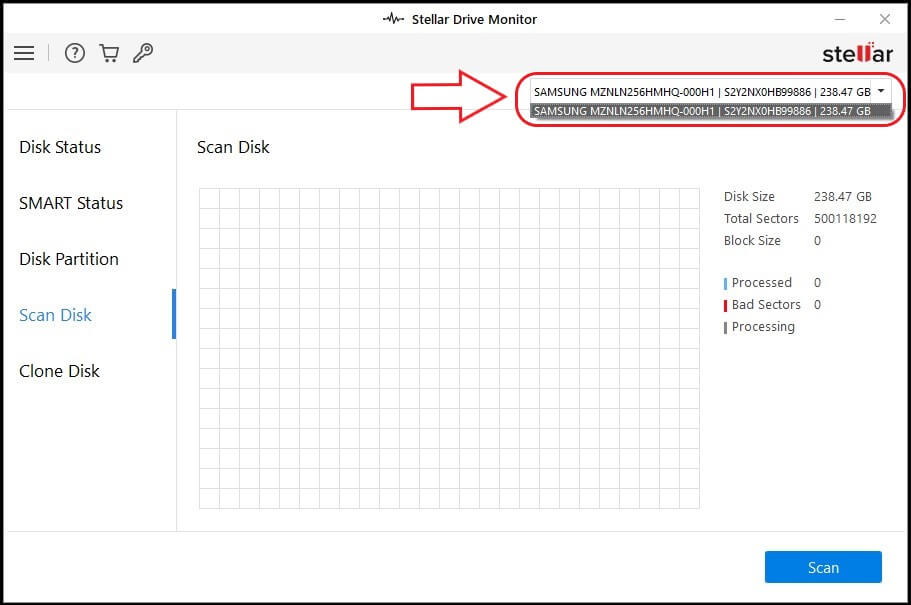
Step 3: Click Scan. You can watch the scanning process in a block table format under the Scan Disk section. You can stop the process at any time by clicking Stop.
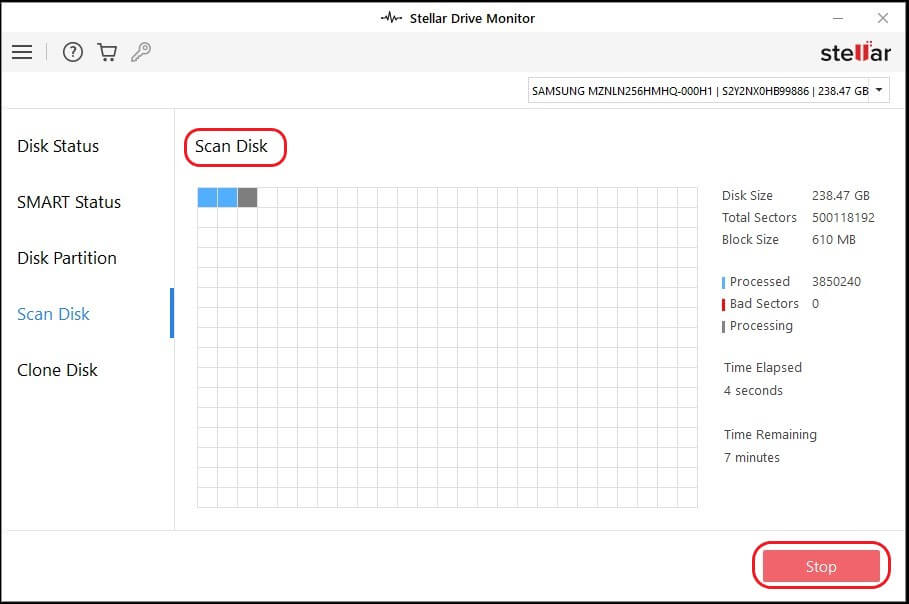
When the scan completes, you?ll see the bad sectors represented by red blocks and healthy sectors as blue blocks. Similarly, Stellar Drive Monitor can easily check the hard drive’s health.
3. Update the device drivers
Since the THREAD STUCK IN DEVICE DRIVER error is caused due to malfunctioning drivers, there is a high possibility some of the drivers are outdated on your PC. Windows allows an update of drivers in an easy way using the Device Manager app. Here?s how you can update the device drivers.
Step 1: Right-click the Windows Start button and select Device Manager from the list.
Step 2: Check for the drivers with an error sign before them and right-click on them. If you know, which drivers to update, you can directly select them and right-click on each.


Step 3: Select Update Driver from the right-click menu.


Step 4: Select Search automatically for drivers and wait for Windows to find and download the latest driver software.

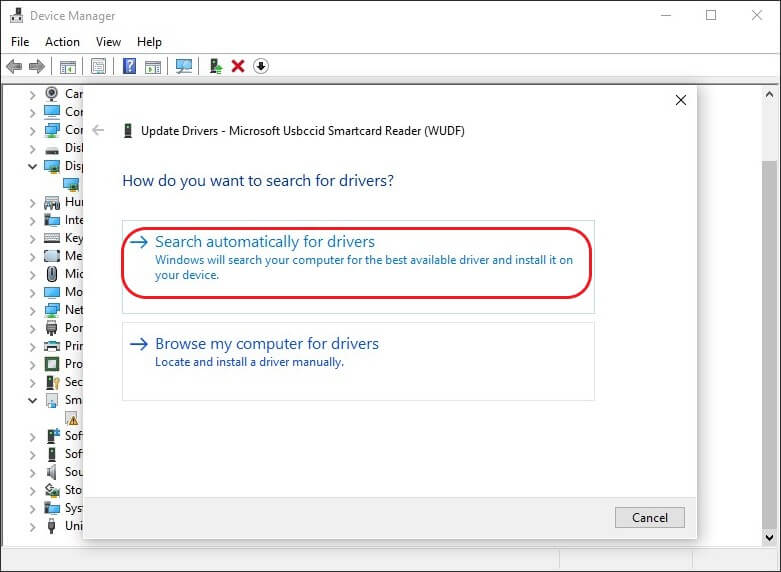
Step 5: Install the driver by following the on-screen directions. Repeat the process for each outdated driver.
You can update your drivers manually by visiting the manufacturer’s website and downloading the latest version.
4. Run an SFC scan on your PC
SFC or System File Checker is a Windows command-line tool that scans and fixes the corrupt or faulty system files on your PC. A corrupt system file might interfere with the system processes. You can run an SFC scan to automatically identify and fix the system files by following the steps ahead.
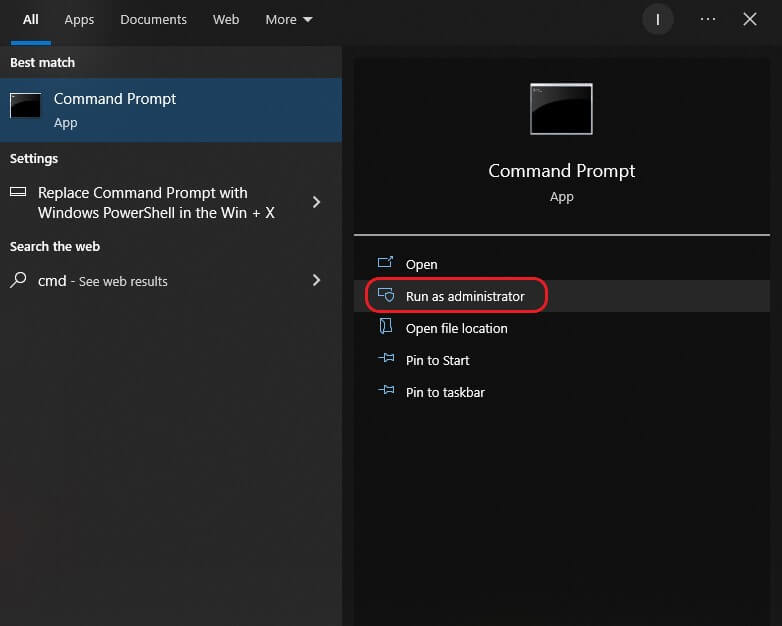
Step 1: Type cmd in the search box and click the Run as Administrator option under the Command Prompt app.

Step 2: Type sfc /scannow in the command line and press Enter.

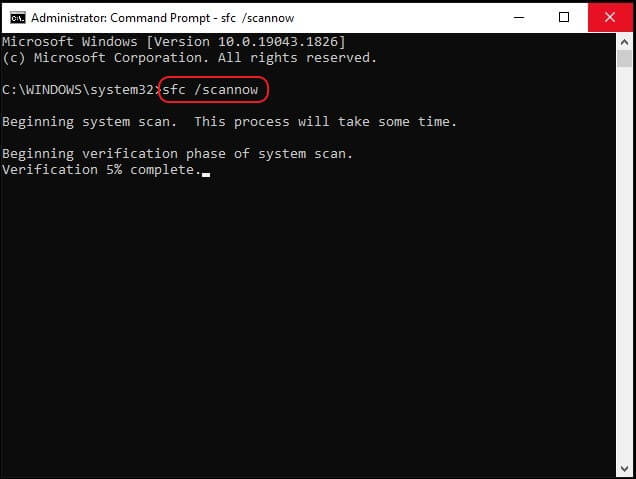
Step 3: Wait for the process to complete, as it may take some time.
If SFC finds any anomaly, it will automatically fix it. Restart your PC for the changes to take effect.
5. Run DISM command
Deployment Image Servicing and Management (DISM) is a Windows built-in tool that re-deploys the system image to repair and fix any issues with the system files and drivers. It proves to be particularly useful in resolving the Windows BSOD errors. Here is how you can run DISM on your troubled Windows 10 PC.
Step 1: Open Command Prompt with Admin privileges.
Step 2: Type the command DISM /Online /Cleanup-Image /RestoreHealth and press Enter.

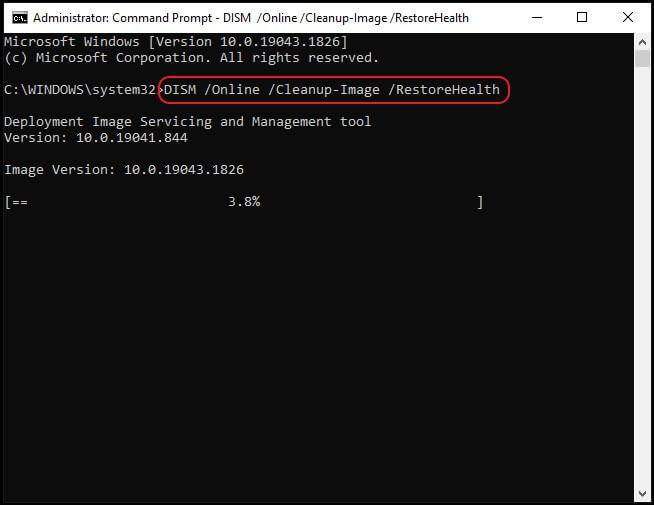
Step 3: Let the process complete successfully.
Note: If there are multiple issues on your system, you might feel like the DISM command is stuck. But it’s not stuck. It will start automatically. Be patient and let it complete.
6. Update Windows
If you have avoided updating Windows for some time, it might have caused outdated system files that may obstruct the driver’s communication with the OS. You must update your Windows to resolve the issue.
Step 1: Click Settings from the Start menu and select Update and Security.
Step 2: Click Windows Update in the left pane and check if there is a pending update available in the right pane. Click Download.

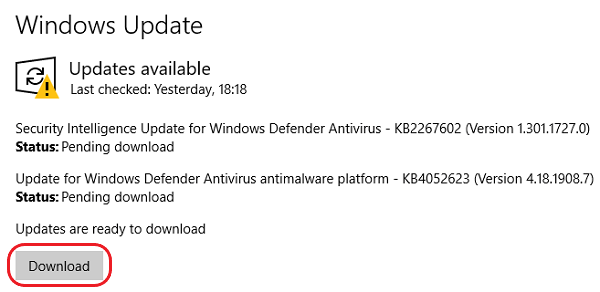
Step 3: You can also click the Check for Updates option to verify if there is any pending update.

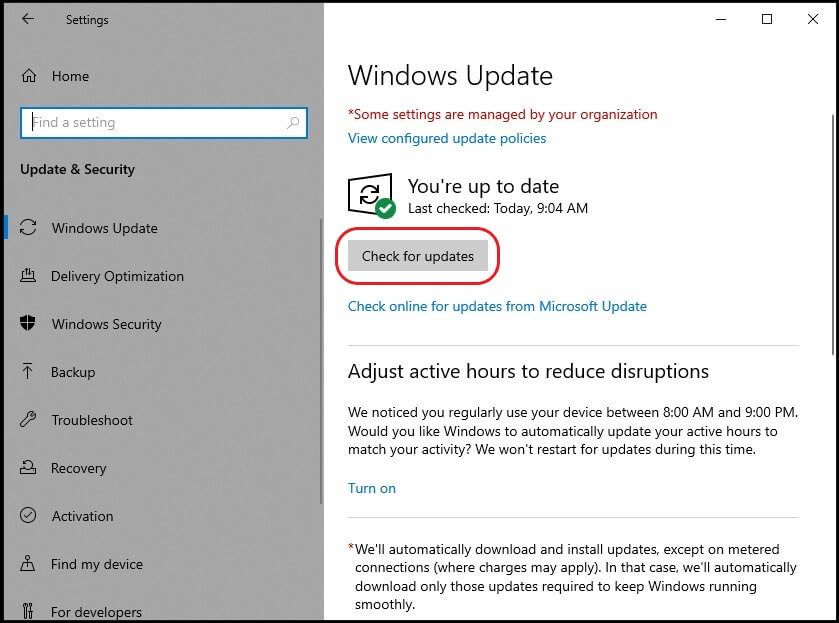
Step 4: Click Install now and Windows will download and install any updates available.


Restart your PC and check if the problem is resolved.
What to do if you?ve lost data due to BSOD?
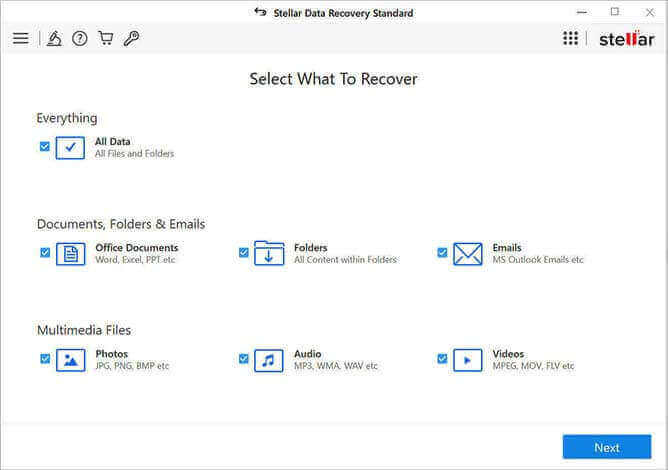
If you realize that there has been any data loss due to the Thread Stuck in Device Driver error or the BSOD caused by the error, you need not worry. You can always get back your data using a backup or restore point. However, if you haven?t got a backup of your data, you can rely on the trusted and secure Stellar Data Recovery for Windows.
It is an effective data recovery software with multiple functions to retrieve data lost for unforeseen reasons. It works in three simple steps and allows a preview of the recoverable data. It is very easy to use, and you don?t need any expertise to learn how to recover data using Stellar Data Recovery for Windows.

Conclusion
Any error could be fatal for your Windows PC if not taken care of in time. The same stands true for the Thread Stuck in Device Driver error. If you resolve it immediately using one of the above methods, you might lose some of the valuable data. It might even cause serious issues with your system software and hardware or brick your PC. We hope you?ve resolved the issue with the effective DIY methods discussed in this blog.
FAQ
1. How do I reinstall device drivers?
To reinstall a device driver, open Device Manager and right-click on the driver. Next, select Uninstall from the menu and close the Device Manager. Now, restart your PC. Windows will automatically attempt to reinstall the driver. Allow wherever necessary and follow the on-screen instructions.
2. How do I check my driver errors?
Go to Device Manager and expand the drivers one by one. Then, check if any error sign is displayed. You can also identify a faulty driver using the Driver Verifier tool. Although it?s a developer’s tool, you must avoid using it unless it is the last option.
3. How do I fix driver errors in Windows 11?
The method to fix a driver error in Windows 11 is similar to Windows 10. First, you must go to Device Manager and identify the faulty driver. Then, right-click the driver and select suitable action from the menu.


