Summary: SSD showing Unallocated in Disk Management? What are the causes for it? Read this guide to learn the best ways to fix unallocated SSD and recover data with a powerful data recovery tool. The reasons why SSD becomes unallocated are also mentioned in post.


I swapped out my hard drive to an SSD and cloned the drive. The initial drive was 500 GB and the new SSD has 1Tb capacity. Everything went well, however when I tried to access my SSD drive, I couldn?t open it. To check if everything is fine, I opened Disk Management. The drive was appearing as unallocated. Please tell me how I can fix this. Any help would be appreciated!


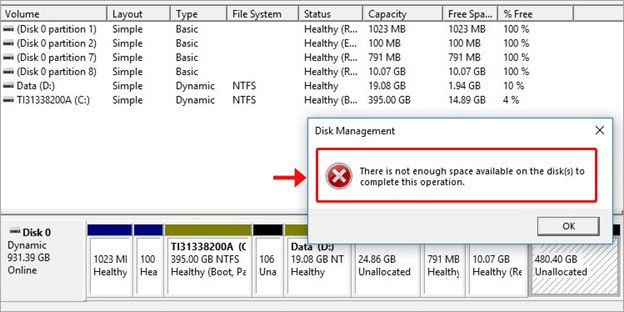
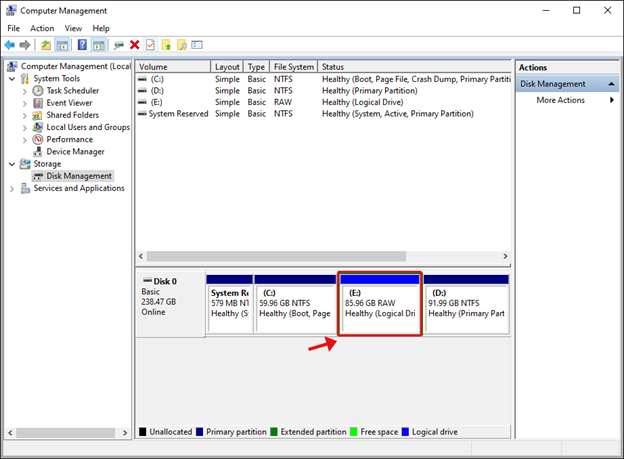
Solid State Drives (SSDs) are significantly faster and improve the system?s performance. Also, these drives offer more reliability as compared to conventional HDDs. However, like any other drive, SSDs may become unallocated due to corrupt file system. There could be several reasons behind file system corruption such as virus attack or bad sectors in the drive. The SSD with the corrupt file system doesn?t appear in File Explorer. Though you can verify the status of the drive in the Disk Management. If you find the drive showing as ?Unallocated? (See Image 1) you may fix it with the best methods given in this blog.

The unallocated SSD becomes inaccessible, which means you may not access your data stored on the drive. No need to worry! You may recover the data with the help of an efficient data recovery tool.
Read on to know the best troubleshooting techniques to fix unallocated SSD to make it accessible again and use it as new.
Best Methods to Fix Unallocated SSD
Method 1: Assign a Drive Letter
You can try fixing the unallocated SSD by assigning the drive letter and later on formatting it and providing a file system to it.
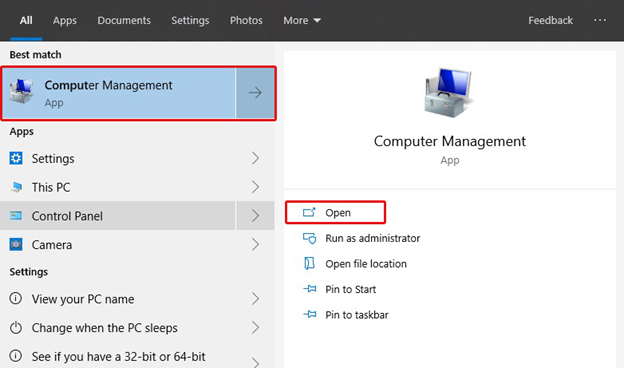
a. Go to Windows Search Box and open Computer Management. (See Image 2)

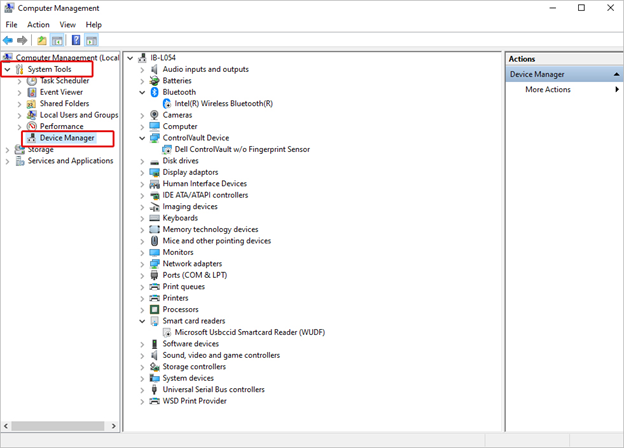
b. Go to System tool and then click Device Manager (See Image 3)

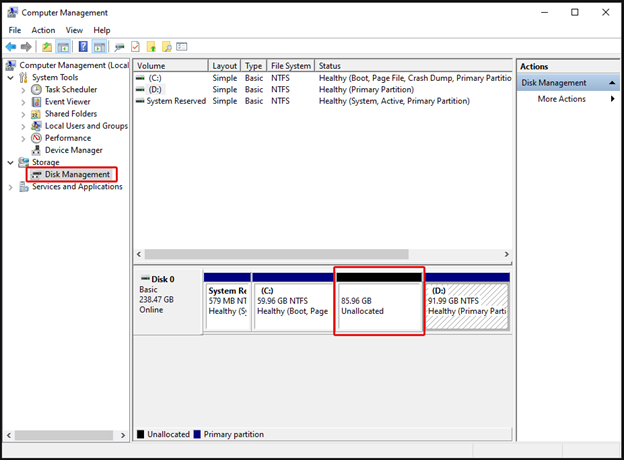
c. Go to Storage and double-click on Disk Management and you will see the unallocated drive. (See Image 4)

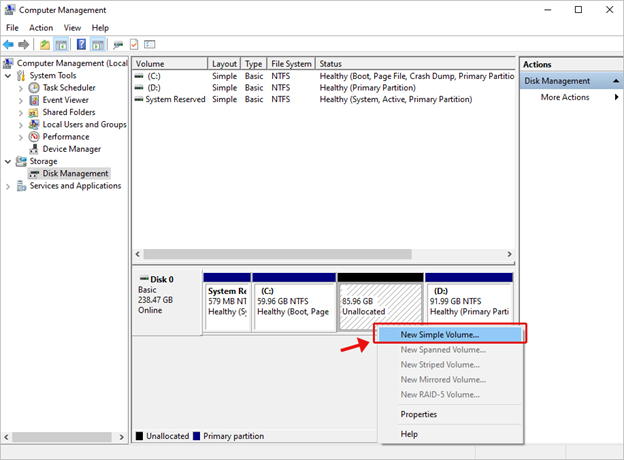
d. Find the drive with unallocated space, right-click on it and select New Simple Volume. (See Image 5)

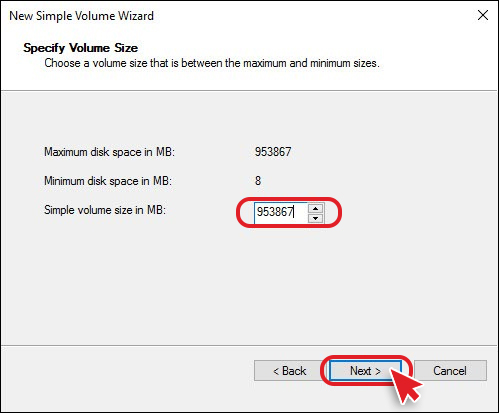
e. Click Next on the next prompt and then click Next again to specify volume size. (See Image 6)

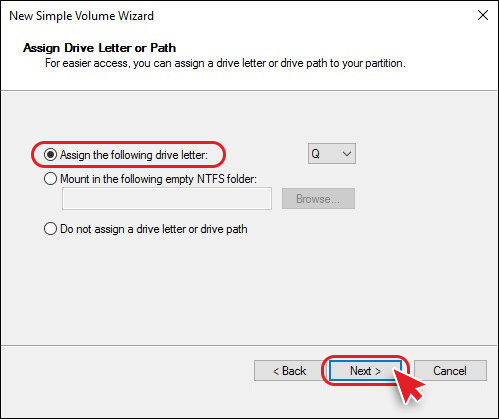
f. Then assign the drive letter from the available options and click Next. (See Image 7)

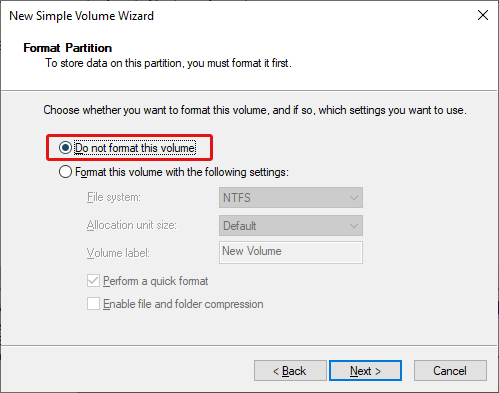
g. Mark ?Do not format this volume? and click Next. (See image 8)

h. Finish the process. Once it?s done, you will be able to see the drive with a letter. However, the drive will turn RAW. (See Image 9)

As you chose to not format the drive, the drive turns RAW, but the data remains on the drive. So, you may recover data from RAW drive with a data recovery tool and then proceed with the next method.
Method 2: Format the Unallocated SSD
To get back your access to the solid-state drive (SSD), you may format the drive and provide it a file system with the help of the following steps:
a. Go to Disk Management and right-click on the RAW SSD.
b. Follow the on-screen instructions and proceed.
c. Click ?Format this volume with the following settings?, choose NTFS as a file system and click Next. (See Image 10)

d. Click Finish to complete the process.
Formatting the drive to wipe out the data stored on it, can result in you losing all your important files, documents and other data. If you have already recovered the data from the drive, you can format the drive.
However, if you lose data after formatting the drive, the recovery is still possible with Stellar Data Recovery software. This DIY data retrieval tool lets you recover lost documents, email files, photos, videos, and more. The software can retrieve all types of hard drive and SSDs, SD/ Memory cards, USB drives & more. The data can even be retrieved from formatted, corrupted, or encrypted devices. The RAW SSD drive recovery is also possible. Check out the video to get back your data.
Method 3: Try Using Diskpart Utility
You may use Diskpart utility to fix the unallocated SSD. With the help of this command-line utility, you can quickly format the drive partition or change the drive partition to NTFS or FAT32.
Caution: Using Diskpart utility will format the drive, due to which, you will end up losing the data stored on the SSDs. Therefore, before proceeding, create a backup of your data.
Follow the below-said troubleshooting steps:
a. Open Command Prompt, and type diskpart command.
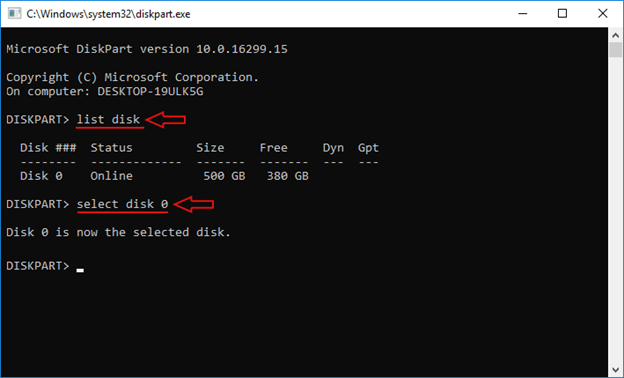
b. Next, type list disk and then type Select Disk 0 (Where disk 0 is the unallocated drive) and hit Enter. (See Image 11)

c. Type clean command on the next prompt.
d. Afterward, type create partition primary and hit Enter.
e. Then type format fs=fat32 quick or fs=ntfs quick, hit Enter and proceed. (See Image 12)


f. Let the process finish and restart the system. Check if the error is fixed.
This method may lead you to a data loss situation. So, you must keep a data recovery tool handy to recover lost data from SSD.
Wrapping up
Solid-State Drives are increasingly replacing mechanical hard drives. They offer better firmware encryption, ensuring better data privacy. However, SSDs are also prone to corruption, formatting, or virus attacks. Due to these reasons, SSD becomes unallocated. And, to fix the unallocated SSD, you may try all the methods given in this post.
However, recovering data from SSDs is a little bit tricky, but you may use an efficient data recovery tool such as Stellar Data Recovery software to get back your data. This easy-to-use software can even restore data from formatted and corrupted Windows PCs as well as external storage devices.

