Summary: Getting a blue screen on your system with a bug code dxgkrnl.sys is not a pleasant experience. However, it may occur at any time due to any possible reasons. However, worry not, as you can fix it with the methods shared in this blog. Moreover, with powerful data recovery software, be ready to recover data from a BSoD-affected PC.


Contents
Windows PCs are quite prone to various BSOD (Blue Screen of Death) errors. The BSOD errors appear with hundreds of different stop codes. One of the most common BSOD errors Windows 10/11 users face is dxgkrnl.sys. There could be several causes for this error, but it is mainly caused due to a graphics driver-related issue. Luckily, it is possible to fix the dxgkrnl.sys error easily. This article lists all the working fixes to eliminate the error.


What Causes the dxgkrnl.sys Error?
The most common cause of dxgkrnl.sys error is a problematic graphics card driver. Some other reasons are also listed below.
- Outdated or corrupt drivers
- Outdated Windows 10
- Problematic software
- Hardware problems
- Memory Leak in the VRAM
Fix dxgkrnl.sys BSOD Error in Windows 10/11
There are several solutions that you can try to fix this error. We will show you some of the most effective ones below.
1. Update Windows
Microsoft keeps fixing potential bugs and issues with Windows updates. Not installing these updates may lead to errors like dxgkrnl.sys. Below are the steps to check for updates on your Windows 10 PC.
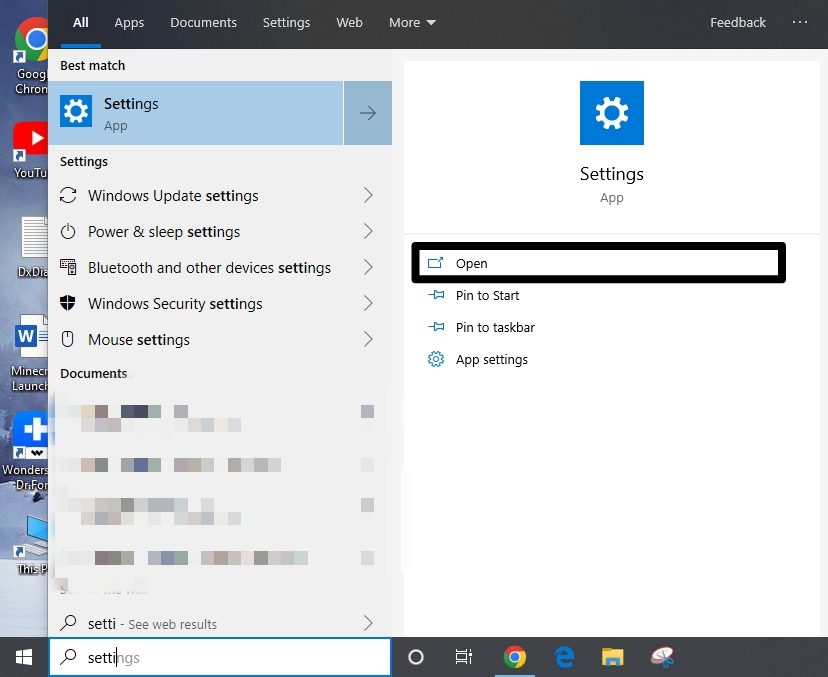
a. Press the Windows + I key to open Settings.

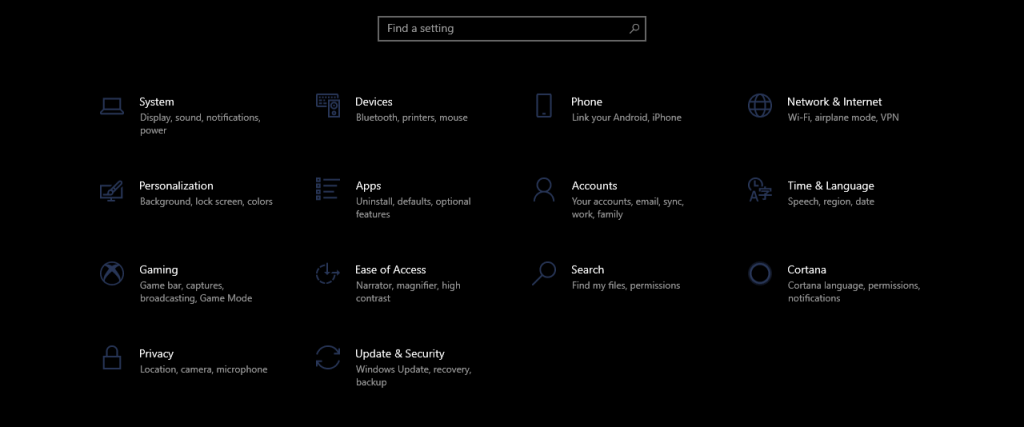
b. In Settings, click on Update & Security.

c. Click on Check for updates.

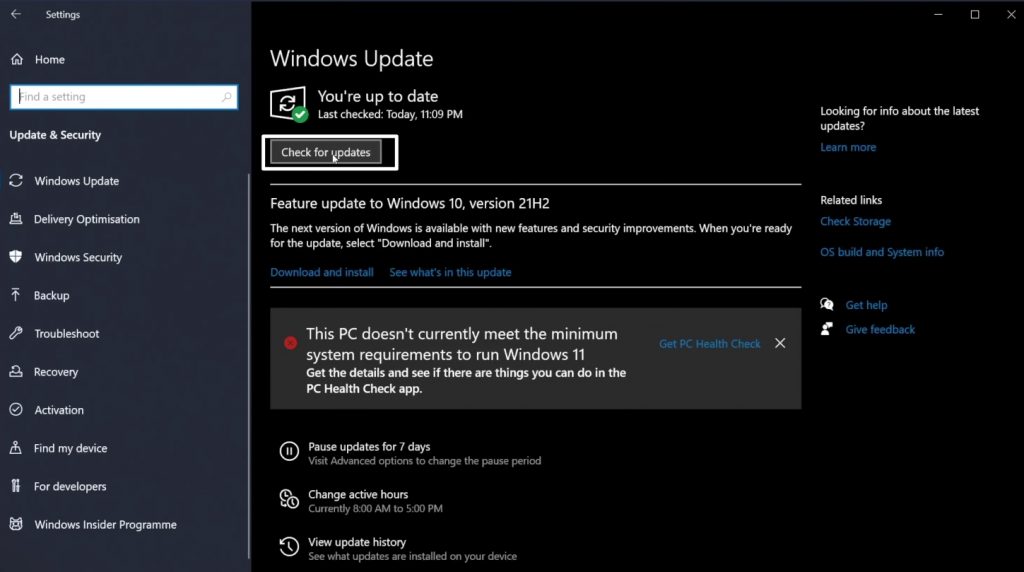
d. If a Windows update is available, download and install it.
2. Disable SLI
With SLI, you can use two graphics cards on your Windows 10 PC and get better graphics performance. However, as good as it may sound, reports suggest that SLI often causes the dxgkrnl.sys error. SLI may cause a potential memory leak in the VRAM (GPU memory), causing the error. You can disable SLI with the help of the below steps.
a. Open NVIDIA Control Panel and go to 3D Settings.
b. Click on Set SLI Configuration or Configure SLI, Surround, PhysX option.
c. Select Disable SLI under the Set the following section.

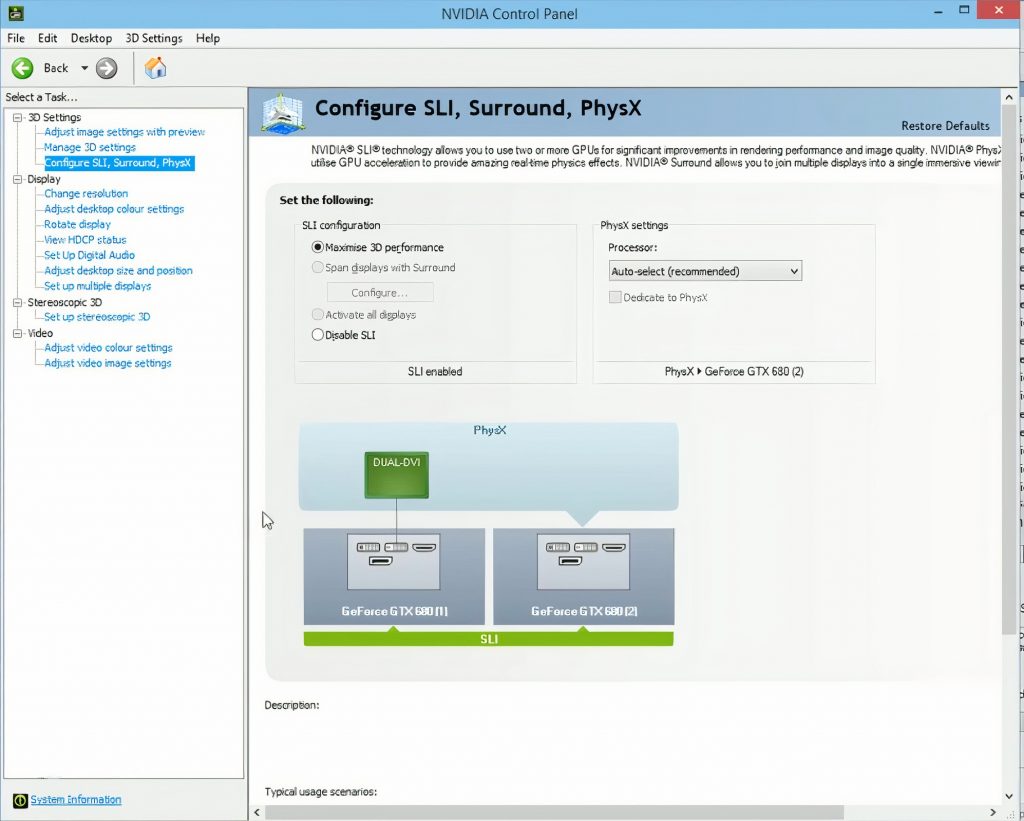
d. Click Apply to save the changes and restart your computer.
Hopefully, the dxgkrnl.sys error should be fixed.
3. Turn Off NVIDIA Surround
NVIDIA Surround is a feature that allows you to use multiple monitors with your NVIDIA graphics card. However, this feature is known to cause the dxgkrnl.sys error. You can easily fix this error by turning off NVIDIA Surround. Press Ctrl + Alt + S or Ctrl + Alt + R on your keyboard, and you should be up and running in no time. If this shortcut isn’t working, unplug all the connected monitors and restart with a single monitor.
4. Change the Graphics Memory Size to 128MB in BIOS
A decent number of users have successfully resolved the dxgkrnl.sys error by changing their graphics memory size to 128MB in BIOS settings. This solution is more effective if you have an integrated graphics card on your system. Follow the below steps to change the graphics memory size in BIOS.
a. Restart your computer while continuously pressing the F2 key on your keyboard until you are greeted with the Setup screen.
b. Once you are there, find the Advanced menu.
c. Find the Graphics Settings or Video Settings entry and change the memory size to 128MB or more.
5. Run SFC Scan
Corrupted system files can often result in BSOD errors like the dxgkrnl.sys error. SFC or System File Checker is a Windows utility that scans and fixes any corrupted system files on your computer. Follow these steps below if you don’t know how to run an SFC scan.
a. Search for cmd in the search bar and run it as administrator.


b. Type sfc /scannow and hit Enter.

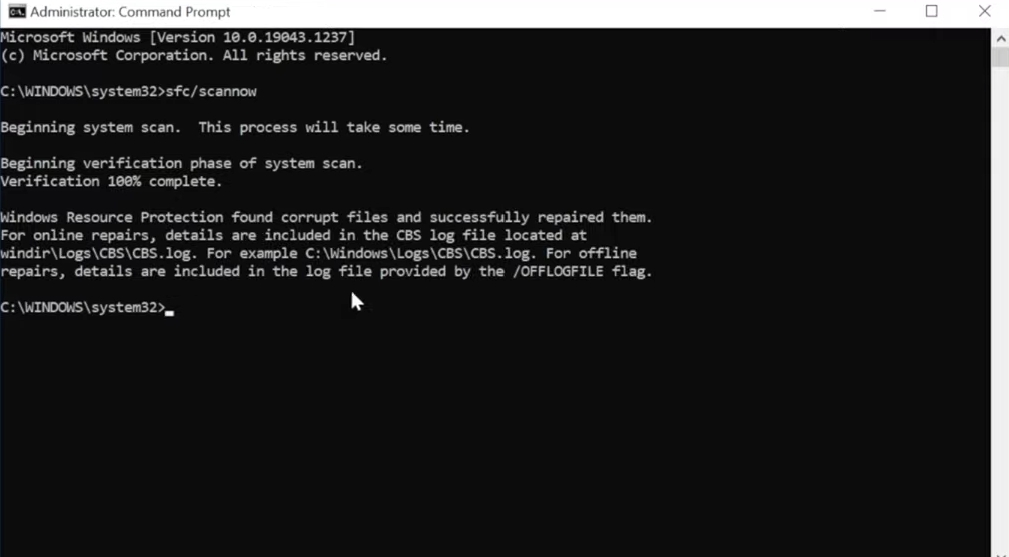
Your system will start checking the integrity of your system files and fix any associated issues. Wait patiently until the verification is done and the dxgkrnl.sys error should be fixed.
6. Run DISM Command
If an SFC scan does not resolve the dxgkrnl.sys issue, try running a DISM command. Deployment Image Servicing and Management tool, or DISM, is a program that scans your machine and corrects any problems.
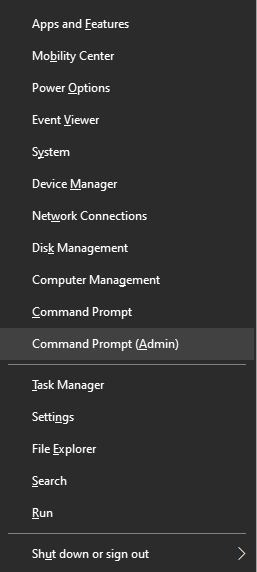
a. Press Windows + X shortcut key to open the Quick Access Menu.
b. Click on Command Prompt (Admin).

c. Enter the following command and press Enter.
Cleanup-image DISM.exe /Online /Restorehealth
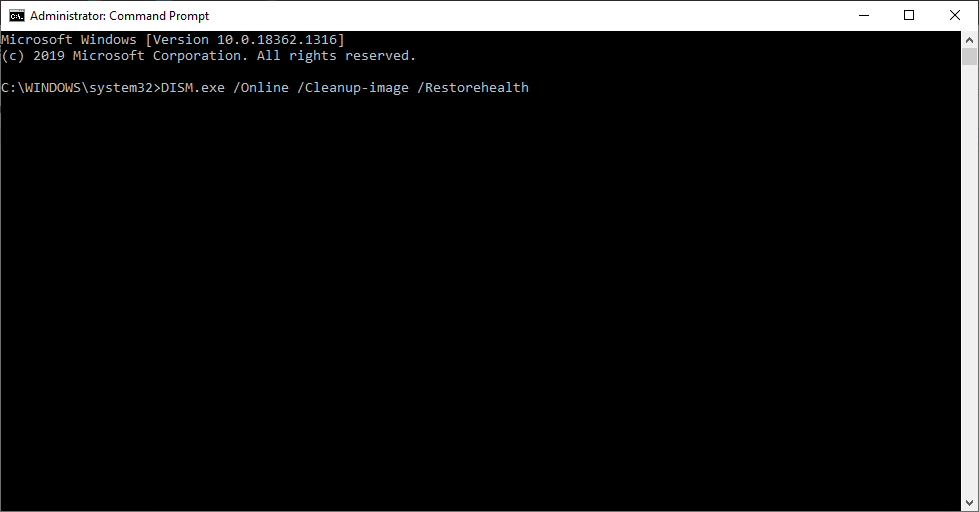
d. Restart your computer after the scan is finished.
Hopefully, your computer will boot normally, and the “dxgkrnl.sys” error will be gone.
7. Reinstall Your Graphics Driver Manually
An outdated or corrupt graphics driver is one of the most common causes of the dxgkrnl.sys error. You can reinstall your graphics driver manually to fix the error.
Uninstall the Graphics Driver
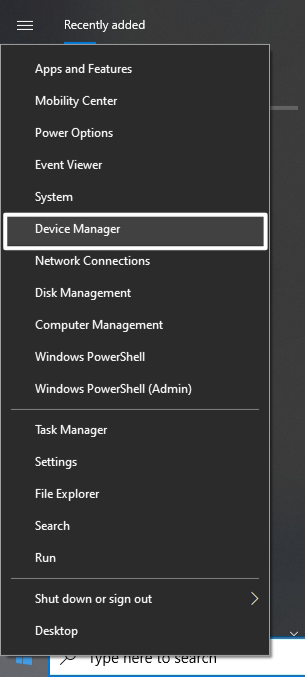
a. Right-click on the Start button and select Device Manager.

b. Click on Display Adapters.
c. Right-click on your graphics card and select Uninstall device.

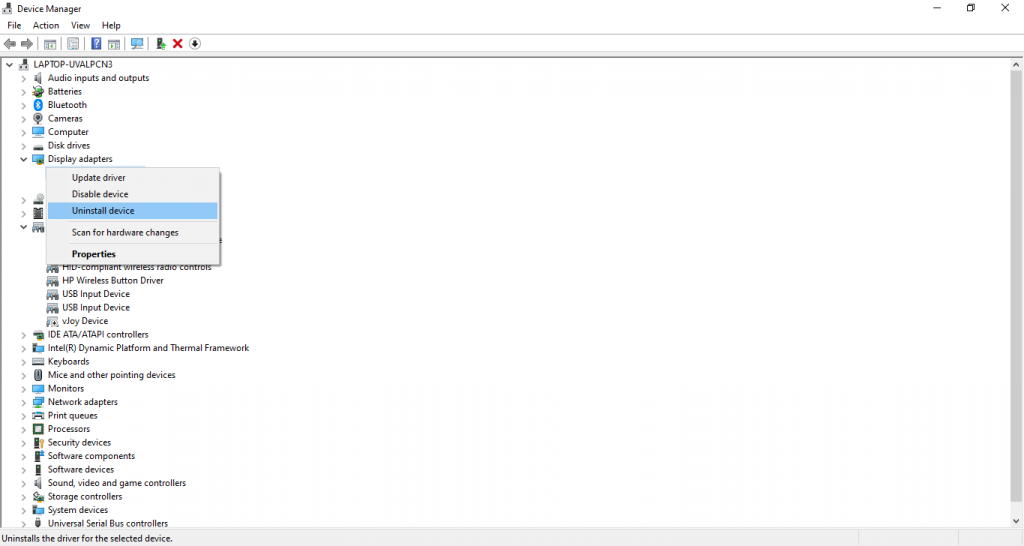
d. Once done, restart your computer.
Reinstall the Graphics Driver
a. Visit the official website of your Graphics maker.
b. Enter the important details, such as GPU type, series, operating system, and language, and click Search to download the latest graphics driver available for your GPU configuration.


c. Once the file is downloaded, right-click on it and select Run as administrator.
d. Follow the on-screen instructions to install the driver.
e. Restart your PC for the changes to take effect.
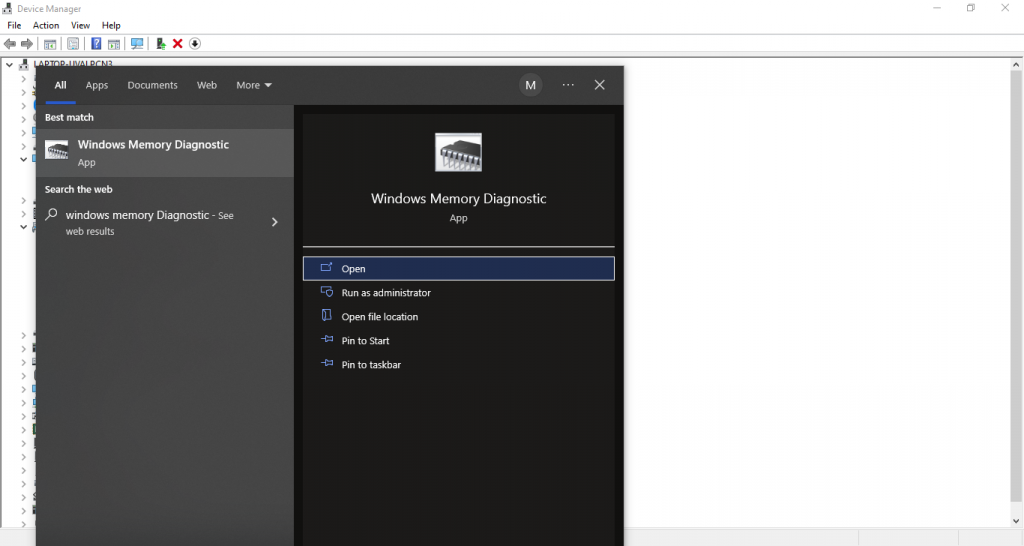
If you are still unable to bypass the dxgkrnl.sys error, you should check for damaged or faulty RAM on your computer. To assist you with this, Windows offers a built-in utility called Windows Memory Diagnostic. It is designed to diagnose your RAM and check for any associated faults. To run the Memory Diagnostic Tool on your computer, follow these steps.
a. Search for Windows Memory Diagnostic and open it.
8. Run Windows Memory Diagnostic Tool
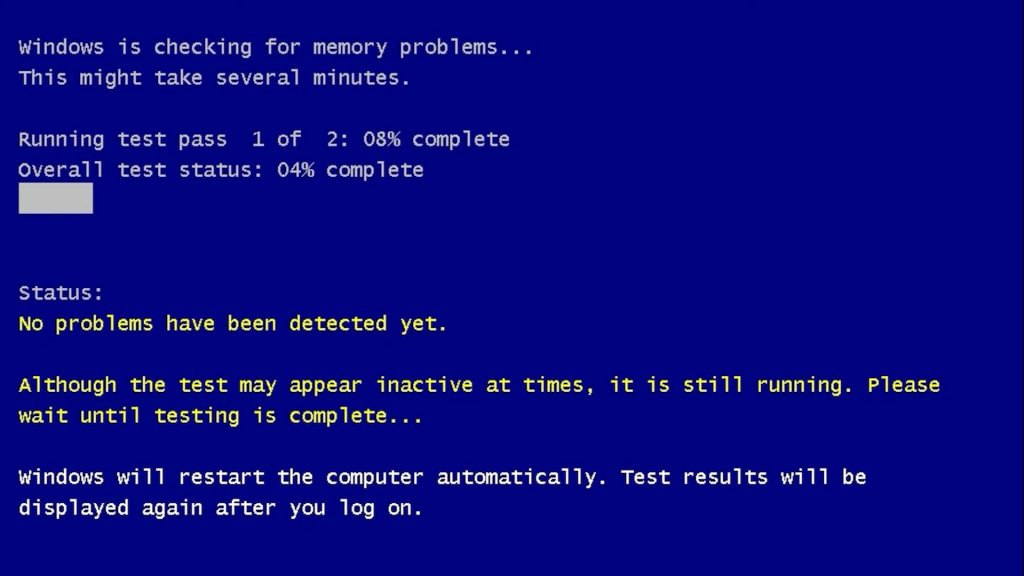
b. Select the Restart now and check for problems (recommended) option. The diagnostic tool will start checking for any issues with your RAM.


c. If the diagnostic tool suggests faulty RAM, you must replace it with a new one.

9. Uninstall Problematic Software
If you have recently installed new software, that might be causing the dxgkrnl.sys error. You should uninstall that problematic software.
a. Press Windows + R key to open the Run dialog box.
b. Type appwiz.cpl and click OK.
c. Find that software and click Uninstall.

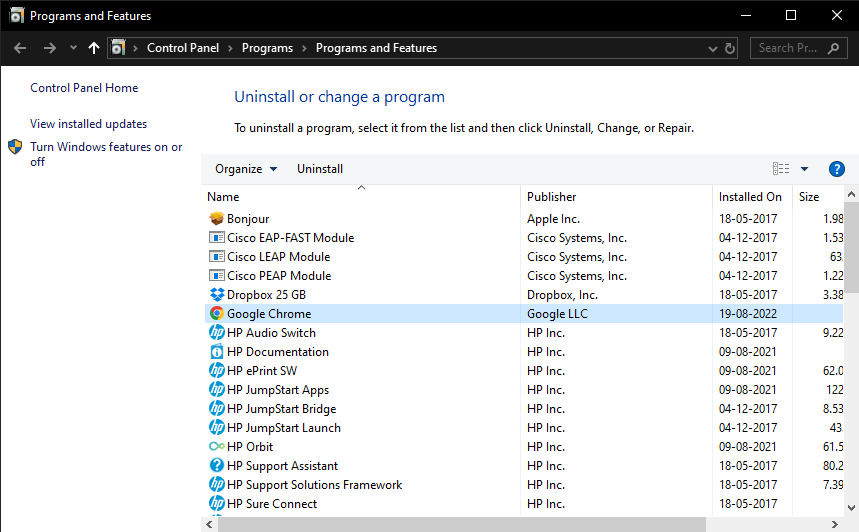
d. Restart your computer.
10. Run the Blue Screen Troubleshooter
Windows PCs come with different built-in troubleshooters. These are designed to find and fix issues on your computer. One such troubleshooter is a blue screen troubleshooter. Here’s how you can run it on your computer.
a. Press Windows + I to open Settings.
b. Click on Update & Security and select Troubleshoot from the left sidebar.
c. On the right screen, find Blue Screen under Find and fix other problems entry.
d. Click on Blue Screen, and then Run the troubleshooter.

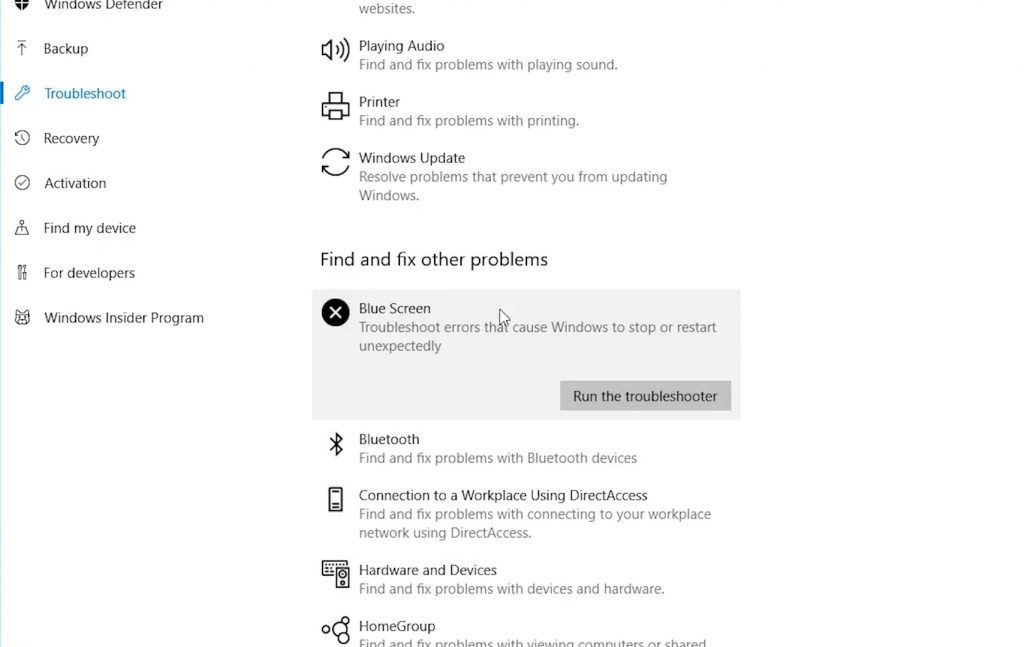
e. Once done, Restart your computer.
11. Perform a System Restore
Suppose you have tried all the above fixes but the dxgkrnl.sys error persists, try performing a System Restore. A System Restore restores your computer to a previously saved restore point when everything was fine with your PC. Below are the steps to perform a System Restore.
a. Restart your PC while holding down the Shift key until the Automatic Repair option appears on the screen.
b. Once it does, Click Restore and then Troubleshoot.

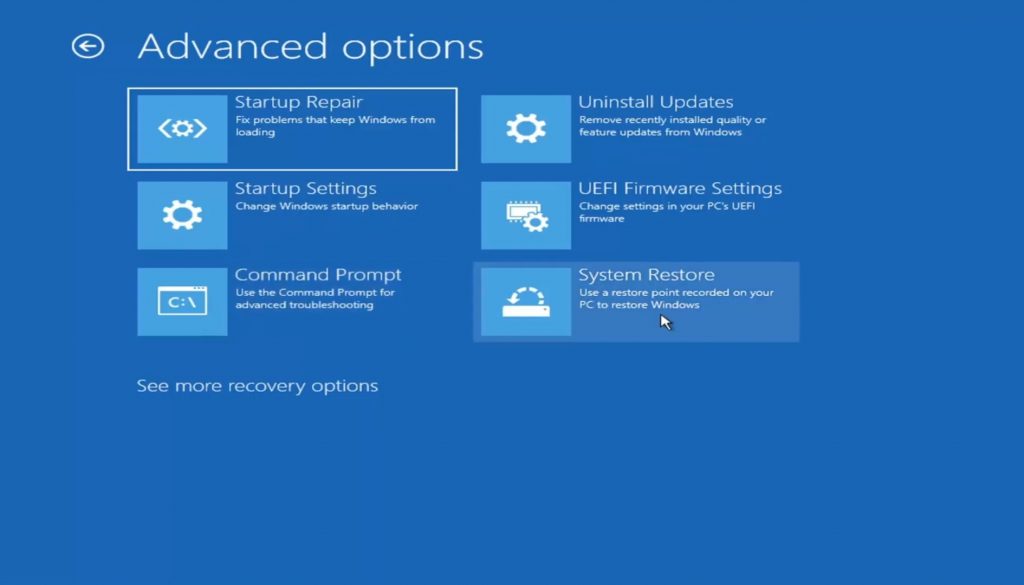
c. Select Advanced options and then System Restore.
d. Finally, choose the restore point and click Next.
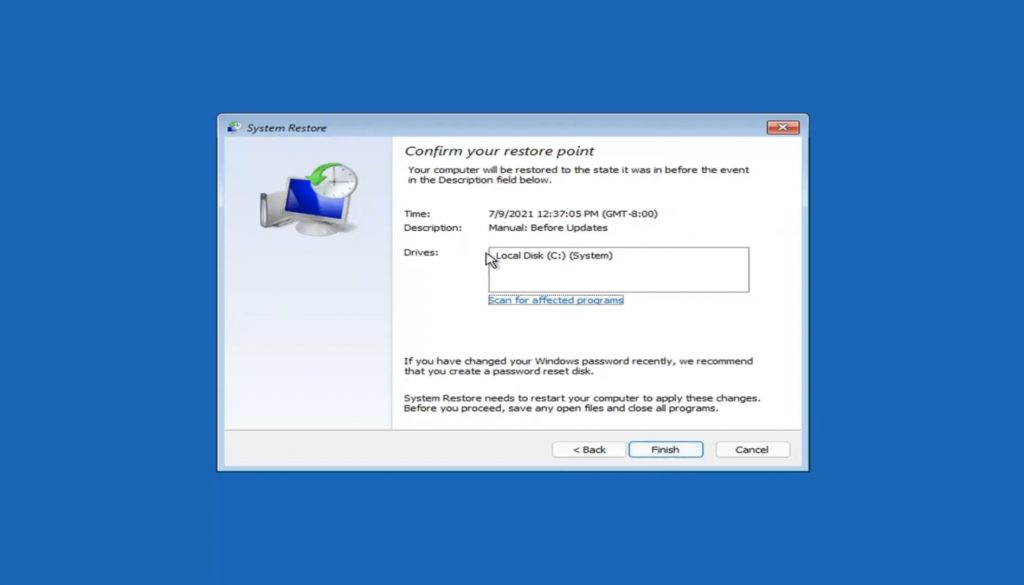
E. Restart your PC.
Recover Lost Files Due To dxgkrnl.sys Error
When dxgkrnl.sys error occurs, your Windows PC suddenly shuts down. All you see is a blue screen with the error stop code. After a few minutes, your system Restarts automatically. Suppose you are working on something important on your PC and the dxgkrnl.sys error occurs. Your PC will shut down and restart after a few minutes. But in all this mess, you may lose the data you were working on. Thankfully, it is possible to recover lost data with the help of data recovery software.
Your next question will be which software I should use. Our recommendation is Stellar Data Recovery Professional. There are dozens of data recovery software claiming to be the best, but you should always go with a reliable solution. Stellar has been in the data recovery business for more than two decades now, with millions of happy customers. You can’t go wrong with it.
Coming to Stellar Data Recovery Professional?s features, the software recovers deleted documents, photos, videos, and other files. You can recover data from a completely crashed and unbootable system, as may be the case with you. The software can recover data from formatted or corrupted drives. It supports the most common File Systems such as NTFS, exFAT, and FAT (FAT16/FAT32). You can take a preview of the data before actually saving it on your computer.
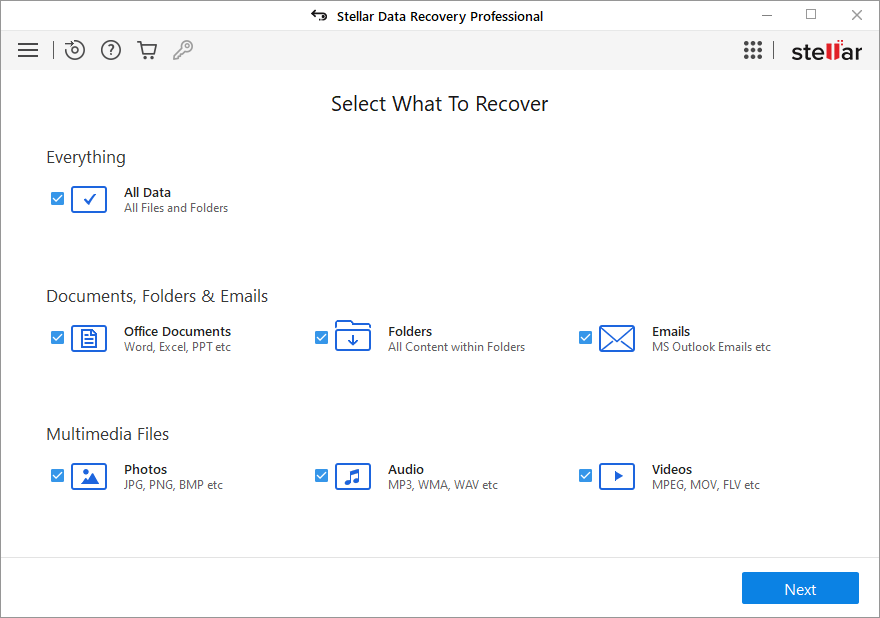
Needless to say, all these features sound interesting, and now you have the data recovery software you will use to recover your lost data due to dxgkrnl.sys” error. If you are worried about how you will use Stellar Data Recovery Professional, don’t worry. The software comes with a famous three-step data recovery process. Below are the exact steps you need to follow to get your data back.
Step 1: Open Stellar Data Recovery Professional on your Windows 10 PC. On the very first screen, select what you want to recover. You can choose Photos, Audio, Videos, Documents, or Emails. If you’re going to restore everything, select the All Data option and click Next.

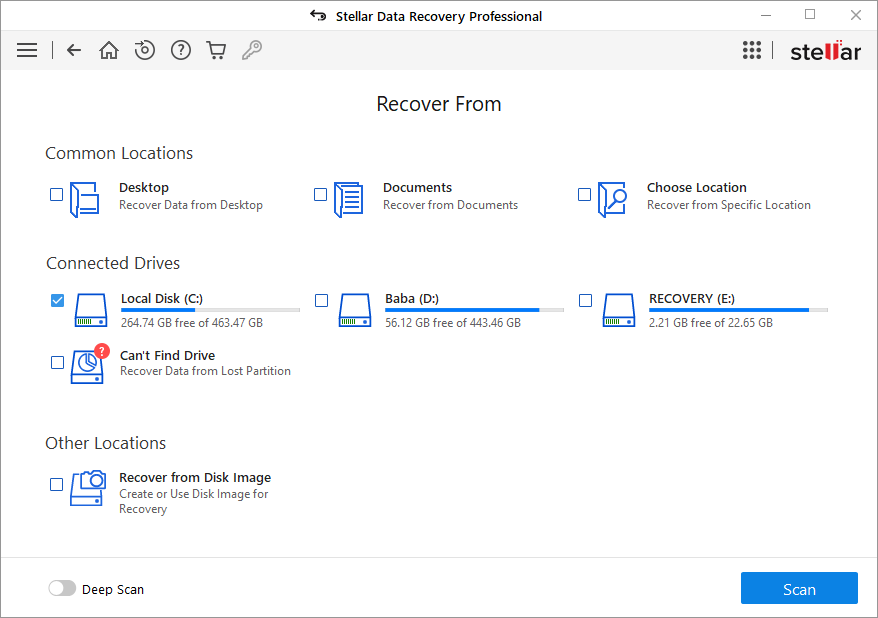
Step 2: In the next step, select the drive from which you want to recover your data and click Scan. The software will start scanning the selected drive. Depending upon the size of the data, it may take a few minutes to complete the scan.

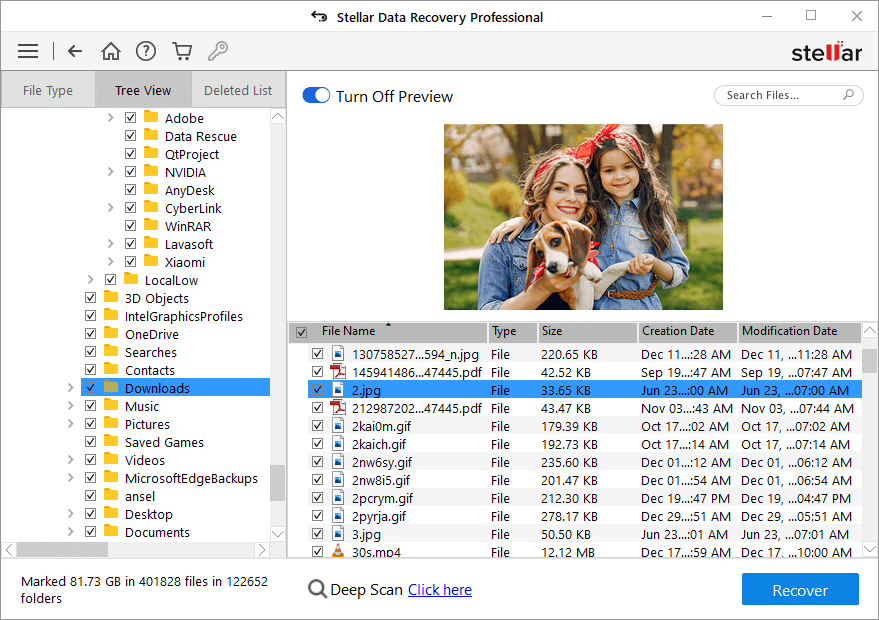
Step 3: Once the scan is complete, you will see all the recoverable data. Go through all the folders and select the files you want to recover. Lastly, click Recover to save the data on your computer.

That’s it. With these three simple steps, you should be able to restore the data you had lost due to the dxgkrnl.sys error.
Final Verdict
The dxgkrnl.sys BSOD error is a common problem for Windows 10 users. The most effective solution to fix the error is reinstalling the graphics driver. Some other working solutions are disabling SLI, turning off NVIDIA Surround, running SFC/DISM scan, and performing a system restore. Hopefully, trying one of the fixes should solve the error for you.
Frequently Asked Questions
- What is the “dxgkrnl.sys” error in Windows 10?
dxgkrnl.sys is one of the BSOD (Blue Screen of Death) errors in Windows 10. It is triggered due to issues in the graphics driver. However, it can also occur due to other software and hardware issues on your system.
- How to fix “dxgkrnl.sys” BSOD error in Windows 10?
You can try several fixes to fix the dxgkrnl.sys BSOD error in Windows 10. We have explained eleven such fixes in this article. You can check them out.


