Summary: In this blog, we will share methods to undelete files after using the “Delete Immediately” command on macOS Ventura, Monterey, Big Sur, Catalina, Mojave and lower versions up to El Capitan.
Try out the best-deleted file recovery software for your Mac system for free.


Contents
Delete Immediately ? An Insight
During the early days of ?Delete Immediately? functionality, many Mac users thought it to be the replacement of ?Secure Empty Trash?. However, this perception is entirely wrong, as the ?Delete Immediately? option only allows a user to delete selected files instantly, i.e., without sending them to Trash.
Earlier, you would select the required files then either drag and drop them into the Trash icon present on the Dock to delete them or press Command + Delete keys to move them to Trash. Then you would right-click the Trash from the Dock and choose the ?Empty Trash? option to delete the contained files permanently.
With the advent of the ?Delete Immediately? feature in OS X El Capitan 10.11 and later carried to macOS Ventura 13, Monterey 12, Big Sur 11, and Catalina 10.15, you can now bypass Trash and delete the selected files permanently from the storage drive.
Ways to Access Delete Immediately
If you want to delete data such as the unnecessary file(s) or folder(s) instantly and permanently, then you can access the ?Delete Immediately? command in the following three ways:
- Select data and press the key combination Command + Option + Delete to delete the selected data immediately.
- In Finder, select data and click the File menu, then press the Option key to make the ?Delete Immediately? option visible. Click this option to remove the data permanently.
- This option also works inside the Trash folder from where you can select data and right-click to choose the ?Delete Immediately? option for permanent deletion.


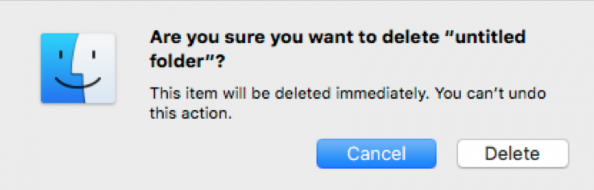
In the preceding methods to access ?Delete Immediately?, a popup window with a warning message shows up. By pressing the Delete button, you agree to remove the files permanently.

So, there are multiple ways to access or use the ?Delete Immediately? feature on macOS Ventura 13, Monterey 12, Big Sur 11, Catalina 10.15, and earlier till El Capital 10.11. After executing the above methods, you won?t be able to find those files in Trash. There is no macOS command to reverse the permanent delete operation. One thing you could do is stop using the Mac immediately and look for options to recover deleted files.
Techniques to Undelete Files after Using Delete Immediately Command
After using the ?Delete Immediately? command on macOS, you need either a backup copy of the permanently deleted files or a data recovery tool to undelete files from your Mac storage drive.
1) Backup ? Though the ?Delete Immediately? option comfortably deletes files permanently, there are chances of losing critical data if the execution is done carelessly. Many times, users are in hassle, or they unknowingly choose to remove the necessary files permanently.
Luckily, most of the Mac users have a habit of keeping backups of Macintosh HD, which is the startup disk of the Mac. With the help of a backup (preferably the Time Machine backup), one can quickly and easily restore deleted files even after removing them permanently with the ?Delete Immediately? option.
2) Undelete Mac Files ? Since ?Delete Immediately? doesn?t remove the files securely, a user can run an advanced Mac data recovery application to undelete deleted files. A Mac data recovery tool is helpful when the user has no backup of their storage drive, or the backup has itself corrupted or can?t be accessed.
Stellar Data Recovery Premium for Mac could prove to be a helping hand in recovering the files, which were mistakenly removed by choosing the ?Delete Immediately? option and for performing Mac Trash recovery. On turning on Deep Scan, the application scans 0 to Nth sectors of the storage drive based on file signature.


For more information on how to use the tool, watch the following video:

Conclusion
The blog shared insights on the ?Delete Immediately? command, different ways to access the command, and techniques to undelete files after using the command on Mac.
The best technique is to keep a Time Machine backup of your Mac. The backup acts as a savior in any data loss incident including ?Delete Immediately?.
In case the backup is not taken or old, Stellar Data Recovery Premium for Mac helps you undelete the deleted files effectively. The tool is compatible with macOS Ventura, Monterey, Big Sur, Catalina, and lower versions.


