Summary: This blog busts the myth that Terminal can recover permanently deleted files from Trash. Instead download the free Mac data recovery software to recover files deleted from Trash.


Contents
Introduction
When you select one or more files, then drag and drop them to Trash, hit the Command + Delete hotkey, or secondary-click and choose the Move to Trash option, macOS deletes those files instantly from the current folder and keeps their references in Trash.
You can straightaway use Command + Z key to undo the delete operation. Otherwise, later you can go to Trash, select those deleted files, secondary click, and choose Put Back to restore the files from the Trash to their original location.
But that?s not the only way to restore your files from Trash. You can use Terminal to perform the same task. The next section describes the method in detail.
Process to Restore Files Deleted from Trash by Using Terminal
You can perform the file restoration task by using the macOS Terminal. The steps are as follows:


- Go to Applications > Utilities > Terminal to open the Terminal app.
- In the command line, type cd.Trash to change the directory to the hidden Trash folder.
- Type ls command to list all files in the Trash folder.
- Type mv <filename> ../ command to move the specified file to the home directory. Here, replace the filename with the name of the deleted file present inside Trash.
- Navigate to the home directory to access your restored file.
Situations wherein Terminal can?t recover your deleted files
Terminal can?t help you to restore your deleted files when the references of the files are lost from the Trash folder. These references could get lost in the following situations:
- When you Empty Trash
- Delete files from Trash by using Delete Immediately option
- Press Option + Shift + Command + Delete keys
This debunks the myth that Terminal can recover permanently deleted files from Trash.


Recover Data Using Free Mac Data Recovery software
When you lose the references of your deleted files from Trash, macOS doesn?t remove the files permanently from the Mac storage drive. Instead, the files remain in the storage medium in an inaccessible state. Only a free Mac data recovery software can scan the entire storage device based on file signatures and retrieve the inaccessible files.
Step 1. Download and install the *trial version of Stellar Data Recovery Free Edition for Mac on your MacBook, iMac, or Mac mini wherein data loss occurred.


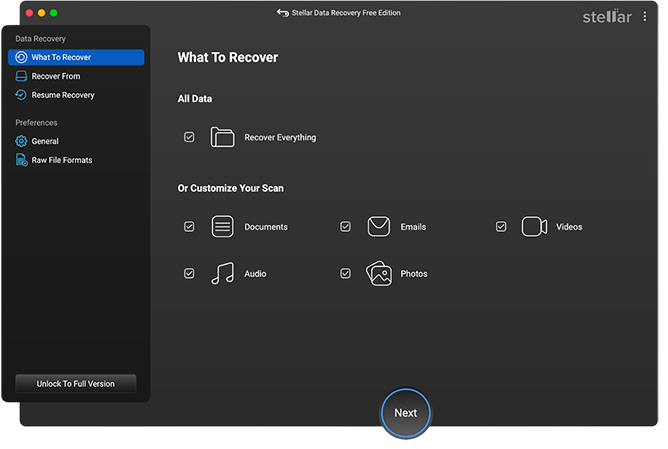
Step 2. From the Select What To Recover screen, select the type of data that you?ve lost from the Trash folder and click Next.

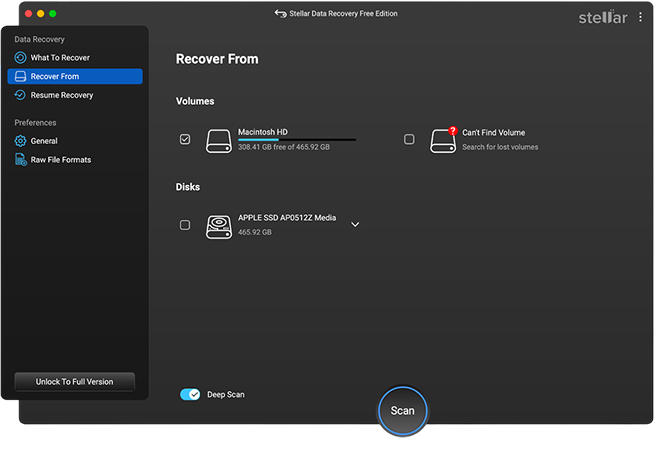
Step 3. From the Select Location screen, select Macintosh HD, the startup disk, wherein the Trash folder is present. Toggle on Deep Scan, then click Scan.

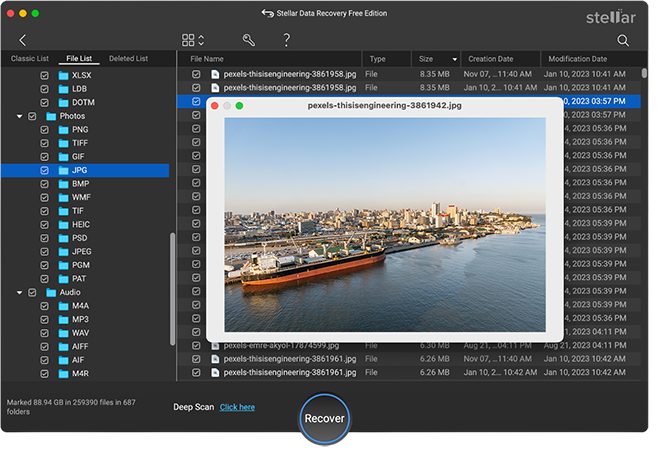
Step 4. Click the Deleted List tab, preview and select the required deleted files, then click Recover. Click Browse to specify a distinct save destination, then click Save.

*Trial version of Stellar Data Recovery Free Edition for Mac allows free scan, preview, and up to 1 Gb of free data recovery. For unlimited data recovery, you can upgrade the software to a higher version.
Watch the video on how to restore files deleted from Trash by using Stellar Data Recovery software.
Conclusion
The blog debunked the myth that Terminal can restore the files that are deleted from Trash. In reality, it restores only those deleted files that are present in the Trash. In case you have emptied your Trash folder or deleted files from the Trash, then Terminal data recovery is useless. You would need a Mac data recovery software to get back your permanently deleted data.
Stellar Data Recovery Free Edition for Mac is a widely used software for recovering permanently deleted files from Trash. The software recovers data on all types of Mac devices viz. MacBook Air, MacBook Pro, iMac, iMac Pro, Mac Pro, and Mac mini. Try it now to retrieve your Trash emptied data, and avert the situation wherein the software can?t recover data due to overwriting.


