Summary: Have you lost data from RAID after installing the latest Netgear ReadyNAS firmware update? Read this guide to learn the steps to recover data lost after this update. You may use a powerful ReadyNAS data recovery tool- Stellar Data Recovery Technician for quick and secure recovery. Download the trial version from here:


NETGEAR intermittently releases firmware updates to secure and improve the storage system. Every update comes with different improvements and bug fixes, such as improved BTRFS stability on ARM units, USB Encryption, Updated Time Machine backup, Dropbox file upload sync, etc.
The firmware is stored in a RAID’s read-only memory. When you install any recent firmware update, the process changes only the firmware, which means upgrading ReadyNAS firmware will not modify or changethe data stored on the drive. However, before any upgrade, NETGEAR recommends creating a backup of the data to avoid data loss due to buggy firmware updates.
The latest ReadyNAS firmware update is full of bugs, as reported by several RAID users. Multiple RAID users have reported on the Netgear and other technology forums about losing data after installing the recent ReadyNAS firmware update. Some users have also mentioned that after installing the update, the RAID stopped working. Even after putting RAID back online to initiate the disks as if they were new to the system, the drive started functioning, but all the data was gone.
| Recover data using RAID 5 NAS data recovery software |
A glance at users’ queries on Netgear and other forums
Countless users have posted about data loss after installing this recent firmware update and looking for solutions to recover it. We’ve briefly mentioned the users’ queries below about losing data after this update.
Hi, I updated the latest ReadyNAS firmware and lost most of the data on it. How to recover it with file structure? Thanks for the help!


I have RN 204 with two 4TB WD red installed. I’ve recently logged into the admin panel, and the device offered me a minor upgrade from one of the latest versions. So, I agreed. After the restart, the device has provisioned my disks as they were empty. LUKS header has been lost, and all the data is gone.

How can I Recover data lost from RAID after the Netgear ReadyNAS Firmware Update?
Method 1: Use Backup to Restore Data
Backups are considered as the primary step to recover the data. Whether you lose it due to this recent firmware update or other reasons, if you have a backup, you can use that backup to get back your data. However, sometimes even the backup fails to retrieve the important files, folders, and more. Hence, it is suggested to keep a Netgear NAS data recovery tool handy.
Method 2: Recover lost data with powerful RAID Data Recovery Tool
If you have no backup or your backup failed to retrieve the data, you may use a powerful ReadyNAS recovery tool such as Stellar Data Recovery Technician to get it back. This data retrieval tool can extract deleted documents, photos, emails & more from RAID drives. The software detects critical RAID parameters and rebuilds virtual RAID to recover data from failed, broken, or corrupt RAID 0, RAID 5, & RAID 6 arrays. You can get back your essential files, folders, and more from hardware & software-based RAID without a hardware controller. It creates an image of the drive for quick and secure recovery. Follow the given steps to restore data:
a. Connect an external storage drive to save the recovered RAID data.
b. Download, install, and run the Stellar Data Recovery Technician.


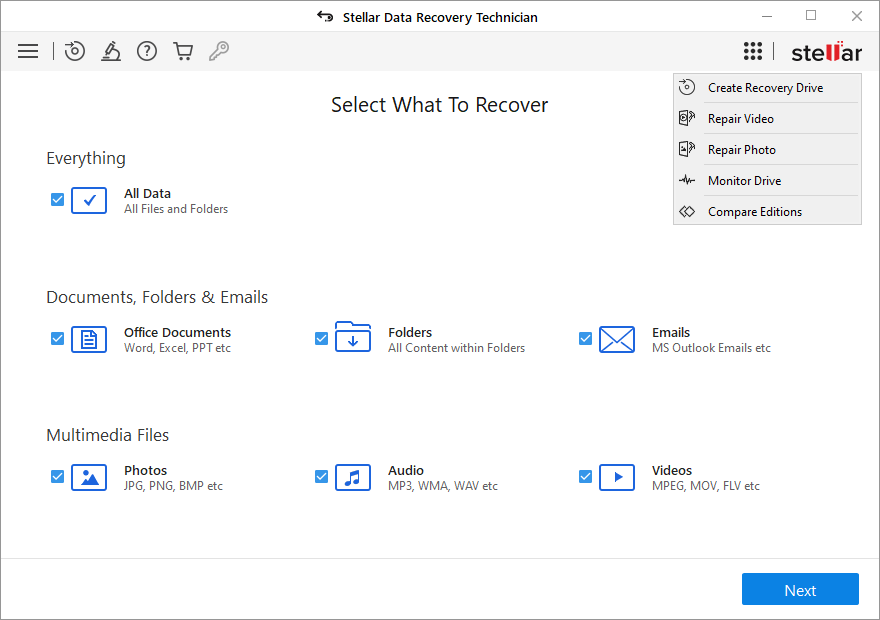
c. From the Select What to Recover screen, click Everything, or select the type of data you want to retrieve, and click Next. (See Image 1)

d. On the next ‘Recover from’ screen, select RAID Recovery and click Scan. (See Image 2)

e. Select the type of RAID from the list given in the left-top panel. (See Image 3)
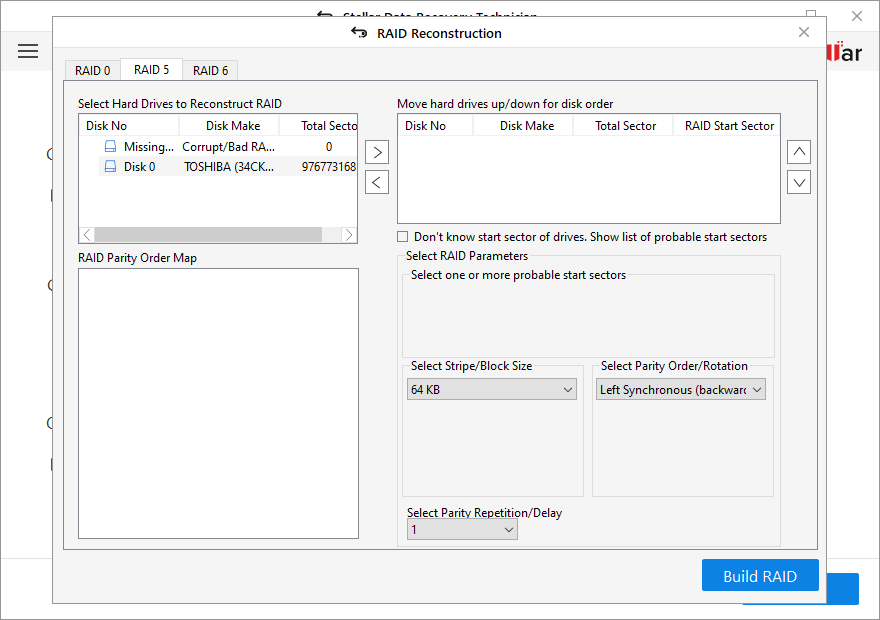
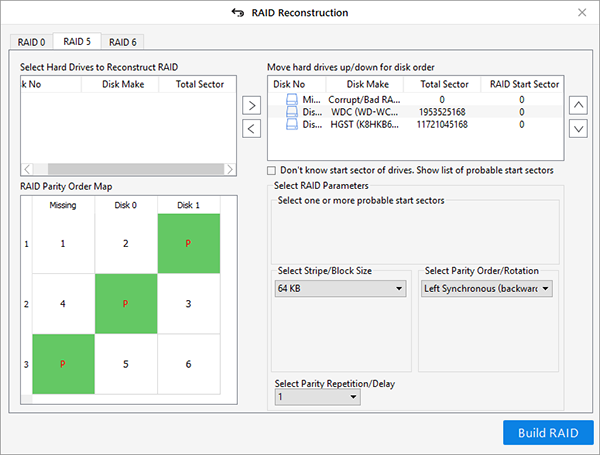
f. Use the arrow buttons, and move the RAID member disks to ‘Move hard drives up/down for disk order’ list box.
g. Arrange the disks in the sequence as they were in the RAID array by using up-down arrow buttons.
h. Select the needed RAID parameters from the available options.
i. If you don’t remember or know the RAID parameters needed for virtual RAID reconstruction, you may choose ‘Don?t Know??
j. Click the Build RAID button and proceed. (See Image 4)

k. Based on the provided RAID parameters, the tool starts constructing a virtual read-only RAID.
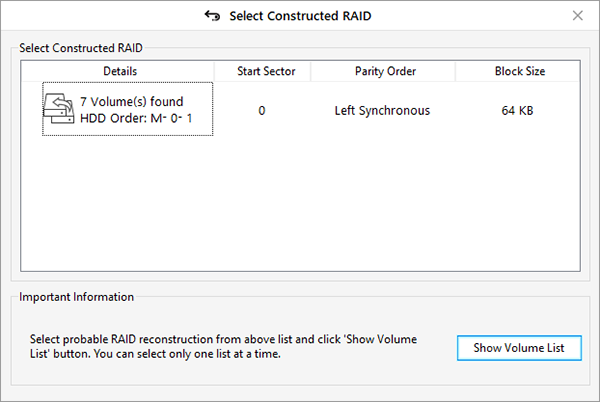
l. Choose the constructed virtual RAID and then click ?Show Volume List.? (See Image 5)

m. Choose the RAID volume and click Scan to proceed. (See Image 6)


n. If the data doesn?t show up in the Quick Scan, select ?Deep Scan.?
o. Once the scan is completed, the results will show up on the screen.
p. You may preview the files before recovering.
q. Select the files and click Recover.
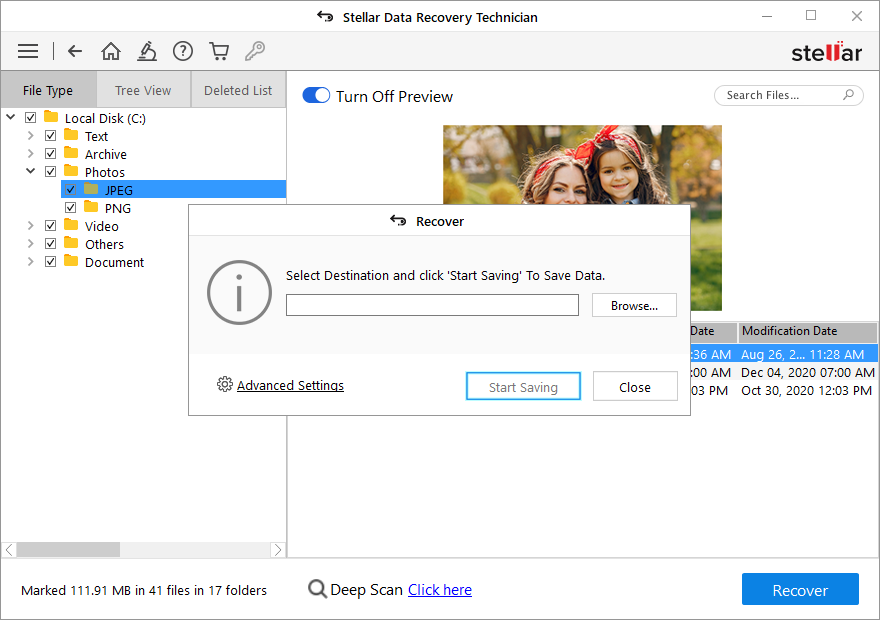
r. Click Browse, choose a destination to store the recovered data. (See Image 7)
s. Click ?Start-Saving? to save the restored data. (See Image 8)
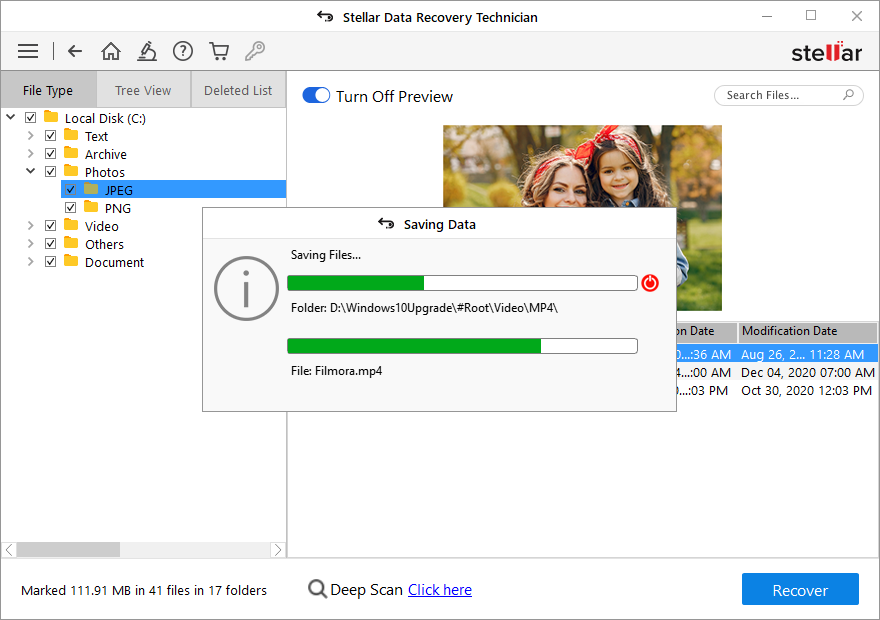
| [Caution: Don?t save the restored data in the same RAID from where you lost it in the first place to avoid data overwriting.] |
Conclusion
The latest Netgear ReadyNAS firmware update is causing data loss for multiple RAID users. If you have a back-up, you may try recovering essential files, folders, etc. using back-up. However, if you don?t have a back-up or the back-up doesn?t work to get back your data, use a powerful RAID data recovery software such as Stellar Data Recovery Technician to retrieve it. This software can restore data efficiently from lost or formatted RAID logical volumes.


