Step 1: This is the main interface of Stellar Repair for MySQL.
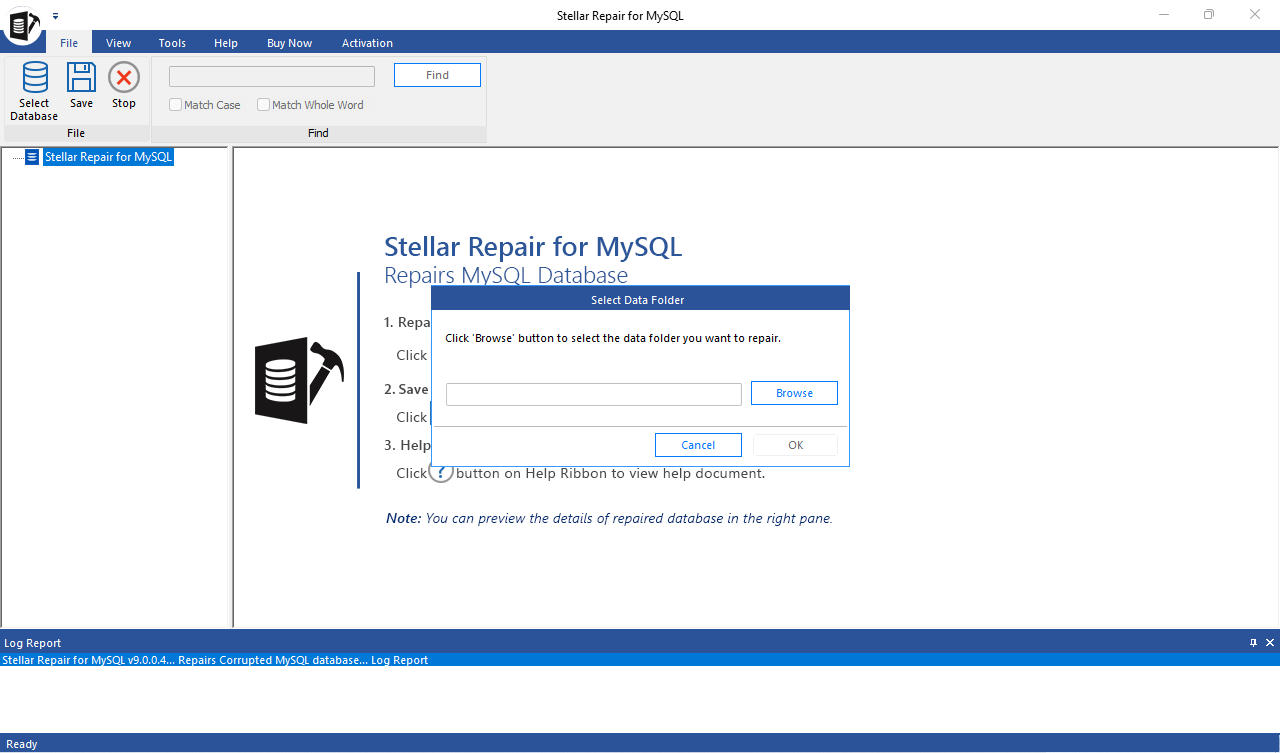
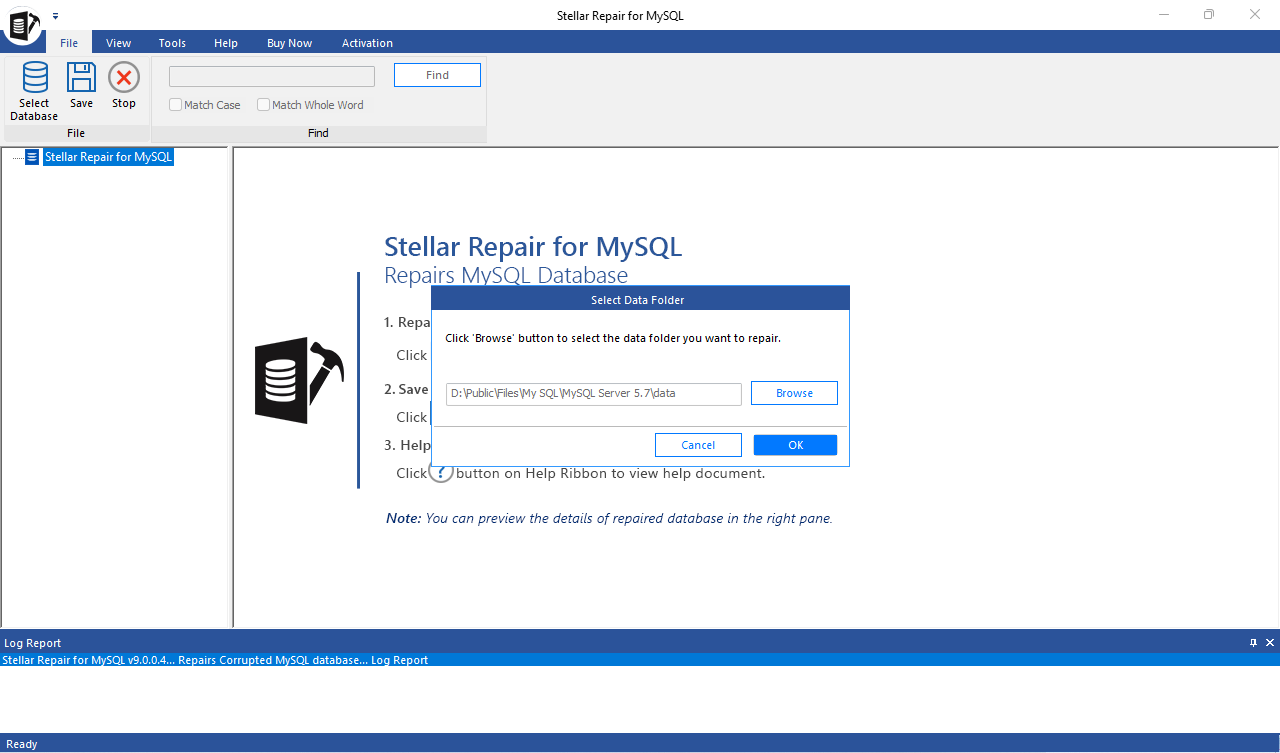
Step 2: Click Browse to select the data folder you want to repair and then click OK.
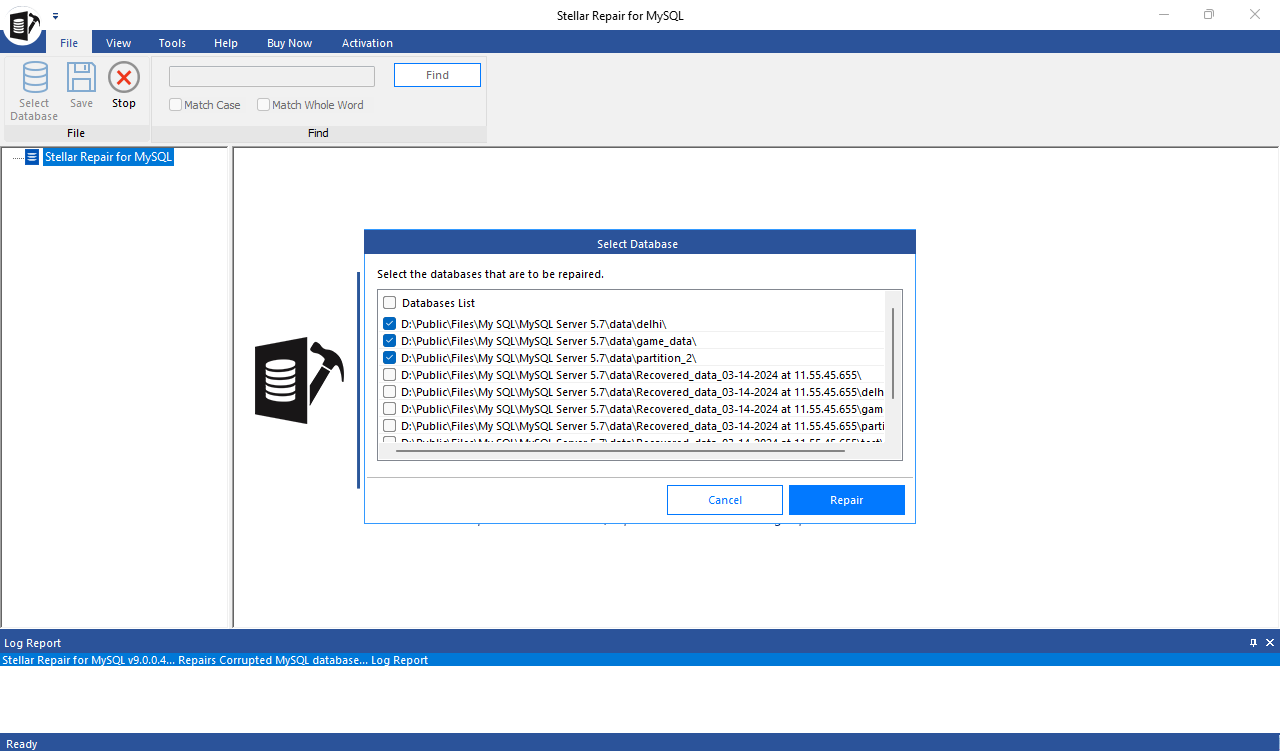
Step 3: Select all or specific MySQL databases you want to repair and then click Repair.
Step 4: The software displays progress of the repair process.
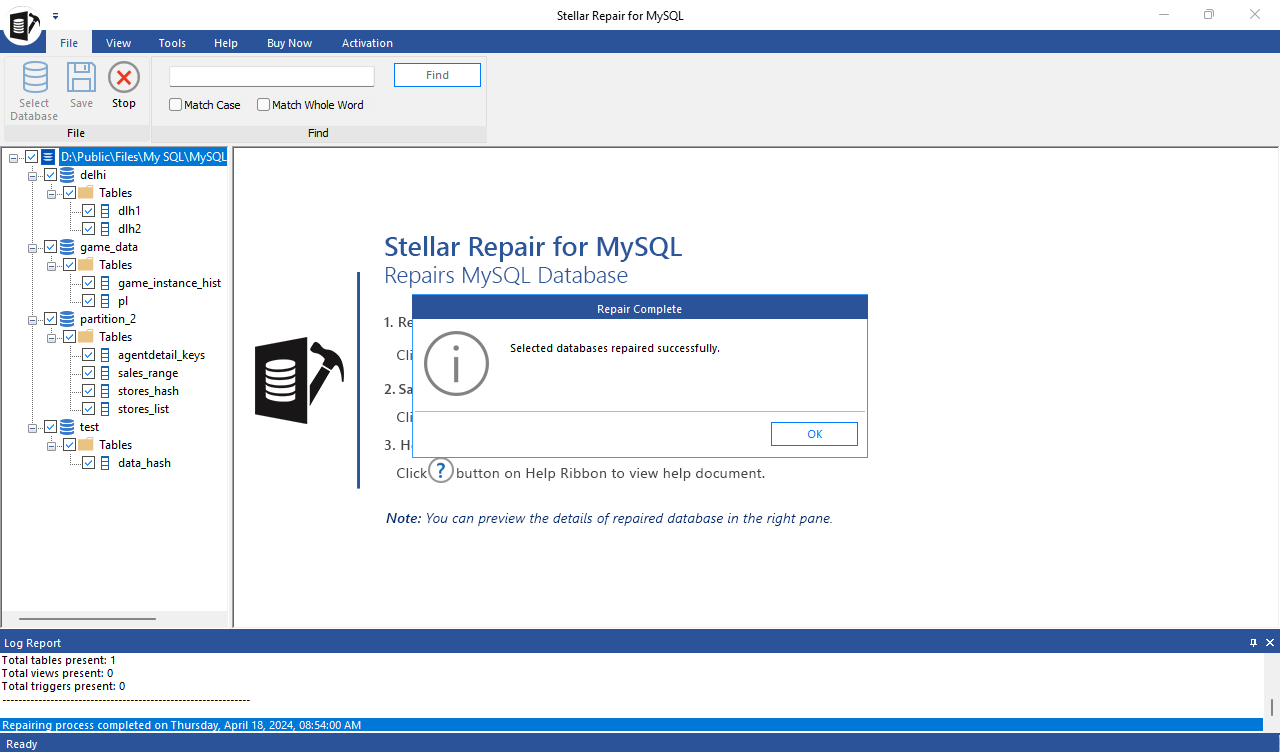
Step 5: Click OK when the ‘Repair Complete’ message box pops up.
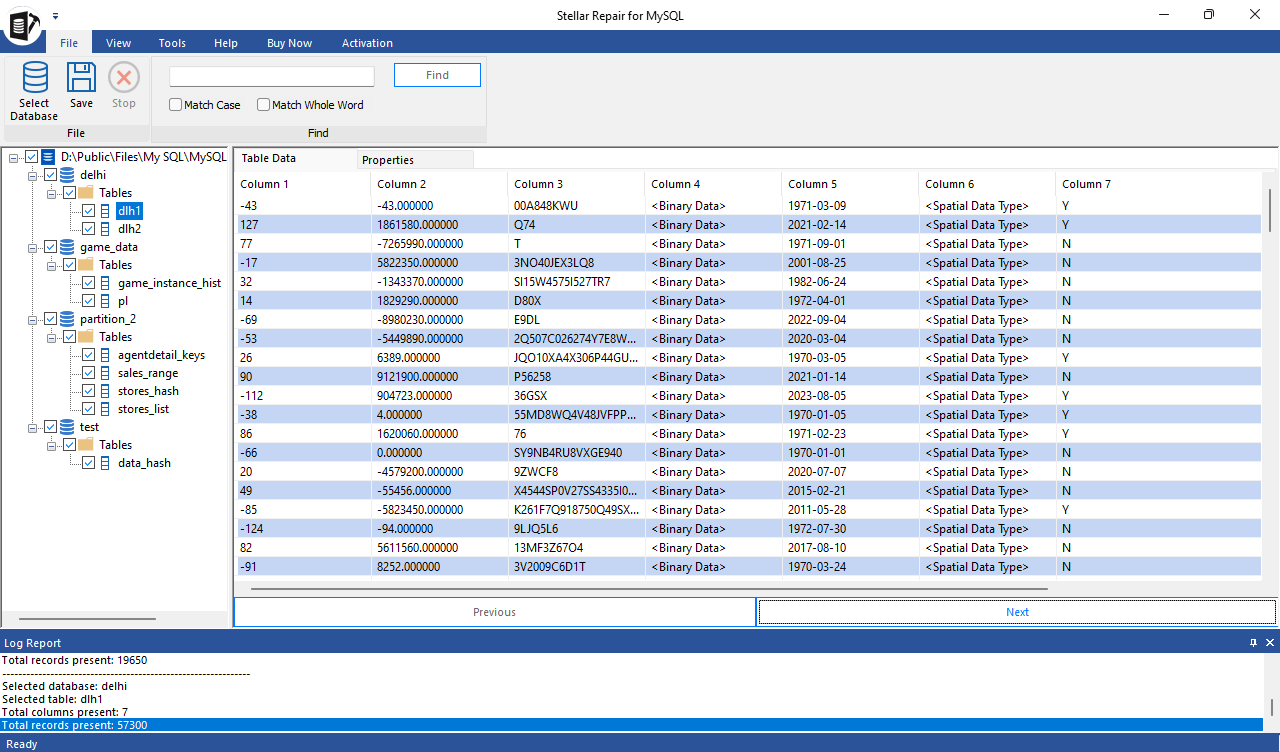
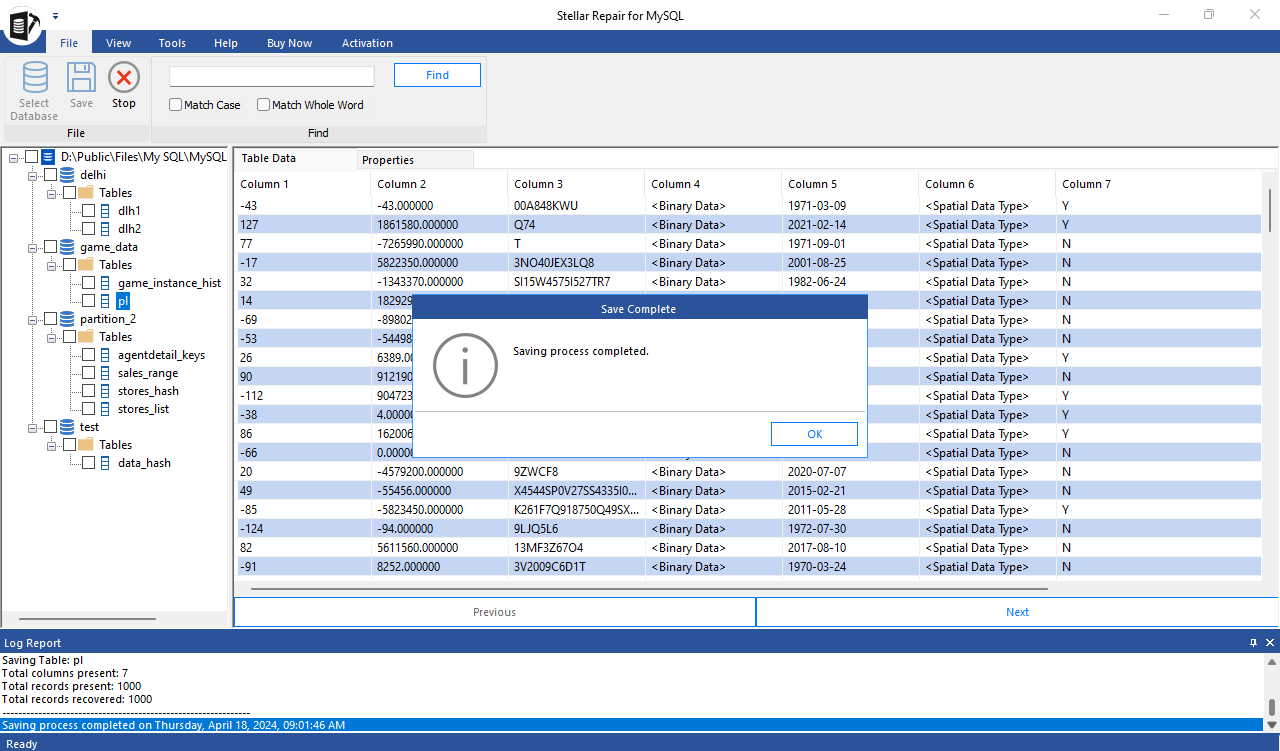
Step 6: Preview the repaired MySQL database files and then click Save on the File menu.
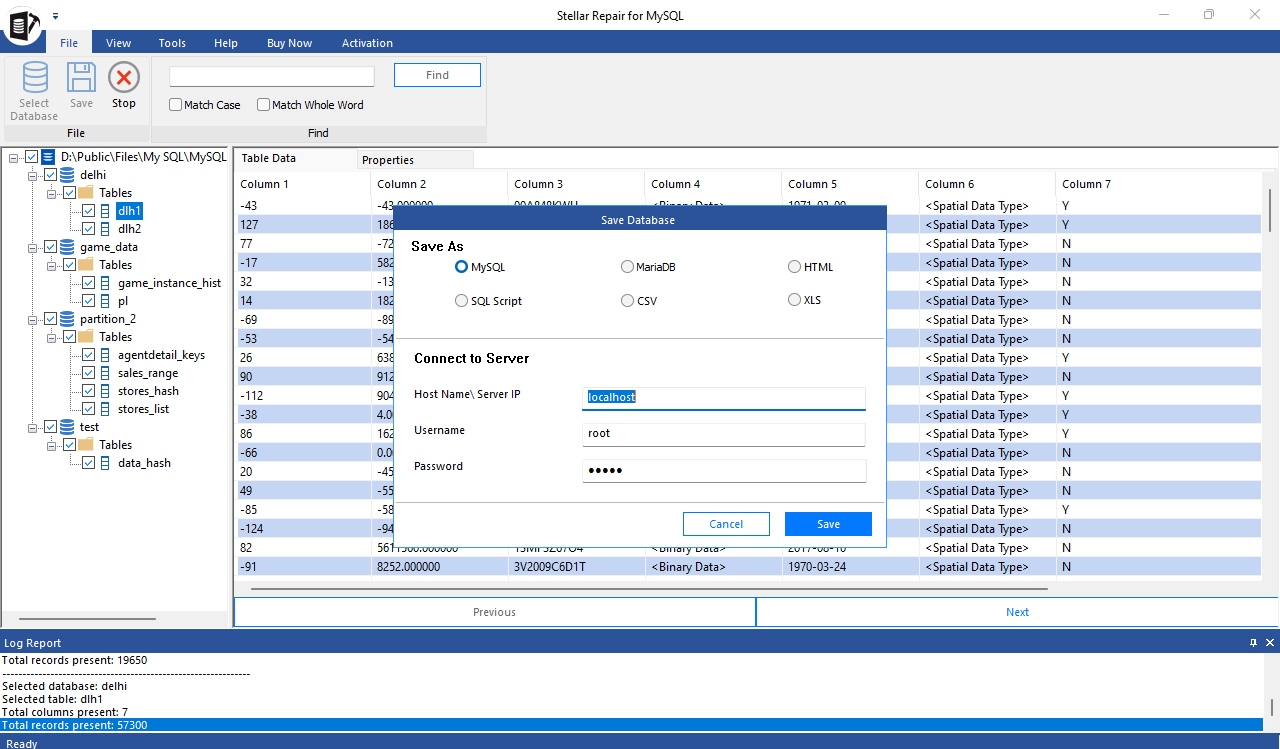
Step 7:Choose an appropriate file format and enter the required details to save the file.
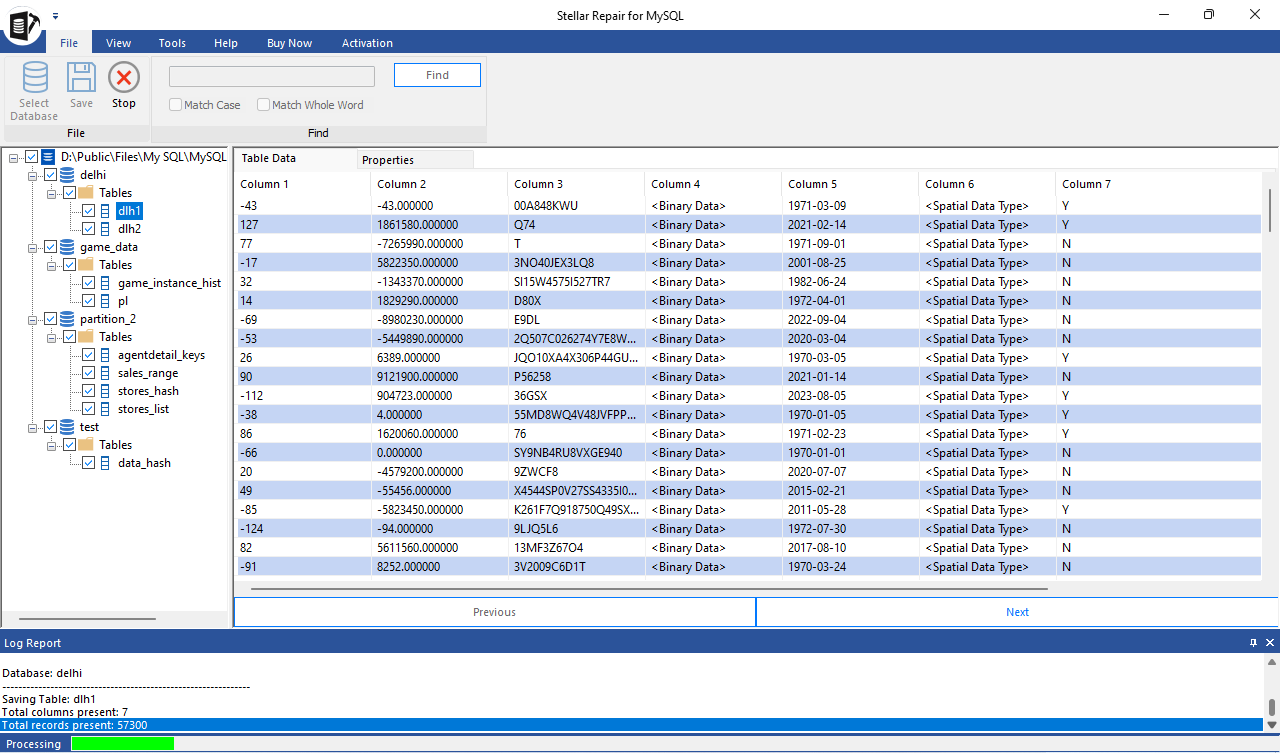
Step 8:Once the process is complete, a Save Complete message box appears.