

In this knowledge base, you’ll learn how to use Stellar Data Recovery Professional for Mac to recover lost, deleted, or inaccessible data from an NTFS-formatted storage drive on Mac.
New Technology File System (NTFS) is a native file system of Windows, and it is not supported on Mac. Thankfully, you can use your Mac to read data from an external NTFS drive once it is mounted on the system. Although, you can’t write anything on to it.
Stellar Data Recovery Professional for Mac can perform NTFS data recovery on Mac, so you don’t need a Windows PC for data recovery. The software can recover data from NTFS-formatted storage drive or partition effectively on MacBook Pro, MacBook Air, iMac, or Mac mini.
Steps to recover data from an NTFS drive on Mac
Step 1. Launch Stellar Data Recovery Professional for Mac to interact with the “Select What To Recover” screen. You can either go for the default selection of “Recover Everything” or customize your scan by toggling on the required file types that you wish to recover. Click Next.

Step 2. From the “Select Location” screen, choose the external NTFS storage drive. When the drive is inaccessible, formatted, or corrupt, you can toggle on “Deep Scan” to perform rigorous media scanning based on file signature. Deep Scan takes more time than “Quick Scan” but maximizes data recovery in challenging scenarios. Click Scan.

Step 3. Once the scanning process is complete, click OK.
Step 4. Preview the recoverable data from the NTFS storage drive to check its integrity. And select the required files for recovery.

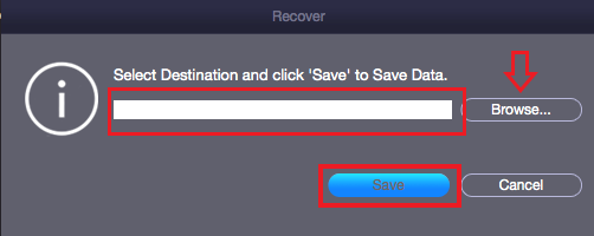
Step 5. Click Recover. In the Recover dialog box, click browse to specify a different drive location where the recoverable data will be saved. Click Save.
Watch the video for quick information:
For any further queries on Stellar Data Recovery Professional for Mac software, please contact Stellar Data Recovery Support.


