

To recover data from a crashed or non-booting Windows PC and Laptop, follow these steps:
Video Tutorial
Step 1: Prepare a Bootable Data Recovery Media
For this, you need an empty USB thumb drive (at least 1GB size). Connect the USB thumb drive to a working Windows PC and follow the instructions below:
a) Download, install and launch Stellar Data Recovery Professional software.

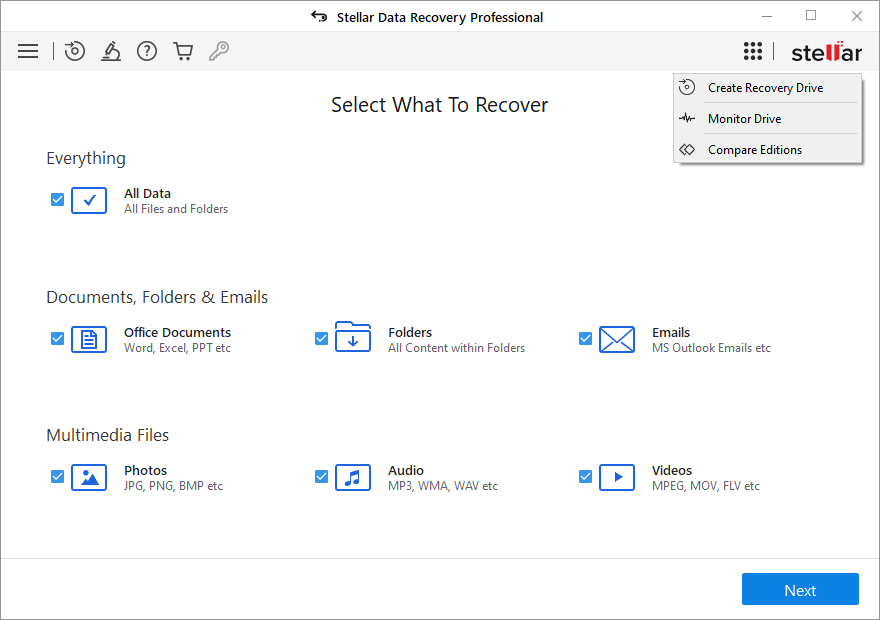
b) From ‘Select What to Recover’ screen, click on ‘Waffle Menu’ at top-right.
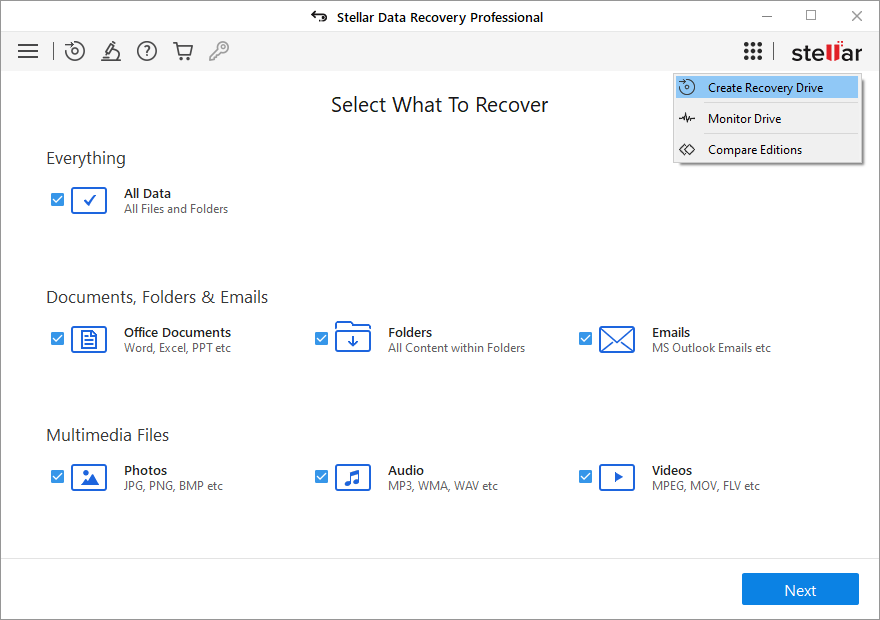
c) Select ‘Create Recovery Drive’ option.
d) From ‘Create Recovery Drive’ dialog box, select the USB drive using drop-down list.
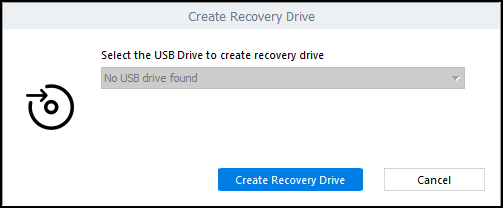
e) Click ‘Create Recovery Drive’ and click ‘OK’ to begin the process.
Once the process is completed, a new ‘Activation’ window appears. Paste or type ‘Activation Key’ received through email after purchasing the product and click on ‘Activate’ button.
Make sure your PC is connected to internet!
Stellar Data Recovery automatically communicates and validates the entered key. After key validation, the software creates a bootable data recovery media that you can use to retrieve lost and inaccessible data from a crashed or corrupt Windows PC.
Step 2: Use Bootable USB Media for Data Recovery
a) Connect the bootable USB media to your crashed or non-booting Windows PC.
b) Power ON your PC and start pressing boot option key, usually F12, to see connected bootable USB media. Refer to your laptop or motherboard manufacturer’s support website for more info.
c) Move selection to bootable data recovery media by using the arrow down button and press ‘Enter’ to boot.
d) Once the computer boots from USB media, you will see Stellar Data Recovery software interface.
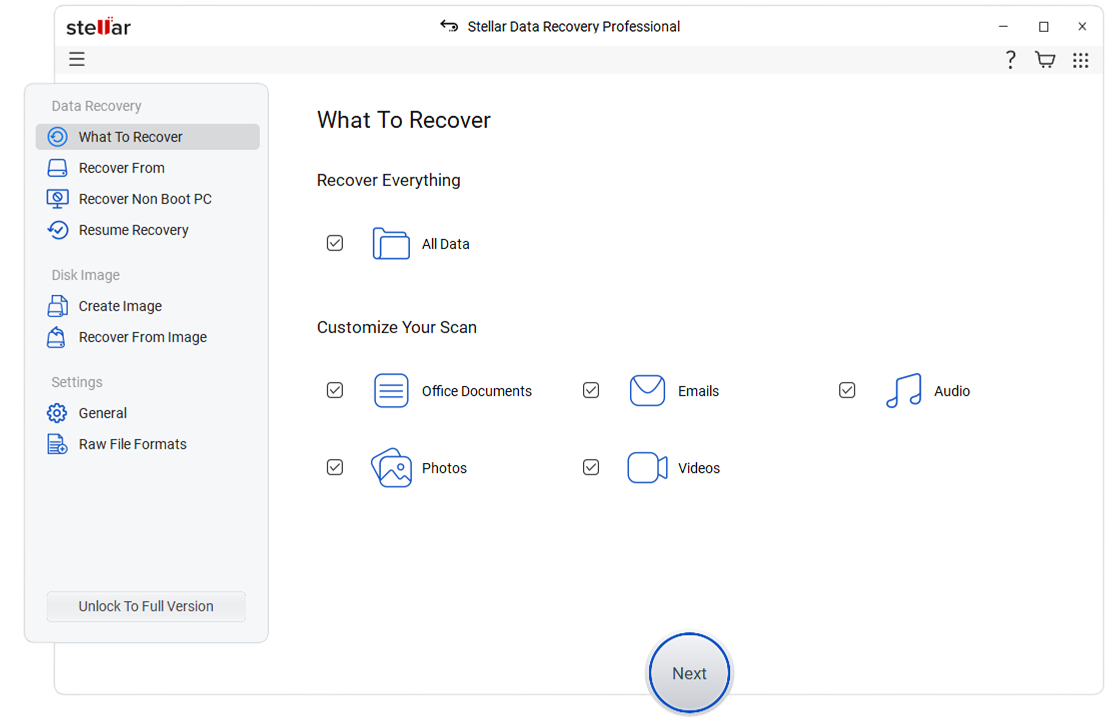
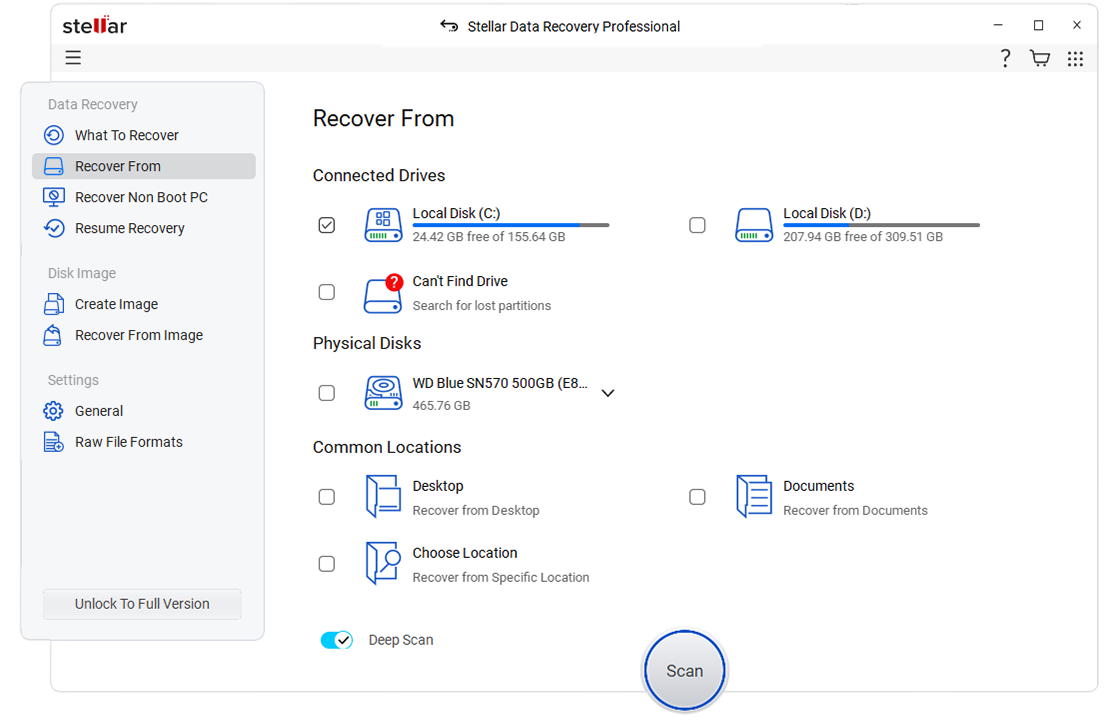
e) From ‘Select What To Recover’ screen, choose file type(s) you want to recover and click ‘Next.’
f) Choose the Windows drive from where you wish to recover data and click ‘Scan’.
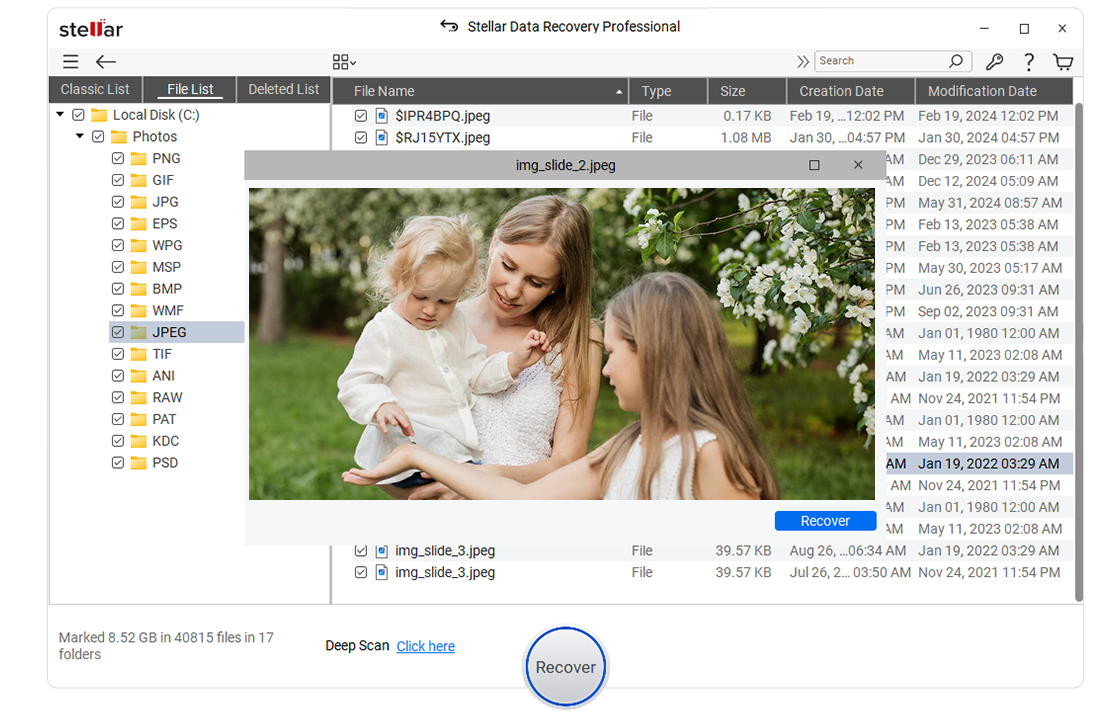
g) After scan, choose all the files you want to recover. You may also preview files to ensure files are not damaged and are recoverable.
h) If you are not able to find desired files, click ‘Click Here’ link at the bottom to run a ‘Deep Scan.’
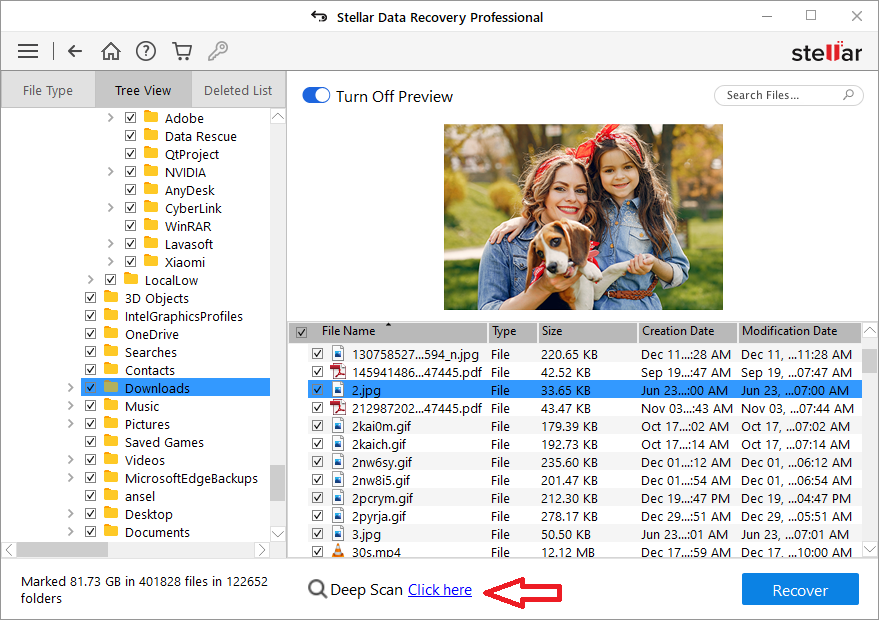
i) Then click on ‘Recover’ button.
j) Click ‘Browse’ to select a location to save recovered files. Use an external hard drive to save your recovered data to avoid data overwriting.
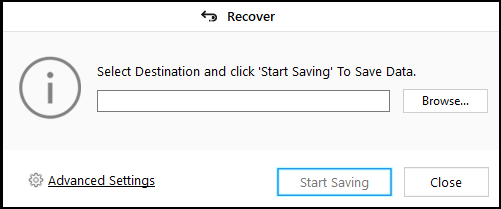
k) Finally, click ‘Start Saving’ to save recovered data.
| In case you are unable to create the bootable media through the above steps or get any error to refer this article for solution: Create activate bootable usb media |


