Outlook PST files contain user mailboxes, which has important user data including emails, contacts, attachments, calendars, etc. With the accumulation of mail data on a daily basis, the size of a PST file tends to increase over the time. A heavy PST file affects the performance of Outlook and is the major cause of PST file corruption. In the worst case, it can even lead to data loss.
However, with the ‘Repair Mailbox’ option of the Stellar Toolkit for Outlook, such situations can be overcome. The ‘Repair Mailbox’ is a powerful option to repair damaged or inaccessible MS Outlook data (PST) files. The software repairs and restores important mail data in their original format. With a simple and easy-to-use interface, you can have a preview of the recovered mail items before saving them. You can save the repaired data in a new usable PST file. The newly created PST file can be later imported into MS Outlook to access all the mail items.
You can easily use this software to carry out the repair process without any technical assistance. In order to repair the PST file using the Stellar Toolkit for Outlook, you need to follow the below-mentioned steps:

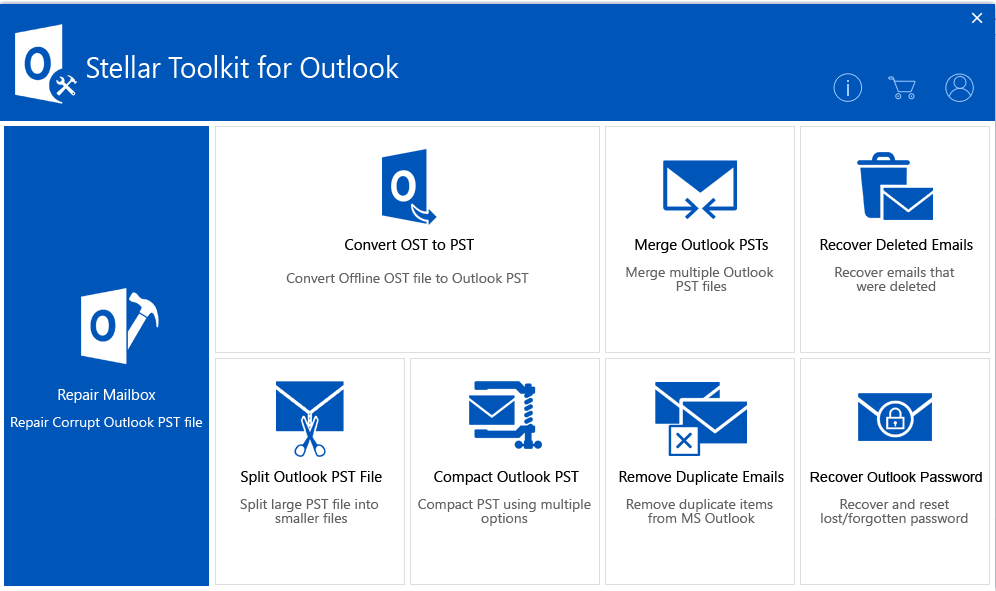
1. Launch the software “Stellar Toolkit for Outlook”. The software displays the main interface as shown below.
2. Click on the ‘Repair Mailbox’ option to select and repair the damaged PST file as shown below.
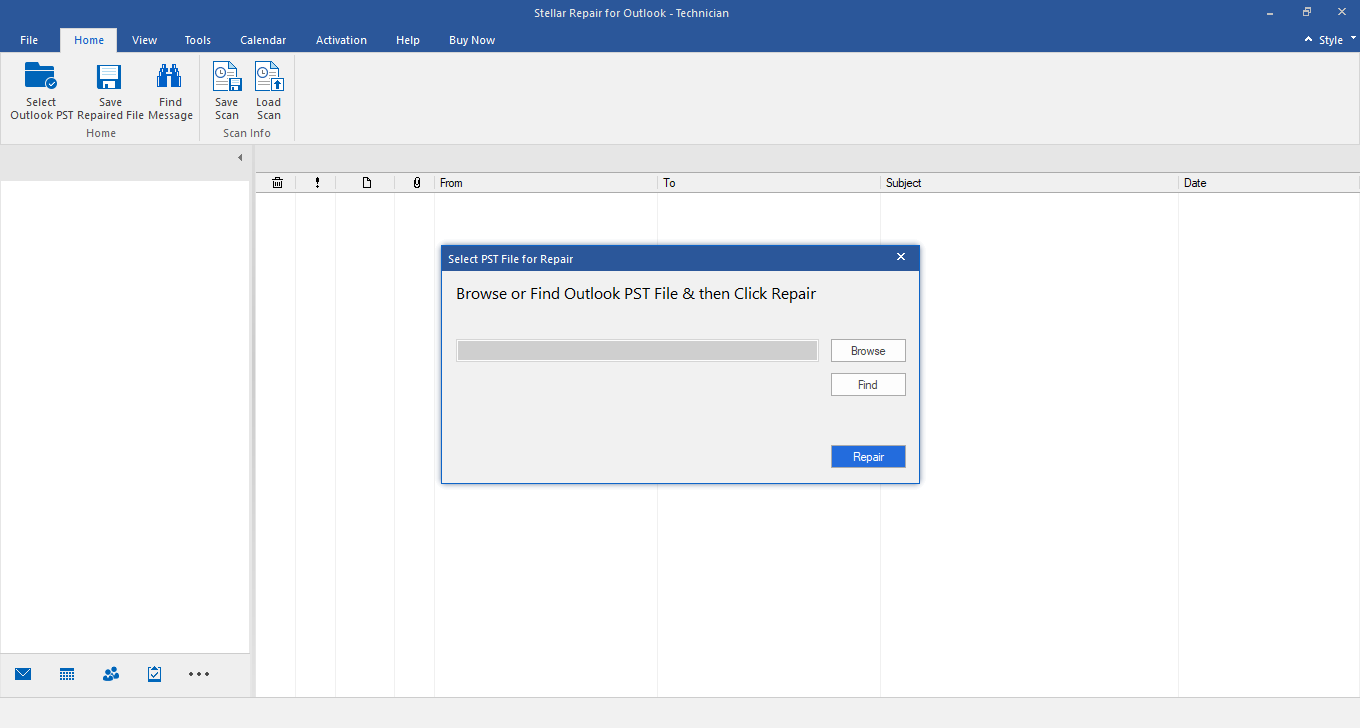
The ‘Select PST File for Repair dialog box allows you to Select or Find an Outlook file. You can either Browse if you know the location or click on the ‘Find’ button to find an Outlook file.
3. Once you have selected the file, click on the ‘Repair’ button to start repairing the corrupt PST file. The software displays an interface showing the progress of the ongoing scanning process as given below.
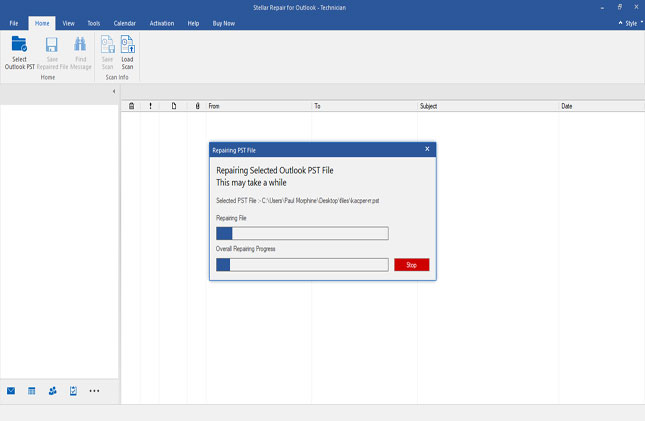
You can stop the scanning process anytime by clicking the ‘Stop’ button on the interface.
4. Once the scanning is complete, the software displays all the recoverable mail folders on the left pane of the interface. You can select any folder to view its content in the middle pane. You can further select any mail item to have its preview in the right-pane of the same interface as shown below.
5. In order to save the recovered files, click on the ‘Save Repaired File’ option on the right below. The software would display the following interface.
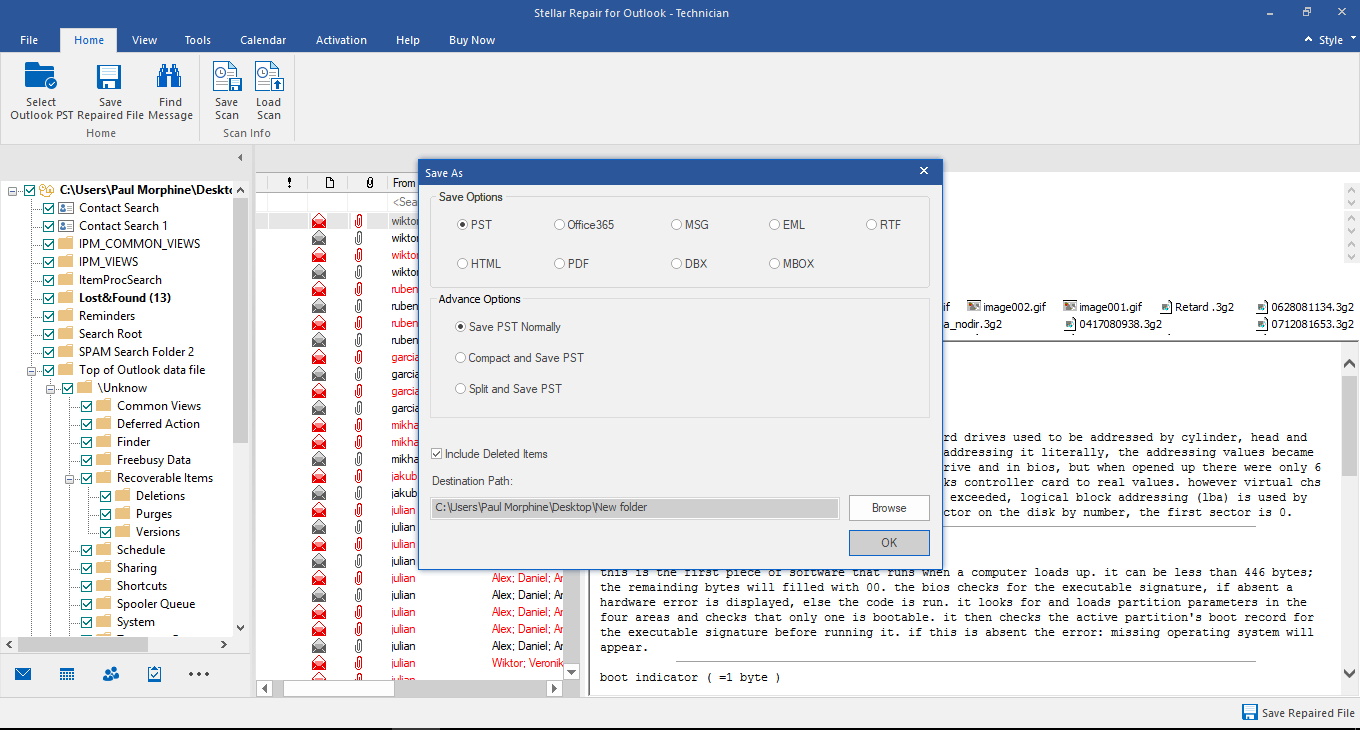
The software allows you to save the repaired file as PST, EML, MSG, RTF, PDF, and HTML. Further, you can select the desired location to save the recovered files by clicking on the ‘Browse’ button.
6. Click ‘OK’ to start saving the files in the desired format and a chosen location. The repair process is shown by the progress bar as shown below.
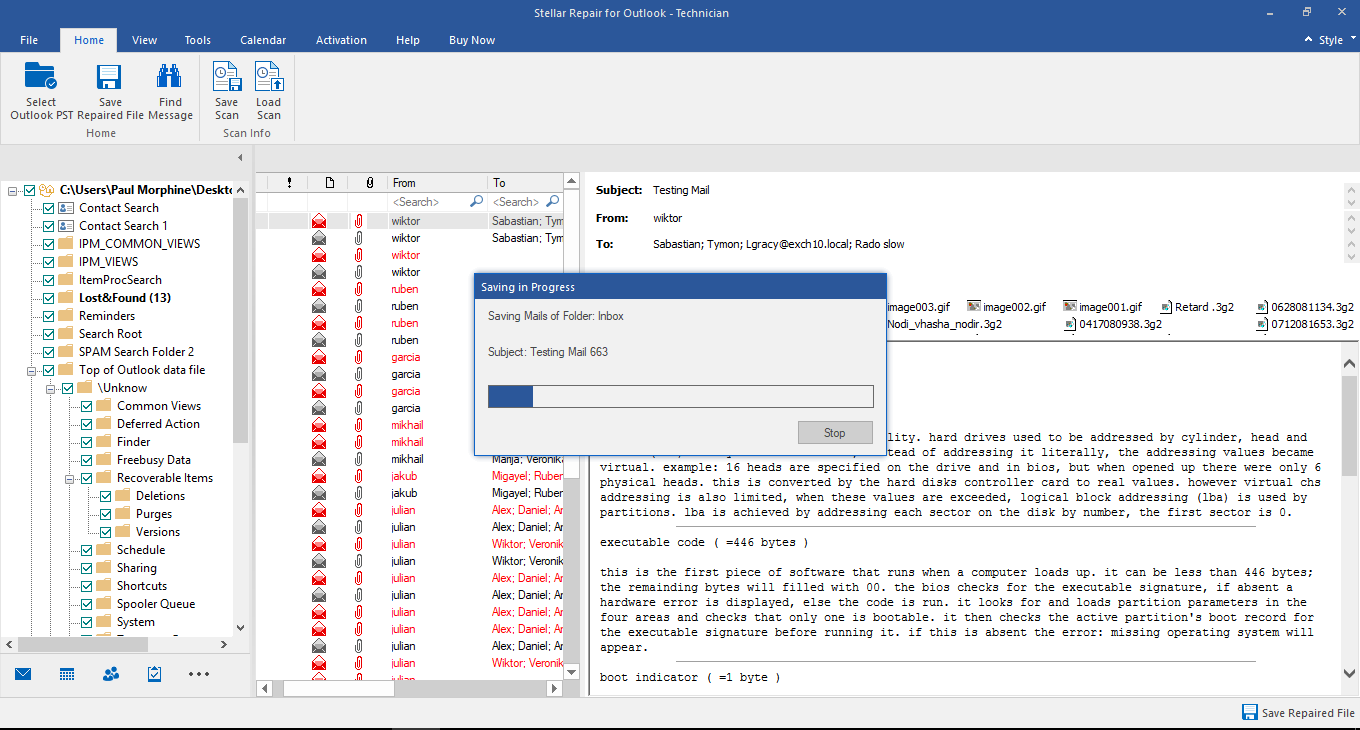
The repair process can be stopped anytime by clicking on the ‘Stop’ button.
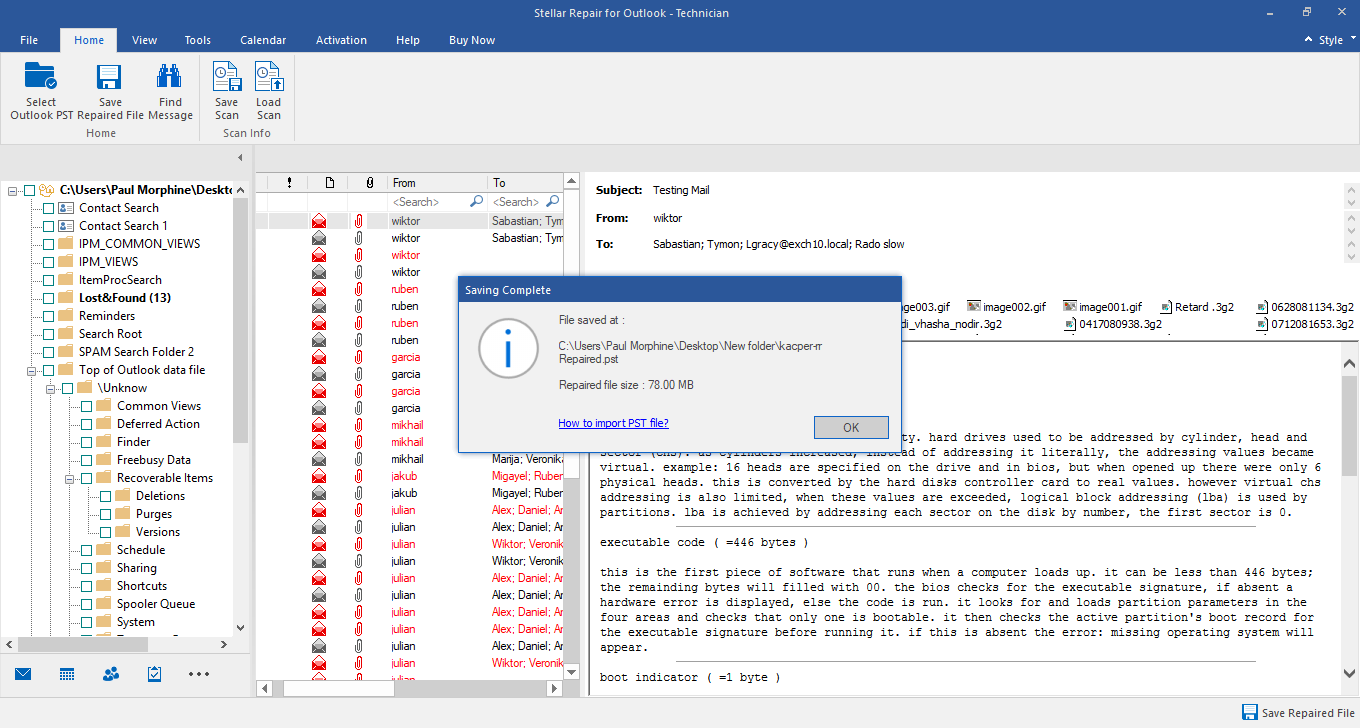
7. Once the process is completed successfully, the software displays a message saying that the repaired files have been successfully saved at your desired location as shown in the below figure.