

Stellar Repair for MS SQL software provides multiple options to save a repaired database, including New Database, Live Database, or Other Formats (such as CSV, XLS, and HTML). To save the repaired SQL database, execute the following steps:
- After previewing the repaired database and its recoverable components, click on the Save option in File menu.

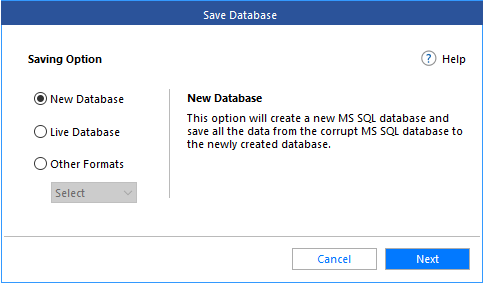
- A Save Database dialog box appears with multiple saving options.
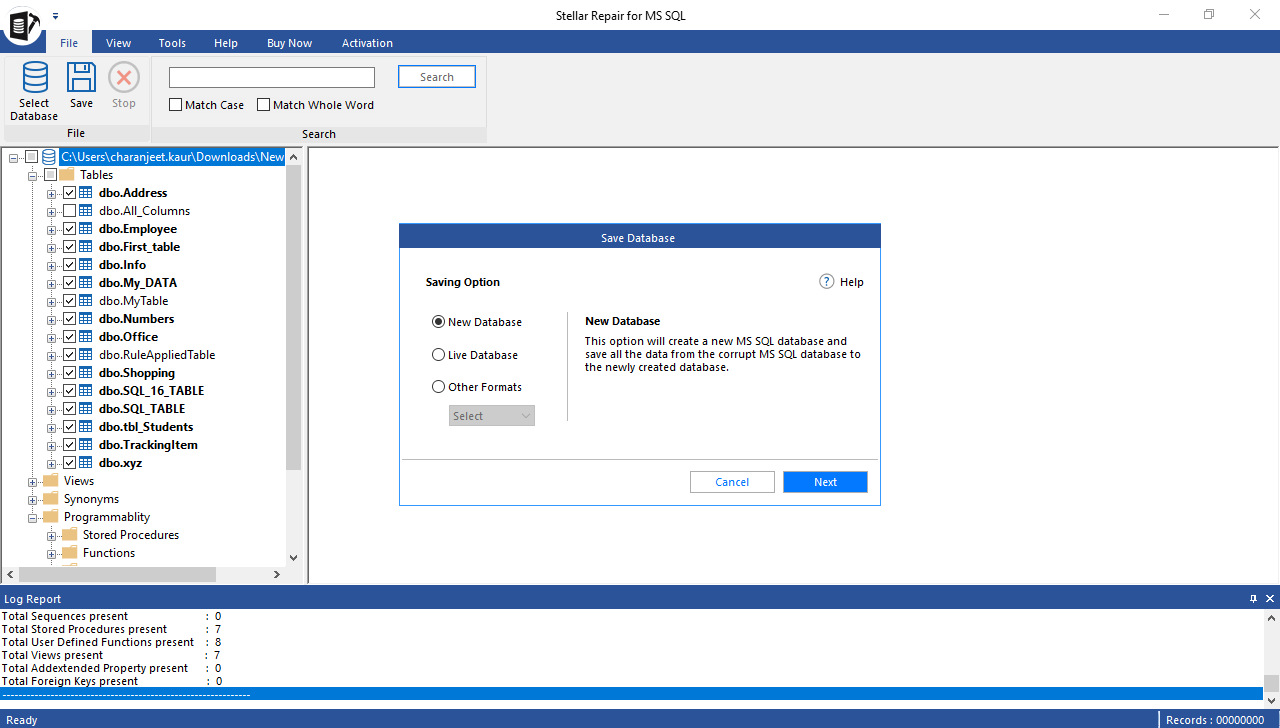
- New Database: Select this option to save the data to a new SQL database.
- Live Database: Select this option to save the data to your live (existing) database.
- Other Formats: Select this option to save the data in an HTML, CSV, or XLS file format.
Now, let’s discuss in detail the steps to save the database using each saving option.
Steps to save the repaired SQL database in a New Database:
-
Select the New Database option and click Next.
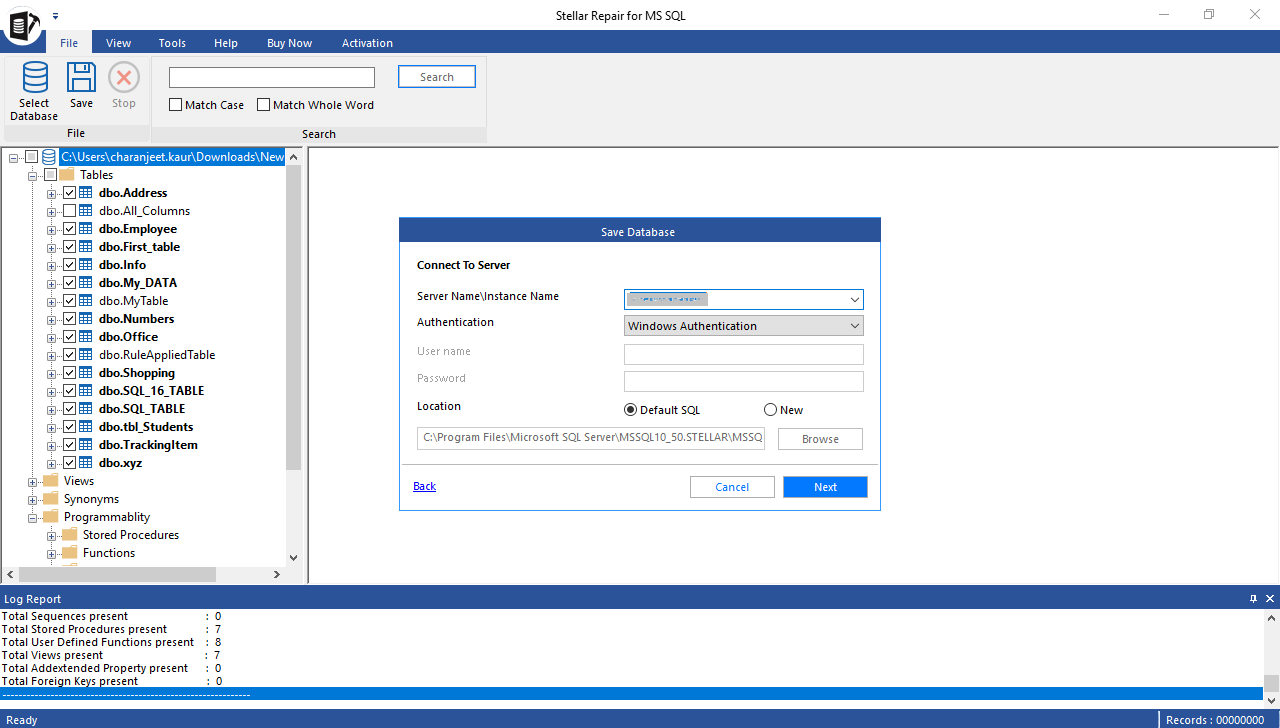
- In the dialog box that appears, do the following:
- Connect to your SQL Server using any of these options:
- Windows Authentication: For Windows authentication, specify the name of your server instance.
- SQL Server Authentication. For SQL Server Authentication, enter username and password of your server instance.
- Connect to your SQL Server using any of these options:
- Select default or a new location to save the repaired database.
- Click Next.
- Now, select any of these save modes to save the repaired database:
- Fast Saving: Use this for processing and saving multiple tables at the same time. It is ideal for large databases, as it helps save the repaired data quickly without downtime.
- Standard Saving: This is the recommended saving mode. It saves the repaired data and indexes simultaneously.
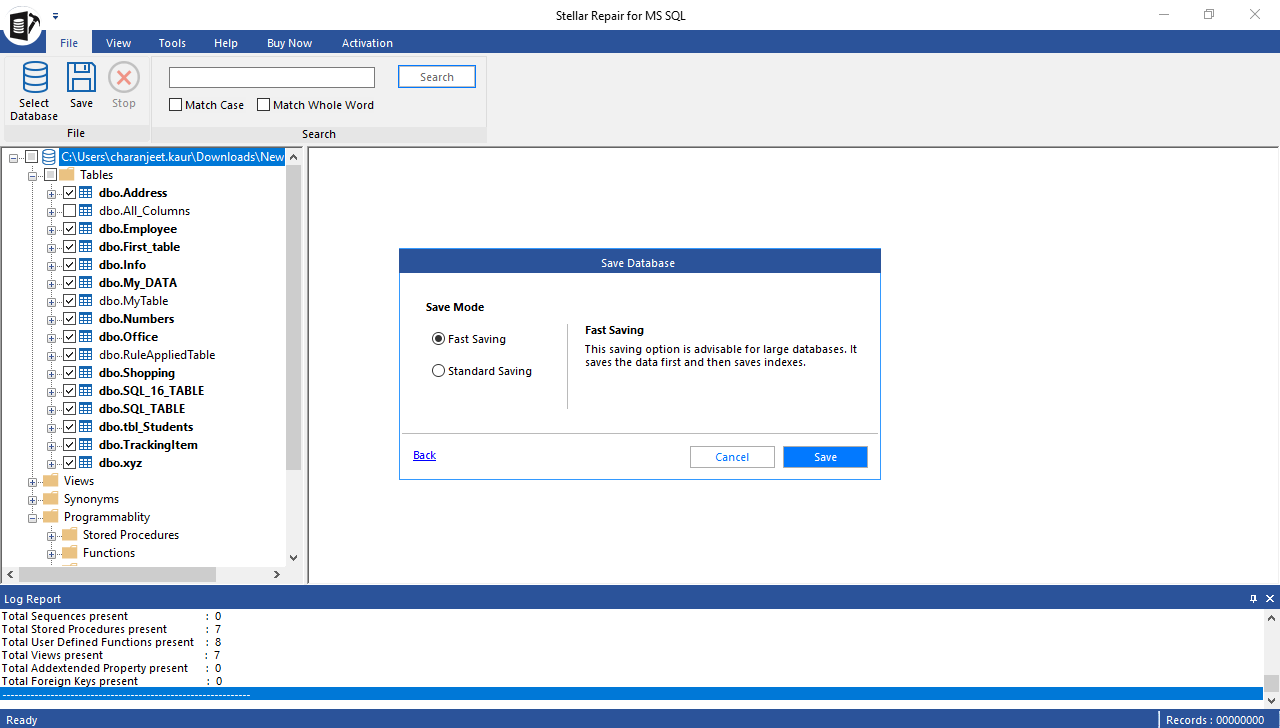
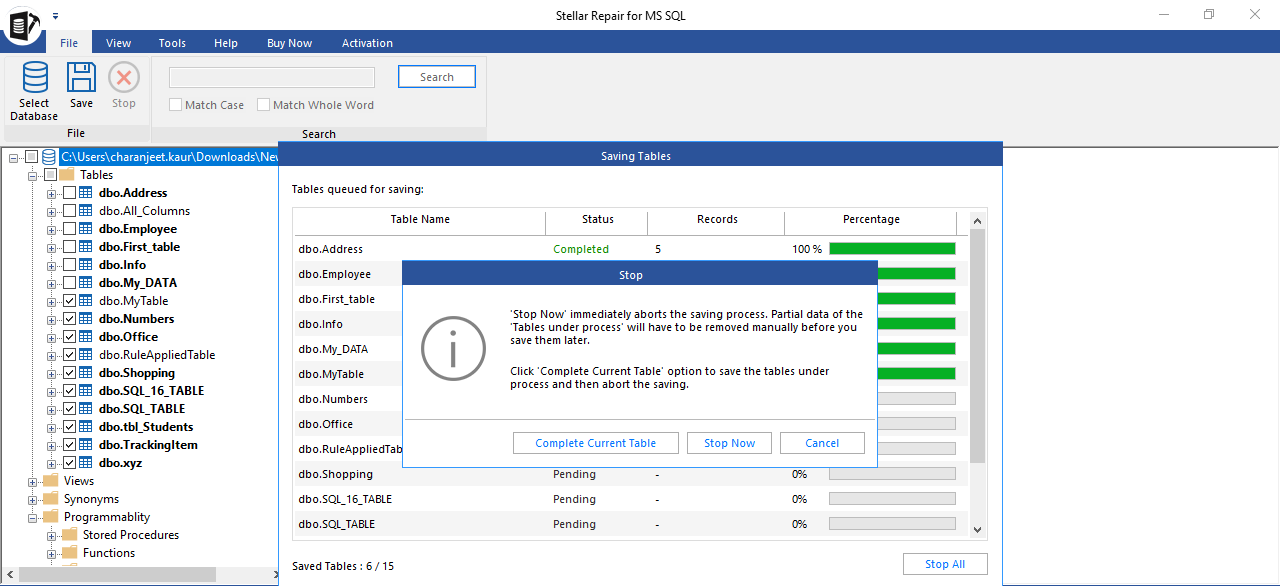
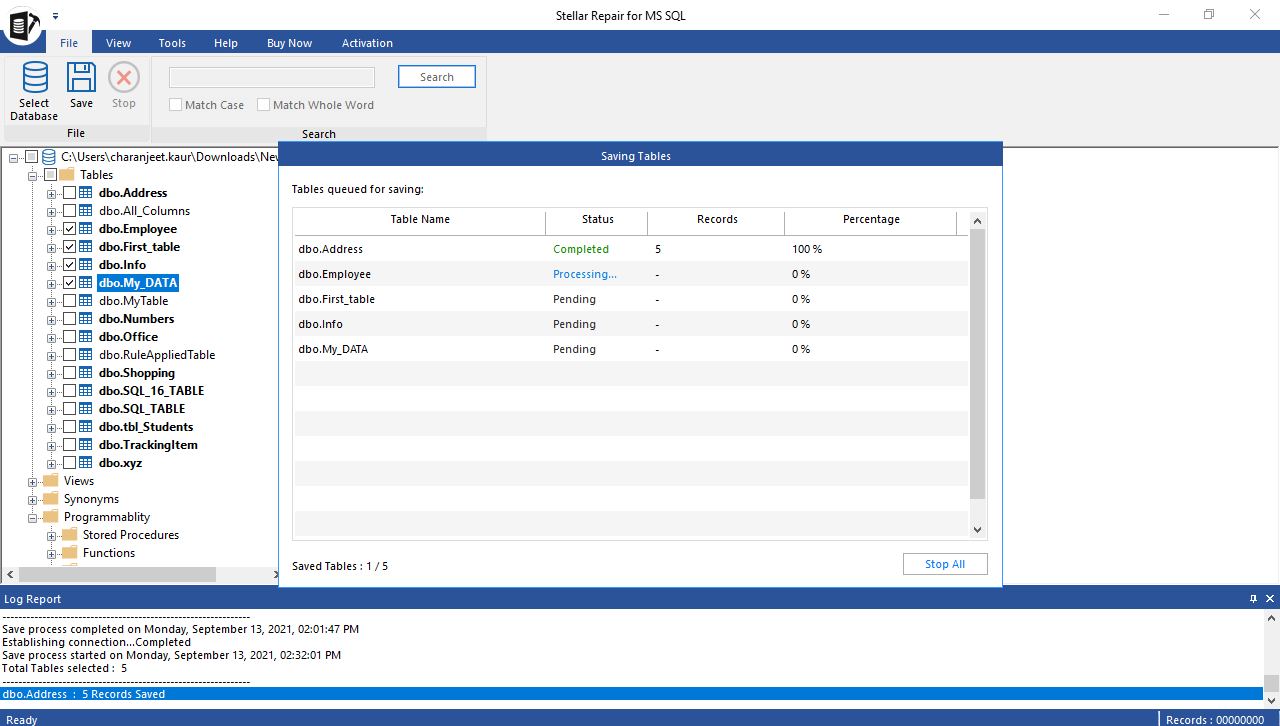
- Click Save. A dialog box showing the status of tables (Completed, Processing, and Pending) is displayed.
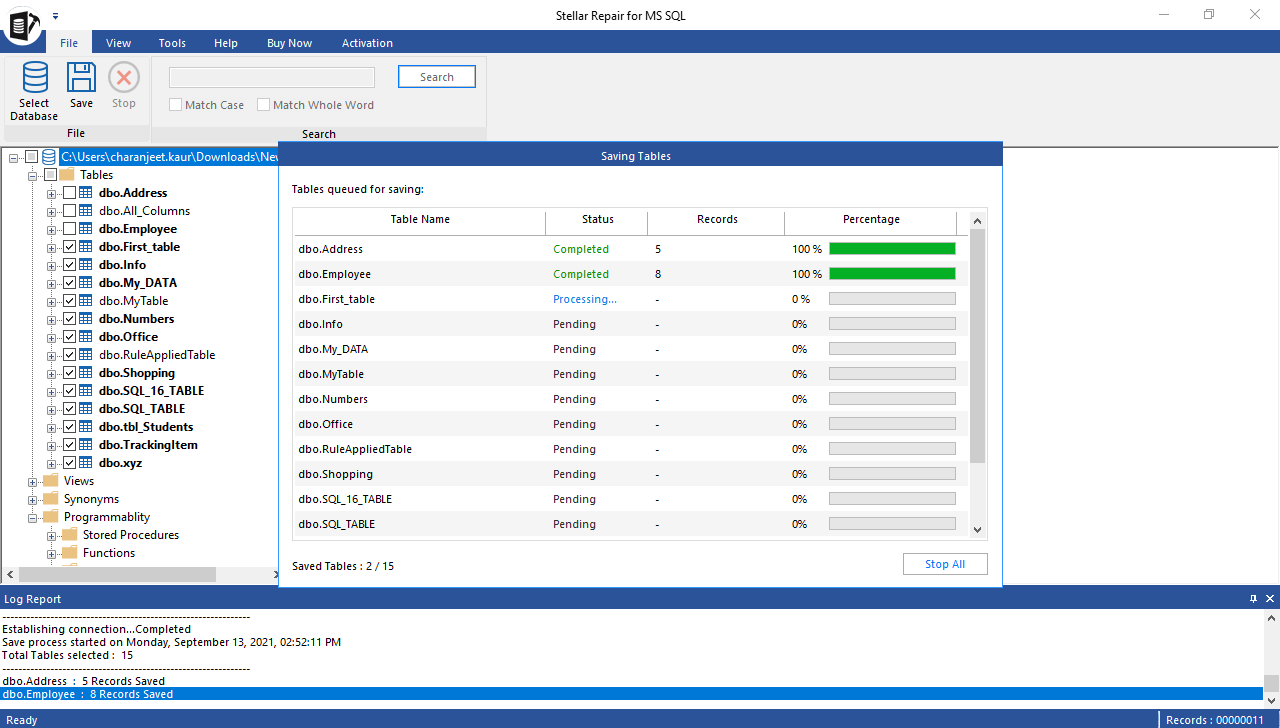
Note: To stop the saving process, click on the Stop All button. You will be presented with a ‘Stop’ dialog box with options – Stop Now (to immediately abort the saving process) and Complete Current Table (to save the tables under processing before aborting the saving process). To continue with the saving process, click Cancel.
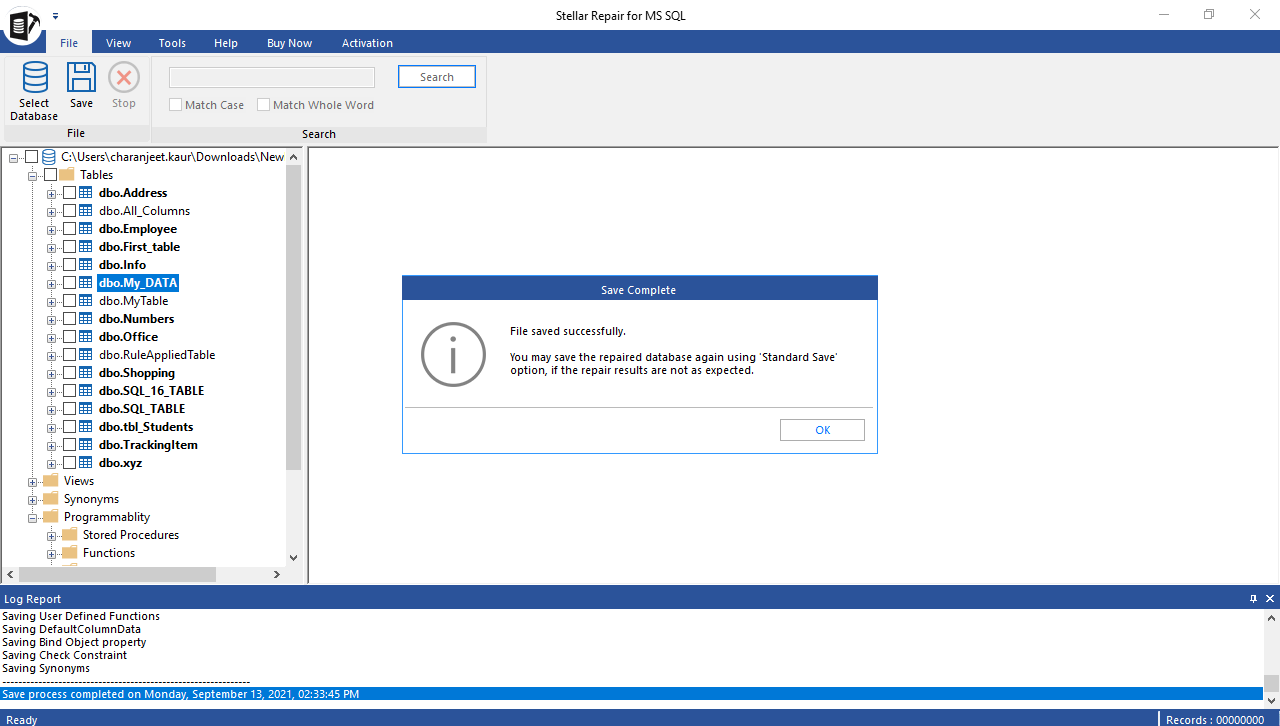
- Click OK when the ‘Save Complete’ message box appears.
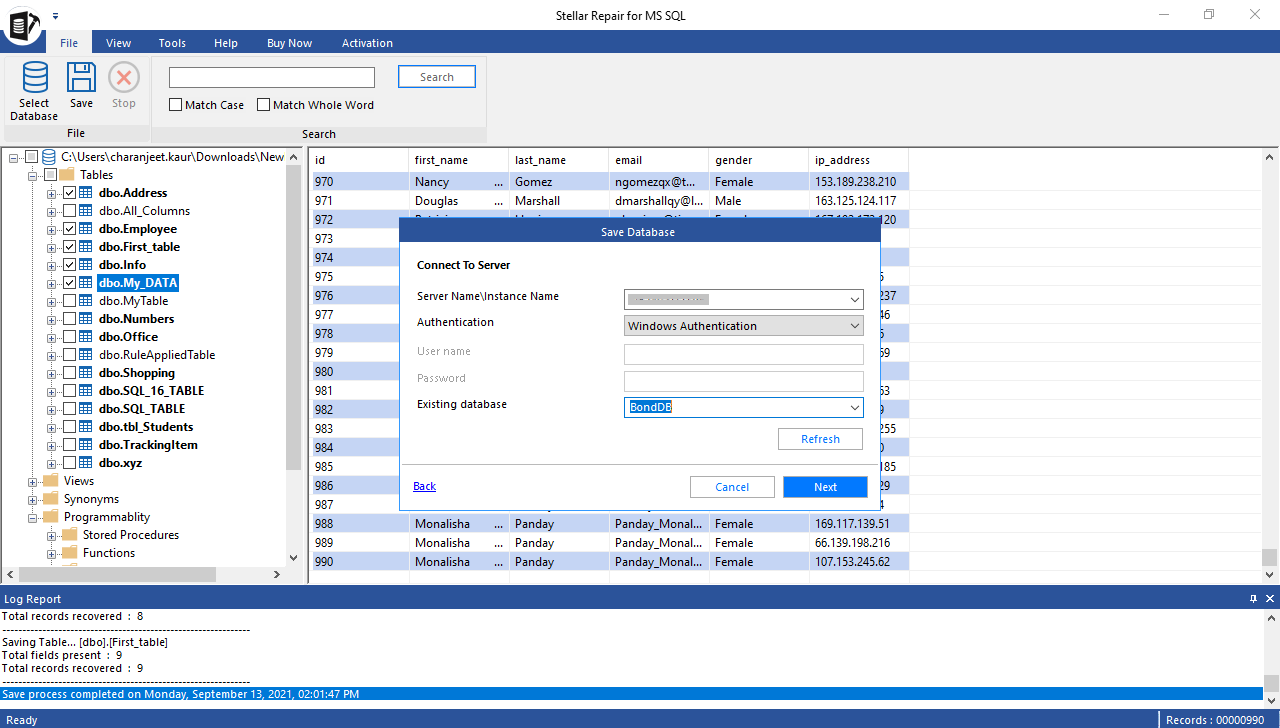
Steps to save the repaired SQL database in a Live Database:
-
Select the Live Database option and click Next.
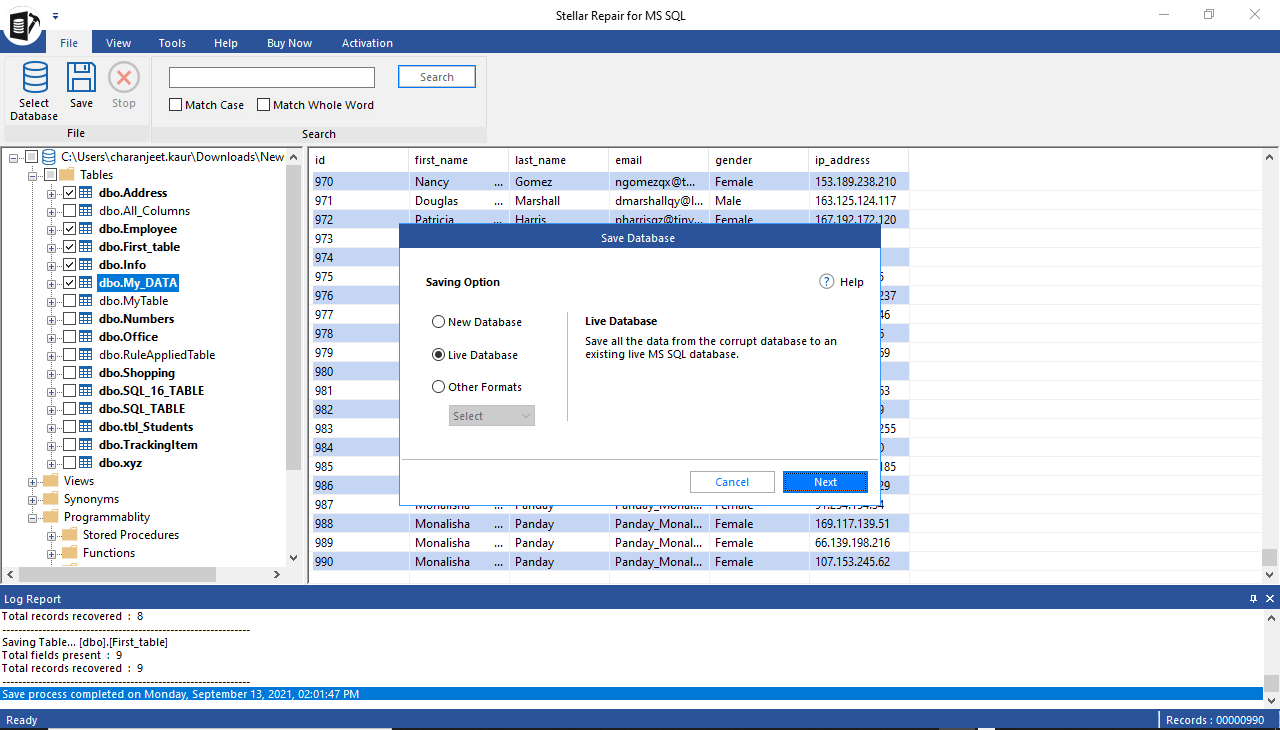
- Enter details to connect to the server, select an existing database to save the repaired data, and click Next.
- Choose Fast Saving or Advanced Saving option to continue saving the repaired data.

- A screen showing progress of the saving process is displayed.
- A ‘Save Complete’ message box pops up on completion of the saving process.
You can view the repaired data by opening the live (existing) database in SSMS.
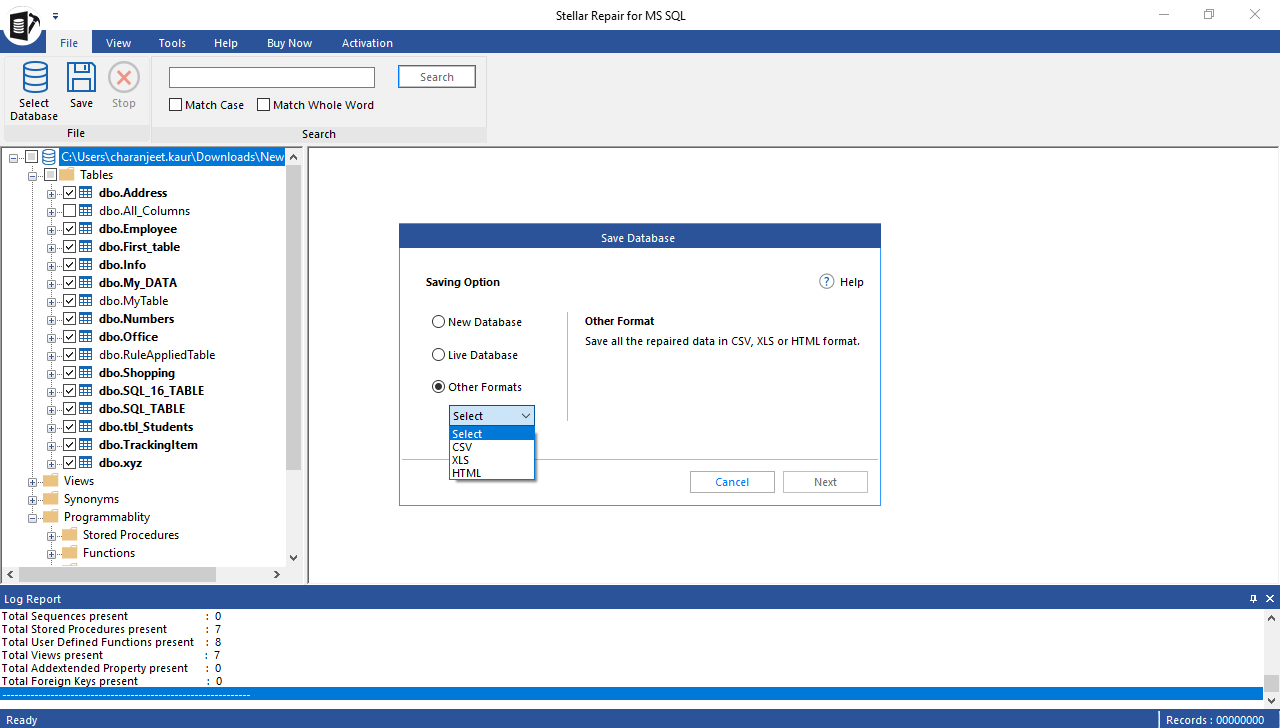
Steps to save the repaired SQL database in Other Formats (CSV, HTML, or XLS):
-
Select the Other Formats option, choose CSV, HTML, or XLS file format, and then click Next.
- Click Browse to select the Destination Path (the location where you want to save the repaired file), and then click Save.
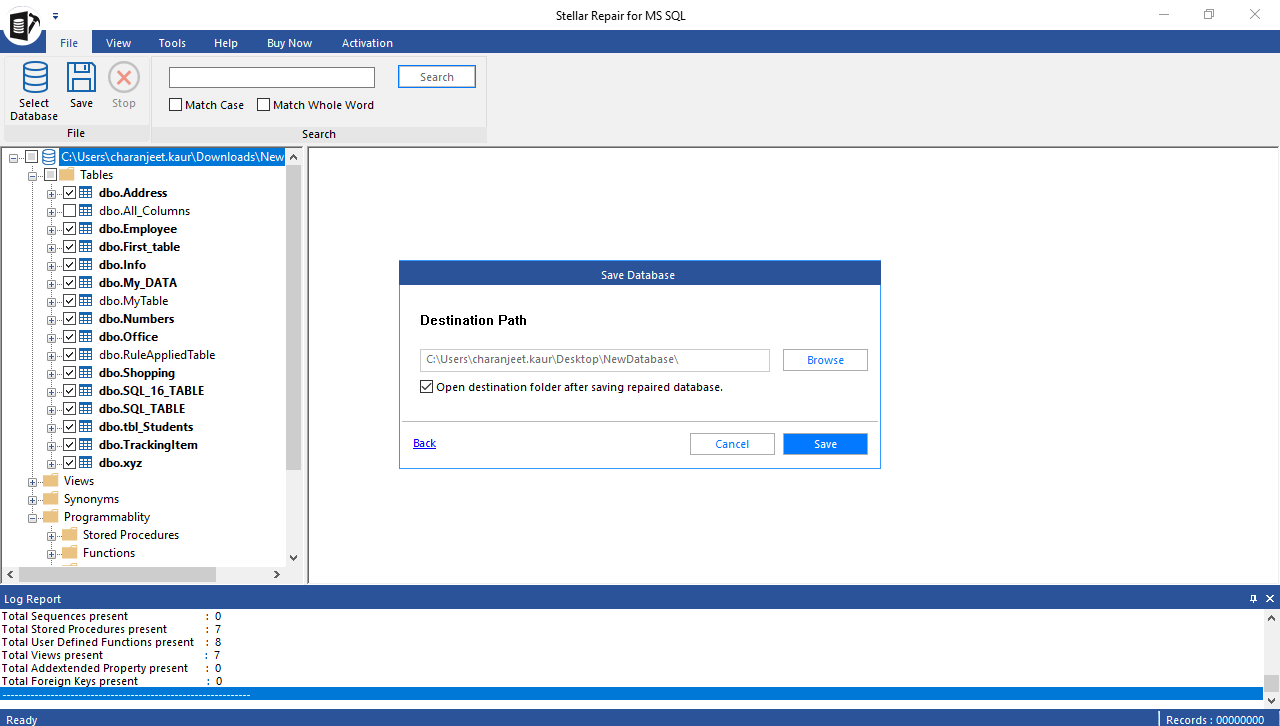
The destination folder containing the file in which the repaired data is stored will open.


