

Along with disk monitoring, Stellar Drive Monitor offers the ‘Clone Disk’ feature that creates a clone of a hard disk or SSD. With disk cloning, you can copy the entire data from the problem disk to another healthy empty drive. Timely Disk cloning helps prevent data loss from a corrupt, damaged, or failing hard disk.
Before you proceed with disk cloning, here are the important points to note:
- The Source Disk (problem disk) and Target Disk (another drive to which data is copied from the problem disk) should not be the same.
- The size of the Target Disk should be more than the Source Disk.
- The cloning process overwrites the existing Target Disk data. So make sure you have taken Target Disk data backup and emptied it before cloning.
- If your computer is connected with multiple hard disks, the software allows you to select the desired drive as Source Disk and Target Disk.
Step-by-step: How to clone a hard disk using Stellar Drive Monitor:
- Run and launch Stellar Drive Monitor on Windows PC.
- Select the Clone Disk option on the left pane of the user interface.
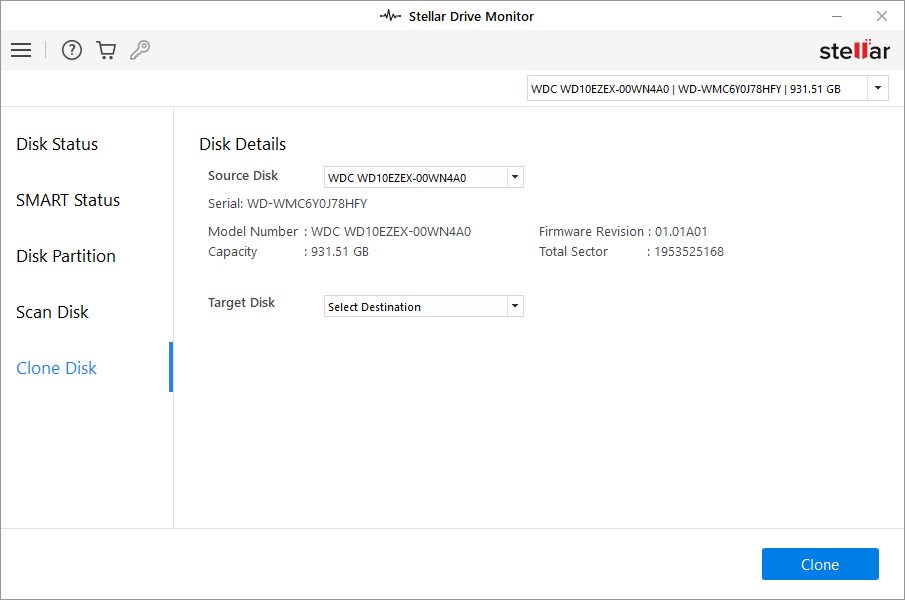
- Select the Source Disk from the drop-down on the right pane.
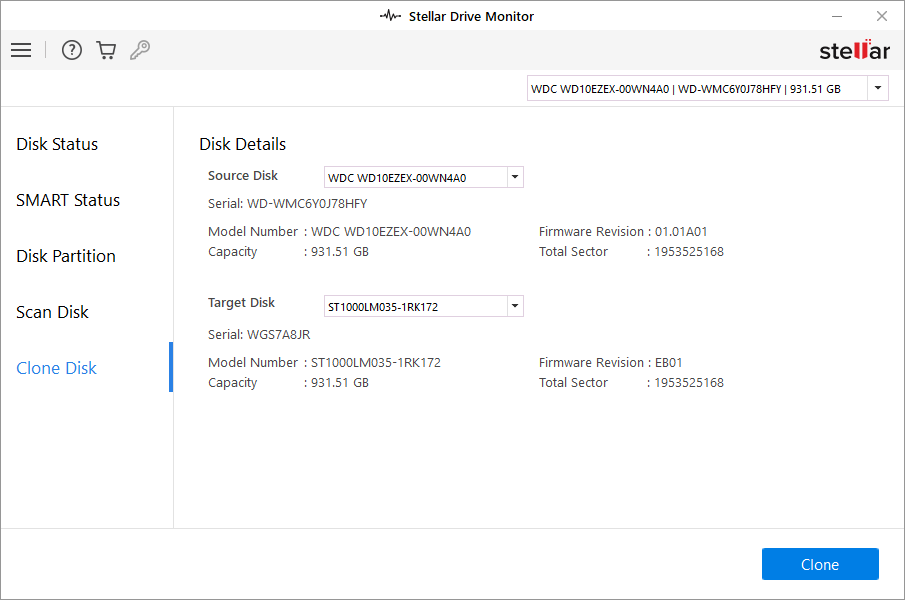
- Next, select the Target Disk from the drop-down on the right pane.
-
Click the Clone button at the bottom to start the cloning process.
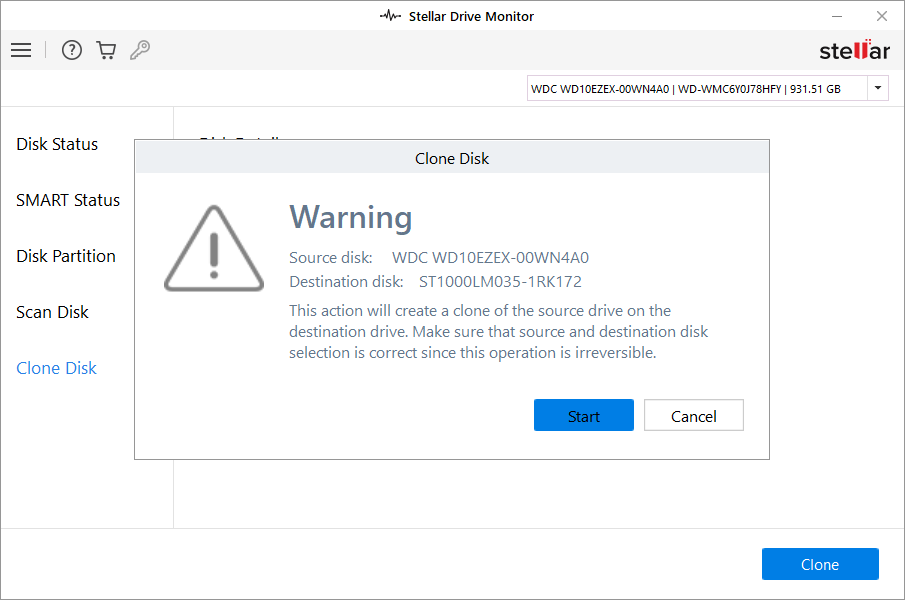
- A warning message appears in the Clone Disk box, notifying the action is irreversible. Click Start to begin the disk cloning process.
You will see cloning progress along with the total time elapsed and time left to complete the cloning process.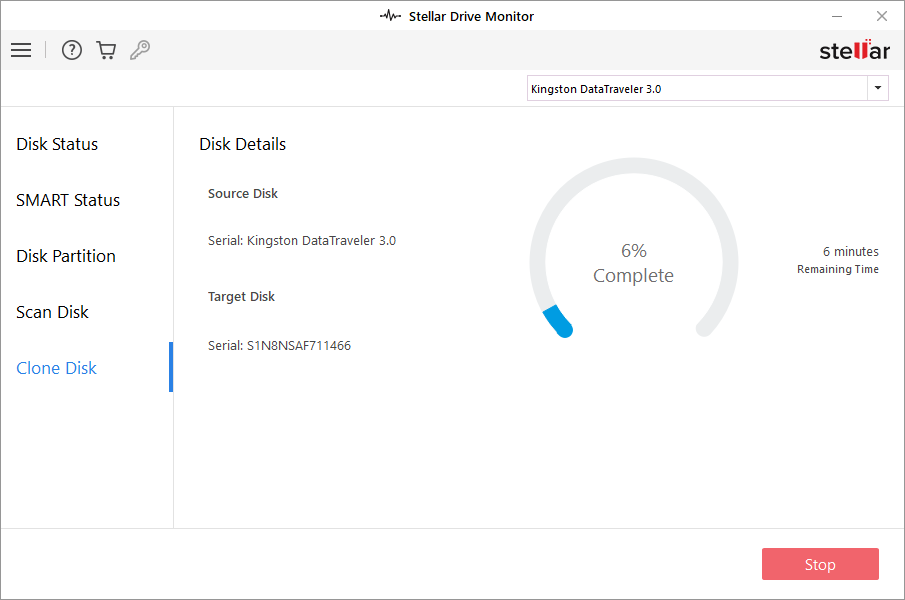
- As the cloning process finishes, a dialog box appears with the message ‘Disk cloning finished’. Click OK.
You can now access the clone drive and recover data anytime.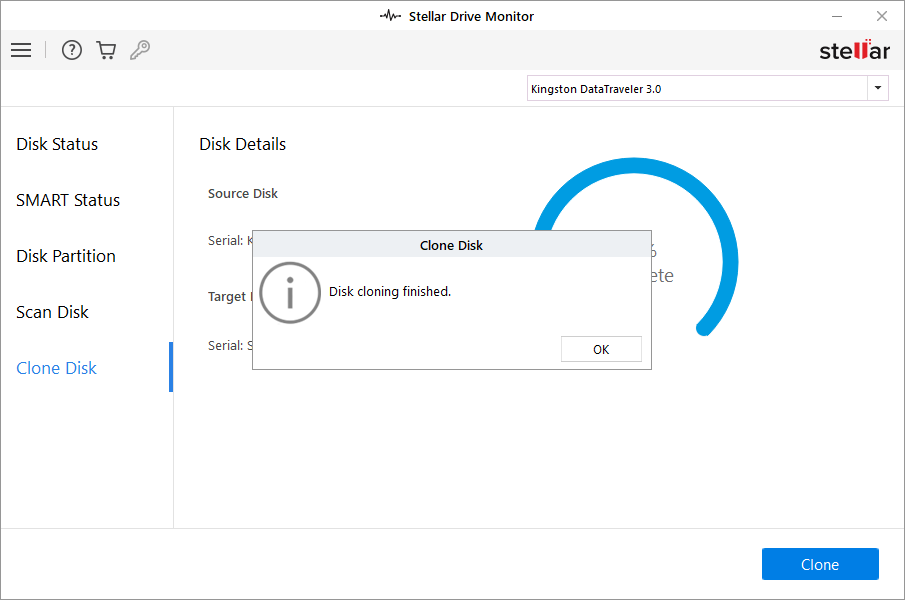
You may like to know: Disk Cloning vs Disk Imaging


