Summary: This guide will help you prepare an Exchange 2010 to Exchange Server 2013 or 2016 migration checklist and collect information about your current Exchange environment for a smooth migration. The guide talks about migration phases, prerequisites, and other requirements for Exchange 2010 to 2016 or 2013 migration.


Contents
Microsoft has ended support for MS Exchange 2010 as it reached its end of life. Thus, organizations are required to upgrade and migrate Exchange 2010 server to 2016 or 2013 in order to continue getting the latest security updates, patches, and features.
However, Exchange migration is a complex task and requires extensive planning and preparation. There are several factors that you need to consider and prepare a checklist before migrating Exchange Server 2010 to 2013 or 2016. By considering and analyzing these factors, you can ensure a successful Exchange migration.
Exchange 2010 to 2013/2016 Migration Overview
The Exchange migration process typically follows a particular set of necessary procedures along with prerequisites. Essentially, the Exchange 2010 to 2013 or 2016 server migration process is sub-divided into three main phases:
- Planning – This phase contains critical information that is required for a successful migration process. It includes segments such as Setup and Deployment, Mailbox, Public Folders, Mail Flow, Exchange Management Shell, Client Connectivity, and Exchange 2010 Coexistence.
- Deployment – The second phase guides users about deploying Exchange 2013 or 2016 and then migration from Exchange Server 2010 to 2013/2016, along with coexistence establishment without disrupting the existing services.
- Migration – The third and last phase is all about migration. It includes migration of mail flow, public folders, clients, mailboxes, etc. For this, the best way is to use a reliable Exchange migration software (EDB to PST Converter) to move mailboxes from Exchange 2010 Server to 2013 or 2016.
Exchange 2010 to 2013/2016 Migration Checklist
Following is the Exchange 2010 to Exchange 2013/2016 server migration checklist.
1. Get Acquainted with the Release Notes
The first and foremost thing to do is to check the release notes on the new version to which you want to update. It contains information that is required for a successful deployment and migration of Exchange. It contains segments such as Setup and Deployment, Mailbox, Public Folders, Mail Flow, Exchange Management Shell, Client Connectivity, and Exchange 2010 Coexistence with Exchange 2013 and 2016.
2. Authenticate the System Requirements
This section acquaints you with the obligation of the Exchange 2013 or 2016 installation. It includes information about hardware, clients, software, operating system, or network needs. Further, it guides you about the supported coexistence scenarios.
3. Check and Ensure whether Prerequisite Steps are Done
This section entails the installation of requirements for the Microsoft Exchange Mailbox, Edge Transport Server, and Client Access roles. These installation steps are for Windows Server 2012 R2, Windows Server 2012, and Windows Server 2008 R2, along with Service Pack 1 (SP1) Operating System prerequisites.
It also offers details about the prerequisites needed for the installation of the Exchange management tools on Windows 10, 8.1, 8, and 7 systems. Further, it guides you about the deployment security checklist. This list ensures whether Exchange objects ACL rights are minimized, administrative permissions are in sync with the modification requirement, or each internal default message path is encrypted.
4. Ensure Configuration of the Disjoint Namespace
Configure the Domain Name System (DNS) suffix search list by using the Group Policy Management console. The DNS suffix search list is needed to add multiple DNS suffixes.
5. For all Exchange 2010 Mailbox Databases, Choose an Offline Address Book
Use the Exchange Management Shell or the Exchange Management Console for provisioning the offline address book (OAB) downloads recipients. There are three ways to identify which recipient uses which OAB.
These methods are required when an individual uses multiple OABs in the organization.
- Per Mailbox Database – For this, you need to access the Exchange Management Shell or Exchange Management Console. It will specify you about the public folder database and the OAB being downloaded by the recipients.
- Per Recipient – For this, you need to use the Set-Mailbox cmdlet within the Exchange Management Shell. At this level, you cannot specify the public folder database but can state which recipients will download the OAB.
- Per Multiple Recipients – For this, you need to use a pipelined command in the Exchange Management Shell. At this level, you can define some OAB recipients for downloading a particular OAB based on mutual attributes.
6. Generate the Legacy Exchange Hostname
Create and check the legacy domain name system (DNS) hostname. It is necessary to ensure that legacy Exchange 2010 and Exchange 2013 coexist. Client Access servers and Autodiscover use this hostname while redirecting legacy users to the servers.
7. Exchange 2013/2016 Installation
Use Microsoft Exchange Server 2013 or 2016 setup wizard for Exchange 2013/2016 Mailbox and Client Access roles installation. Further, it also guides how you can verify the installation of Microsoft Exchange Server Migration from 2010 to 2013 or 2016. For this, the recommended way is to run the Get-ExchangeServer cmdlet and review the setup log file.
8. Prepare an Exchange 2010 Mailbox
In an Exchange organization, mailboxes are considered as the most common recipient type for the information workers. Every mailbox has an Active Directory user account associated with it. These mailboxes are used to send and receive messages and to salvage tasks, appointments, documents, messages, notes, etc. You can easily create the mailbox by using PowerShell or EAC.
9. Ensure Configuration of Exchange-related Virtual Directories
You must ensure the Exchange-related virtual directories configuration. Irrespective of the fact that Exchange 2013 or 2016 Client Access server does not tackle client protocols processing, still certain settings need to be applied to the Client Access server. These settings are for certificates and virtual directories.
10. Ensure Configuration of Exchange 2010 and 2013 or 2016 Certificates
This section outlines an overview of Digital Certification. It also provides details about different types of certificates, which certificates to choose, Proxying, and Digital Certificate best practices.
Generally, in Exchange, SSL is designed to create secure communication between server and client. This is because the clients use computers as well as smartphones inside an organization and computers outside an organization. Therefore, when we install Exchange 2013 or 2016, client communication is auto-encrypted.
11. Ensure Configuration of Edge Transport Server
Create Internet mail flow using a subscribed Edge Transport server. To establish Internet mail using an Edge Transport server, an individual needs to subscribe the Edge Transport server to an Active Directory site. On subscription, it auto-generates the much-needed twin Send connectors for Internet mail flow.
These configured Send connectors are as follows:
- One Send connector is to direct the outbound email to all Internet domains
- Another Send connector is to direct Edge Transport server Inbound Email to the Exchange 2013 or 2016 mailbox server
Before beginning the configuration process, you need to perform the following:
- Assign Permissions
- Authoritative domains and email address policies for Exchange organization need to be configured
- Enable Secure LDAP Port 50636/TCP
12. Ensure Configuration of Unified Messaging
To successfully deploy Unified Messaging (UM), there are certain factors that you should consider. These factors are the different components, features, and elements of Unified Messaging. These factors help in planning appropriate Unified Messaging infrastructure as well as deployment. It is the most basic yet vital step that helps in UM deployment.
It helps you in planning your Voicemail System, UM Deployment, and establishing a connection with the telephony network. To proceed with deployment, you need to be aware of UM IP gateways, UM hunt groups, UM mailbox policies, voice mail for users, UM services, UM dial plans, auto-answer, and route incoming calls.
13. Enable and Ensure Configuration of Outlook Anywhere
This section guides the user about Outlook Anywhere and its benefits. In the Exchange Server, it is also defined as RPC over HTTP. The main feature of this attribute is that it allows Microsoft Outlook 2013 or 2010 clients to establish a connection with their particular Exchange Server even over the Internet and from outside the Corporate Network. It will entail you about Outlook Anywhere management, coexistence, and testing of connectivity.
14. Ensure Configuration of Service Connection Point
Undoubtedly, the Client Access server in Exchange does not take responsibility for the customer protocol processing, but still, certain settings are being employed to the Client Access server. These settings are the certificate settings and virtual directory settings.
15. Ensure Configuration of Exchange 2010 URLs
This section talks about the systematic configuration as well as testing guidelines of the Exchange 2010 external URLs. Usually, when we connect the Exchange 2010 mailbox user to Exchange 2013 Client Access server, it redirects the connection to the Exchange 2010 Server. For this redirection, the Exchange 2013 server uses an external hostname configured on Offline Address Book, Outlook Web Access, Unified Messaging virtual directories, Exchange Web Services, the internal hostname for the Exchange ActiveSync virtual directory, and Exchange ActiveSync of Exchange 2010 server.
The main point to be considered here is that in the Exchange 2010 server, internal as well as external hostnames are different from the Exchange 2013 or Exchange 2016 server hostnames. Further, they are pointed to the Exchange 2010 server.
16. Ensure Configuration of DNS Records
After configuration of the server, the next paramount thing is the DNS record changing. It helps an individual to direct the connection to the new Exchange 2016 or 2013 server.
This section clears your apprehensions, such as:
- How you can ensure that the Exchange 2010 hostname is configured correctly
- How you can set up your public DNS as well as internal DNS record
- How you can ensure the precise working of it
DNS configuration includes the following aspects:
- Verification to ensure that the hostname and Client Access server for Exchange 2010 resolves to the publicly accessible external IP address
- Change in primary hostnames. This points to the Exchange 2013 Client Access server external, publicly accessible, IP address towards the user public DNS provider
- Changing of the primary hostnames for pointing the Exchange 2013 Client Access server name to the internal DNS servers
17. Migrate Mailboxes from Exchange 2010 to Exchange 2013 or 2016 Server
Now you can move mailboxes from Exchange 2010 to 2013 or 2016 mailbox database. You can export the mailboxes to PST by using Exchange Admin Center (EAC) or Exchange Management Shell (EMS) and then import the PST to Exchange 2013 or 2016 server.
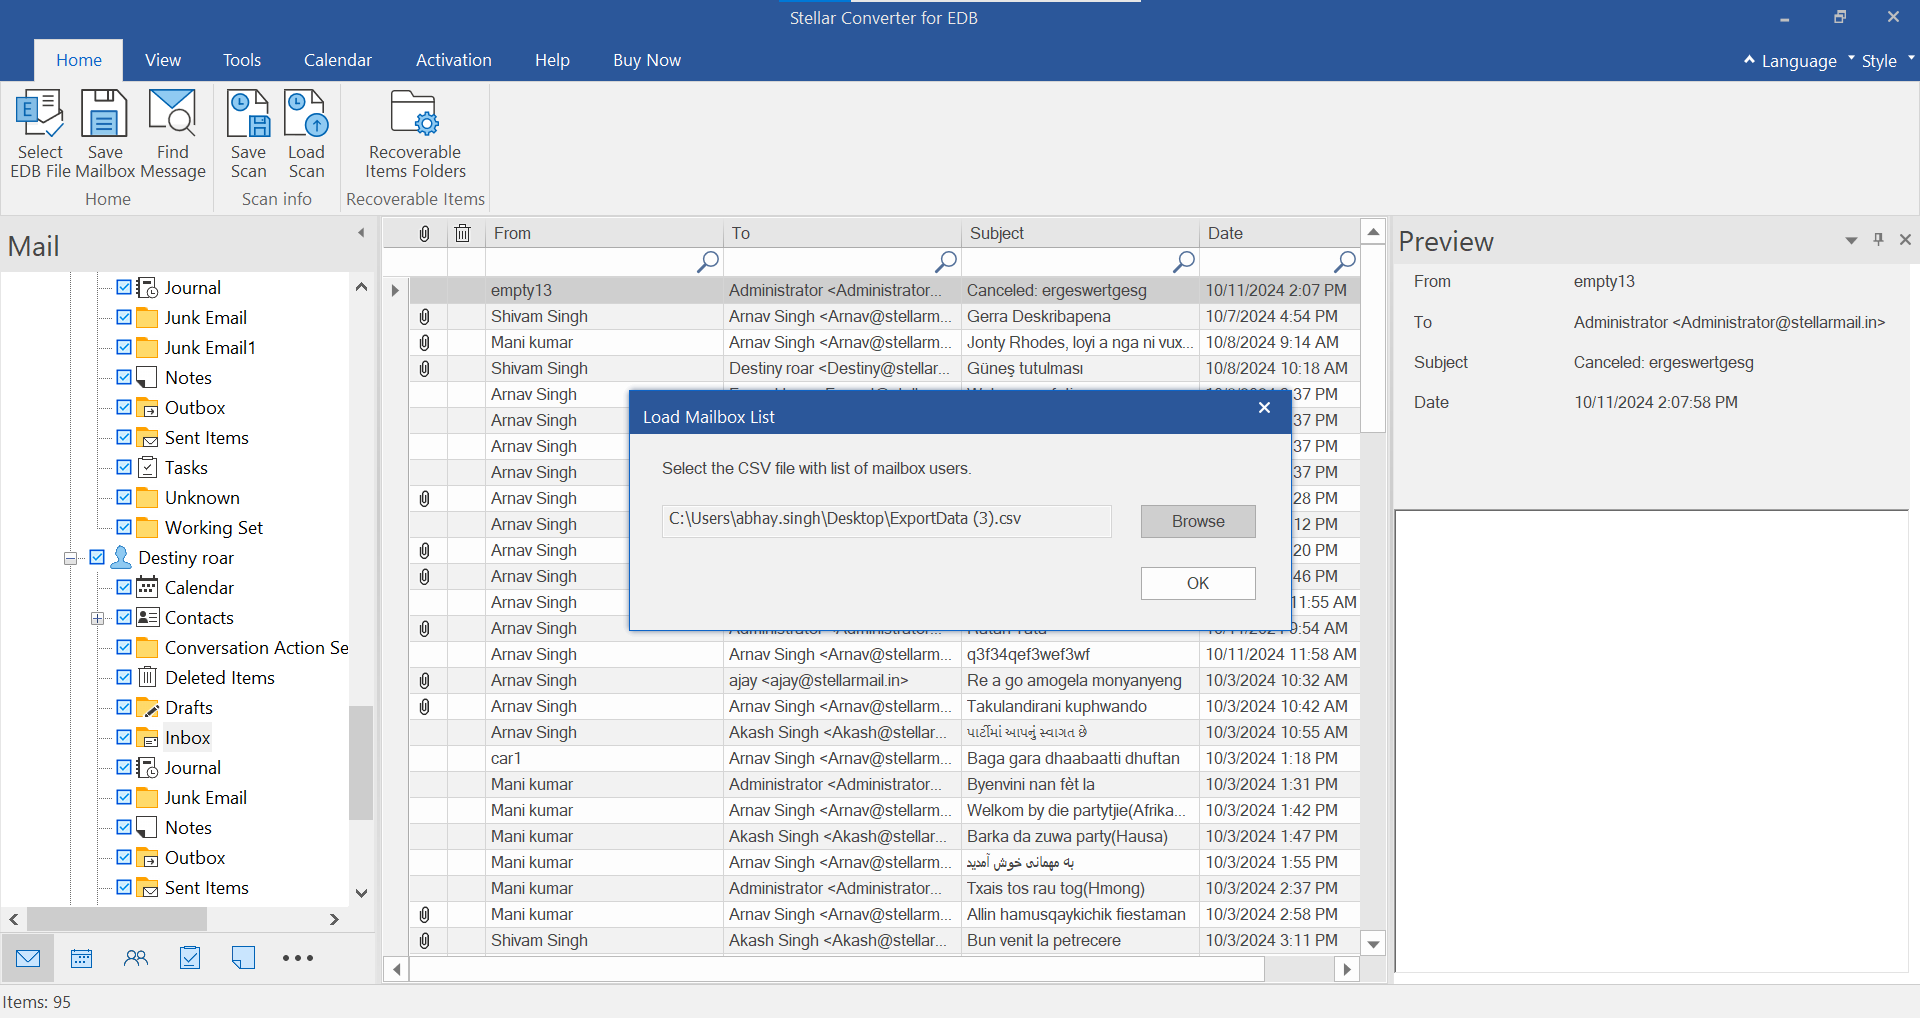
You may also use third-party software, such as Stellar Converter for EDB, to migrate mailboxes from Exchange 2010 to 2013 or 2016 Server directly (in the same forest). You may download and try the free demo version to check it yourself.
The steps are as follows,
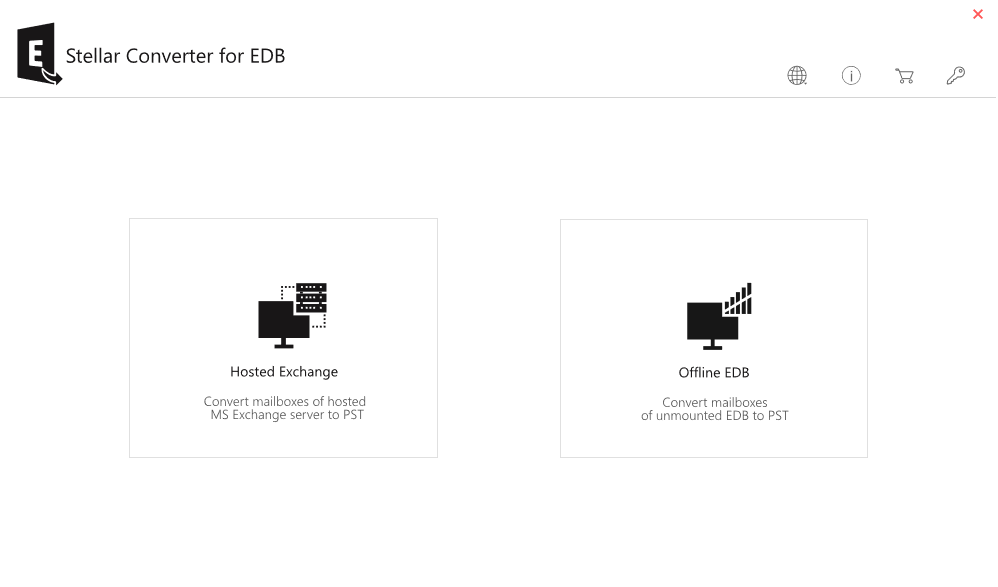
Step 1: Launch the software and select ?Offline EDB file?.

Step 2: Browse and select the Exchange 2010 EDB file.

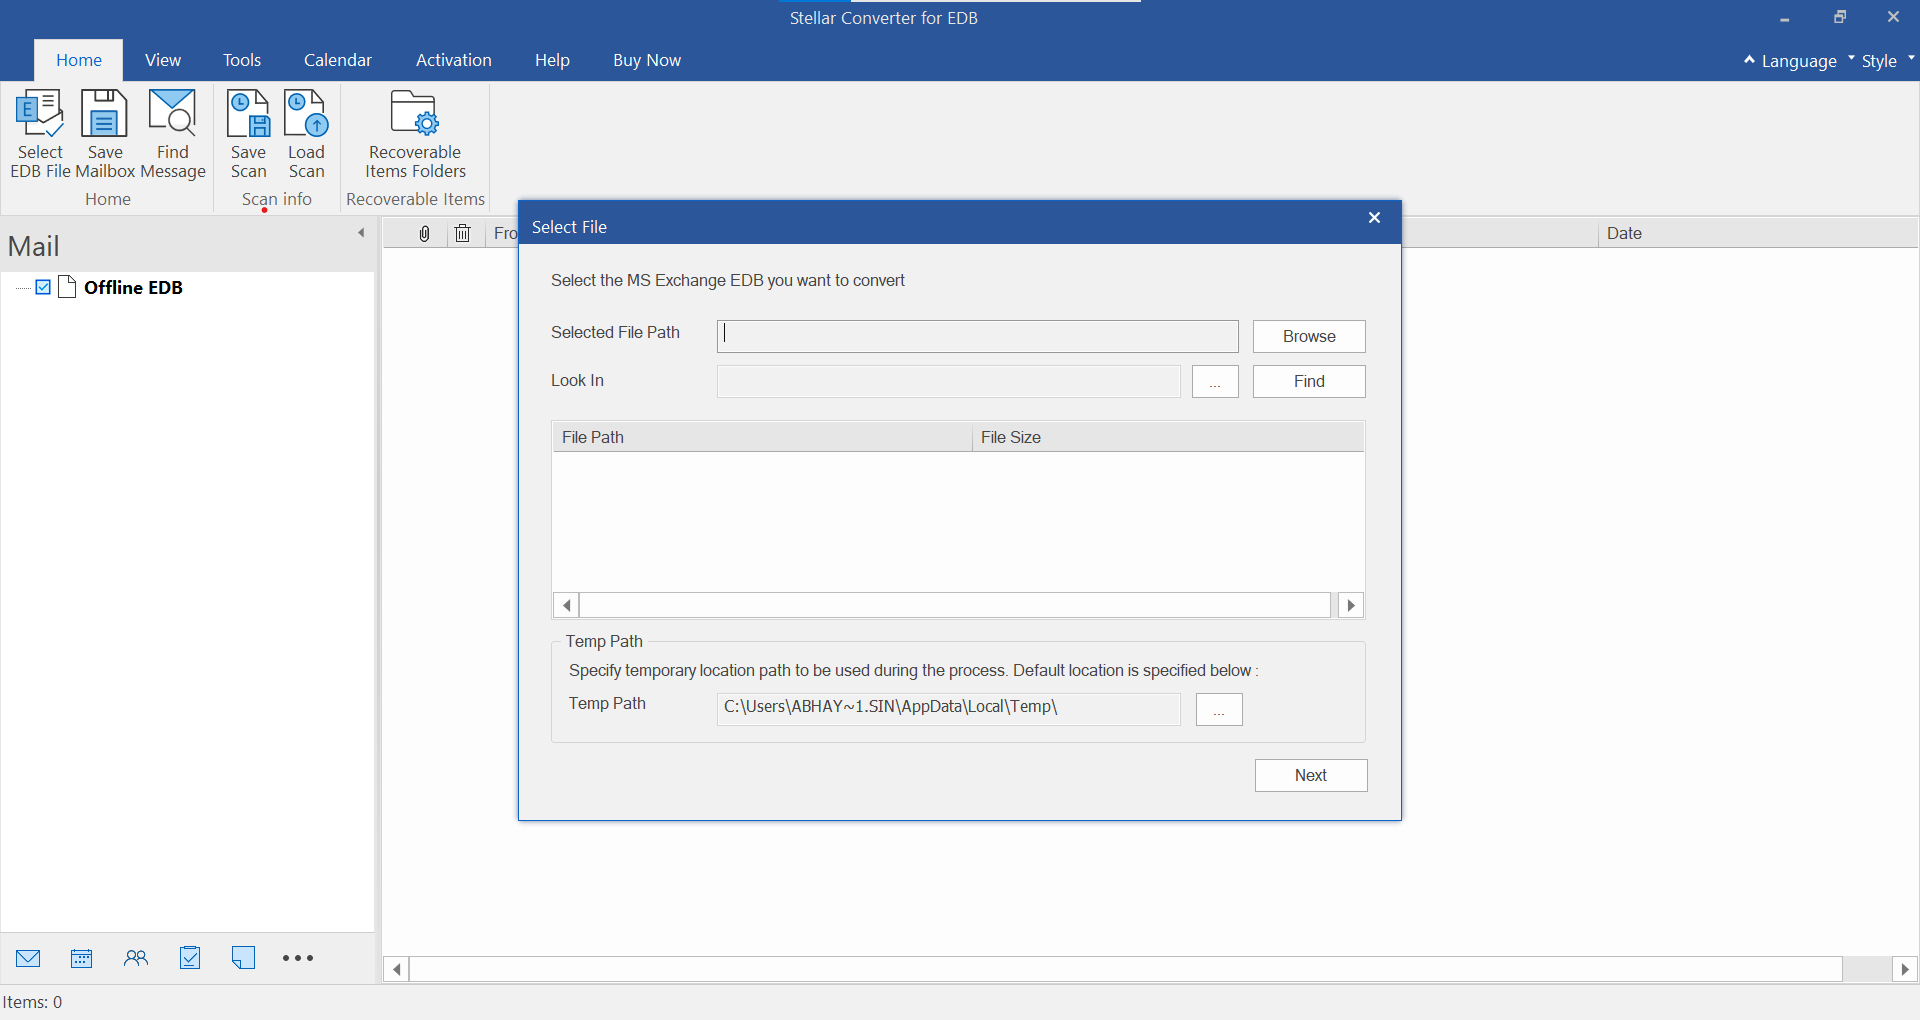
Step 3: Click ?Next? and wait for it to complete. It displays all mailboxes in the EDB mailboxes.


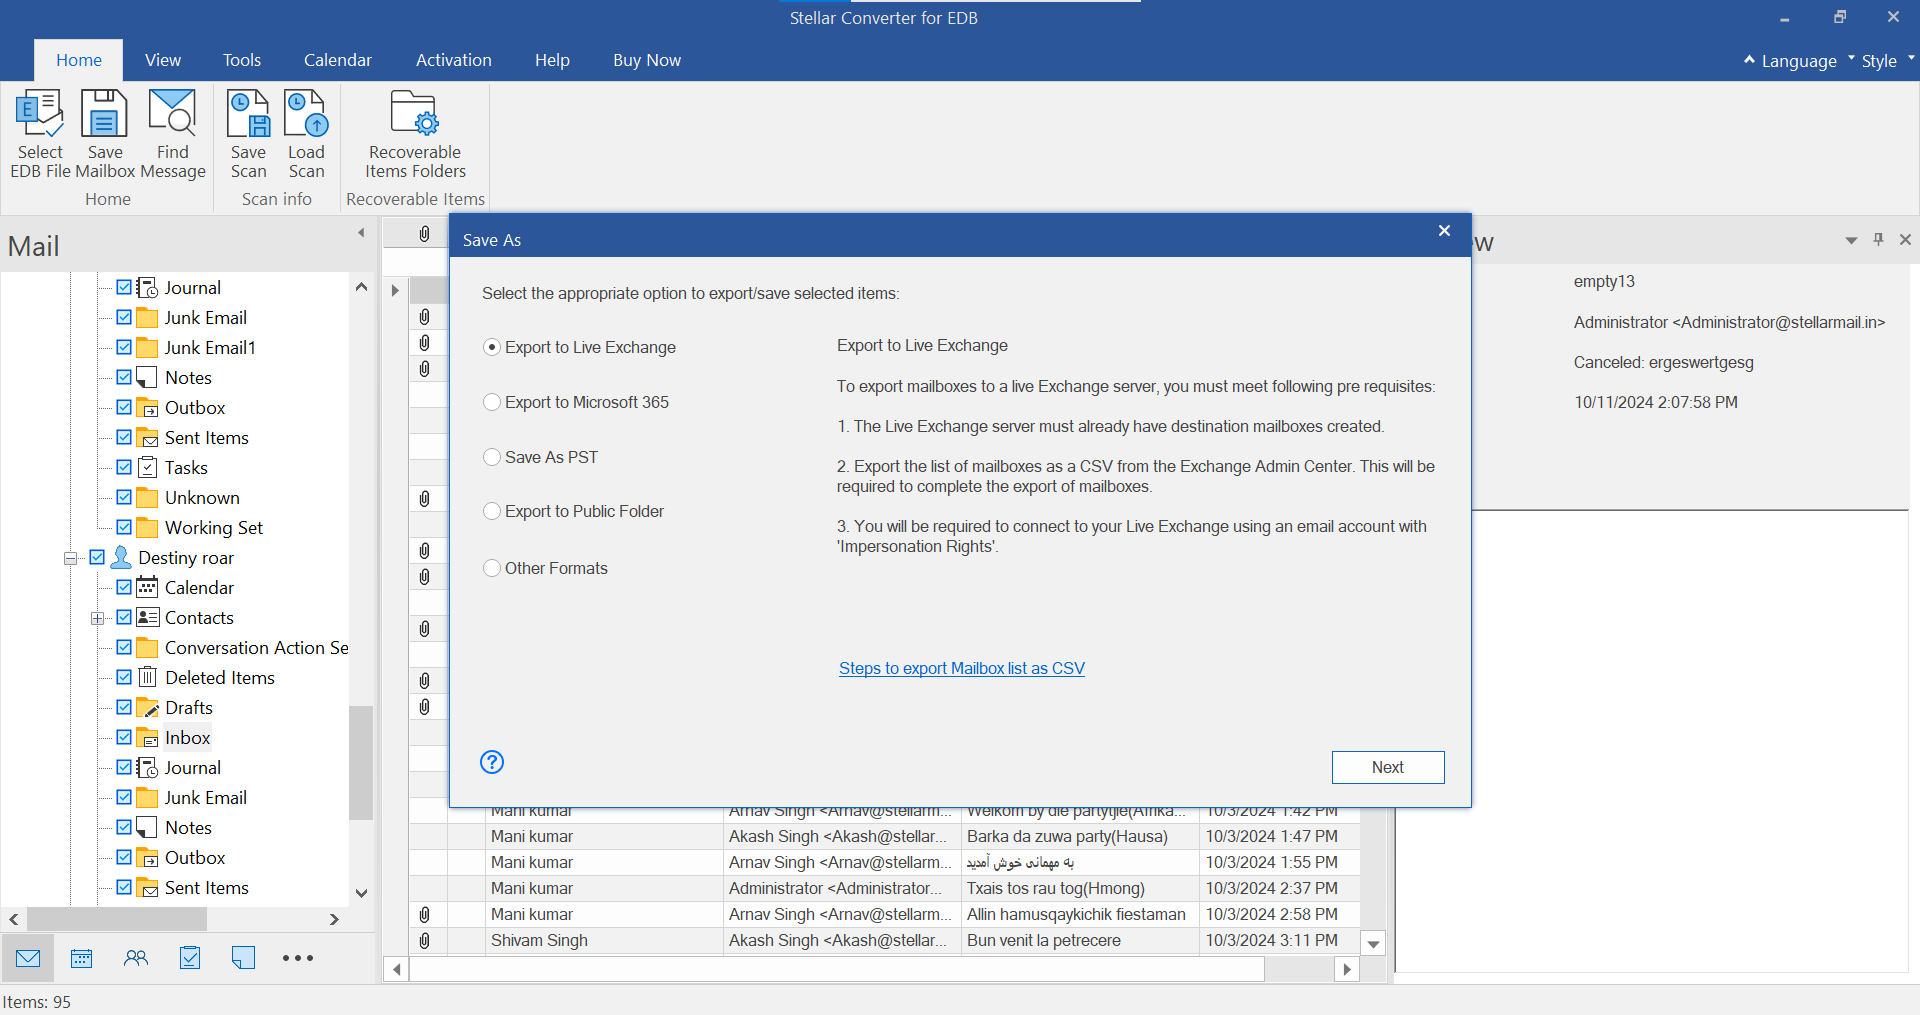
Step 4: Select individual mailbox or all mailboxes and then click ?Save?.
Step 5: From the options, choose Export to Live Exchange.
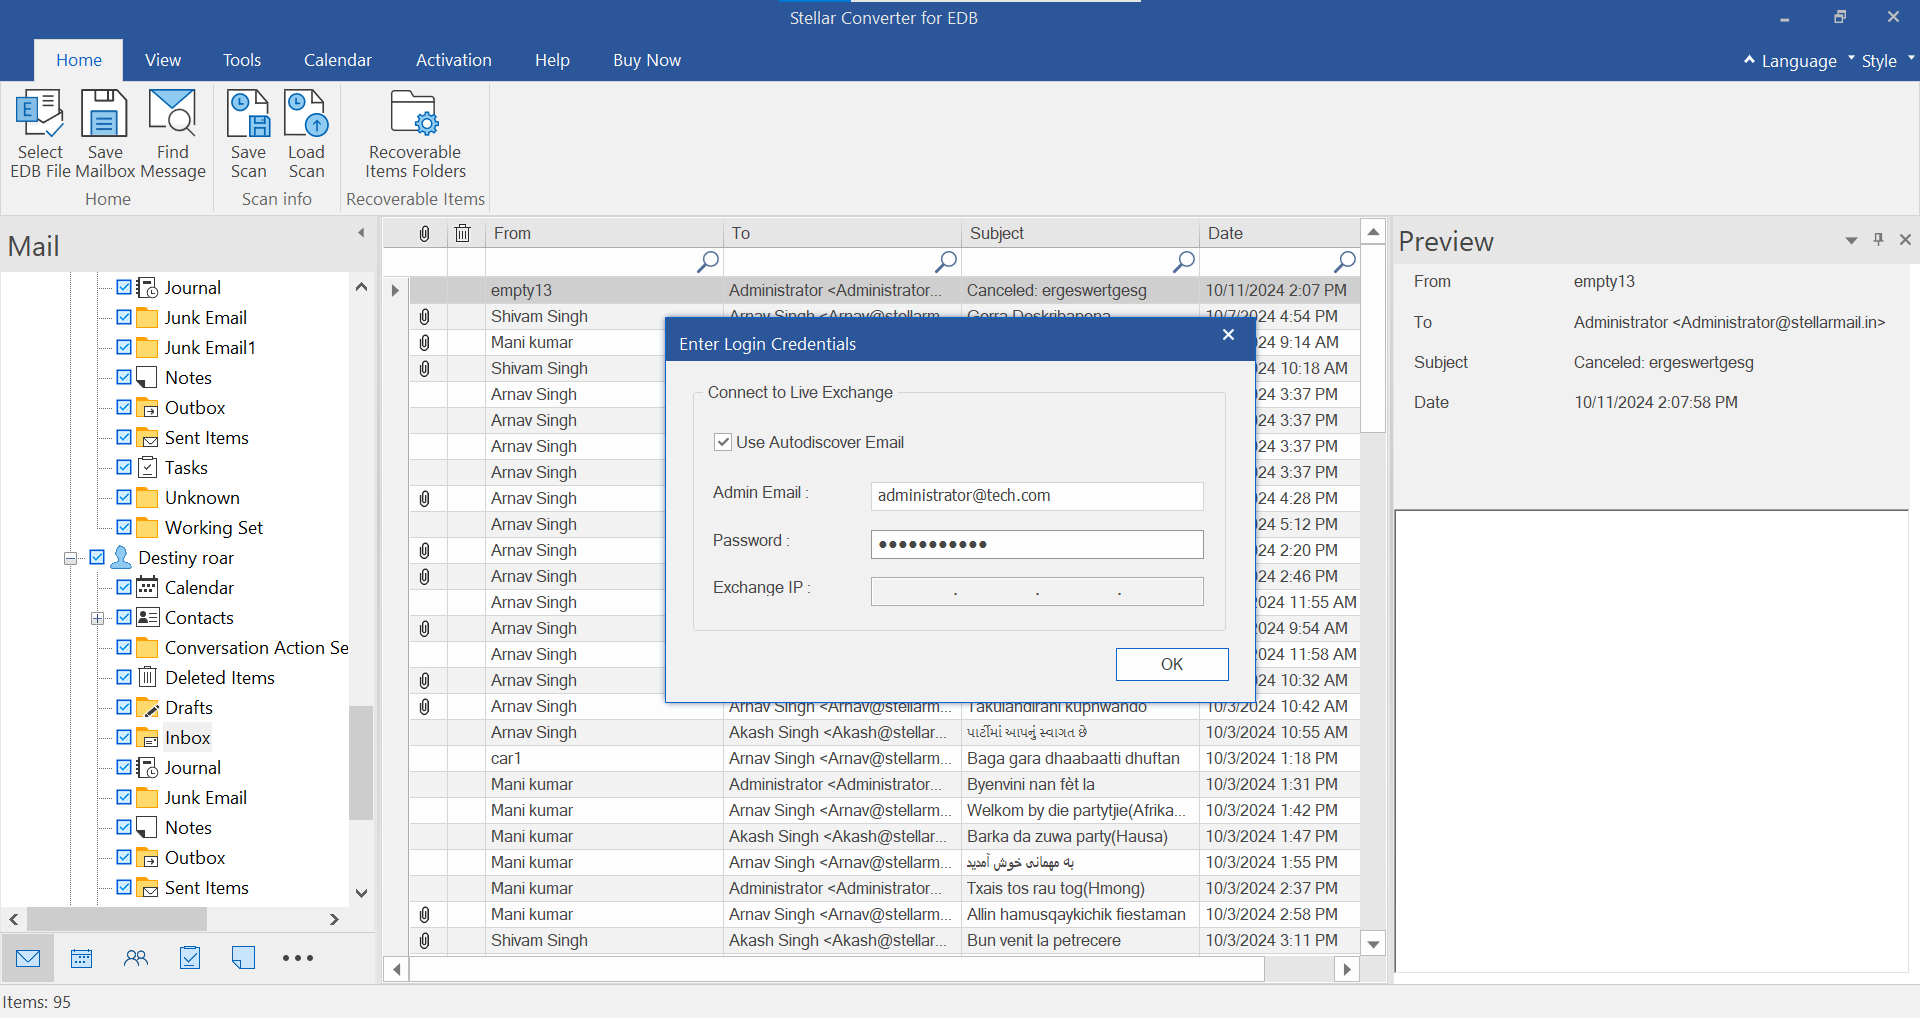
Step 6: Choose the configured Outlook profile (administrator), enter the password, and then provide the Domain Controller credentials, such as ADS Name, Admin Mailbox, and password. Then click ?Next?.

Step 7: The software auto-maps the source and destination mailboxes. However, you can also create a new mailbox (if the mailbox is not available on the destination server) and then map the mailboxes manually. After mailbox mapping, click Export.

Step 8: That?s it, mailboxes from Exchange 2010 will be migrated to configured live Exchange 2013 or 2016 Server.


Doing this manually could take a lot of time and may extend downtime. By using the software, you can automate this task with a few clicks. Plus, the software supports Exchange 2019, 2016, 2013, 2010, 2007, 2003, 2000, and 5.5.

18. Ensure Seamless Migration of Public Folder Data from Exchange 2010 to Exchange 2013 or 2016 Server
This step is helpful for those enterprises which use Public Folders. It helps you get acquainted with the Public Folder. It also guides you on how an individual can migrate public folders to Exchange 2013 from previous versions by using serial migration.
By the end, you will be aware of what all you need for migration, how a user can migrate, how to eliminate public folder databases from the legacy Exchange servers, how migration can be rolled back, and how can you ensure the precise working of the same.
19. Post-Installation Tasks
This section helps in the configuration of the new Exchange 2013 or 2016 organization after Microsoft Exchange Server 2016/2013 migration. By the end of this segment, you will be acquainted with mail flow and client access configuration, Internet mail flow configuration via subscribed Edge Transport server, Exchange 2013/2016 installation verification, and Exchange 2013/2016 management tools installation.
Lastly, you can decommission the Exchange 2010 server.
By now, you are aware of all the information and setup required for migrating Exchange 2010 to 2013 or 2016 Server.
Tip: We also suggest using Microsoft Exchange Server Deployment Assistantthat asks you a series of questions and creates a step-by-step checklist to deploy different versions of Exchange Server.
The Way Forward
Exchange 2010 to 2013 or 2016 migration is a very crucial but complex process. It includes some basic and advanced procedures and processes, along with prerequisites for comprehensive end-to-end migration. By following the above-stated Exchange 2010 to 2013/2016 migration checklist, you can ensure smooth, fast, and secure migration.
In case of more help, let us know via comments down below.

