Summary: Learn how to enhance photo quality with Adobe Photoshop! Our detailed blog covers everything from basic adjustments like cropping, brightness, and contrast to more advanced techniques like color balance and sharpness. With Photoshop, you’ll be able to take your images to the next level and create stunning visuals that truly stand out.
Contents
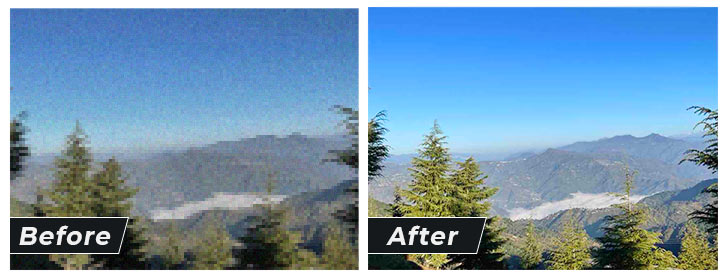
In today?s digital era, photography has become an integral part of our lives. Whether you want to capture beautiful memories or promote your business through visual content, creating high-quality photos is essential. However, at times, the images we capture may not be perfect. There may be issues with color balance, brightness, contrast, sharpness, or excess noise in the image.
In such a scenario, photo editing tools like Adobe Photoshop or Lightroom and others come handy. Here are some helpful tips that can be used to enhance photo quality with Adobe Photoshop.
Steps to Enhance My Picture Quality with Adobe Photoshop
Whether you?re working on your photographs or pictures you source from other websites, you can make sure to enhance your photos to look their best with a handful of tips. Let?s introduce Color Balance, Sharpness/Contrast, and more tools to help you enhance photo quality with Photoshop.
1. Import the Image
The first step is to open Adobe Photoshop and import the image you want to edit. Go to File > Open, or just drag and drop the image in the Workspace.

2. Color Balance
Photographers are known to adjust the color balance settings to enhance your photos and correct color imperfection in the image. You can also use Color balance to create dramatic effects in the photo by changing the overall mixture of colors.
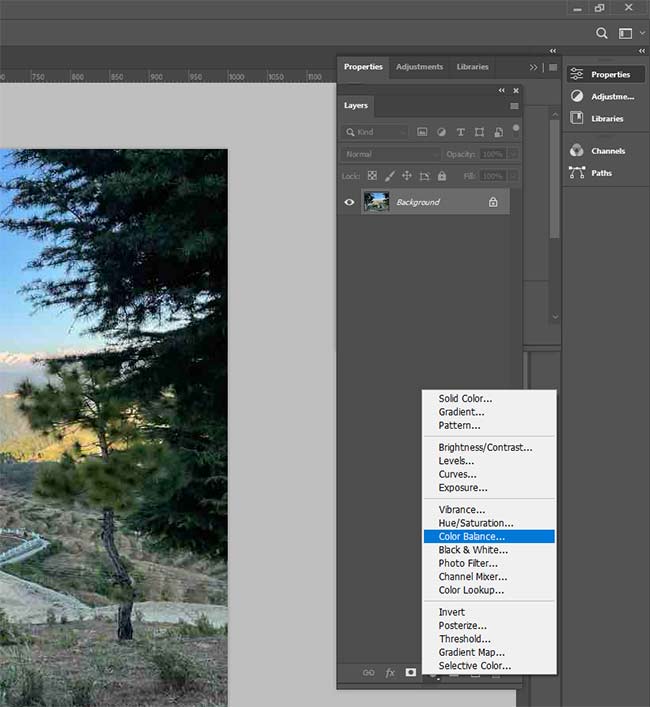
Steps to apply color balance adjustments
- In the Adjustments panel, click on the Color Balance icon.

- A New Adjustment Layer with the name of Color Balance1 is formed and a Properties panel opens.

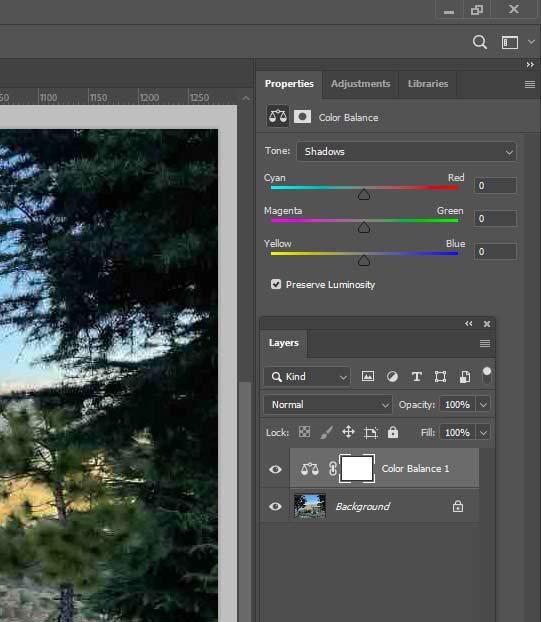
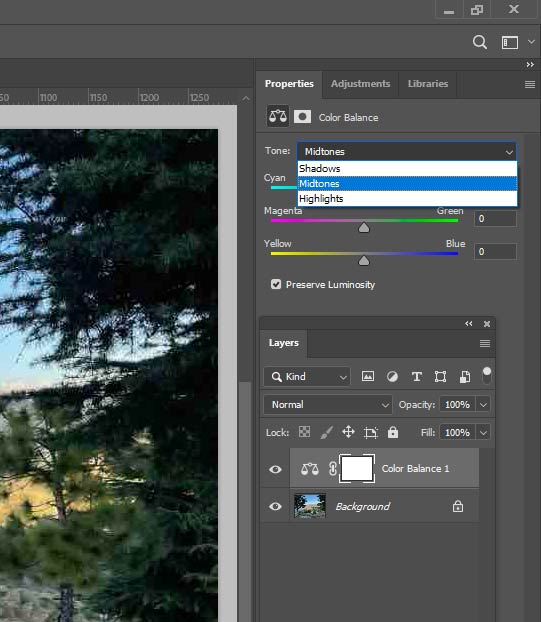
- Here, select any of the Tone balance options, such as Shadows, Midtones, or Highlights. Now move the Cyan, Magenta, or Yellow slider to add or subtract the color from the image.
- Once you have achieved the desired color balance, change the name of the New Adjustment Layer from Color Balance 1 to another.
3. Brightness and Contrast
Lightning is the hardest thing to get right during a photo shoot even for professional photographers. Some photos may end up little too dark or little too light, but they can be improved by adjusting the brightness and contrast. Moreover, increasing the contrast is the best way to make your photo pop, and reducing it may the photo look flat.
There is no one rule of how much brightness and contrast should be increased or reduced to enhance your photos. However, remember adjusting the brightness will make everything darker or brighter; likewise upping the contrast makes light areas lighter, and dark areas darker in your image, which is why you need to pay more attention while enhancing your images.
Steps to enhance photos quality by adjusting contrast & brightness
- In the Menu bar, go to Image.
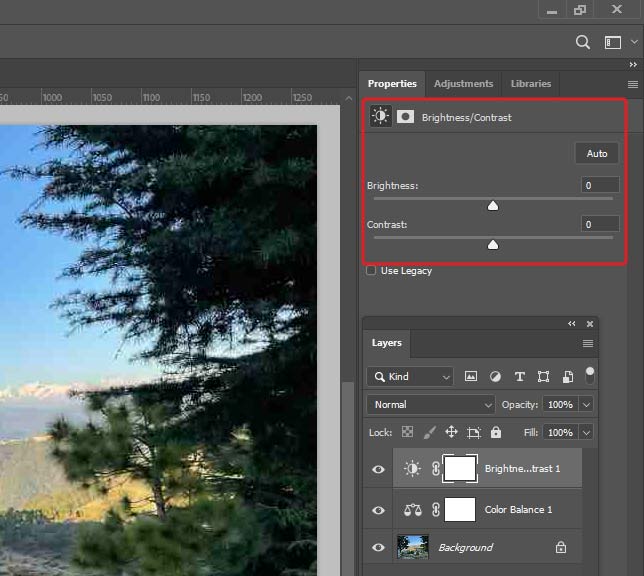
- Select Adjustments and click Brightness/ Contrast.

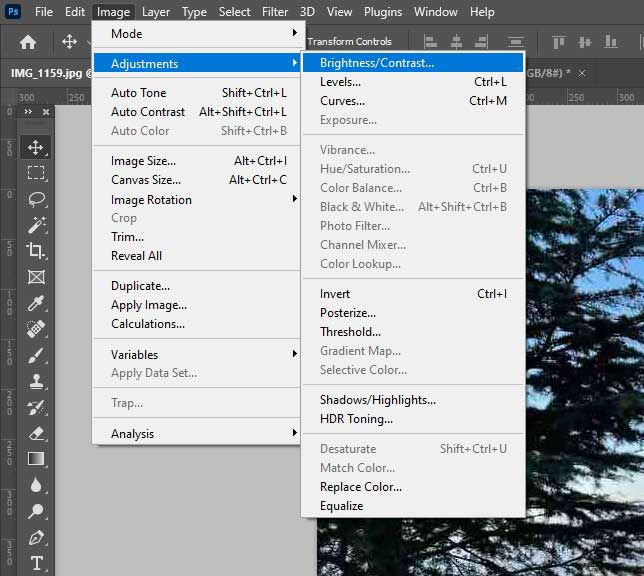
- Next, adjust the brightness and contrast slider to change the overall brightness or contrast of the image.
- Click OK and the adjustments will be applied.
4. Sharpen the Image
There will be times when your image will appear blurry or lack sharpness, making its overall appearance dull. Use the Sharpening tool in Photoshop to enhance photos’ quality and correct issues like blurriness or lens distortion.
Sharpening brings out the details in your image that might be difficult to see. Follow the below steps to sharpen the image in Photoshop:
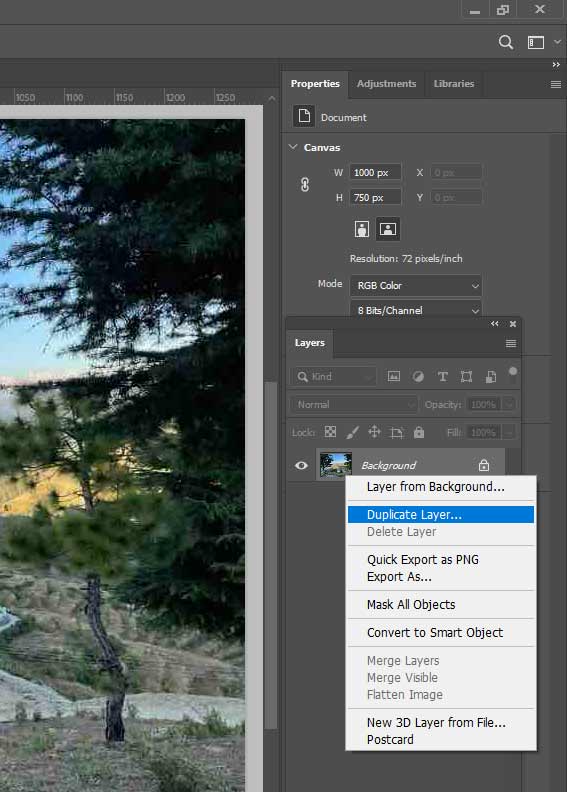
- Right-click on the background layer on the right pane and select the Duplicate layer option to create a new layer of the image.

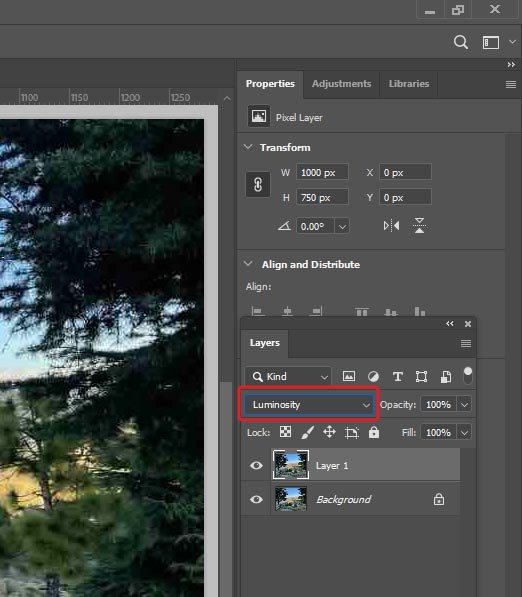
- Now, set the blend mode to Luminosity for the new layer to prevent color distortion around edges.

- Next, go to Filter > Sharpen > Unsharp Mask.

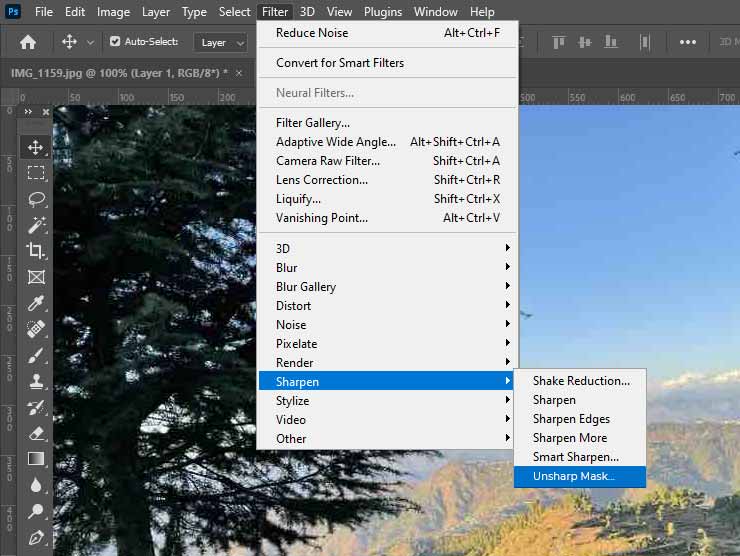
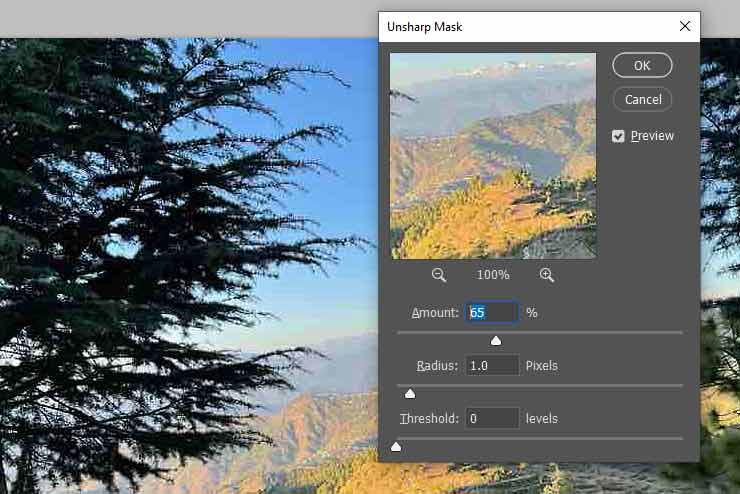
- The Unsharp Mask window will open. Ensure that the Preview option is selected to see the result of the changes done in the image.
- Move the Amount slider to determine the amount of sharpening, Radius slider determines the width of the sharpening effect at the edges of images. The Threshold slider indicates how different the sharpened pixels must be from other surrounding pixels of the image.

5. Remove Noise
The noise in your photo may cause them to appear pixelated. This noise can be either color noise or luminance noise. Color Noise appears when the color is distorted, whereas luminance noise makes your photo have grains on it.
Steps to reduce noise in Photoshop:
- Go to Filter > Noise > Reduce Noise.

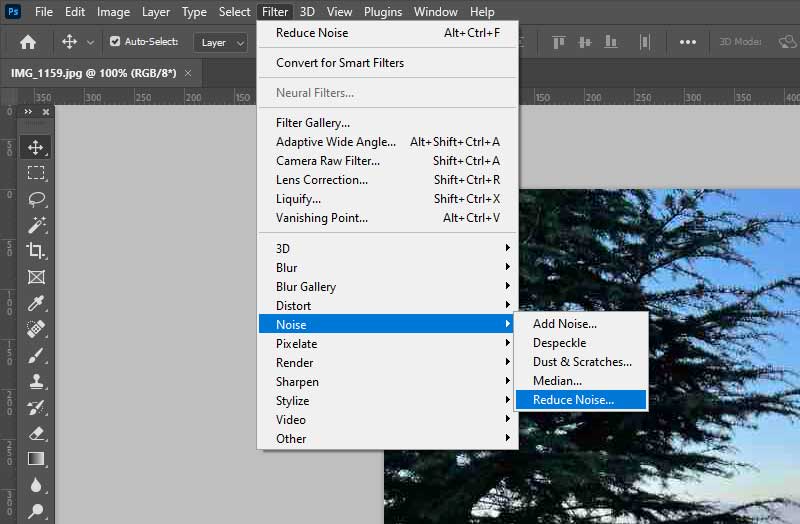
- Next, move various sliders to adjust the noise of the image. The Strength slider determines overall noise reduction, the Preserve Detail slider maintains sharpness, the Reduce Color Noise and Sharpen Details sliders further refine the noise reduction settings.

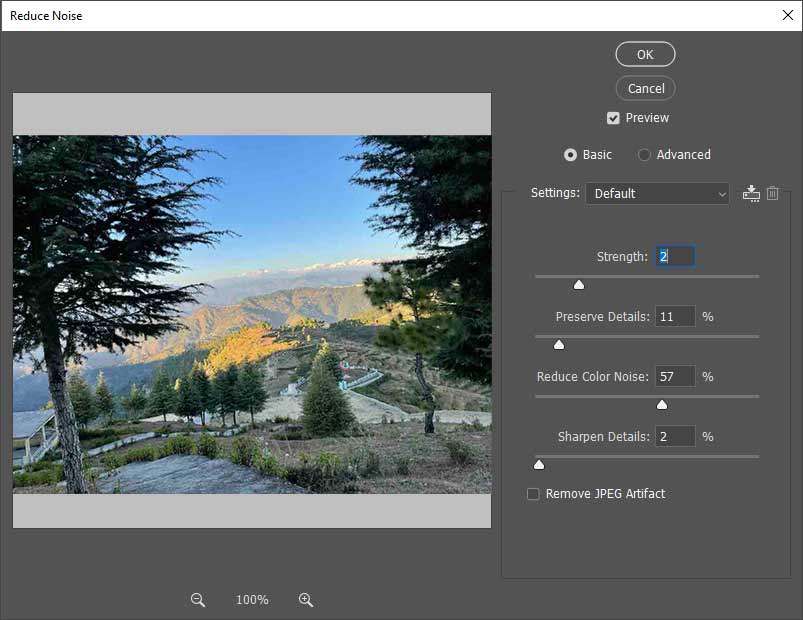
- Once you are satisfied with the noise reduction settings, click OK to save the changes.
6. Crop and Resize the Image
If your photo has unwanted elements or needs to be resized, use the Crop tool to completely transfer your photo. This tool can be used to remove unwanted or distracting elements, resize the image and help emphasize the focal point of the image. To do so,
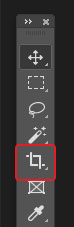
- Go to the Toolbar and select the Crop tool.

- Drag the crop handles present in each corner of the image.

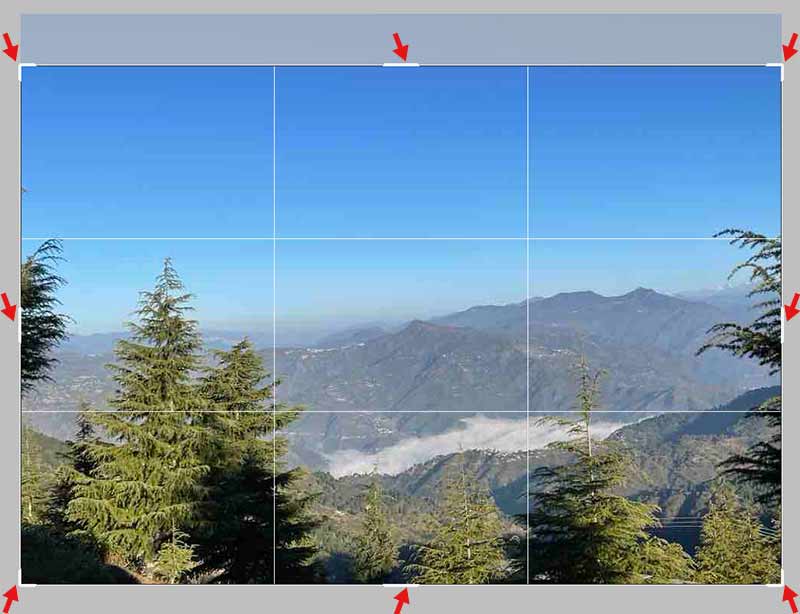
- Click and drag the handles to adjust the crop border to any size you need.
- Once you set the required crop, click the checkmark in the Options Bar. You can also press Enter in Windows and Return in Mac.
You can check the image size of the cropped image easily by doing the following:
- Go to the Image menu and click Image size.
- In the Image Size dialog box, you can resize the image as per your need. Click OK to save.


What to do if your photos get inaccessible or corrupt?
While transferring or sharing or uploading the image file, it can become corrupt either due to bad sectors or a virus attack on your storage device. In such a scenario, images might not open or if they open it appears to be greyed out or show a black screen, etc.
You can use a photo repair tool such as Stellar Repair for Photo to automatically fix damaged file headers, invalid file structures, invalid markers, etc. You can even repair inaccessible, fuzzy, tinted, grainy, faded greyed out, and other images.


Conclusion
Enhancing the quality of the photo with Adobe Photoshop can make your image look extraordinary. By adjusting the color balance, sharpness, brightness, and contrast, removing noise, and cropping the image, you make your image more appealing. With these tips and tricks, you can create stunning images that can impress the audience.
FAQ
1. How to Fix Bad Lighting in a Photo?
Bad lightning in a photo can be due to low-light conditions or bright daylight. Read this blog to learn how to fix bad lighting in an image.
2. How to fix pixelated images?
Your photos can be pixelated due to inappropriate resizing of images, wrong image compression or camera settings, corruption in the image file, etc. To fix the pixelated images, you can refer to this blog.
3. How to reduce noise in your photos?
Noise is an unfriendly element in your photos that can be due to high ISO, small sensors or low light situations, and others. Read this guide to learn ways to reduce noise in photos.

