Summary: Are you getting a blue screen on your Windows system with a stop code Critical Service Failed error? Time to try some proven methods to fix the error without any further delay. You can also use data recovery software to recover any important system data.

![Fix Critical Service Failed BSoD Error [Solved]](https://www.stellarinfo.com/blog/wp-content/uploads/2017/02/free-download-1.png)
As a responsible Windows user, you must install a security patch, system update, or driver on your system to keep it up-to-date. However, while installing a pending update, you may see a blue screen with the error code ?Critical Service Failed.?


What happened here?
What did I do wrong?
How do I fix it?
And many other thoughts may run into your mind in an instant. Well, you can breathe a sigh of relief, as this error is fixable with some easy methods discussed in this blog. Read on to know more.
CRITICAL SERVICE FAILED: Overview
The Critical Service Failed error is a Blue Screen of Death (BSoD) error. It contains a bug check value of 0x0000005A. The error usually appears due to incompatibility issues with your system’s freshly installed hardware or driver. The error may lead to several system problems. Multiple users have reported that they encountered the error usually after installing system updates. Some even said that they just got a pop-up notification to restart the system, and when they did so, their system rebooted with a Critical_Service_Failed error.
Due to this error, your system may get stuck in a booting loop. Or, in the worst case, it may crash frequently and reboot with the same error at every boot, leaving you in trouble.
Getting worried is understandable, as the error puts your system and data at risk. However, the data can be recovered using professional data recovery software. To fix the error, follow the methods shared below.
How to Fix Critical Service Failed Error?
Experiencing a blue screen of death (BSoD) error with stop code CRITICAL_SERVICE_FAILED is no joke. It can cause multiple problems for your system; hence, it should be fixed in time. We’ve shared some tried-and-tested methods with you.
Basic Troubleshooting Methods:
We’d advise you to first try the following quick fixes and see if they solve your problem:
1. Boot PC in Safe Mode
Safe Mode boots your Windows in the basic state with limited drivers and settings. It helps you narrow down the source of a problem and let you perform troubleshooting methods without error causing any interruption. Hence, try if you can boot your PC in Safe Mode.
2. Update Device Drivers
Once in Safe Mode, fix the error by updating the device drivers. The BSoD error may occur due to incompatible, corrupt, or outdated drivers installed on your system. You can update drivers manually by following the given steps:
- Press Windows + X and select Device Manager from the available options.
- Next, expand the device category you want to update the driver for and right-click on the driver; click Update driver.

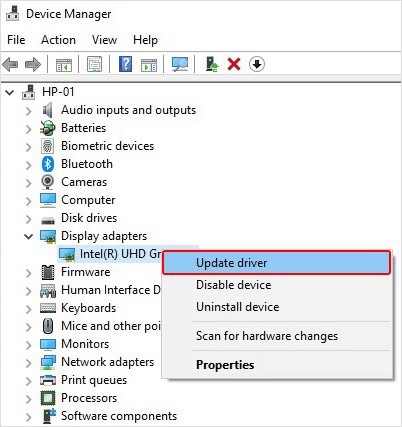
- On the next prompt, click Search automatically for drivers.

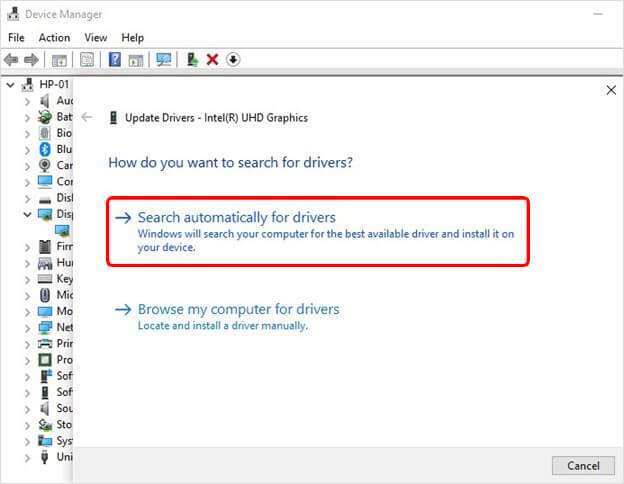
The Windows will scan and show the latest driver software available for your device (if any). Download that and reboot your system to check if the problem is fixed.
3. Uninstall Recently Installed Updates
Multiple users reported Critical Service Failed in Windows 10 after installing updates. It usually happens when a new cumulative update is installed due to bugs or incompatibility issues. Hence, you can uninstall recently installed system updates in Safe Mode. Here’s how to do so:
- Press Windows + I to open Settings; go to Update & Security > Windows Update > Update history > Uninstall updates.

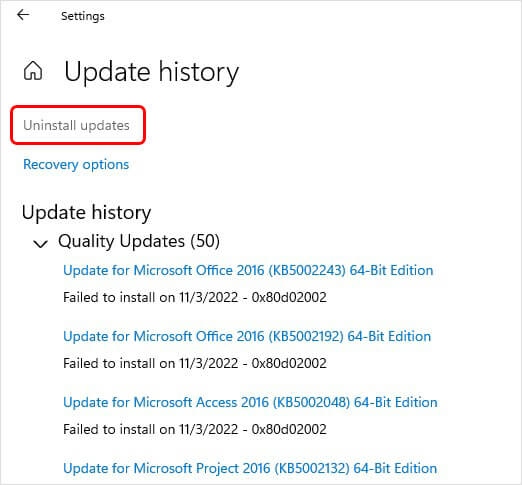
- Select the update you recently installed, right-click, and click Uninstall.

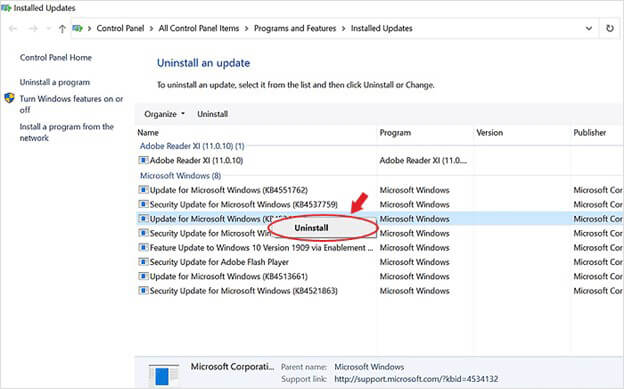
Once done, see if the error gets fixed.
4. Perform Clean Boot
This method is used when non-Microsoft products are causing issues on your system. To identify and fix the error stop code critical service failed, you can perform a clean boot. It will only boot the system with essential files and programs.
- Press Windows + R to open the Run Dialog box, type msconfig, and hit Enter.
- Navigate to Services > Hide all Microsoft Services > Disable all > Startup > Open Task Manager.
- Select every non-Microsoft service and click Disable.

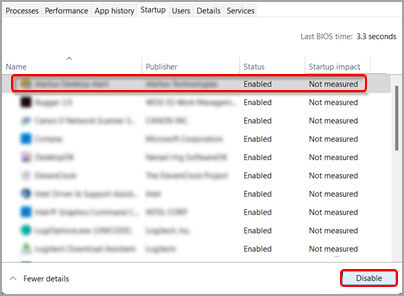
- Close Task Manager and click OK on the Startup tab of System Configuration when you reboot your system.
You’ll be in a clean boot environment. Now, check if the error is gone.
5. Run SFC Command
Sometimes, damaged or corrupted system files can also cause BSoD errors. Try running System File Checker to replace the damaged files with their correct versions and fix the problem.
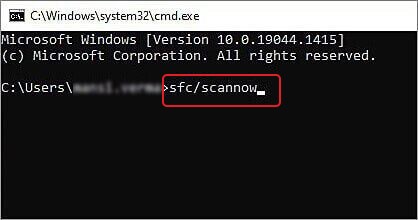
- Go to Search, type cmd, and click Run as administrator.
- Type SFC/Scannow and hit Enter. The scanning process for incorrect system files will start.

Once done, close the window, reboot the system, and check if the error is gone.
6. Run CHKDSK Command
There is a possibility that your hard drive may be the main culprit here. If the hard drive is corrupted or faulty, the Windows critical service failed error may appear on your screen. You can run the CHKDSK command on your hard drive to see and fix corruption or a bad sector.
However, there are two scenarios:
Scenario 1: Hard Drive is Aging
If your hard drive is aging, it may not perform well and cause several system issues, including BSoD Critical Service Failed error. Additionally, if the hard drive is obsolete, it won’t be able to survive the repair service, causing you complete data loss. Hence, we’d advise you to use a dedicated Drive Monitor, such as Stellar Drive Monitor to check the health status of your hard drive. If everything seems fine, recover data from the hard drive and proceed with CHKDSK repair.
Scenario 2: Faulty or Corrupt Hard Drive
If the hard drive is faulty, corrupted, or has bad sectors, it may cause a blue screen error on your system. However, performing CHKDSK repair scans marks the bad sectors on the drive and prevents Windows from reading and storing data from those sectors, causing data loss. Hence, we’d suggest backup or recovering your drive data before running this command.
Steps to Run CHKDSK Command:
After backing up or recovering data from your system hard drive, perform CHKDSK repair with the following steps:
- Run Command Prompt as administrator, type CHKDSK /f /r D:, and hit Enter. (Replace D: with your drive letter).

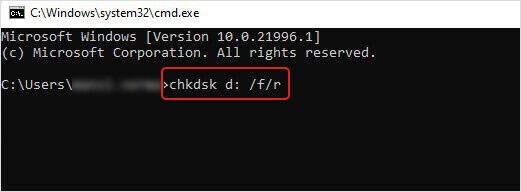
- Let the process complete. Once done, reboot your system and check if the issue is fixed.
Advanced Troubleshooting Methods:
If the above methods don’t work, try the advanced troubleshooting methods discussed below. These methods are performed in the Windows recovery environment. However, some of them may cause permanent data loss.
| Important Note: Since this BSoD error may prevent you from accessing the system and backup important files/folders, recover your data with reliable data recovery software, such as Stellar Data Recovery Professional. The software has a bootable recovery drive feature that lets you recover data from an unbootable or crashed Windows system. You can create and activate a bootable recovery drive, connect it to your affected system, scan the hard drive with the Quick Scan feature and retrieve your data on an external storage drive. Once you’re done recovering data, proceed with the troubleshooting methods discussed below. |
7. Perform System Restore
If your system is on, turn it off. Next, reboot the PC and the moment you see the Windows logo on the screen, turn the PC off. Repeat this method thrice, and you can enter the Automatic Repair environment.
- On the Automatic Repair page, choose Advanced options.

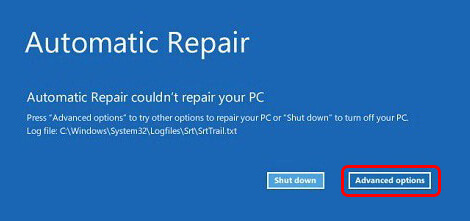
- Next, follow Troubleshoot > Advanced options > System Restore.

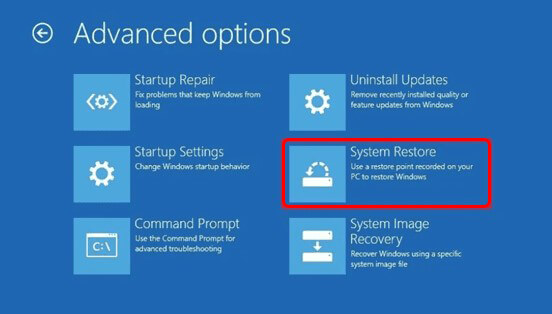
Use the System Restore utility to fix your Critical Service Failed BSoD error.
8. Reset Your PC
You can try resetting your PC to get rid of the error. However, resetting the PC will cause data loss. So, ensure that you have a backup or recover your data.
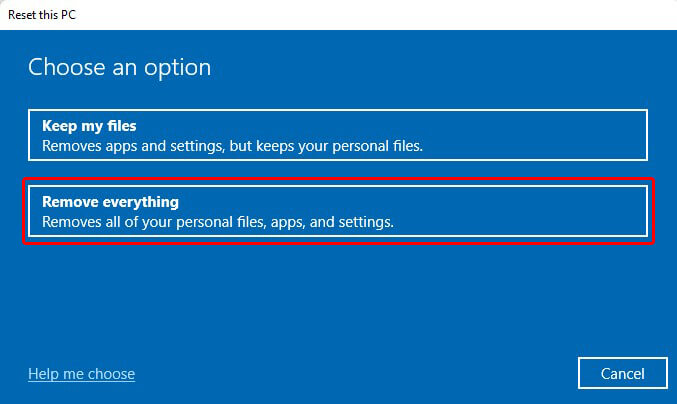
- Enter the Automatic Repair environment as discussed above and then follow Advanced options > Troubleshoot > Advanced options > Reset this PC.
- Next, you’d get two options ? Keep my files and Remove everything. If you have a data backup, Choose ‘Remove everything’ to remove all the faulty or corrupt system settings, drivers, apps, software, etc., and make the process work efficiently.

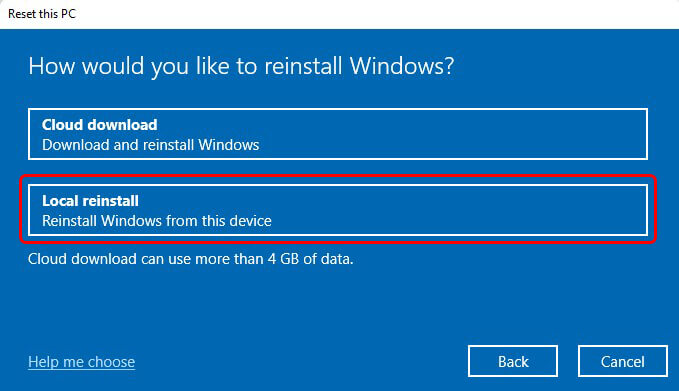
- On the next prompt, click Local reinstall.

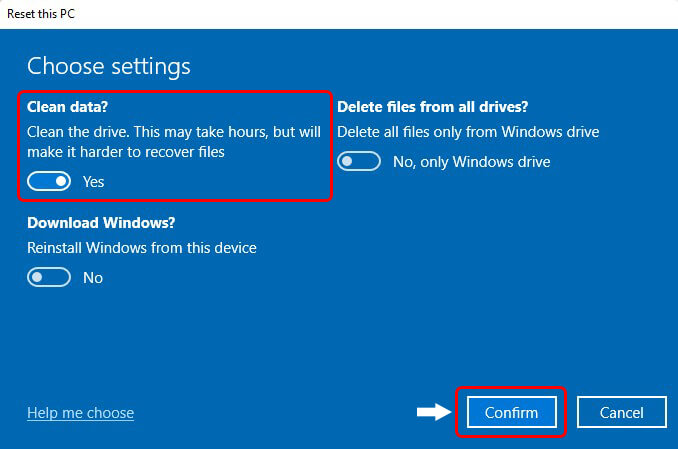
- If you’re ok with the current settings, click Next. Else, click Change Settings.

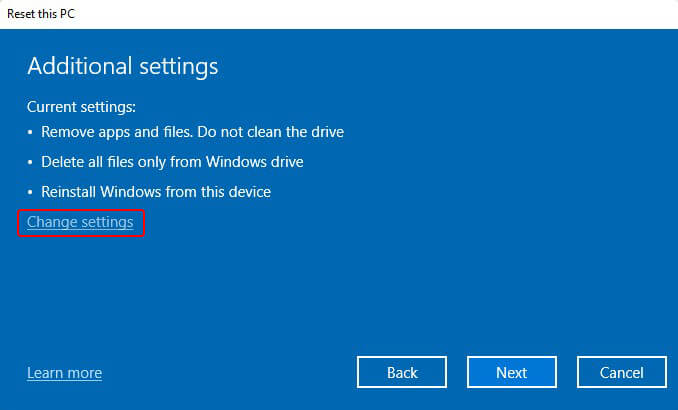
- Now, check the options and read the details given below. Then, choose the option at your convenience. For example, you may choose the Clean data option and finally click Confirm.

The process of resetting the PC will start. Let the process complete and reboot the system to check if everything is alright.
9. Perform a Clean Windows Installation
Some users reported that even resetting the PC didn’t work for them. When they reset their PC, it seemed like the error was gone. However, on rebooting the system, it started appearing again, and their system got stuck in a boot loop. In this case, one is left with no option but to perform a clean installation of Windows.
To perform a clean installation of your Windows OS, you’d need a bootable recovery media, which you can create using the Windows Media Creation tool on a fresh/formatted USB drive. Once you’re done creating USB Installation Media, connect it to your system and follow the steps to install Windows.
Remember, this process will remove the entire data stored on the drive on which it will be installed. In addition, the process needs the existing drives to be formatted and the creation of new partitions in the system. Hence, ensure you’ve already recovered your data.
FAQs
1. What causes critical service failure?
The Critical Service Failed is a blue screen of death (BSoD) error usually due to software corruption and incompatible hardware or drivers installed on your system.
2. How do I get rid of the blue screen on Windows 11?
You can try running a few proven methods to fix Windows 11 BSoD errors, given as follows:
- Run Windows Memory Diagnostic Tool
- Update/Rollback/Disable/Uninstall Device Drivers
- Run SFC Scan
- Scan PC for malware
- Perform System Restore
3. How do I get out of the Automatic Repair loop?
You can try Hard Reboot. It may help you get rid of the Automatic Repair loop. First, hard reset your system by pressing the Power Key until the system shuts down. Next, remove all the connected peripherals and now wait for 1 minute. Once done, restart your device, and it will complete the hard reboot process. Now, check if the problem is solved.


