Contents
Redundant Array of Independent Disks or RAID 5 is a logical arrangement of minimum 3 drives that act as a single virtual disk volume to facilitate faster read speed and fault-tolerance.


RAID 5 is popular among professionals and businesses as it’s the most affordable RAID array that facilitates faster read speed—equivalent to RAID 0—with redundancy.
However, a RAID 5 array protects against single disk failure only. It may unmount or fail to mount due to multiple disk failure or logical error caused by abrupt system shutdown, system crash, power surges or failure, malware/virus attack, and disk errors etc.
What to Do When RAID 5 Fails To Mount
When a RAID 5 volume fails to mount, the access to the data it contains is permanently lost. And there is no way to get it back other than fixing the error. In most cases, it’s rebuilding or reconstructing the RAID array.
However, before you head to the rebuilding process, check the SMART status of all member disks. Use the Drive Monitor or CrystalDiskInfo tool.
But a RAID 5 volume may fail to mount even after rebuilding process. It’s a complex situation, and you shouldn’t try to force mount the RAID. This happens due to some missing information (metadata) after rebuild.
In such cases, you should recover data by using a RAID 5 data recovery software such as Stellar Data Recovery Technician. Once you get back your data from a RAID 5 volume, reconstruct a fresh RAID 5 arrangement from scratch and restore your data.
Steps to Recover Data from Unmounted or Failed RAID 5 Array
Step 1: Disconnect Drives from the RAID 5 Array
Follow the steps in the given order to reconstruct a RAID 5 volume for recovery safely:
Remove RAID 5 drives from the array and connect them to a Windows system by using SATA connectors. You may also use SATA to USB converter cables.
Step 2: Check Drive Health & SMART Status
Free download, Install, and run Stellar Data Recovery Technician software. Then,
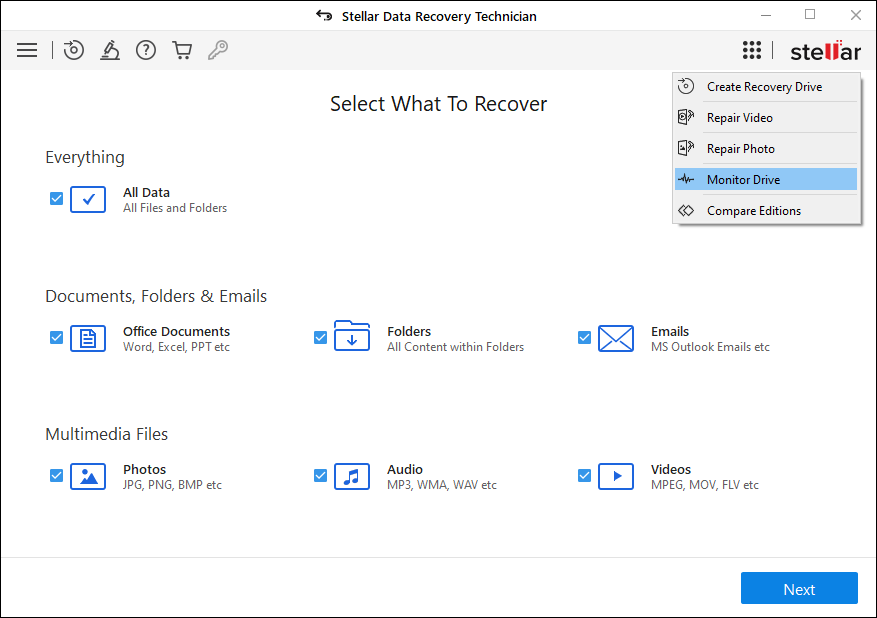
- Click the Waffle icon at the top right and select ‘Monitor Drive’ from the menu.

- Select connected RAID 5 drives from the top-left dropdown to check the drive health status.

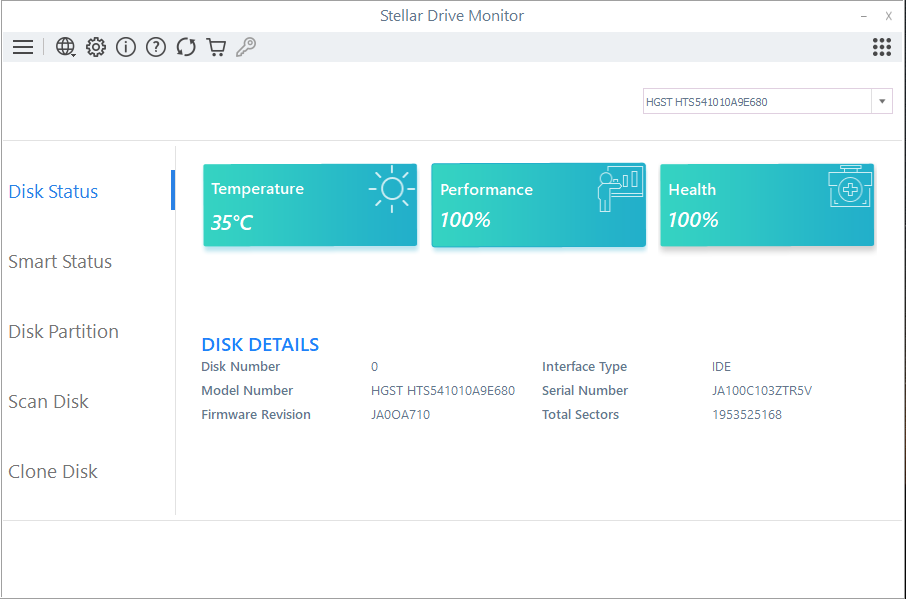
- You may further click ‘SMART Status’ to inspect the critical SMART parameters of the drive for a warning sign
- If there’s no warning sign and software displays vital stats as green, proceed with next step, else follow this guide to clone a failing drive (the drive(s) with health or SMART status warning)
Step 3: Reconstruct Unmounted RAID 5 Array to Recover Data
Close the Drive Monitor utility, start the software again and Then,
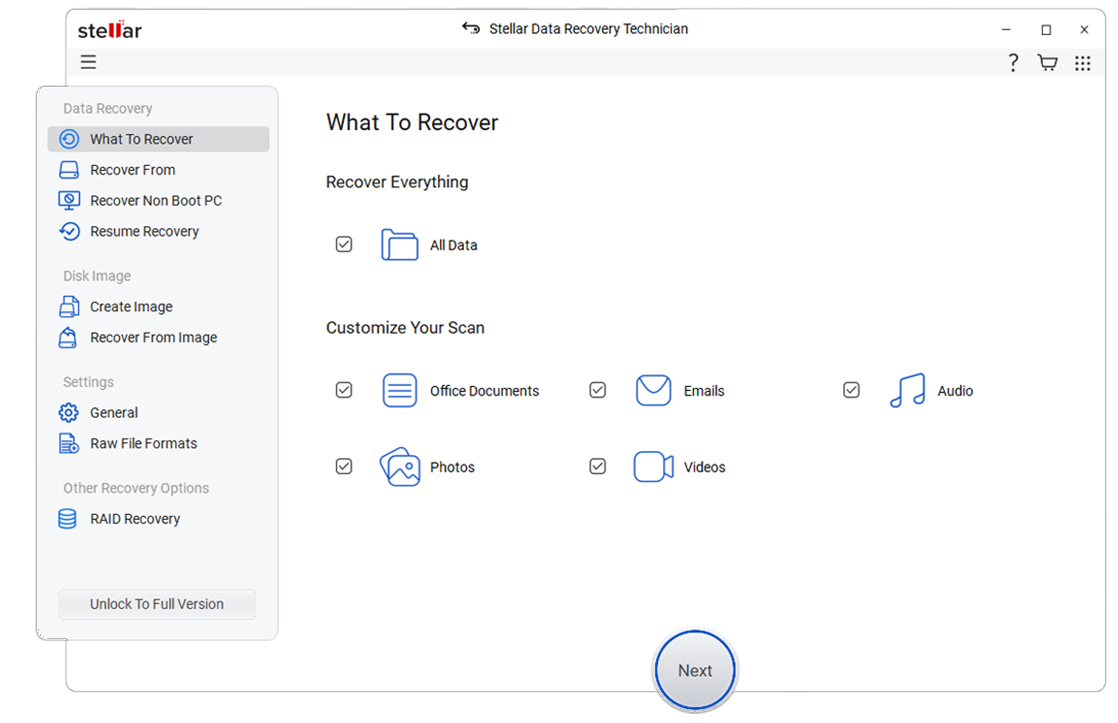
- Select ‘All Data’ and click ‘Next.’

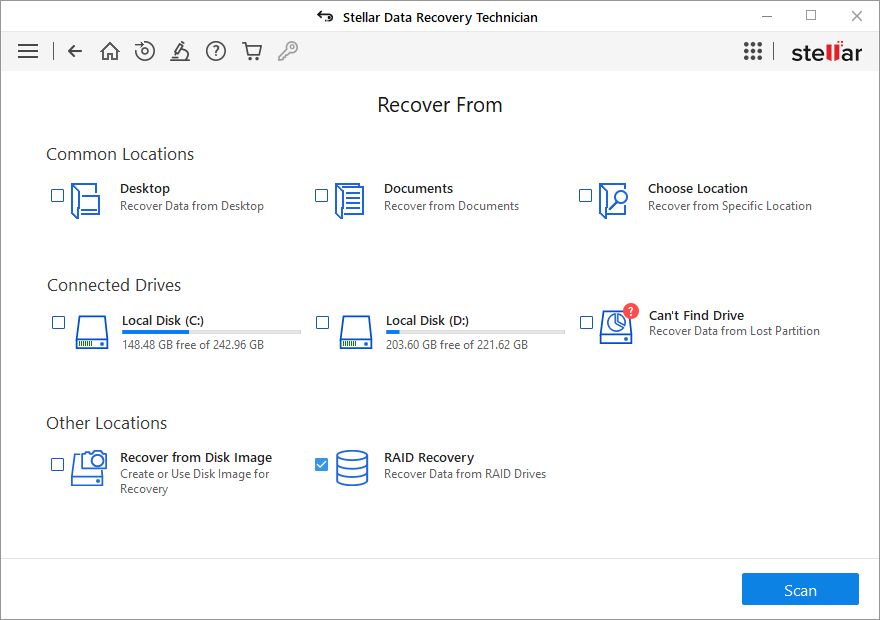
- Then on next screen- under Other Locations, select ‘RAID Recovery’ and click ‘Scan.’
- Click RAID 5 tab and use the left/right arrow button to select and move the RAID 5 hard disks listed under ‘Select Hard drives to reconstruct RAID’ to ‘Move hard drives up/down for disk order’ list box
- Use the up/down arrow buttons beside the added hard disks to arrange them in the same sequence as they were in the RAID array
- Enter or choose a start sector value
You may click the ‘Don’t know start sector of drives. Show a list of probable start sectors’ checkbox if you don’t know or remember the start sector. Then choose one or more probable start sector(s) or add desired start sector in the text box if it’s not listed in the checklist box
- Then click the ‘Add Sector’ button

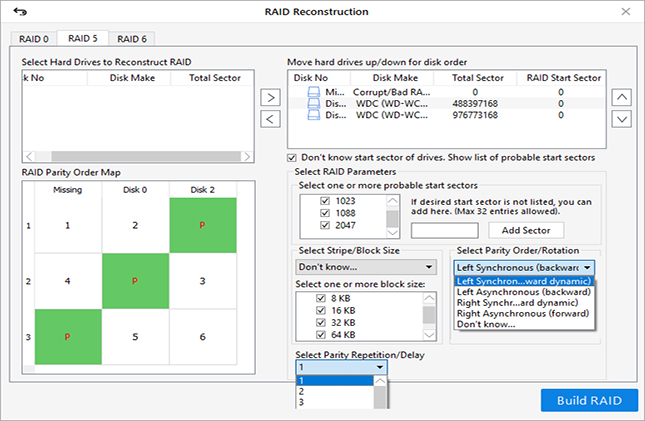
- Choose Stripe/Block Size; Select Parity Order/Rotation and then select the parity repetition or delay from respective dropdowns.
Select ‘Don’t Know’ from the required parameter drop-downs if you don’t know or remember the required RAID parameters, and click ‘Build RAID’. The software intelligently rebuilds a few probable RAID constructions, which you can scan to get back lost data
- Click the ‘Build RAID’ button
- The software quickly reconstructs RAID 5 volume based on provided parameters. After reconstruction is finished, constructed RAID 5 volume(s) is displayed in the ‘Select Constructed RAID’ window. Click ‘Show Volume List’ to view reconstructed RAID 5 volumes
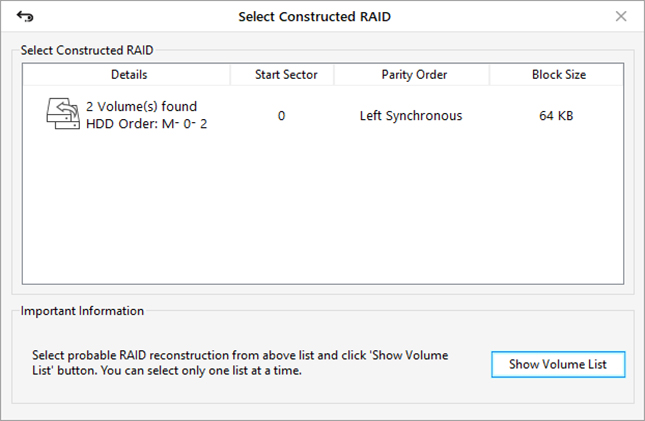
TIP: In case the desired RAID 5 volume is not listed, choose ‘Physical Disk’ and click ‘Scan’ to recover from missing RAID 5 volume (see screenshot below)
- Select the RAID 5 volume from the list and click the ‘Scan’ button. Wait for the scan to finish

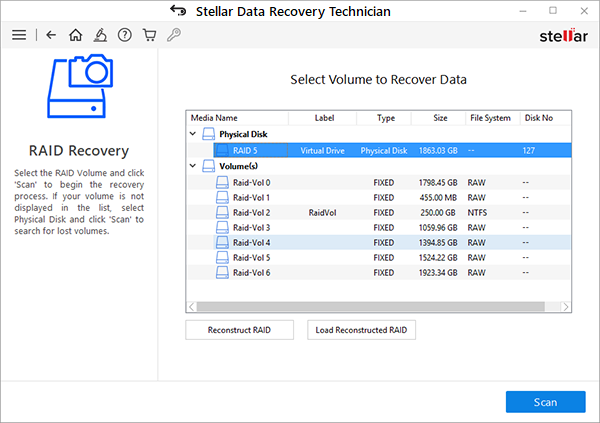
- Click ‘Click Here’ link beside Deep Scan text at the bottom to start a through scanbased on file-signatures. Use it when the desired files are not found in the scan results
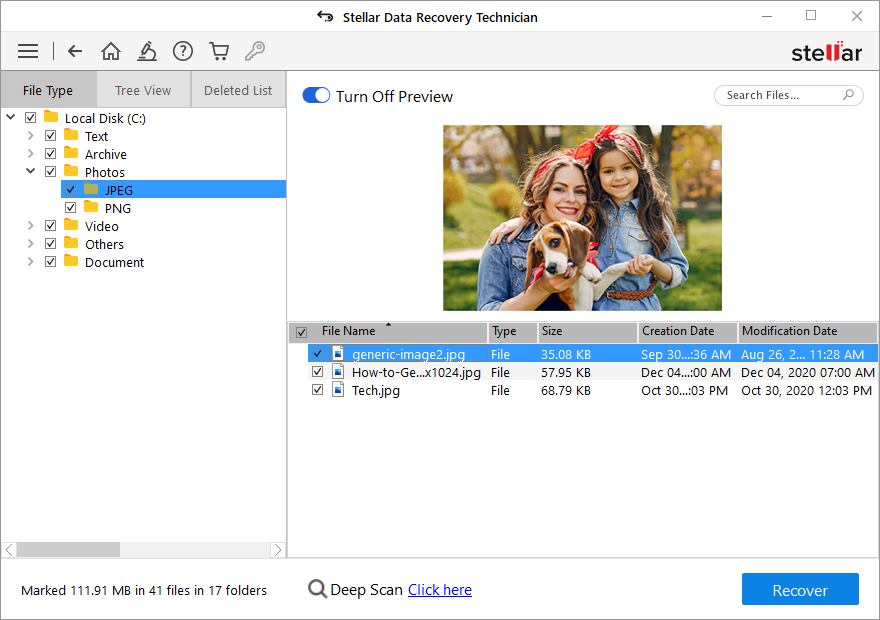
- Click on a file to see its preview or select the check boxes of a file or folder that you wish to recover
- Then click Recover>Browse to choose a location on a separate internal or external disk where you want to save the RAID 5 recovered data.
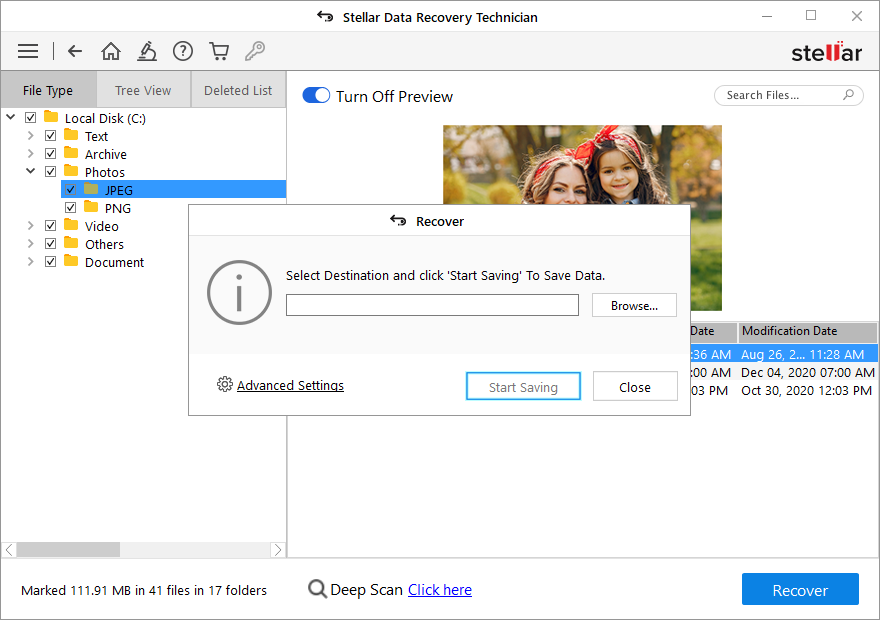
Do not to select any of the connected RAID drive volumes.
- Finally, click ‘Start Saving’ to save selected files and folders at your desired location
Conclusion
Keep a regular backup of data stored on your RAID 5 array. RAID 5 provides fault-tolerance; however, it is prone to logical errors. Thus, it’s not fail-proof and requires a backup. Follow the 3-2-1 backup rule for critical data backup. Use external drive and cloud storage for ‘not so important’ files.
And use Stellar Data Recovery Technician software to reconstruct and recover data from a damaged, failed, or unmounted RAID 5 configuration, when the backup is obsolete or not available.
The RAID Data software also helps you repair corrupt photos and video files, actively monitors disk health, and facilitates data recovery from all kinds of Windows storage media and RAID 0, RAID 5, and RAID 6 arrays.