Summary: If you are reading this, you must be looking forward to try out the newly released macOS Sonoma. Before you start, back up your important files and install software like Stellar Data Recovery Professional to be able to restore your data in case something goes wrong.


Updating your Mac to the most recent macOS Sonoma version gives you new features, improvements, and security patches. Yet the task can seem very daunting, especially when it comes to safeguarding your data. In this article, we will walk you through the steps to upgrade to the macOS Sonoma without losing your data.
How to Prepare Your Mac Before Installing macOS Sonoma?
Before installing the newest macOS 14 version, let?s do some preparation ? backup your Mac and check if there are no compatibility issues.
1. Back Up Your Data
Creating a backup of your macOS Ventura (or any other macOS version you have installed) is an important measure to secure your files. You can use Apple?s own backup system features to backup your Mac ? Time Machine and iCloud.
- Time Machine is a built-in backup feature that backs up your apps, accounts, settings, music, photos, movies, and documents. To set up Time Machine, plug in an external storage device to your Mac, then go to System Settings > General > Time Machine. Click Choose Backup Disk and select your external storage device for backups.

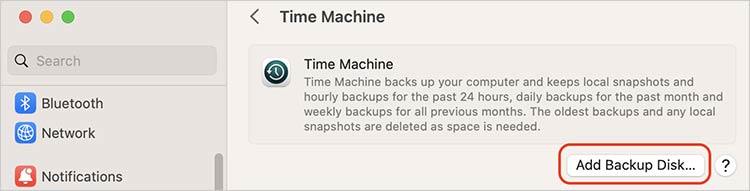
After Time Machine is set up, it automatically backs up your Mac.
- iCloud is a cloud-based service where you can back up your Mac. To back up your Mac with iCloud, go to System Settings > Apple ID > iCloud. Choose the items you?d like to upload to iCloud.

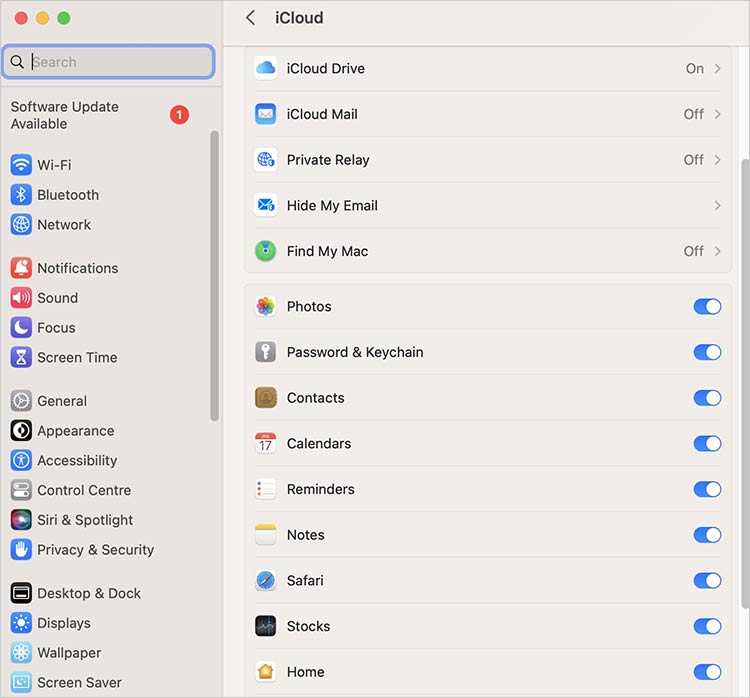
You get 5GB of storage space free with iCloud. However, you can buy more if necessary.
2. Check System Requirements
Verify that your Mac meets the system requirements for the latest macOS Sonoma version. Here is the list of Macs where you will be able to run macOS 14:
- iMac 2019 and later
- Mac Pro 2019 and later
- iMac Pro 2017
- Mac Studio 2022 and later
- MacBook Air 2018 and later
- Mac Mini 2018 and later
- MacBook Pro 2018 and later

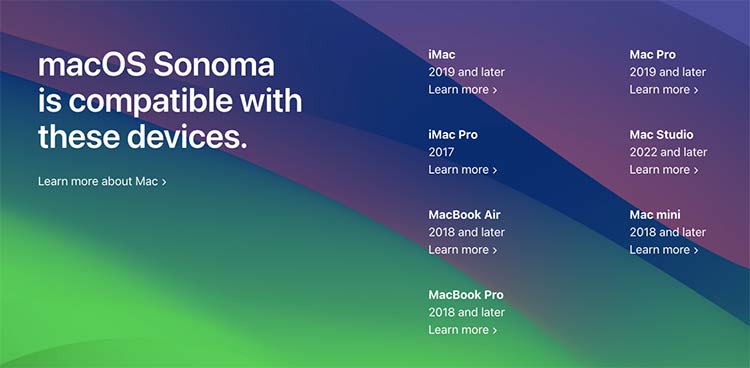
You can also check the details on the official Apple website.
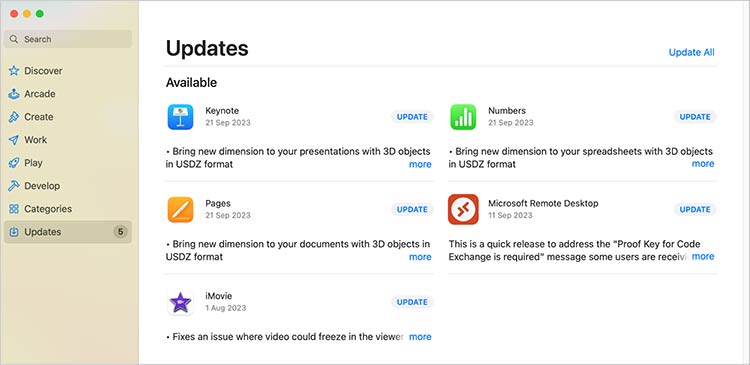
3. Check App Compatibility
Ensure app compatibility with the latest version of macOS Sonoma, as some apps might need updates for proper functionality. Go to the Mac App Store or app developer?s website and download and install any required updates.

4. Check Internet Connection
Check that you have a stable and reliable internet connection. macOS Sonoma may require downloading a significant amount of data during the installation process.
How to Install macOS Sonoma
Let’s proceed with the instructions to start the installation of macOS Sonoma, ensuring a smooth and easy process.
Download and Install the Latest macOS Sonoma
There are two easy ways to install the macOS Sonoma on your Mac. Let?s explore each of them.
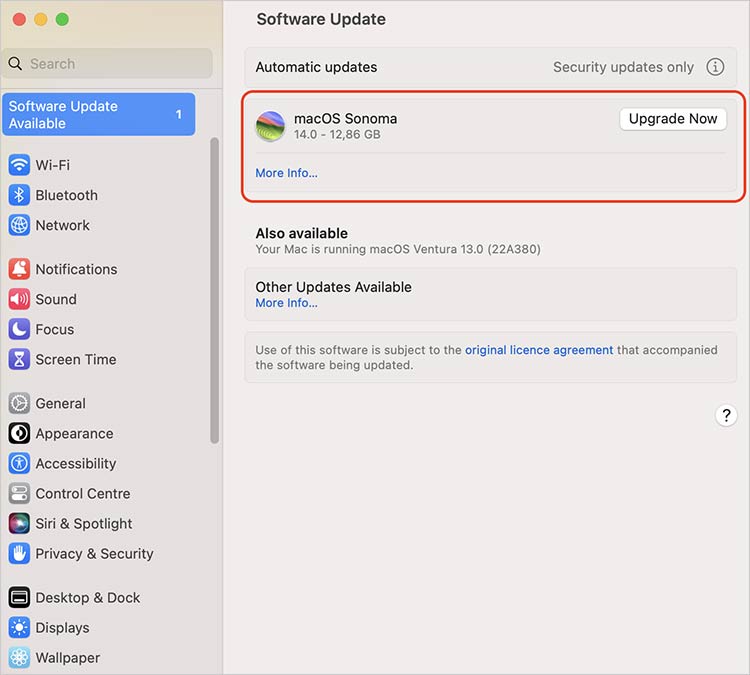
1. Using System Settings
Using System Settings is the easiest way to install any macOS update. Here’s how you can do it:
- Open System Settings from the Apple menu.
- Go to General > Software Update and check whether the macOS 14 is available to install.
- Click Upgrade Now.

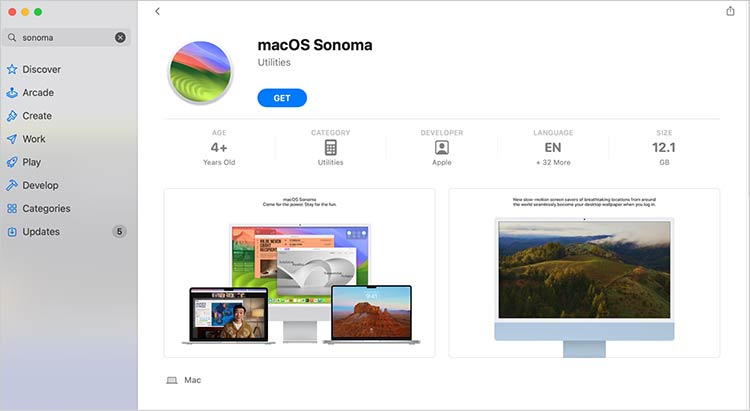
2. Install macOS Sonoma via the App Store
Additionally, instead of using the System Settings, you can make an update from the App Store. Follow these steps:
- Open the App Store.
- Search for macOS Sonoma in the top-left corner.
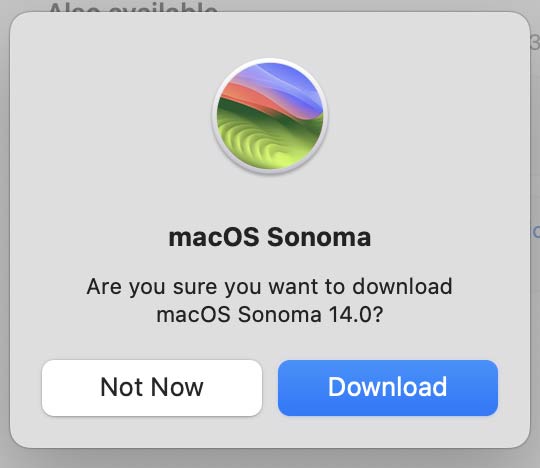
- Click Get.

- In the end, click Download to start the installation process.

Restore Data from Backup
After installation is finished, macOS will boot into the latest version. To retrieve your data, follow these steps:
- When prompted, select the option to migrate data from your Time Machine backup or external hard drive.
- Choose the backup destination, and then follow the on-screen steps to recover your files and configurations.
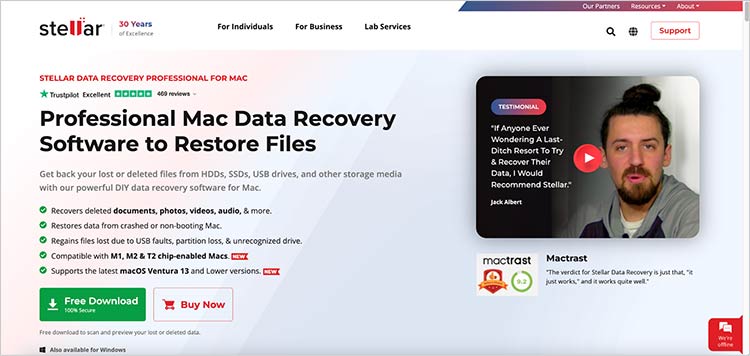
Use Stellar Data Recovery Professional to Restore Lost Files
If you suffer from data loss at any point during the macOS installation, Stellar Data Recovery Professional for Mac can be a lifesaver. This powerful data recovery tool is created to restore deleted or lost files from all Mac storage devices, such as internal and external drives.
To use Stellar Data Recovery Professional, follow these steps:
- Download and install Stellar Data Recovery Professional on your Mac.

- Launch the application and select the type of data you want to recover.

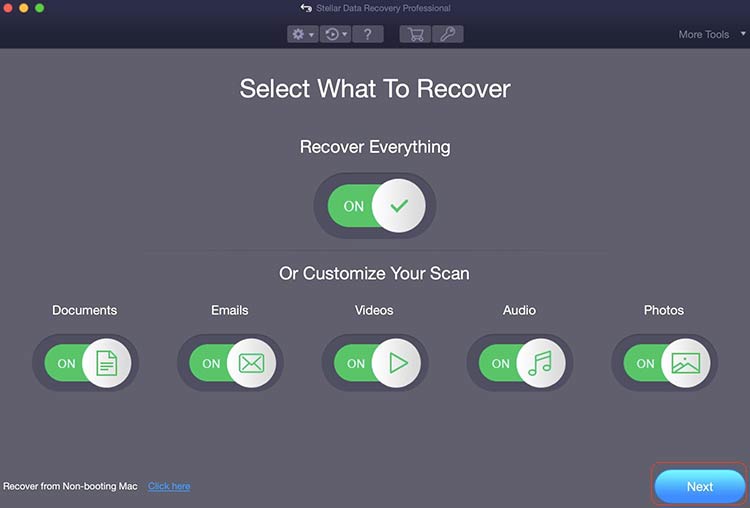
- Choose the location where the lost data was stored.
- Scan for lost files and preview the recoverable data.
- Select the files you want to recover and click the Recover button.
- Specify a location to save the recovered files.
- Once the recovery is complete, access your restored data.
Wrapping Up
By carefully following these steps, you can successfully upgrade your Mac to macOS Sonoma and keep all your existing data untouched. Make sure your backups are kept current so you don?t risk data loss later. Also, we recommend installing Stellar Data Recovery Professional to add another layer of security to keep your data safe, even in the most unpredictable scenarios. Your Mac gets the latest features and improvements while your important data remains untouched.
Read more:

