Summary: Do you want to create or modify a hard drive partition? Read this blog to get help on how to partition a hard drive on Windows 10. You may also recover data from formatted or deleted drive partitions using reliable data recovery software, such as Stellar Data Recovery for Windows. Download the trial version below!


Usually, a Hard Drive comes with a single collated storage memory that you may logically divide into separate partitions. People usually partition a hard drive to organize or manage their data into multiple virtual drive volumes.


Partitioning a hard drive is undoubtedly a great way to make the most of all the space you?ve got. You can Create, Shrink, Extend, Format, or even Delete the hard drive data on Windows 10. And, it?s pretty easy. But careful! If you do it wrong, you may end up losing your data forever.
Of course, you don?t want that to happen. So before getting started, take backup of your essential data to prevent data loss. You can use an external storage media drive, such as SSD, HDD, USB, etc., to create the backup.
Once the job?s done, start partitioning your hard drive with the easy DIY methods shared in this blog.
How to Partition Hard Drive in Windows 10?
A. Steps to Create Partition of Hard Drive
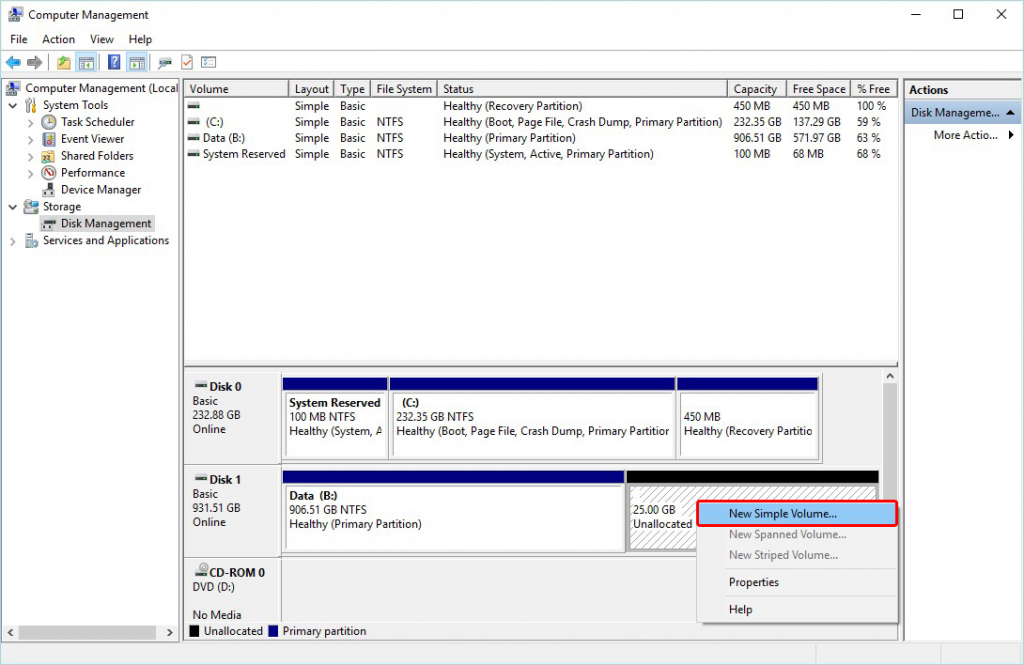
You can create a new partition by shrinking an existing one. However, it may appear as ?Unallocated.? You may convert unallocated disk space into a healthy useable partition with the following steps:
a. Locate the unallocated disk space, right-click on it, and select New Simple Volume. (See Image 1)

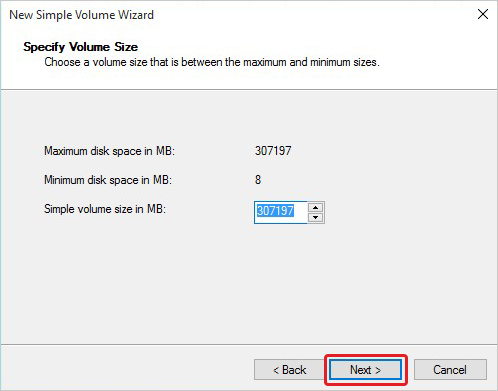
b. Click Next in the New Simple Volume Wizard.
c. Now, specify the volume size you want to create or accept the default size. Then, click Next. (See Image 2)

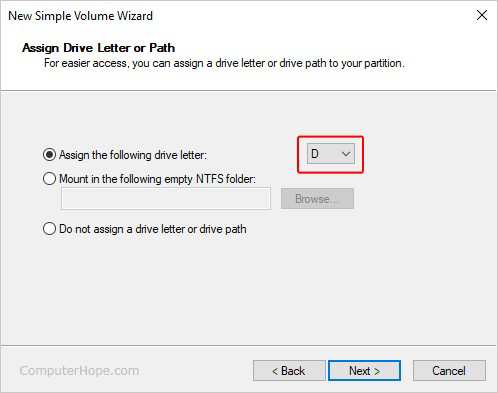
d. Now, assign a drive letter to the hard drive partition from the drop-down list, and click Next. (See Image 3)

e. Now, select ?Format this volume with the following settings:? choose NTFS or ReFS with other details, and click Next. (See Image 4)

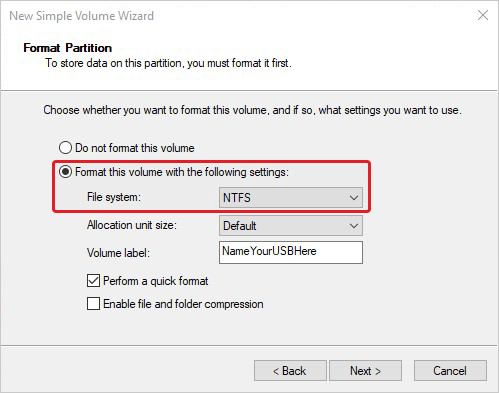
f. Finally, click Finish to partition a hard drive successfully.
g. A new hard drive partition is ready to use.
B. Steps to Shrink a Hard Drive Partition
Suppose you need an extra partition to manage your data but don?t have any additional disks. In this case, you may shrink the existing partition from the end of the volume to create an ?Unallocated? disk, which can be created as a new partition. Follow the given steps to shrink an existing drive volume:
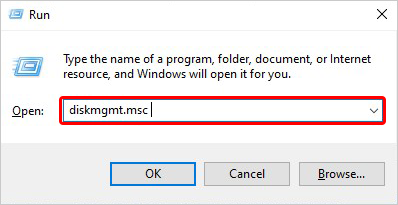
a. Press Windows + R to open the Run dialog box, type ?diskmgmt.msc? and click ?OK? or press Enter to open Disk Management. (See Image 5)

b. The Disk Management window will open with a list of all the hard drives connected to your system.
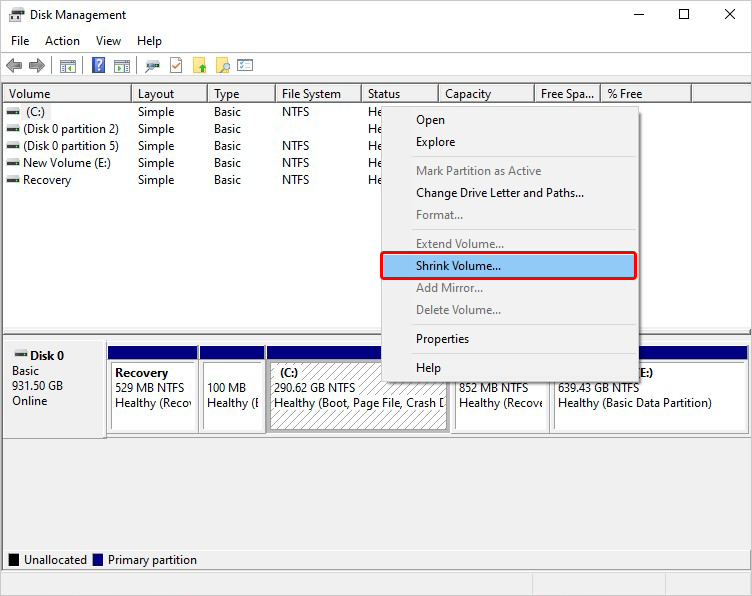
c. Right-click on the hard drive you want to partition and select ?Shrink? from the available options. (See Image 6)

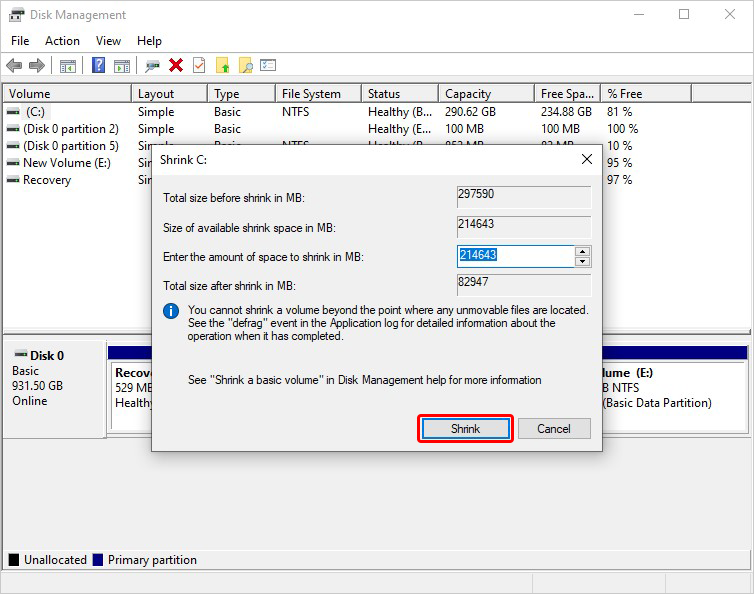
d. Now, enter the amount of space to shrink in MB and click Shrink. (See Image 7)

e. Space will appear as ?Unallocated? in the Disk Management. Now, convert it into a functioning hard drive partition.
C. Steps to Extend a Hard Drive Partition
If you want to add more space to an existing drive partition, you can extend it, but only if there is a partition available with storage but no drive letter or file system assigned to it. Follow the given steps to extend a volume into space directly after the partition on the drive:
| Note: The partition you want to extend should also be formatted with the NTFS or ReFS file system. |
a. Open the Disk Management with the admin rights.
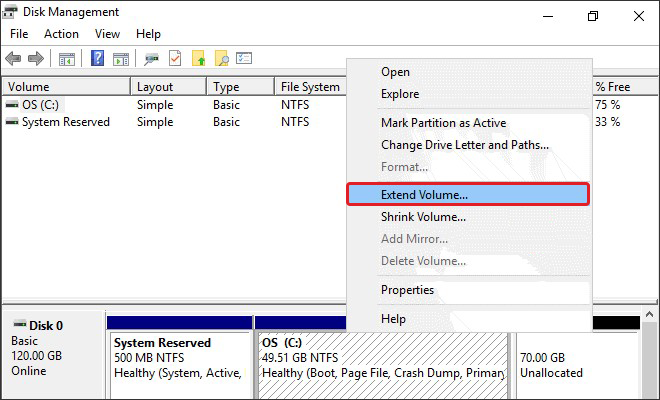
b. Select the volume to which you want to add more space and click ?Extend Volume??. (See Image 8)

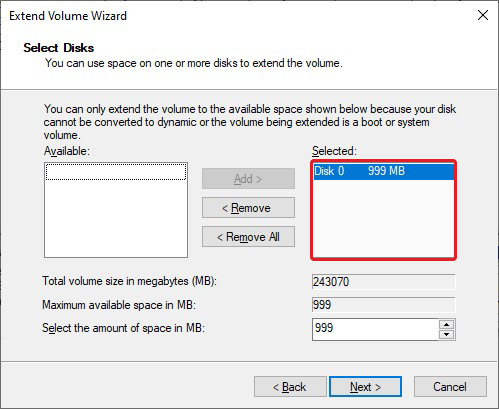
c. Click Next and then on the Select Disks wizard, enter how much size you want to extend, or use the default size and click Next. (See Image 9)

d. Click Finish to complete the process and close the wizard.
D. Steps to Delete Hard Drive Partition
Sometimes, you may want to increase the size of another drive volume or get rid of the partitions that are no longer in use. To do so, you may clean the storage by deleting the hard drive partition.
Important Note: Deleting drive volume may erase all of your data stored on it. If there are important files that you want to save, take their backup first or recover them using reliable data recovery software. Once you have got your files, you may proceed with deleting the hard drive volume.
Follow the given steps:
a. Open Disk Management and select the drive volume you want to delete.
b. Right-click on the volume and click Delete Volume. (See Image 10)

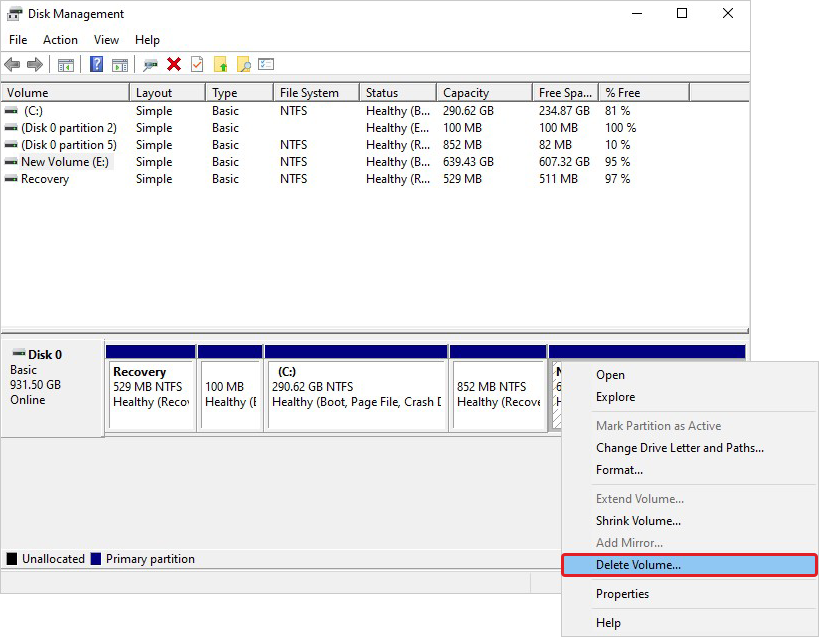
c. Click Yes to delete the partition.
d. Once done, you may use the available storage space to create a new drive partition or extend the existing partition to add more storage to it.
E. Steps to Format Hard Drive Partition
You may encounter several disk errors with your hard drive, such as ?You need to format the disk in drive before using it,? ?SMART Hard Disk Error: 301,? ?I/O Error? etc. And to fix this error, you may want to format the drive. Formatting the drive may help you get rid of this error but will end up causing data loss. You may recover lost data using efficient data recovery software.
To format the drive volume, follow the given steps:
a. Go to Disk Management, locate the drive partition you want to format.
b. Right-click on the volume and choose to Format it. (See Image 11)

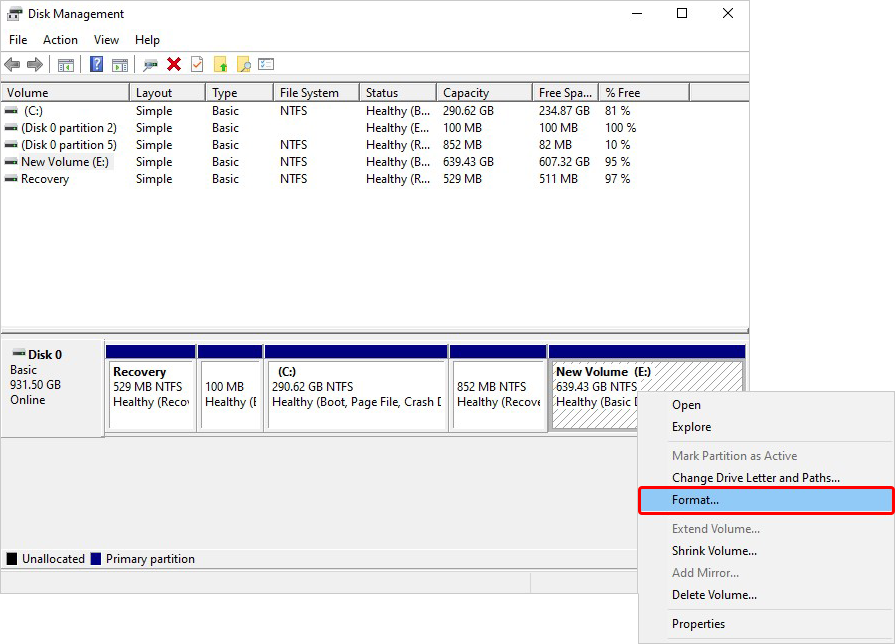
c. Now, click OK > OK again to complete the process.
d. Once the process is done, close the window.
Remember, after formatting the drive, you will end up losing data. We recommend using powerful data recovery software, such as Stellar Data Recovery for Windows.
This DIY data recovery tool can help you retrieve all your files, folders, etc., in all data loss scenarios, such as deletion, drive formatting, corruption, and more. You may check the video to learn how to recover data from deleted, formatted, or deleted drive partitions:

[Caution: Don?t save the recovered files to the exact location or drive to prevent data overwriting. Always choose a separate storage drive or partition to save the restored files, folders, photos, etc.]
EndNote
Undoubtedly creating or modifying your hard drive partitions helps you manage your files, folders, photos, videos, and more. But before you partition a hard drive, take the backup of your data first, so you don?t end up losing access to your data.
If you forgot to back up your files, don?t stress out. You may use an efficient data recovery software, such as Stellar Data Recovery for Windows. This DIY software can recover data from deleted, formatted, or even corrupted hard drive partitions.

