Summary: In this post, we are going to know what are the possible manual as well as alternative methods to fix raid failure after upgrading BIOS, and how Stellar Data Recovery Technician software can help get your lost data back.
RAID is a redundant array of independent disks that provide failover protection in data storage. However, a RAID can fail at any time due to various factors such as power failure, disk failure, hard drive corruption, sudden power surge, etc. But the most common reasons to why RAID fails are related to hardware & software failure.
In a software controlled RAID array, the array information is saved on the compatible system?s BIOS. When the BIOS is upgraded or reset to defaults settings, RAID configuration also changes that leads to RAID failure after upgrading BIOS.
Moreover, removing the CMOS battery (Complementary metal-oxide-semiconductor, a small amount of computer memory on RAID controller or motherboard that stores BIOS settings) from the motherboard/RAID controller board resets the BIOS to defaults thus resulting in RAID failure.
Although RAID failure after upgrading BIOS or reset can be fixed by altering BIOS settings and recreating the RAID array. In case that doesn?t work, we have also mentioned an advanced option that can help you reconstruct RAID array for RAID data recovery, recover data from it, and then recreate a new RAID array through BIOS utility.
Solution 1: Check SATA Cable, Power Cable, and CMOS
Check whether the CMOS is connected to the motherboard or not. Also, check for any loose SATA or power connection to your hard drives. Sometimes, we fail to verify the basic connectivity. If all connections are intact, then the problem lies with Settings.
The next solution details resetting BIOS.
Solution 2: Re-Enable RAID from BIOS
A BIOS reset due to CMOS removal or restoring defaults can lead to RAID failure. Resetting BIOS switches the controller back to AHCI mode from the RAID. This can be solved by switching controller to RAID from AHCI mode. Follow the steps to switch controller to RAID from AHCI mode:
- Turn on the System and immediately start pressing press F2 key to ?Enter? the BIOS settings.
- Go to Advanced>IDE Configuration>Configure SATA as using arrow keys on the keyboard and then press ?Enter? key
- In the Configure SATA as options, select RAID
- Press F10 to save changes & exit the BIOS utility
This should most probably fix the RAID issue. If not, try Solution 3 of recreating the RAID.
Solution 3: Recreate the RAID
In case re-enabling RAID from AHCI doesn?t help, a recreation of RAID array is required to fix the RAID failure due to BIOS upgrade. Follow these steps to recreate RAID in your system:
- After enabling RAID, shutdown and then start the system. Immediately press ?CTRL+I? to enter Configuration Utility & create RAID volume. Don?t format drives as you will lose all data from the drive.
- In case there is no other way other than formatting to re-create RAID array, go to solution 4 and perform RAID array recovery from the failed Later, recreate RAID using the ?Configuration Utility? or Intel Matrix Storage Manager
However, this process is complex and requires time. Also, successful RAID recreation is not guaranteed. Most importantly, this doesn?t work for the RAID that is used as the primary volume in the system.
If you are not able to re-create RAID, then opt for the best solution.
Solution 4: Reconstruct the RAID Volume and Recover Data
RAID failure recovery software such as Stellar Data Recovery Technician can help reconstruct a RAID array in case it fails on your system. All you need is a working Windows PC with Stellar Data Recovery Technician installed and SATA connectors to connect RAID drives to the system. You can also use SATA to USB converter cable or HDD enclosures to connect your failed RAID drive to the working Windows PC via USB port.
Once connected, follow these steps to reconstruct the RAID volume and proceed to RAID array recovery. Later you can format drives and create a new array on your system.
1. Launch Stellar Data Recovery Technician software.
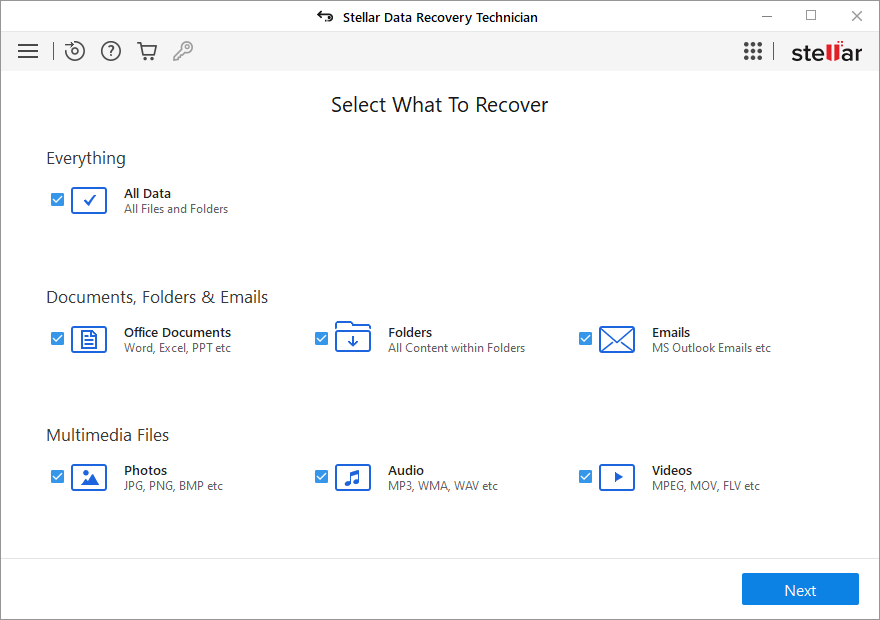
2. Choose What to Recover. Click ?All Data? to recover all file types and then click Next.

3. Click on RAID Recovery option. A new RAID Reconstruction window appears.
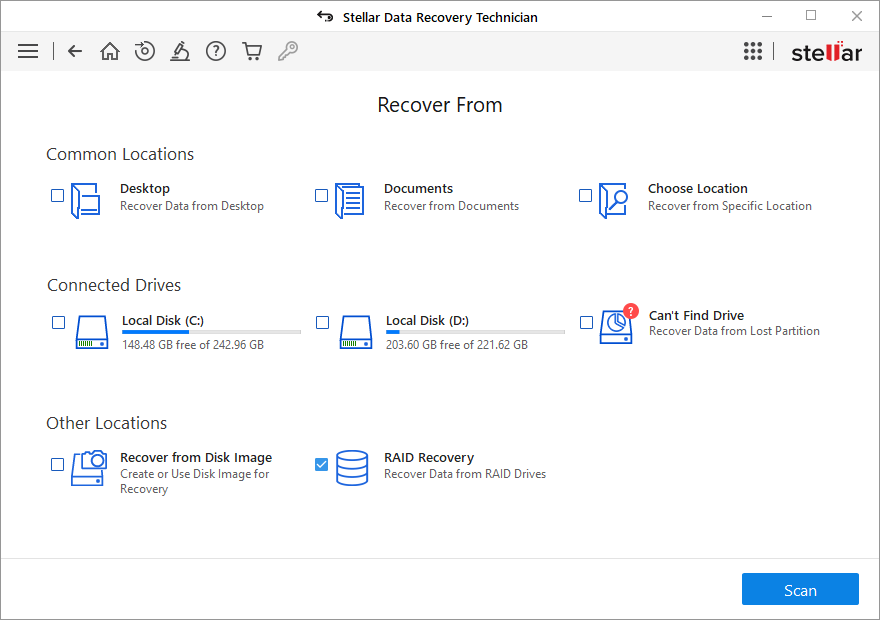
4. Click the ?Scan? button. A new ?RAID Construction? Window appears.

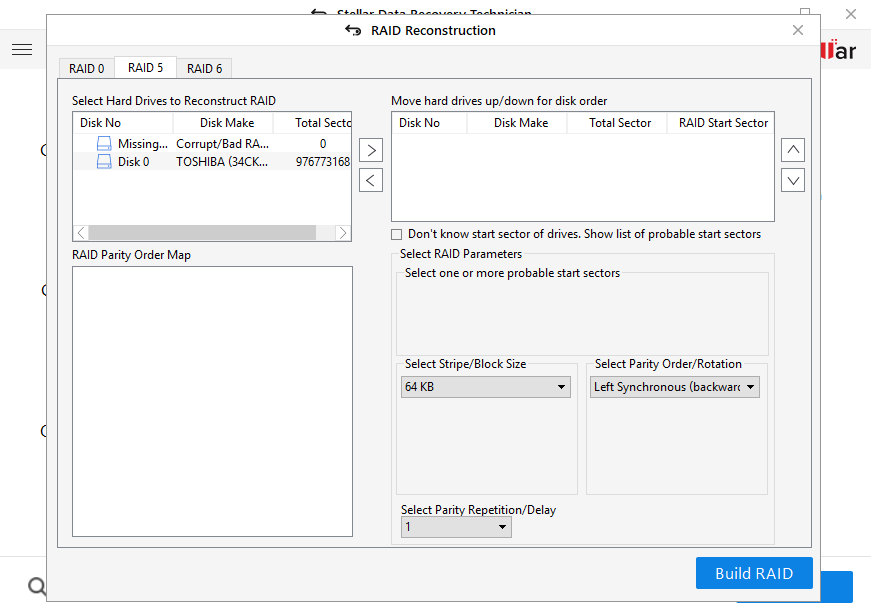
5. Click either RAID 0, RAID 5 or RAID 6 tab as per the RAID configuration you had. All the drives connected to the system are visible under ?Select Hard drives to reconstruct RAID? list box
6. Click on RAID HDDs, one at a time, and use the arrow button to add or remove drives from the ?Select Hard drives to Reconstruct RAID? list box to ?Move hard drives up/down for disk order? list box
7. Use the up or down arrow buttons adjacent to the list view box and arrange disks in the same sequence as they were in the RAID array
8. Click the ?Don?t know start sector of drives. Show list of probable start sectors? checkbox if you don?t know the required parameters and start sector of the drive. A new checklist box appears in the ?Select RAID Parameter? section
9. Choose one or more probable start sectors or add desired start sector in text box & click on ?Add Sector? button (max 32 sectors can be added) when it?s not listed in the checklist Skip this step if you know the RAID parameters.

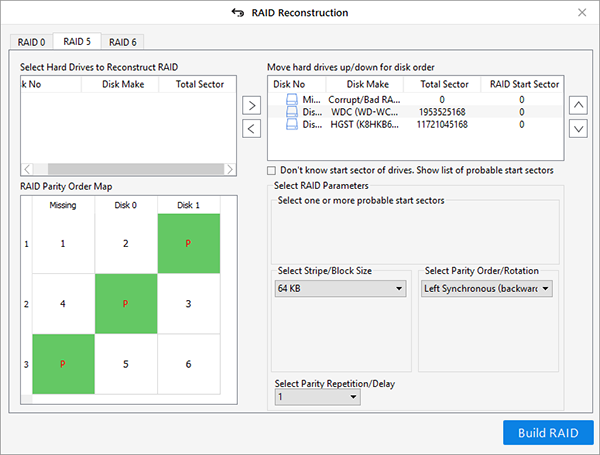
10. Choose RAID parameters from the ?Select Stripe/Block Size?; ?Select Parity Order/Rotation? drop-down, and from ?Select Parity Repetition/Delay? dropdown. It is presumed that these values are known to the RAID admin or user who built it.
11. After adding and selecting the RAID parameters in the software, click ?Build RAID?.
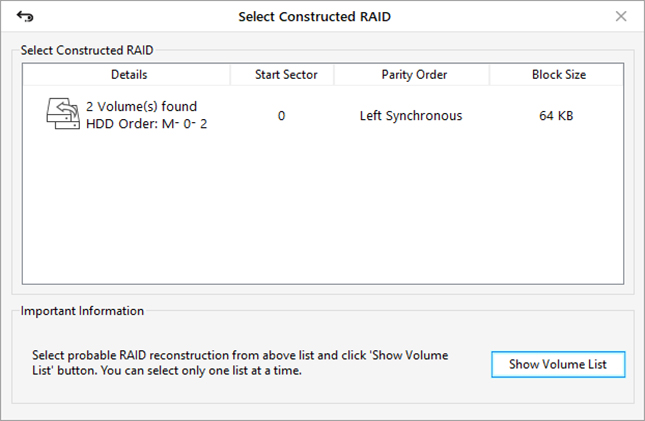
12. Constructed RAID volume details are displayed in the ?Select Constructed RAID? window.
13. Click the ?Show Volume List? button.

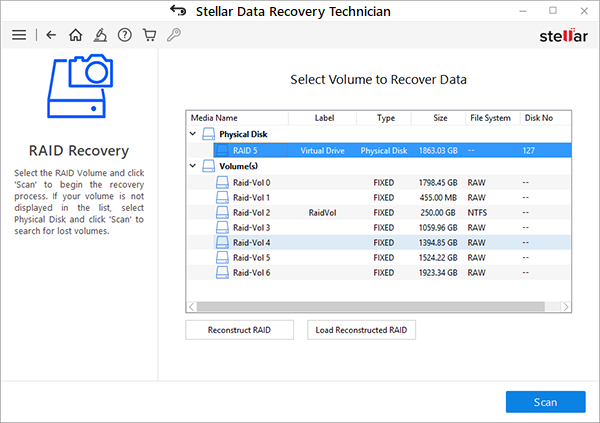
14. In ?Select Volume to Recover Data? windows, choose the volume from the listed volumes of the reconstructed RAID ? from where data is to be recovered.
15. After selecting the RAID volume, click the ?Scan? button. Wait until the scan is finished.

16. Click on blue colored ?Click Here? link beside Deep Scan text at the bottom of the software to start ?Deep Scan? process if the desired files are not found in the scan results during Raid 0 data recovery
17. In the left tree-view pane, all recovered folders and files are listed. Click on the ?File Type? tab or search box to easily browse and recover required data
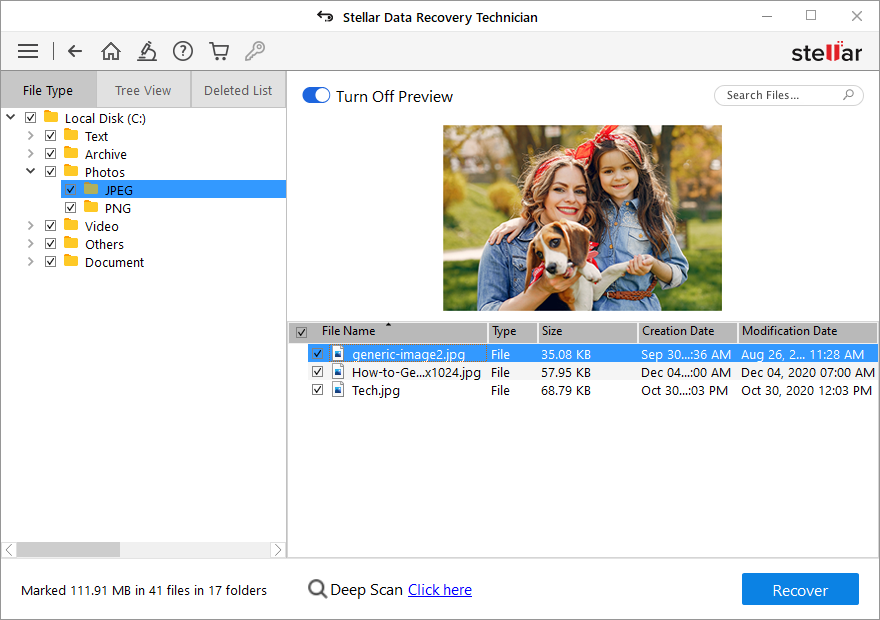
18. Check the checkboxes of the files and folders that you want to recover, and then click the ?Recover? button. A pop up appears
19.Click the ?Browse? button to select the location where you want to save the recovered data. At this point, RAID 0 data recovery is successfully completed.
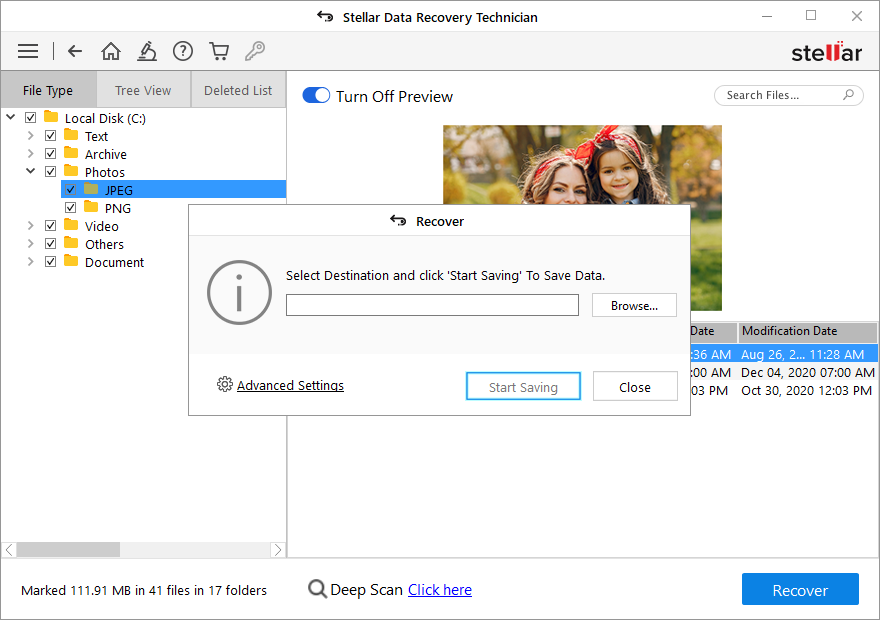
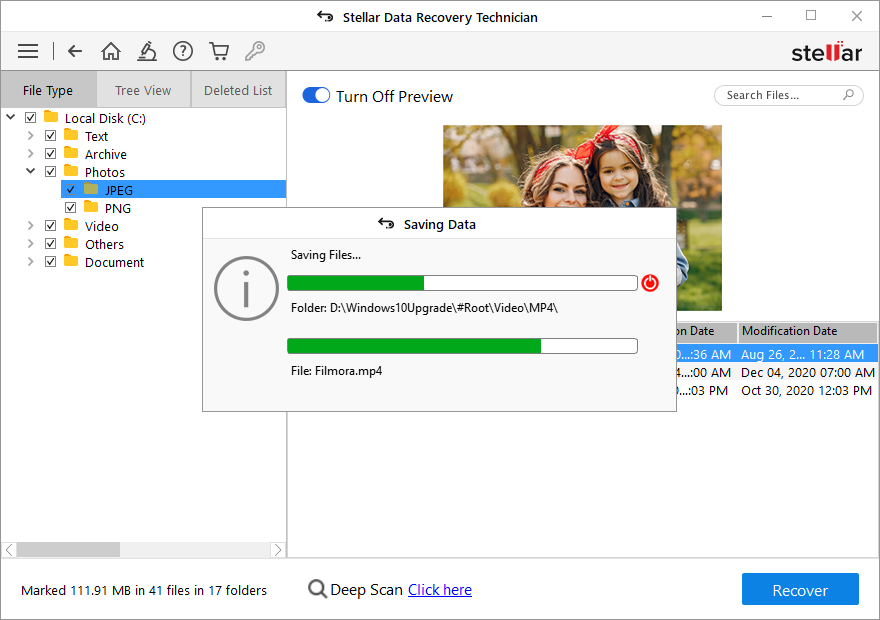
Note: Make sure not to select the drive which is in the reconstructed RAID array. Use an external disk or internal disk with enough space to save recovered data.
20. Click the ?Start Saving? button and wait until data is saved successfully.
Conclusion:
In this blog, we discussed why RAID fails when you reset the BIOS to defaults and how to re-create or reconstruct the failed RAID using the BIOS utility and advanced options available in the market such as Stellar Data Recovery Technician that also helps in successful RAID failure recovery.
Never remove CMOS from your RAID controller or PC?s motherboard as it resets the customized changes to BIOS and can significantly affect your system. Always disconnect RAID before restoring defaults (reset) in BIOS. After reset, re-enable RAID settings before connecting the RAID drives to the system to avoid RAID failure.


