Summary: In this blog, we are discussing the methods to solve error- Semaphore Timeout Period Has Expired. You can try these efficient troubleshooting fixes to get rid of this issue. Also, check out the best Windows Data Recovery software to restore your data from the error-affected PC/drive.


An unexpected error is preventing the operation. ?Error 0x80070079: The semaphore timeout period has expired?. I received this message when I tried to copy a 1.6GB file to a new SanDisk 8GB SDHC card. I tried formatting the card, but it is only accepting Quick format.
-Microsoft User
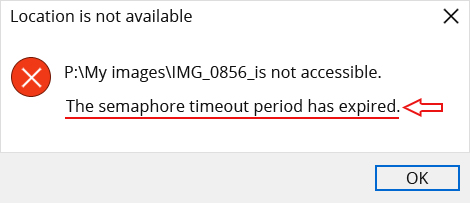
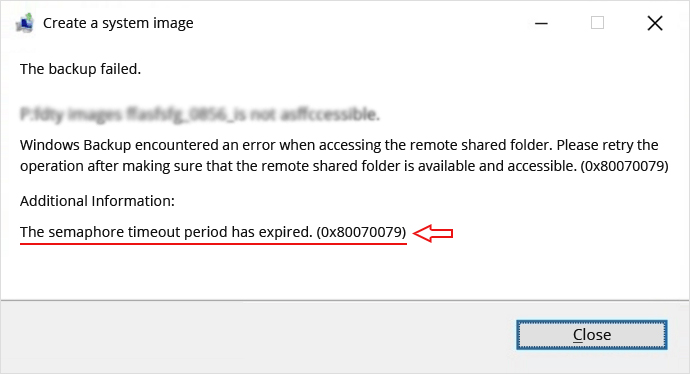
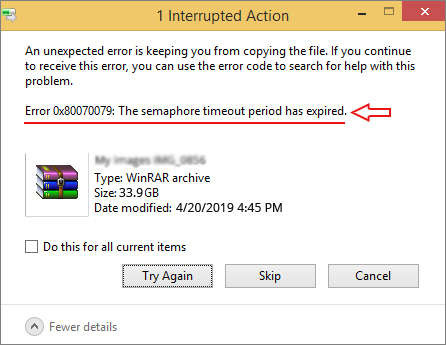
Sometimes, while transferring or copying your data to another device, you may encounter ?Error 0x80070079: The semaphore timeout period has expired?. There could be several circumstances leading to this issue. However, it generally occurs when you try to-


- Access a portable device (See Image 1)

2. Take backup of your system data (See Image 2)

3. Transfer the data from one disk to another (See Image 3)

This error may occur when system OS fails to build a connection or locate the source or target during file transfer. Although it is difficult to identify the exact cause, the error usually happens due to corrupt system files, faulty network adapter, weak signals, or corrupt disk drivers. Irrespective of the causes, this error means indicates that you are at the risk of losing your data.
Read on to know the best methods to fix ?Error 0x80070079: The semaphore timeout period has expired?.
Methods to Solve Error Semaphore Timeout Period Has Expired

- Method 1: Update Network Drivers
If the error occurred due to the faulty network adapters, the best way to fix the issue is to update the drivers. Follow the given steps to troubleshoot the problem:
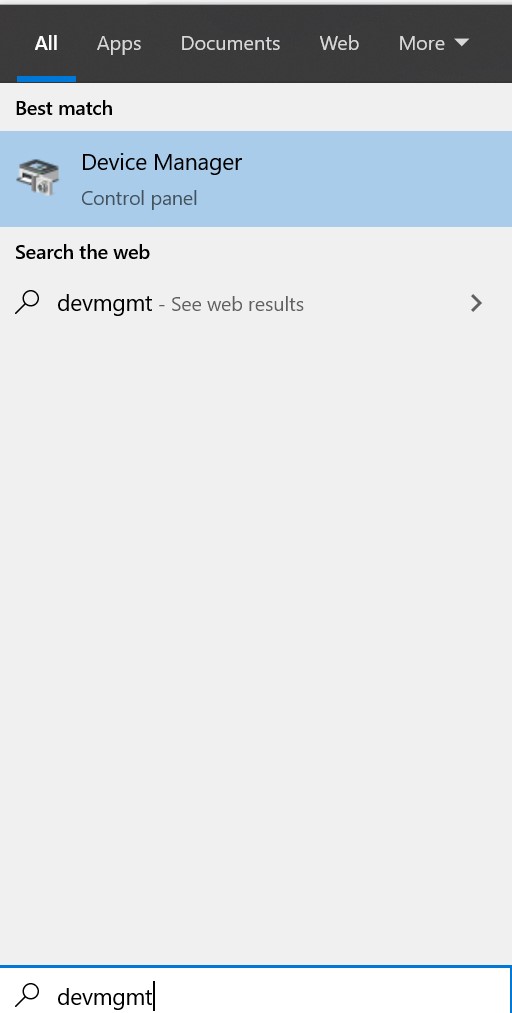
a. Type devmgmt in the Windows search box and open Device Manager. (See Image 4)

b. Double-click on Network Adapters and expand it.
c. Select the appropriate driver, right-click on it, and select Update Driver. (See Image 5)


d. Select Search automatically for updated driver software on the next prompt.
e. Once the process is done, restart your system and check if the problem has been fixed.
Method 2: Disable Windows firewall temporarily
It might be possible that a certain file transfer is blocked by the Windows Firewall. Try disabling the firewall protection temporarily to fix the error. Follow the below-mentioned steps:
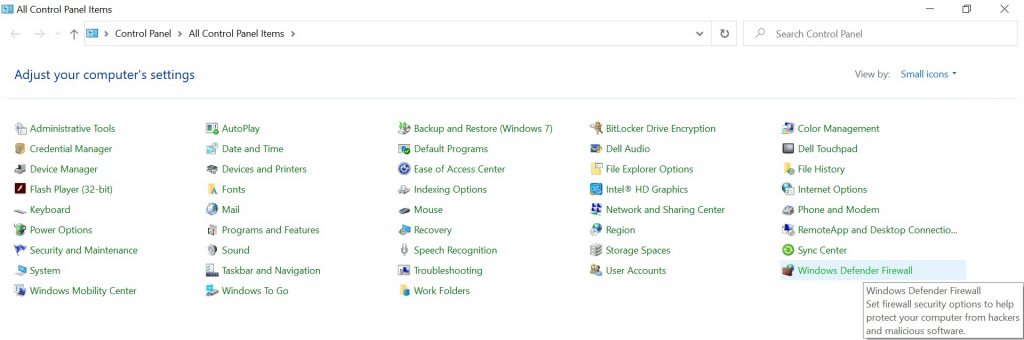
a. Open Control Panel and click Windows Defender Firewall. (See Image 6)

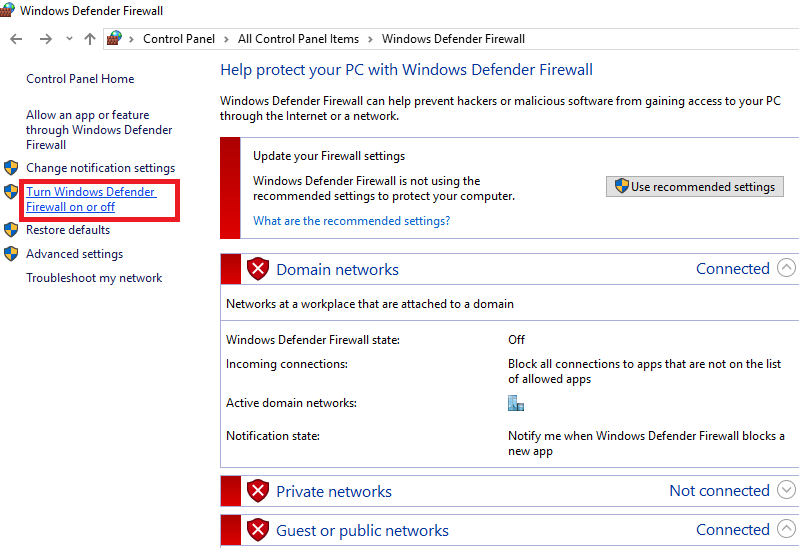
b. Click Turn Windows Defender Firewall on or off. (See Image 7)

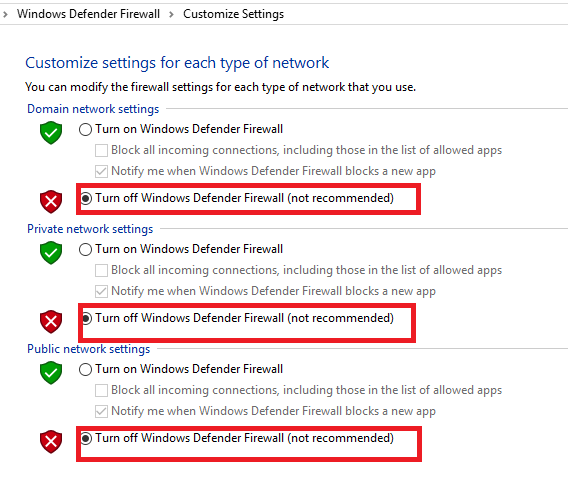
c. Under ?Domain network settings, Private network settings, and Public network settings,? select the Turn off Windows Defender Firewall (not recommended) option, and click OK. (See Image 8)

Wait till the process is completed and reboot your PC to check if the error is fixed.
Method 3: Run CHKDSK Command
If the error is caused due to corrupt file system or bad sectors on the drive, you may run CHKDSK command. This command line utility may fix file system corruption, and allocate new sector for data located on bad sectors. Also, it may help you restore data from corrupt drive/partition. Follow the given troubleshooting steps to fix the ?Error 0x80070079?.
|
Caution Running CHKDSK command may lead to data loss as it marks the unreadable sectors as bad sectors. Hence, before performing this command, we recommend you to use a Windows data recovery tool to access and safely restore your data from the affected drive. |
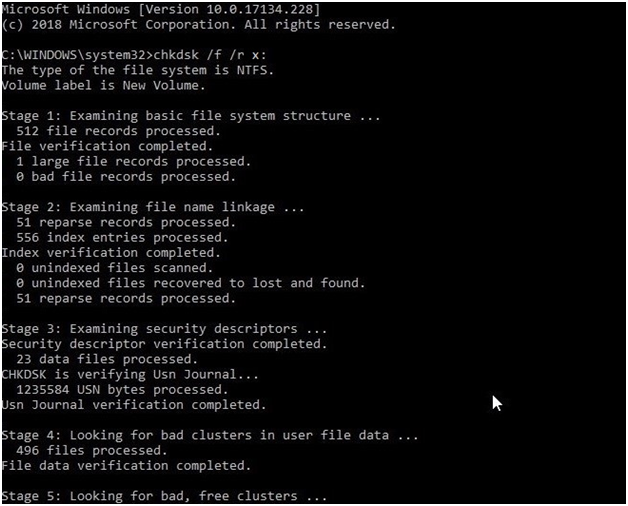
a. Open Command Prompt and select Run as Administrator.
b. In the Command Prompt window, type chkdsk /f /r x: and hit Enter. (See Image 9)
X is the letter of a drive partition, /f fixes errors, and /r locates the bad sectors and reads information from them.

Note: If you are not able to transfer files to any volume of the drive, you need to run this command for every volume separately.
Method 4: Perform a Clean Boot
You may perform a clean boot to identify if any software/app or program is conflicting and causing ?Error 0x80070079?. Perform the following steps:
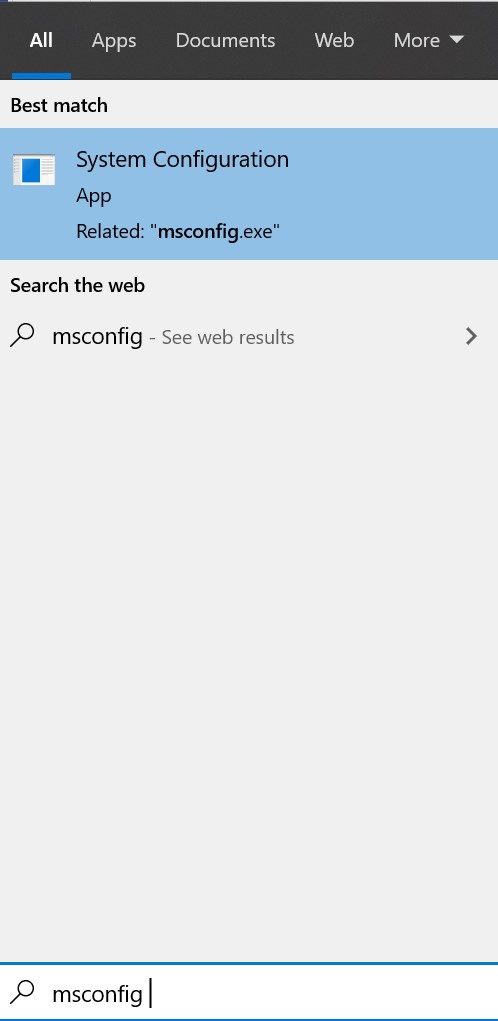
a. In the Windows Search box, type msconfig, and open System Configurations. (See Image 10)

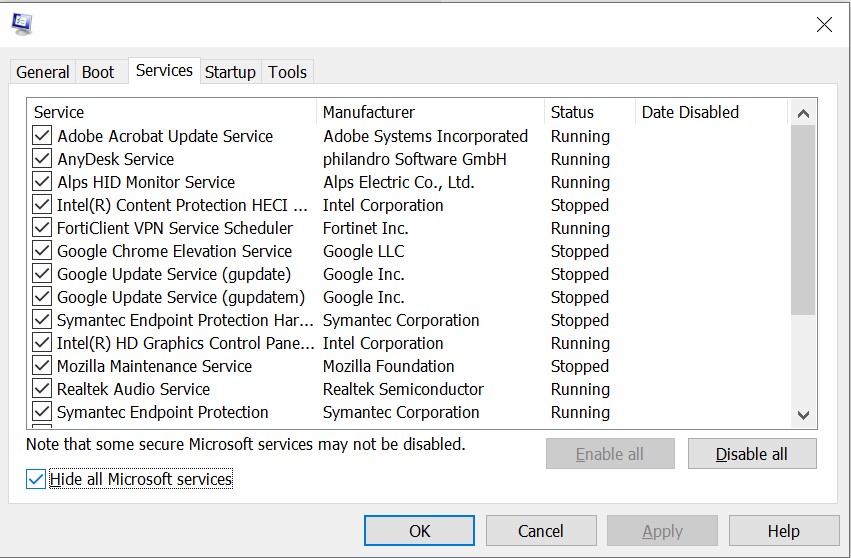
b. Go to Services and choose Hide all Microsoft Services, given at the left bottom. (See Image 11)

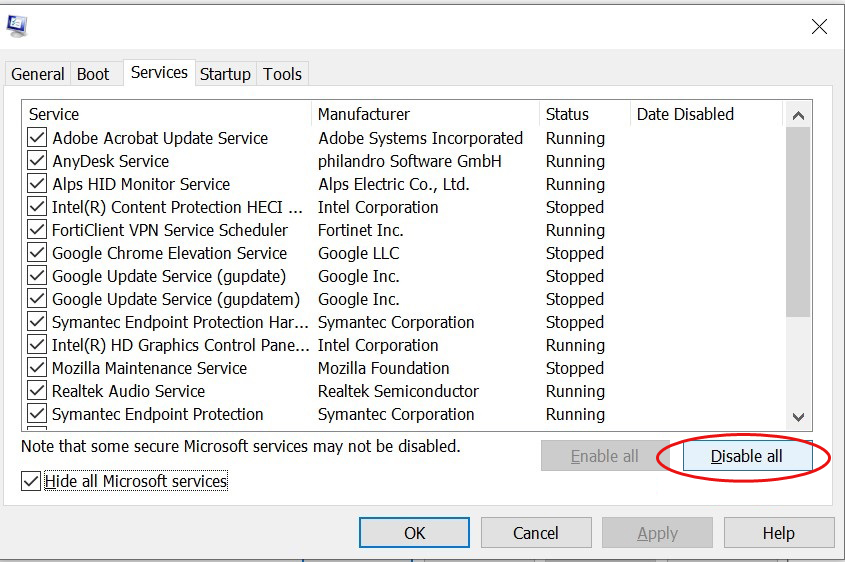
c. Click Disable All > OK. (See Image 12)

Apply the changes and restart your system.
Method 5: Convert Drive?s File System to NTFS
This solution can work only if you want to copy data to a drive with a file system, which has a file size transfer limitation. For example, FAT32 cannot transfer a file larger than 4 GB. Transferring large-sized files is possible if the drive?s file system is formatted into NTFS.
[Caution: Converting your drive?s file system to NTFS may fix the error but it will format the drive and erase all existing data. It this situation, we recommend using a data recovery tool to retrieve formatted data after moving to NTFS file system.]
Follow the given steps:
a. Navigate to This PC.
b. Right-click the target drive.
c. Click Format and select NTFS on the next prompt.
d. Select Quick format and wait till the process completes.
If none of the above methods fix the ?Error 0x80070079: Semaphore Timeout Period Has Expired?, don?t perform any hit & trial method. Doing so may overwrite the data and you may end up losing any chance to restore it.
Can?t access my data due to Semaphore Timeout Period Has Expired error. What to do?
Use the Best Windows Data Recovery Software
Even if you are not able to fix the error, the best you can do to save your data is to retrieve it from the affected drive and create a backup. To do so, you may use a DIY Windows Data Recovery software such as Stellar Data Recovery. The software can retrieve data such as documents, email files, photos, videos that have become inaccessible due to Semaphore errors such as above. It supports multiple file formats and lets you recover data from formatted, corrupted, and even encrypted drives.
Conclusion
?Semaphore Timeout Period Has Expired Error 0x80070079? may occur due to several reasons as explained in this blog. You may solve the error with the afore-stated methods including converting the drive?s file system to NTFS, disabling Windows Defender Firewall, updating Network Drivers, running CHKDSK command, and performing a Clean Boot. However, some of these methods may lead to severe data loss. If that happens, go for a specialized data recovery tool such as Stellar Data Recovery for retrieving your crucial data.

