Summary: Exchange 2013 or 2016 mailbox may fail or stop working if the mailbox size exceeds the defined storage limit. When mailbox gets full, Outlook users can’t send or receive new messages until the mailbox size limit is increased or older messages are deleted. In this blog, we have shared a few troubleshooting steps and workarounds to resolve the “Mailbox size limit exceeded” issue in Exchange 2013/2016.


Contents
Mailbox size limit is defined by Exchange administrator on Microsoft Exchange 2013 or 2016. Usually, admins assign a storage capacity of 1-5 GB per mailbox that is applicable for all mailbox users in the organization. When the Exchange mailbox reaches or exceeds the stipulated storage limit, a descriptive notification or error message is received by the mailbox user. This prevents any further transaction of emails. If a user tries to send any message, it returns and an error message is displayed.
How to Resolve Mailbox Quota Exceeded Issue?
It is imperative to manage mailboxes as some users may find 2 GB storage limit enough while some may require additional storage as per usage and preferences. An Exchange administrator can easily increase or decrease this Exchange mailbox size limit as per the user or organisation?s requirements.
This guide will help you increase the storage space in Exchange 2013 and 2016 for a particular mailbox user and all mailboxes at database level. The entire procedure to increase the mailbox size limit is performed via the Exchange Admin Center (EAC) and by using Exchange Management Shell (EMS).
This will help you resolve the Exchange mailbox size limit warnings and errors in Exchange 2013 and Exchange 2016.
NOTE: In most cases, the problem can be resolved by increasing the mailbox size. However, this will requires you to utilize more server storage. It can add extra cost for additional server storage, which is not cheap. As an alternate solution, one can also export certain or old mail items from mailbox and save them in PST format as backup. This can be done via EAC or EMS in Exchange but that can take an eternity to finish. The easiest way to resolve this issue without losing any mail item is by using an EDB to PST converter software, such as Stellar Converter for EDB. Read on to know more.
Increase Exchange Mailbox Size Limit via Exchange Admin Center
Let?s look at the process to increase the Exchange mailbox size limit using the Exchange Admin Center (EAC).
Increase Mailbox Size for Individual User Mailbox
To increase the mailbox size limit for a particular user in Exchange 2013 and 2016, follow these steps,
- Access Exchange 2013 or Exchange 2016 EAC by typing,
https://<ServerFQDN>/ecp in the web browser URL. If you are logged into Exchange server, type https://localhost/ecp in the Internet Explorer to load Exchange Admin Center (EAC)
- Next, click on Recipients and select mailbox of the user that you want to resize
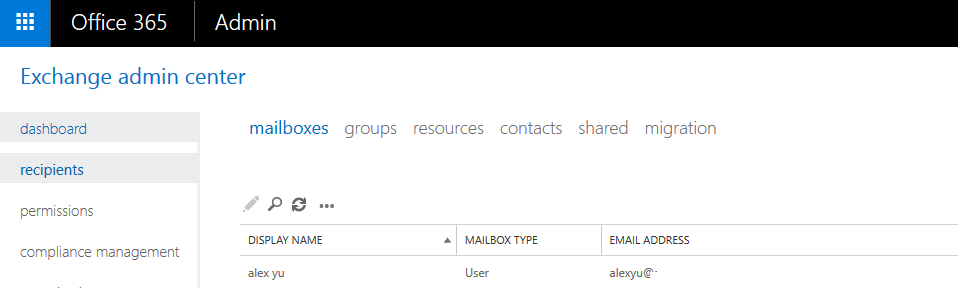
Click on Edit button to open properties - Then select ?Mailbox usage? and click ?More Options? to view the current mailbox size limit and increase the mailbox size
- Click on the ?Customize the settings for this mailbox? radio button
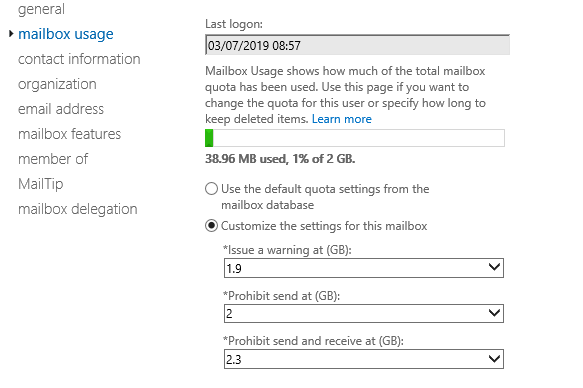
- Change mailbox quota limits as per the user or organization?s current needs


The changes made to mailbox size limitation will immediately affect the mailbox. This will increase Exchange mailbox size and fix the Mailbox quota exceeded error for the Outlook user.
TIP: You can set Exchange 2013 maximum mailbox size to ?Unlimited?.
Increase Size Limit of All Mailboxes at Database Level
If several Exchange mailbox users are experiencing the Exchange mailbox size limit error or you want to increase the mailbox size limit for all mailboxes and users at once, you can do so by changing the mailbox size limits at the database level.
Steps are as follow:
- Login to EAC and go to Servers> Databases
- Select the required database where all mailboxes are stored
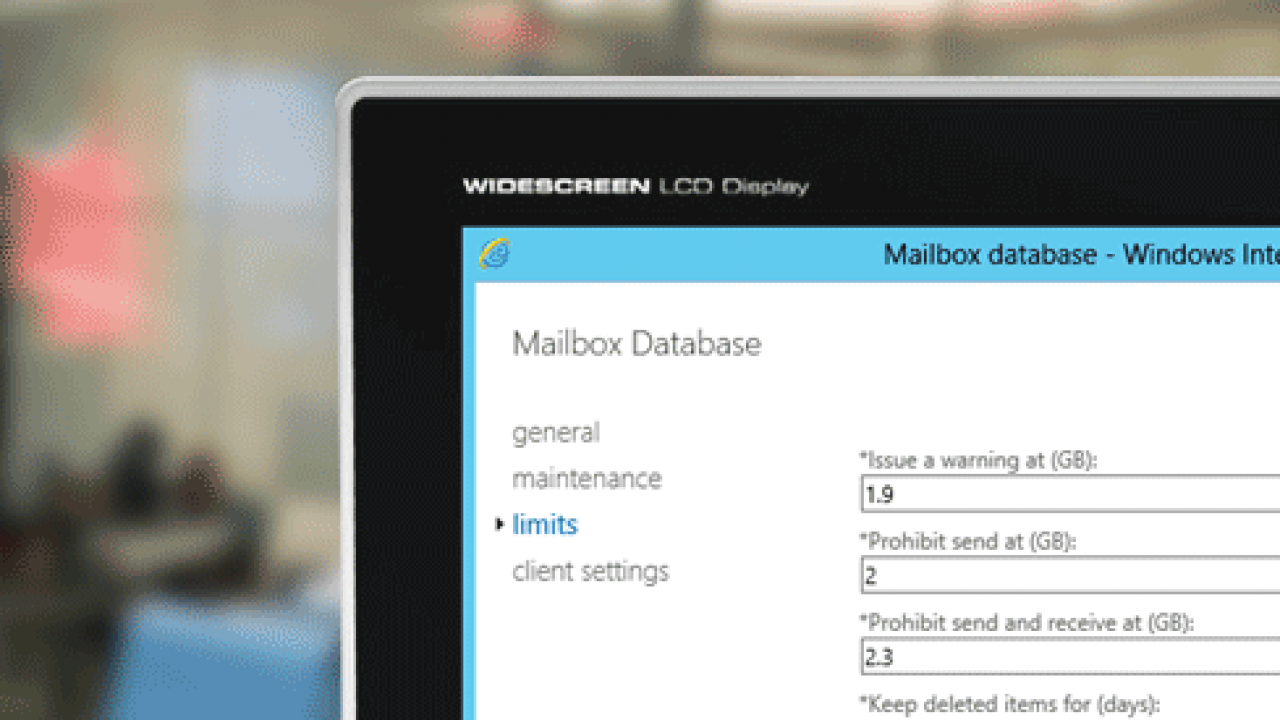
- Go to Properties and click ?limits?
- Enter the required values to change quota limits for all mailboxes in the database as per user or organization?s current needs

The changes are applied to all the mailboxes that reside on the database immediately. However, the time that modifications take to implement is based on the number of mailboxes and the overall size of the database.
Go back and open the recipient?s mailbox properties to verify the new quota limits. Check if the changes have been applied to the mailboxes.
Increase Mailbox Size Limit via Exchange Management Shell
Besides EAC, you may also use the Exchange Management Shell (EMS) cmdlets to change Exchange 2013 or 2016 Standard mailbox limit for single or multiple users. This also fixes the ?Mailbox size limit exceeded? error. This requires you to login to Exchange server as admin.
Manage Individual Mailbox Storage Quota via Exchange Management Shell
Enter the example command given below. The following command sets the ?Issue Warning?, ?Prohibit Send? and ?Prohibit Send and Receive? quotas for Kelly Smith mailbox to 24 GB, 24.5 GB and 25 GB respectively.
Set-Mailbox -Identity ?Kelly Smith? -IssueWarningQuota 24gb -ProhibitSendQuota 24.5gb -ProhibitSendReceiveQuota 25gb -UseDatabaseQuotaDefaults $falseWhat do these Quota Limits mean?
- IssueWarningQuota: This describes the maximum storage limit for mailboxes before the warning message is issued to the owner.
- ProhibitSendQuota: When mailbox exceeds the stipulated storage limit, Exchange prevents the mailbox owner from sending new messages and a descriptive error message is displayed.
- ProhibitSendReceiveQuota: When mailbox exceeds its maximum storage limit, Exchange prevents the mailbox owner from sending new messages and no new message will be received by the mailbox. If a user sends any message, it turns back to the sender along with the error message.
Increase Mailbox Size Limit for Multiple Mailboxes at Database Level
Open Exchange Management Shell (EMS) and then,
- Enter the following command after replacing ?YourDatabaseName? with the mailbox database name that you want to modify,
Set-MailboxDatabase "YourDatabaseName" -ProhibitSendReceiveQuota 5GB -ProhibitSendQuota 4.9GB -IssueWarningQuota 4.8GB- Press the Enter key
The command increases the limit of each mailbox in the database to 5 GB. Now users get a warning message when the mailbox size reaches 4.8 GB and the ?Mailbox size limit exceeded error? when it crosses 4.9 GB and reaches 5 GB.
How to Verify If the Mailbox Size Limit Has Changed?
After you have modified the mailbox quota for mailboxes in the database, it is important to verify if the modifications are well applied. You can verify the mailbox quota limit by using Exchange Admin Center or Exchange Management Shell as shown below.
Verify using Exchange Admin Center
In the Exchange Admin Center,
- Navigate to Recipients and then Mailboxes
- Select mailbox from the list of mailboxes for which you need to verify the storage quota
- Next, click on edit
- mailbox Properties page, click on Mailbox Usage and then click ?More Options?
- Then verify that Customize the settings for this mailbox option is selected
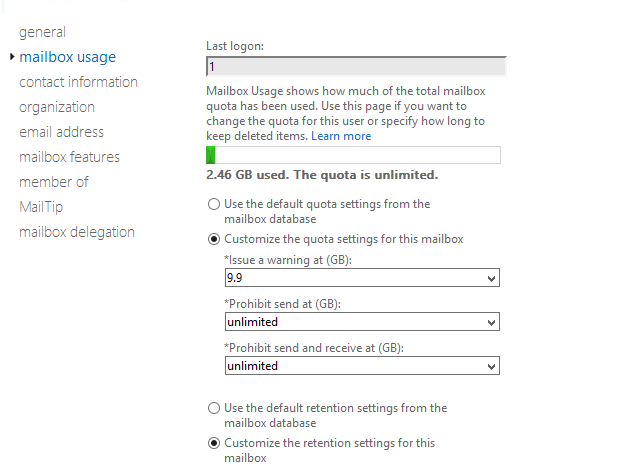
- Next, verify storage quota settings

Verify using Exchange Management Shell
Run the following cmdlet in Exchange Management Shell. Change <Identity> with an alias, user, or email address of the mailbox.
Get-Mailbox <Identity> | Format-List IssueWarningQuota, ProhibitSendQuota, ProhibitSendReceiveQuota, UseDatabaseQuotaDefaultThe Way Forward ? An Alternate Way to Manage EDB Mailbox Storage
Server storage can be quite costly. Increasing storage space limit for mailboxes in Exchange server can resolve the ?Mailbox size limit exceeded? error but with time, the mailbox will start filling up. And then you?ll have to increase it again.
Instead of increasing the storage space for individual or all mailboxes in your organisation, it?s better to take the backup of older mailbox items or delete them from the server mailbox. This will resolve the error and help avoid unnecessary waste of server storage, resources, and save cost.
An EDB to PST Converter tool such as Stellar Converter for EDB can help you export single or multiple Exchange mailboxes or selected contents to PST files. You can also perform selective conversion of mailbox components such as Inbox, Contacts, Calendar Events, etc. This speeds-up the conversion procedure saves time, and the entire export task is executed effortlessly.
You can also export the entire database and all mailboxes at once to corresponding PST files. These files can be stored locally instead of the server. In case users need to access older email, they can easily import their mailbox backup (PST) and view or manage the emails.
Moreover, it?s a must-have software tool for all Exchange administrators. Besides mailbox database backup, it can also be used for mailbox or database migration from one database to another or one server to another in a few clicks. To know more, click here.

