Contents
Are you considering upgrading your Mac to a new version and are afraid to lose your data? In general, there is no need to worry. Upgrade will not delete any information on your device. However, it?s always better to have a backup plan if something goes wrong. That’s why we offer ways to ensure your update goes smoothly.
Updating macOS is a standard procedure. Many users do it whenever a new major version is released. Nevertheless, it would be best if you were mindful of the safety of your data. In unlikely cases, the upgrade can cause an error in the hard drive, leading to data loss.
So what can go wrong while upgrading your Mac? Let’s deal with everything step by step.
Update vs. Upgrade
So, what is the difference between an update and an upgrade? The update is a minor adjustment to a particular software version. On the other hand, ?pgrading can involve significant changes, often accompanied by a major change in the version number.
In most cases, the process of updating performs automatically (in case this option is enabled on your Mac).
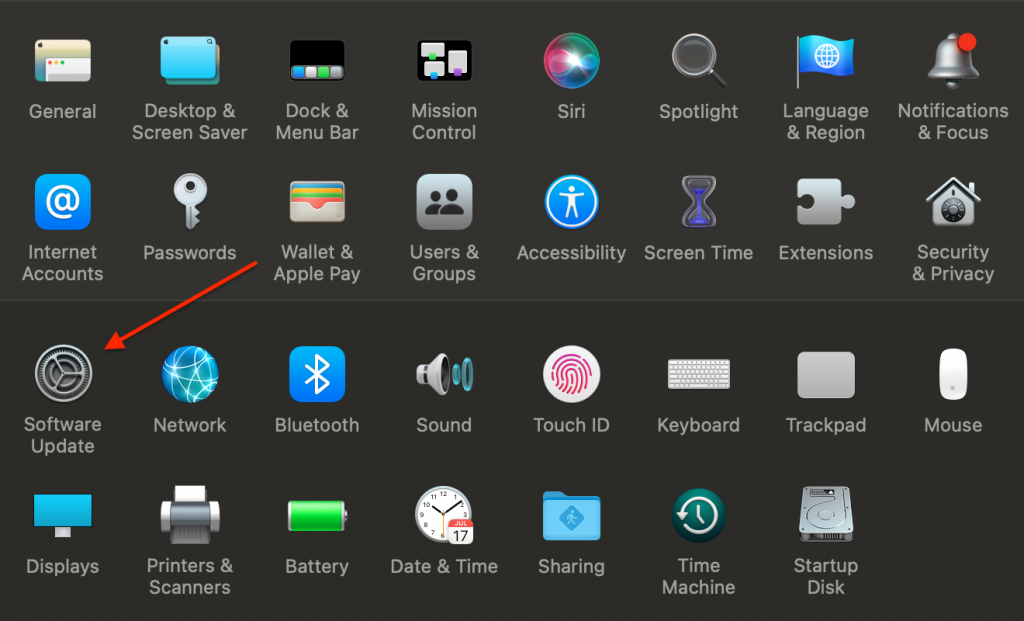
Also, you can check for the Mac updates manually. To do this:
1. Go to the Apple menu.
2. Choose System Preferences.
3. Click the Software Update tab.

Another way to get an update is by navigating through the App Store:
1. Go to the App Store.
2. Click Updates in the left sidebar.


Update Now refers to updates within the current version of the OS you have (from Monterey 12.1 to Monterey 12.2, e.g.).
Upgrade Now will perform the update between two different versions, such as from Monterey to Ventura.
Will Upgrading macOS Delete Everything?
In most cases, after upgrading macOS, your files and data will usually stay untouched. Let’s consider three main reasons for the unsuccessful upgrade.
Reason 1: Updates with Bugs
The slow internet connection can cause issues while downloading the file with an update. This way, the file can be damaged, which will fail the update. So before starting the updating process, make sure you have a stable internet connection.
Reason 2: Outdated Programs
Some apps don?t get updates simultaneously with a new macOS release. As a result, compatibility issues can appear. An outdated app?s data may not be usable or even available after a macOS upgrade.
Reason 3: Not Enough Space on ?our Mac’s Hard Drive
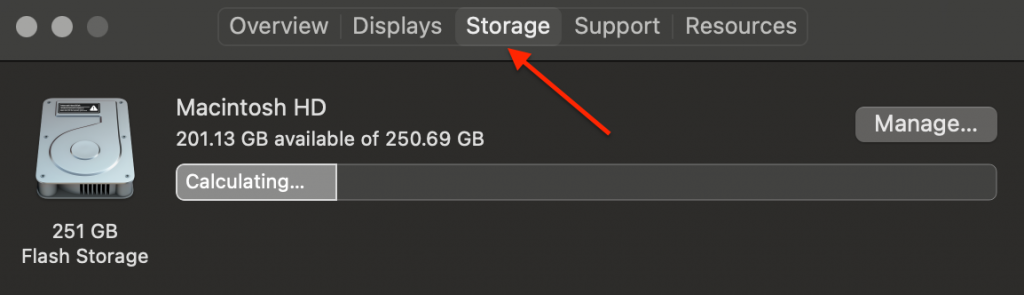
Generally, it is recommended to have around 64GB of free space to upgrade your Mac. This way, your upgrade should download without any space issues.
Check the available storage space on your Mac by following these steps:
1. Go to the Apple menu.
2. Select About This Mac.

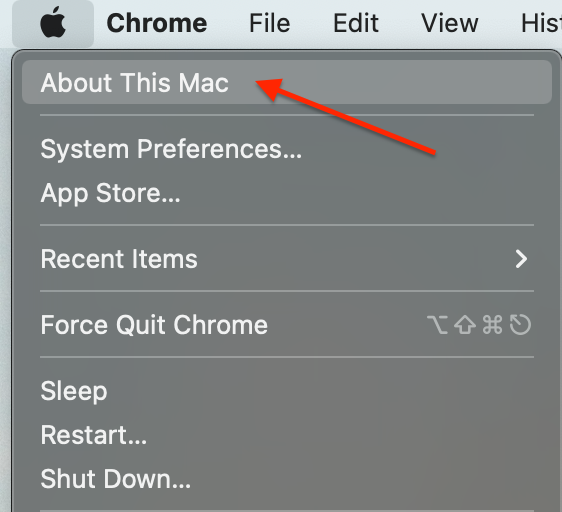
3. Go to the Storage tab and wait for it to scan through everything.

Protect your Data Before Upgrading
Despite the safety of the macOS upgrade procedure, it?s always better to have your files backed up. For cases just like this, Mac computers have a Time Machine tool installed in them. Time Machine is a powerful backup instrument of macOS.
Follow the steps below to create a Time Machine backup:
1. You need to prepare and connect an external storage device to keep your data (e.g., USB).
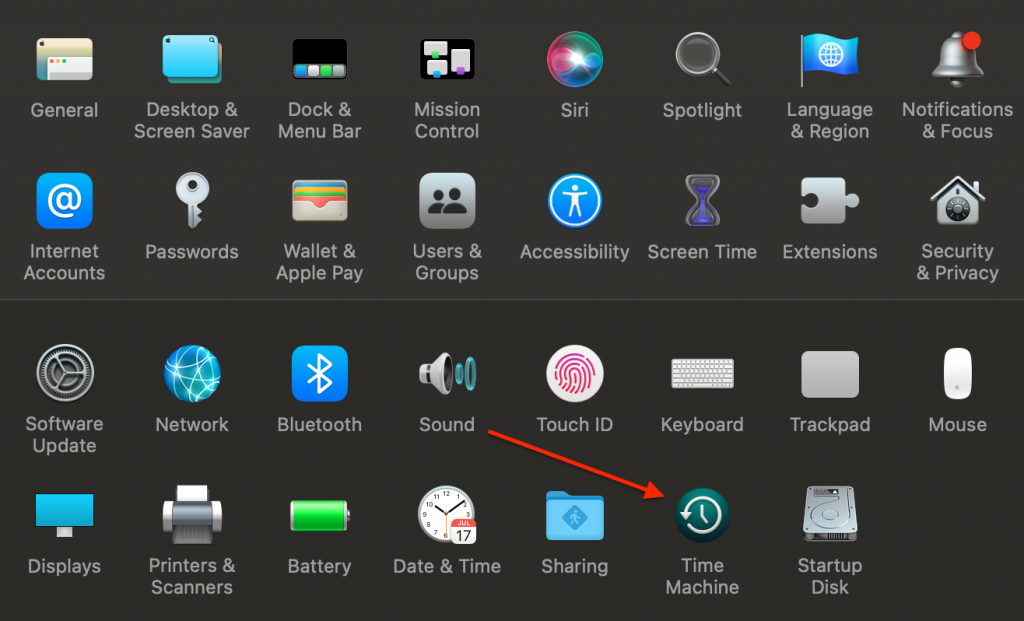
2. Go to the Apple Logo > System Preferences.
3. Chose Time Machine.
4. Click Select Backup Disk.

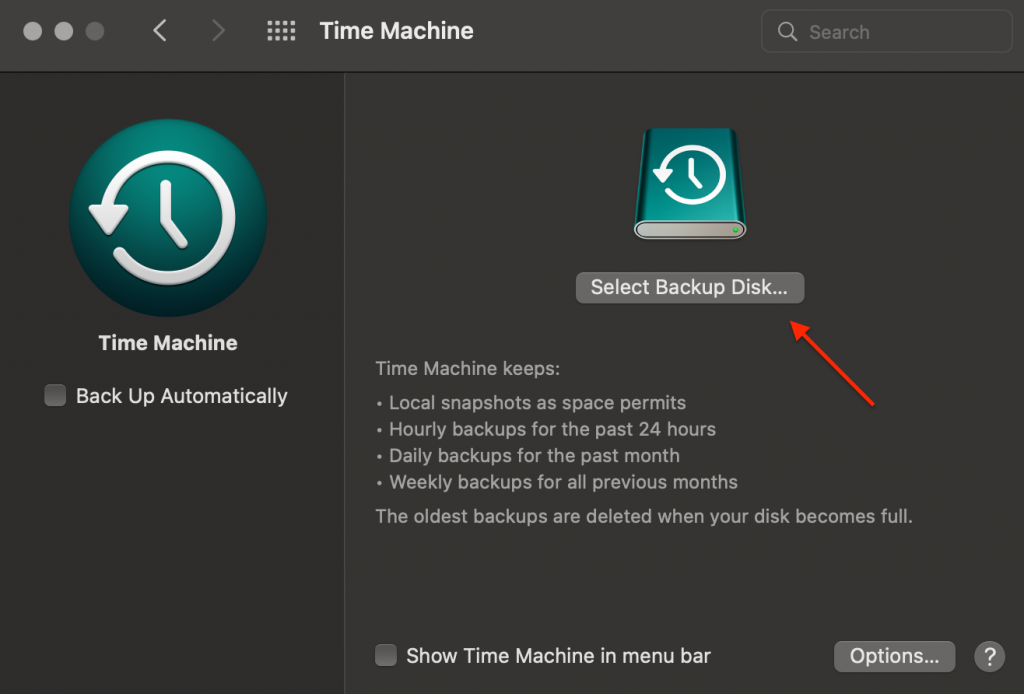
5. Choose the name of your disk from the list, then click Use Disk. Time Machine will start making backups automatically for you.
After the Mac upgrade, connect the Time Machine drive to your computer and transfer your data.
Updated your Mac and Lost Everything?
So what to do when you haven?t set up the Time Machine and lost your files? No panic! There is a solution to this situation.
You can download and use an especially designed program called Stellar Data Recovery. With this tool, you will be able to restore deleted files, photos, and critical documents. Stellar can recover files from HDD, SSD, Fusion Drive, and SD Card. It can restore your data from high storage capacity Mac storage drives.
Follow these steps to download and install the program:
1. Download and install the Stellar Data Recovery software and select what files you want to restore.


2. If you want to recover specific data, you can use a customized scan. Just turn off the Recover Everything toggle, and choose the files you want to bring back. Then click Next below.
3. Select the drive from which you want to restore your data, and click on the Scan option.
4. The scan process starts automatically. You can easily monitor it.
5. After the recovery process is finished, the apps will list all restored data on the left.
6. On the right, you can see specific files/pictures/videos by double-clicking them. Just put the checkmark on the files you want to bring back, and click on the Recover button.

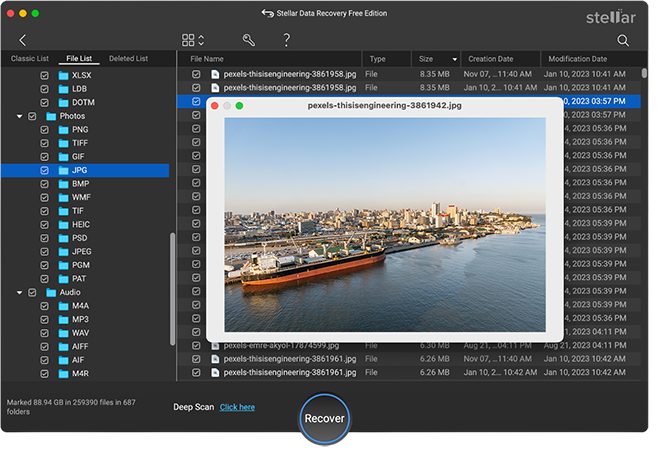
7. Provide the destination to save the data. You can select another drive or an external storage device.
All done! You can now see your favorite family photo or that funny dog video again!
Wrapping Up
To summarize, here are four main steps for a successful macOS upgrade:
- Take care of your apps. Keep track of their updates. Unless there is no compatible update available, you can delay upgrading apps until the timely updates are released.
- A backup is always a good idea. Even if your upgrade fails, you can be sure you will not lose anything. Don?t forget to set up your Time Machine.
- Use App Store or Apple’s website to look for updates. Instead of installing the update, you can just download it. Simply double-click the program to proceed with the update. Make sure you have a stable Internet connection. This way, you will secure the integrity of the update file and lower the chance of errors.
- If you updated your OS and lost everything, you can always use specific data recovery software to restore your files, so it’s a win-win situation!
Related reading:


