Summary: In this article, we’ve discussed the step-by-step process to export Exchange archive mailbox to PST file by using Outlook, Exchange Admin Center, and PowerShell. We’ve also mentioned about an advanced EDB converter software that can easily export archive Exchange mailbox to PST, even if the mailbox database is not mounted.


With Exchange Server 2010 SP1 onwards, Microsoft has introduced the personal archiving system for mailboxes which involves provisioning of a personal archive mailbox for the end user to move their emails and is kept separate from their primary mailbox. The archive is stored in an Exchange mailbox database. This means that it will be in the daily backups. If something happens to the computer or device accessing the mailbox, nothing is lost as the archive data is stored in the Exchange Server. Archiving can be done manually or by a retention period stipulated by the business and configured in the Exchange Admin Centre (EAC).
There are three methods to export Exchange archive to PST:
- Using Outlook
- Using the Exchange Admin Centre (EAC)
- Using PowerShell
For the Exchange Admin Centre (EAC) and PowerShell, the following pre-requisites must be met:
- Permissions to export/import
- Share to store the PST file
Permissions
Even if you are the administrator of Exchange, you still need to be assigned the role to import/export. To assign permissions, open the Exchange Admin Center (EAC) and click on Permission and admin roles.

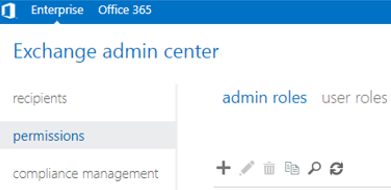
Then, click on the + button to create a new role and assign the import/export role. You can assign it to the user who will be exporting the mailboxes.
This can also be done by using PowerShell commands (as given below).
New-ManagementRoleAssignment ?Role "Mailbox Import Export" ?User "<Username>"


New-ManagementRoleAssignment -Role "Mailbox Import Export" -SecurityGroup "Organization Management" -Name "Import Export"


Share to Store the PST File
You cannot export to a drive directly. You will need to use a UNC path. For this, create the folder to hold the exports, for example C:\PSTExports. Then, share the folder and assign the Exchange Trusted Subsystem with full permissions on the folder and share.


After meeting the above pre-requisites, you can go ahead to export archive mailbox to PST.
1. Using Outlook
You can use Outlook to export the Archive Exchange mailbox. Here are the steps:
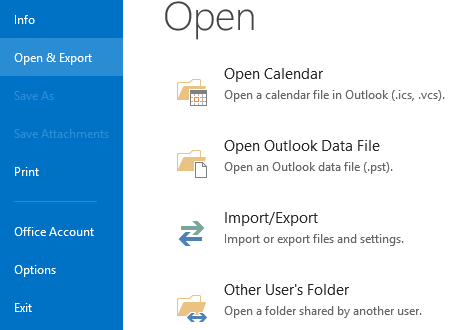
- Opening Outlook, click on the File and Open & Export. Then, click on Import/Export.

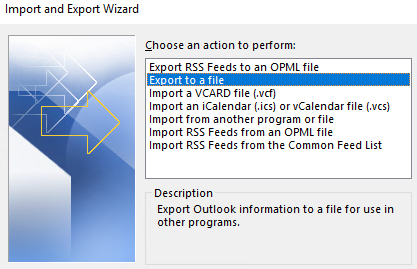
- Click on Export to a file and click Next.

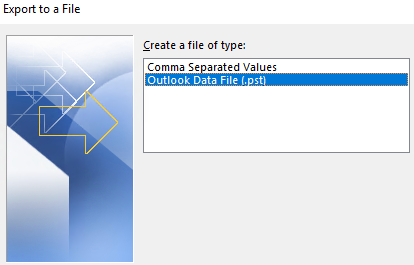
- Click on Outlook Data File (.PST) and click Next.

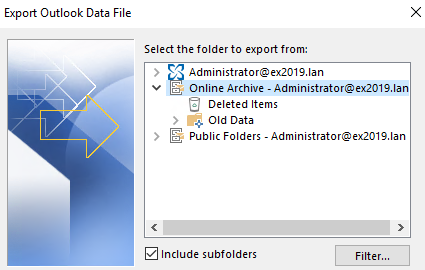
- From the structure show, select the Archive Online mailbox and click Next.

- Select the location where you want to store the PST.

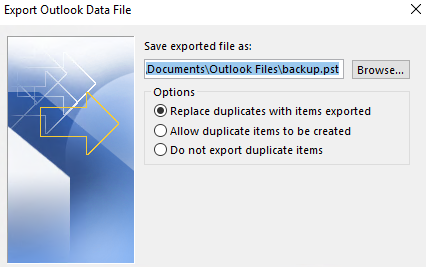
After the export is complete, you will find the PST file at the location.
Note: This method is a little bit messy as Outlook might crash during the process and will not be responsive during the export. On the other hand, you will need to do this directly on the user?s computer.
2. Using Exchange Admin Centre (EAC)
To export mailbox by using the Exchange Admin Center, follow these steps:
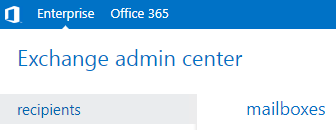
- From the browser, open the Exchange Admin Center which would be Read More.
- After login, go to Recipients and Mailboxes.

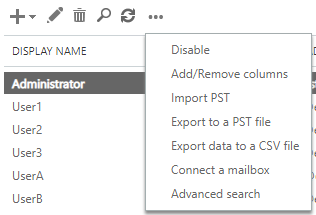
- Click on mailbox to export and click on the more options button. Click on Export to a PST file.

- Select the Export only the contents of this mailbox?s archive option and click Next.


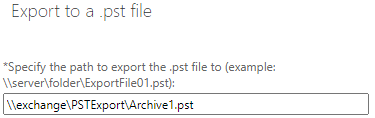
- Enter the share path to export to, along with the PST name and click Next.

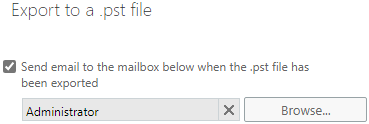
- In the next screen, specify the user to notify when the export has been completed. This is optional.

- Once done, click Finish to start the export.
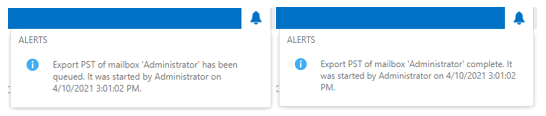
In the Exchange Admin Center (EAC) alter icon, you will be notified when the export is queued and completed or if there are any errors. If you have opted for the email notification, you will get an email at each stage.

Note: This method works fine, but you do not have any option for granular export. It will export all Exchange archive mailboxes, while limited to only one mailbox at a time. Another issue is that you need to assign the right permissions and create a shared location. Also, this method works if the mailbox database is mounted and the Exchange Server is available.
3. Using PowerShell
To export the mailbox using the Exchange Management Shell (EMS), use the following command.
New-MailboxExportRequest -Mailbox "Administrator" -FilePath "\\Exchange\PSTExport\Archive.pst" -IsArchive


This command, by adding the switch -IsArchive, will queue the export and export the mailbox accordingly.
With the PowerShell method, you can use some search criteria, such as:
- Include Folder
- Exclude Folder
- Date Larger Than
- Date Lower Than
- Date Range
To include a folder/s, run the following command with the folders separated by comma.
New-MailboxExportRequest -Mailbox "Administrator" -FilePath "\\Exchange\PSTExport\Archive.pst" -IsArchive -IncludeFolders "#Inbox#", "#Outbox#"


To exclude a folder/s, use the following command.
New-MailboxExportRequest -Mailbox "Administrator" -FilePath "\\Exchange\PSTExport\Archive.pst" -IsArchive -ExcludeFolders "#Inbox#", "#Outbox#"


To export emails from a date onwards, use the ContentFilter switch with the gt parameter.
New-MailboxExportRequest -Mailbox “Administrator” -FilePath “\\Exchange\PSTExport\Archive.pst” -IsArchive -ContentFilter {(Received -gt ’01/01/2020′)}


To export emails from a date backwards, use the ContentFilter switch with the lt parameter.
New-MailboxExportRequest -Mailbox “Administrator” -FilePath “\\Exchange\PSTExport\Archive.pst” -IsArchive -ContentFilter {(Received -lt ’01/01/2020′)}


To make a date range, you need to combine the lt and gt parameters (as given below).
New-MailboxExportRequest -Mailbox “Administrator” -FilePath “\\Exchange\PSTExport\Archive.pst” -IsArchive -ContentFilter {(Received -lt ’01/01/2020′) -and (Received -gt ’01/01/2019′)}


You can also have a combination of both date and include or exclude folder.
New-MailboxExportRequest -Mailbox “Administrator” -FilePath “\\Exchange\PSTExport\Archive.pst” -IsArchive -ContentFilter {(Received -lt ’01/01/2020′) -and (Received -gt ’01/01/2019′)} -IncludeFolders “#Inbox#”, “#Outbox#”


Note: This method works fine, but you must script the whole thing, especially if you would like to exclude/include folders with date ranges. You cannot search for emails to export. You can export only one mailbox at a time if you do not do a scripted loop. Another issue is that you need to assign the right permissions and create a shared location. This method works if the mailbox database is mounted and the Exchange Server is available.
Conclusion
The above methods can successfully export archive Exchange mailbox to PST. However, there is an easier and less messy way that provides more search criteria and granularity. You can use an EDB converter tool such as Stellar Converter for EDB to export archive Exchange mailbox to PST. The software allows you to open any version of Exchange Server database, browse through the database, and export to PST and other formats. You can also export directly to a live Exchange database or Office 365 tenant.


