Contents
Using external drives gives users many different ways to manage data. For example, it is easy and convenient to transfer, share, and backup files from your Mac with an external hard drive. But, you may encounter an issue when the disk is not mounting, and you can?t access your data. Find out what ?com.apple.DiskManagement.disenter error 0? on Mac means and get working solutions to fix it for good.
What Is ?com.apple.DiskManagement.disenter Error 0??
Usually, external drives mount automatically when you connect them to your Mac. Once connected, you can see the disk on your Desktop and in Finder and can easily access its content. You can also mount the drive manually using Disk Utility. In most cases, this step is quick and easy.
Unfortunately, sometimes you may end up getting the ?com.apple.DiskManagement.disenter error 0? on your Mac. Instead of 0, you may see different numbers in the error message. For example, it can show ?com.apple.DiskManagement.disenter error 49223? or ?com.apple.DiskManagement.disenter error 49221? or something similar. All of these messages mean that there is an issue with macOS or that external hard drive. So due to that error message, your system can?t mount the drive and can?t access its content.
Steps before Fixing ?com.apple.DiskManagement.disenter Error 0?
There are some basic steps to try before hopping on to more complicated instructions when fixing ?com.apple.DiskManagement.disenter error 0? on Mac. For example, the error message could be caused by a temporary system glitch, and even a simple restart may fix the situation.
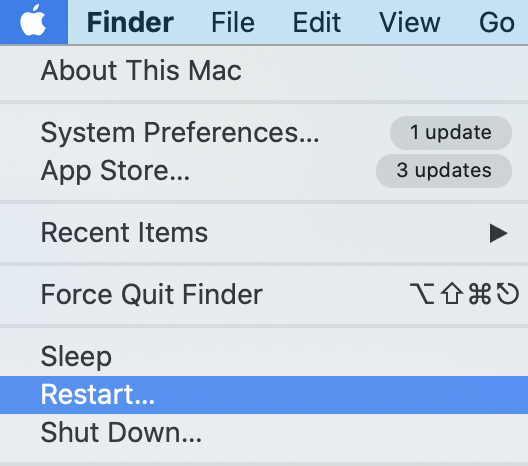
To restart Mac:
- Click on the Apple sign at the top left corner of your screen.
- Choose ?Restart? in the drop-down menu.

If this didn?t help, make sure to check the formatting of your hard drive. This is especially relevant if you have previously used the drive on Windows on Linux machines. Not all file system formats are compatible with macOS. This means that Mac won?t be able to mound the disk and access its files.
File system formats supported by macOS:
- APFS (for macOS 10.13 and higher)
- HFS+ (for macOS 10.12 and earlier)
- FAT
- exFAT
- NTFS (read-only)
You will need to reformat the drive if you identify that it is currently set up under a file system that is not supported by Mac.
Pro tip: Reformatting the hard drive erases all the data stored on it. Make sure to create a backup or use Stellar Data Recovery Software to easily restore any kind of lost files.
You may also get ?com.apple.DiskManagement.disenter error 0? on Mac if you used it previously on Windows, even if the format is compatible. For example, this could happen due to the difference in the allocation unit sizes (block sizes) between Windows and Mac.
4 Solutions to Fix ?com.apple.DiskManagement.disenter error 0?
Restarting your Mac and checking the file format can be helpful, but it might not be enough in some cases. Move on to more advanced instructions, if the basic troubleshooting steps didn?t help with the ?com.apple.DiskManagement.disenter error 0? on Mac. Below we provide four different methods to address the issue and get it fixed.
Solution 1: Check for Connectivity Problems
A proper physical connection of your external hard drive plays an important part in the mounting process. Make sure to check the cable and the correct work of the USB port before moving forward to the next steps. To do this, unplug and then plug back the drive. You can also try to connect it with a different cable or plug it into another USB port on your Mac. These easy tricks should help with the ?com.apple.DiskManagement.disenter error 0? if the issue is related to connectivity problems.
Solution 2: Use First Aid to Check for Errors
First Aid is a handy tool you can find in Disk Utility. It allows to check and repair system errors related to directory structure and formatting. It is recommended to run a First Aid scan when you encounter the ?com.apple.DiskManagement.disenter error 0? error message in Disk Utility.
To use First Aid:
- Open Disk Utility from Applications > Utilities.
- Choose an unmounted drive from the list on the left.
- Click on First Aid and then click on Run.

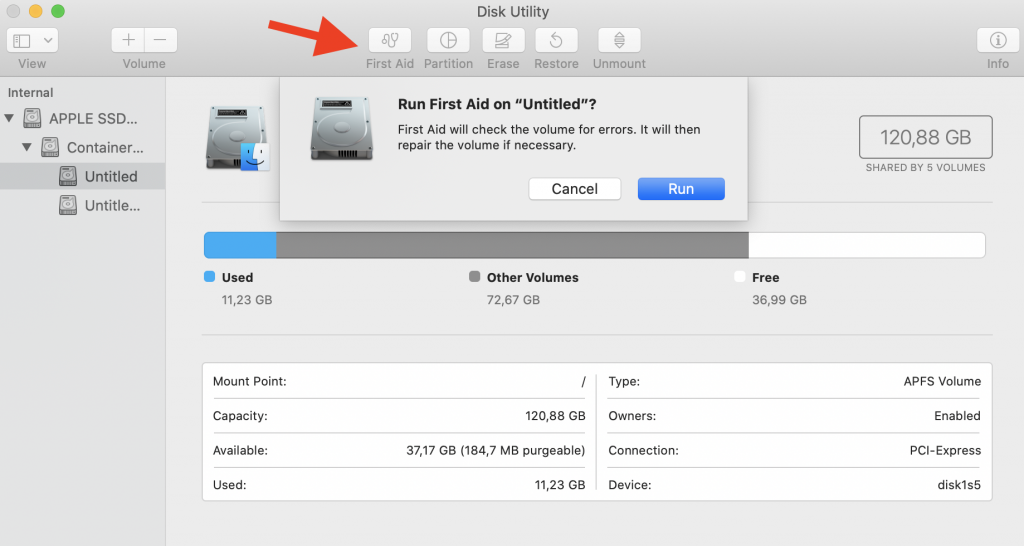
Once the process is done, you can access a detailed report. Make sure to address the issues if First Aid finds any errors during the scan.
Solution 3: Mount the Disk in Terminal
The Terminal app is a command line that allows you to control your Mac and perform various changes to your system. This powerful tool allows you to access any macOS settings and run commands with administrative privileges. So you might be able to mount the disk with Terminal even when you see ?com.apple.DiskManagement.disenter error 0? in Disk Utility.
To mount the disk in Terminal:
- Open the Terminal app.
- Type diskutil list to see all drives that are connected to Mac.
- Type diskutil mount /dev/disk1s2 and press Return.


Make sure to replace disk1s2 with the name of the unmountable drive. You can find out its name in the Identifier column by running the first command.
Solution 4: Reformat the Unmountable Disk
Reformatting the hard drive is the last step you should try, if nothing else works to fix ?com.apple.DiskManagement.disenter error 0?. Reformatting helps with most disk problems as it erases everything on it and makes it as brand new. The downside of this solution is that you also lose all the data stored on it.
Use a reliable recovery tool to prevent data loss on your external hard drive. With the help of Stellar Data Recovery Software, you can restore files from inaccessible, unmounted, and even damaged drives. Using the software before performing reformatting is recommended to make sure all your files are safe. But the advantage of Stellar Data Recovery is that you can recover files even if you have already formatted the drive.


Conclusion
Getting ?com.apple.DiskManagement.disenter error 0? can become an unexpected bombshell when you are trying to mount the drive in Disk Utility. But it shouldn’t become a reason to stop you from using your external storage. With a few simple solutions provided in this article, you should be able to mount the disk and access its content back again.
Read more articles:


