Summary: Are you constantly agitated with grainy images that show deficiency of color and definition? Don't worry! In this post, we’ve mentioned some effective solutions to fix the grainy JPEG images. We’ve also mentioned a photo repair software that can easily fix grainy images of almost all file formats.


Grain is a type of visual distortion present in photographs. It is also referred to as Noise. It can be anything from spots to splotches of discoloration present all over a photograph. Grain is a prevalent problem for photographers and photo editors. Usually, shooting in poor light or at a high ISO can lead to grainy photos.
Fortunately, this apparent distortion can be corrected. In this post, we?ll discuss several techniques to fix grainy JPEG images. But before that, let’s discuss the reasons behind grainy images.


Reasons for Grainy Images
Digital noise refers to the grainy flakes that appear in digital pictures. There are a variety of reasons why noise appears in digital photographs. Longer exposures and higher ISO settings are just a few examples.
1. Digital Noise
In a dark or dimly lit surrounding, light is converted to energy by the camera?s sensors. These sensors have to amplify light signals to achieve the proper exposure. As a result of the inconsistencies in the output, blurry photographs are created due to digital noise.
2. Shot Noise
Often, shot noise can also exist in photographs in addition to digital noise. This is a form of noise that is not related to your camera in any way. Instead, it is caused by the light entering your camera. Photons are the particles that make up light and they all move at different speeds from the light source to your camera. As a result, you can notice tiny and dark blotches in your shots, resulting in grainy images.
Ways to Avoid Grainy Photos
It’s true that knowing about the numerous noise reduction software options available out there can be really beneficial. Nevertheless, it will be much easier to acquire clear and sharp images if you can avoid noise from the start.
Here are some ways that can help you control the noise:
1. Low ISO
As mentioned earlier, ISO is a setting in a digital camera that helps you to manipulate the amount of light entering the lens. It?s recommended to keep the ISO as close to 100 as possible. But there are times when you?re indoors and you require a higher ISO. In this case, you should change the aperture first, followed by shutter speed (maximum 1/60 without a tripod/wall), as this will compensate for high ISO.
2. Work with more light
If you find yourself in a low light setting, we recommend using a strobe or flash light. These external light sources will provide you an artificial source, thus exposing the object to a great extent. You can also use reflectors to brighten some dark areas. Reflectors help to bounce light to areas where light is not reaching, thus enhancing the experience.
3. Overexpose your images
One way to repair grainy images is to gradually overexpose them. During the post-processing stage, over-exposing the image reduces the grain. When you increase the exposure, the digital noise is also reduced. If you really want to try this approach, use high ISO to avoid overexposure. You will notice that it will just add to the amount of noise in your images. Instead, reduce the shutter speed or increase the aperture. Always keep in mind that overexposing your photographs can have negative implications. If you blow out your photos, you’ll lose a lot of detail that you won’t be able to recover in post-production.
4. Turn off the noise reduction
Many new cameras have built in noise reduction that assists in repairing grainy photographs without having to edit them. Each camera has its own method of enabling noise reduction. Generally, it is listed on the menu. When you activate the function, the camera will automatically remove the grain.
Cameras have different levels of noise reduction for fixing the grainy photos. You can get the options of setting it to low, medium, or high. We recommend that you only use low or medium settings. Setting the noise reduction to high may obliterate the details of your images.
5. Use RAW instead of JPEG
Noise reduction only works with JPEG photos. You will be better off if you switch off the noise reduction and utilize the RAW file format to have more control. Having the main file in RAW format makes the file more editable while utilizing the photo editing software and preserves the detail of images.
How to Fix Grainy Photos?
If you find problem in controlling the noise in your photographs, the best way to fix noise is by using a post-production software.
Here?s a list of a few of them, along with the steps to use them:
1. Use Photoshop
You can use Photoshop to reduce grain from photographs. Here are the steps:
- Launch Adobe Photoshop and open the grainy image.
- Reduce noise by following the path: Filter -> Noise -> Reduce Noise.


- You will see a Reduce Noise pop up window on the screen with some sliders ? Strength, Sharpen Details, and Preserve Details.
- Start adjusting the sliders of these options in the pop up window until the image is fixed.

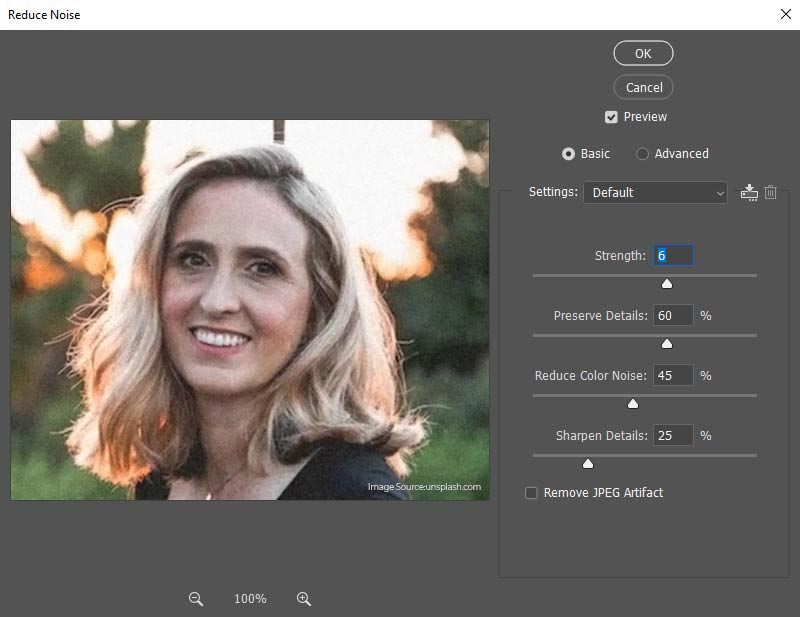
- If you increase the ?Strength’ and decrease the ?Color Noise’ and ?Sharpen Details’, you will most likely to fix the image.
Note:There are no fixed values to these options. You will have to try different values to get optimal results.
- You can preview the image by pressing the Remove JPEG Artifact button.

2. Use Lightroom to reduce noise
Adobe’s Lightroom is a picture editing software that includes a photo noise reduction tool. If you don’t have access to Photoshop, you can use Lightroom. Here?s how to use Lightroom to reduce noise in images:
- Open the grainy photograph in the Lightroom software.
- Navigate to Lightroom’s Develop module.
- You will notice the Luminarc and Color options under the Noise Reduction tab.
- You can start using Luminarc by clicking on it.
- Now tweak the noise reduction settings to reduce the noise.
- Adjust the details and contrast, till the grainy image rectification is satisfactory.
- Save the photo after you’ve finished the editing and repairing process.
If the editing software mentioned above don?t help you fix your grainy images, it’s recommended to go for an advanced photo repair software.
3. Repair photos with Stellar Repair for Photos
Stellar Repair for Photo is a photo repair tool, which is highly effective in fixing grainy images. It has a huge advantage over other photo editing software as it doesn?t affect the photo’s details and helps you maintain the original image. Moreover, not only does it restore grainy images, it also fixes damaged, broken, blurred, or pixelated photos and restores them to their original sharpness and clarity. It may even repair files that are completely unreadable due to faulty headers, corrupt data, or an erroneous file structure.


Here?s how you can perform the repairing process using the software:
- Download Stellar Repair for Photo from the official website.
- Install the software by opening the setup file.
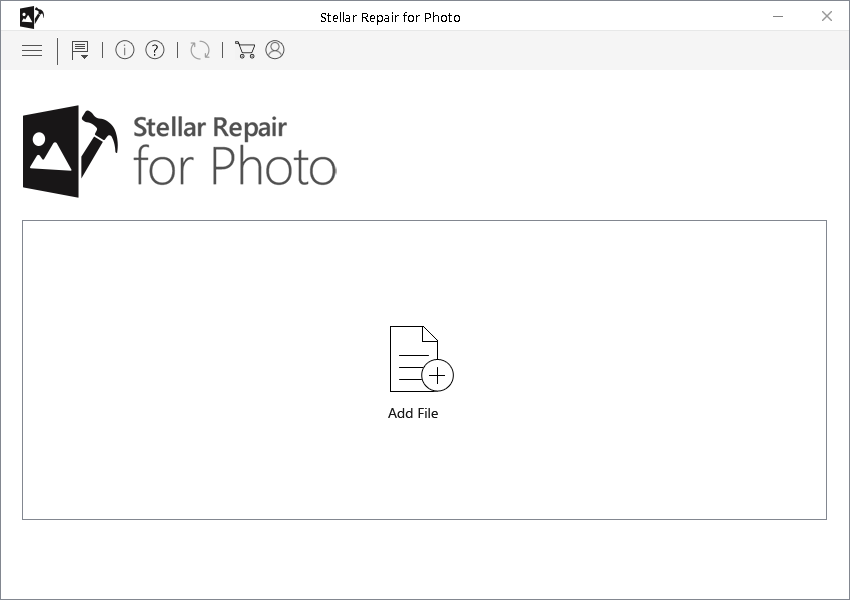
- Launch the software once the installation process is complete.
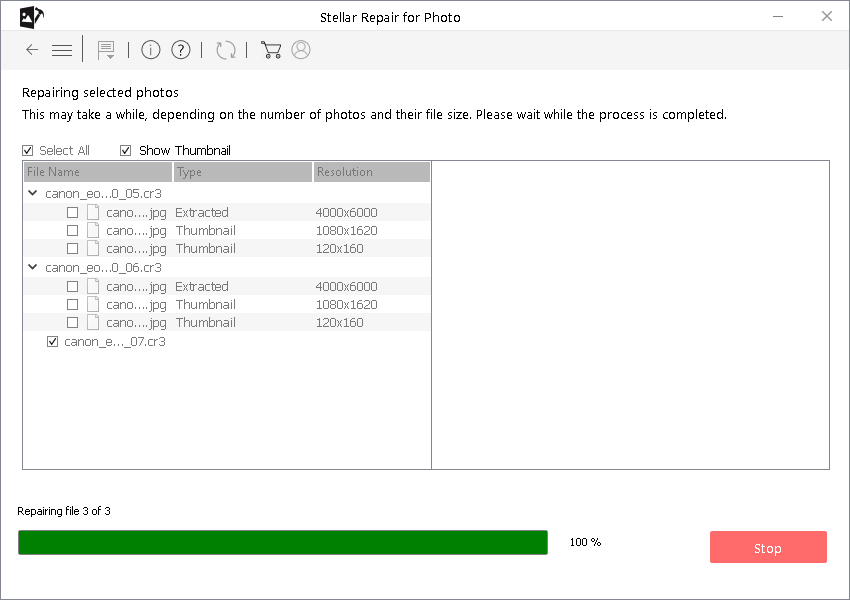
- A user-friendly interface will pop up. Go to the Add file button and add the file which you would like to repair.

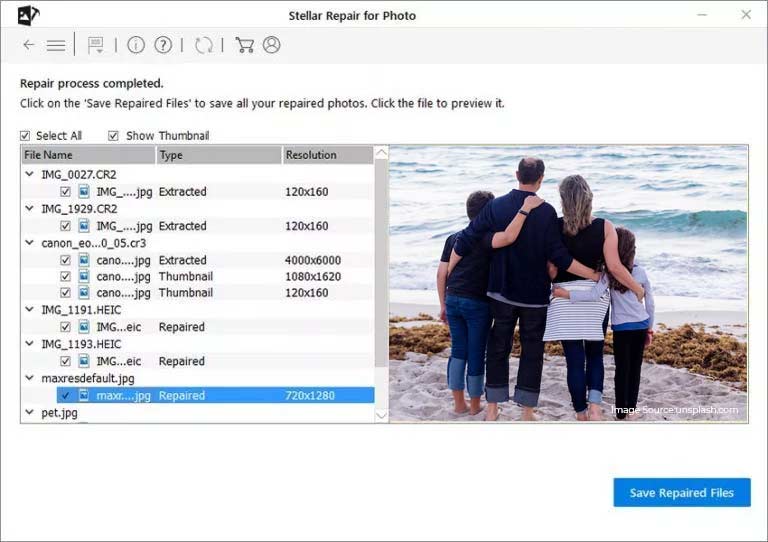
- Once you have added the corrupt files, start the repair process by clicking on the Repair button. It may take a while for the repair process to finish depending on the computing power of your machine and size of the files.

- You can preview the repaired JPEG photos once the repair process is over and save them to a desired location by clicking on the Save Repaired Files button.

Conclusion
It is to be noted that you won’t be able to completely eliminate grain from your photos. However, there are certain physical aspects which you can control to get grain free images. Nevertheless, controlling the physical aspects is not easy for amateur users. So, you can try photo editing tools, such as Photoshop and Lightroom to reduce grain in your photos. But if you want a more powerful tool, try Stellar Repair for Photos. It produces more clear, clean, and vibrant results with no effort on your part.

