Summary: Photos are a precious part of life. We save them as lifelong memories but sometimes due to technical glitches, we face strange distortion in our digital photos. Photos being greyed out is one such distortion. Read this blog to learn how to fix greyed-out photos in Windows and Mac.


Contents
?I have lots of photos taken from a DSLR during our recent vacation. I transferred the photos to the laptop. But was shocked to find almost half of the photos have a grey box over them. The images appeared perfect on camera. It is very upsetting. Is there a way to fix the grey box in photos or greyed-out Photos??
Memories are priceless and it is natural to be upset about the distortion in photos. Pictures can often appear distorted with grey bands or missing parts over them.
There could be several reasons for the grey box appearing over your photos such as below:
- Files did not transfer or copied completely
- Abrupt power shutdown during the transfer of photos
- Pictures are corrupt
- You have used an unsafe photo recovery tool that has led to corruption in the recovered photos.
- Your storage media (hard drive, SD card, CF Card, memory card, etc.) is logically or physically corrupted
How to Repair Half-grey photos
- Download the Photos again
- Restore pictures from backup
- Use a third-party Photo repair software
- Repair with Command Prompt
- Repair corrupt pictures with Hex Editor
- Open greyed-out picture in Image Editor
1. Download Photos again
Sometimes incomplete download or transfer of photos due to abrupt shutdown of the computer, disconnection of storage media in the middle of the process can cause images to appear partially. Try downloading the pictures again.
2. Retrieve Photos from your backup
Maintaining backup is overt advice for all kinds of photo loss situations. If you follow it then retain the correct photos from your backup folder in your PC, flash drive, SD card, memory card, etc.
| Did Photos turn grey after importing from Lightroom? Backup works in critical situations like when you edit the photos in Photoshop or Lightroom and they turn half grey after import. If you edited the copy of Photos, you are safe. You still have the original picture and can edit it again in Lightroom or Photoshop. |
3. Fix grey box in photos with Stellar Repair for Photo
Photos covered with grey bands or missing parts are efficiently repaired with Stellar Repair for Photo.
Remember, most third-party repair programs are not smart enough to analyze and fix completely unreadable Photos with corrupt header/ data, invalid file structure, unknown or invalid JPEG marker, missing SOS marker, etc. Stellar Repair for Photo is one tool that fixes corruption in photo header, file data, or file structure while maintaining the original quality of the image.


Even the most severely corrupt pictures can be retained with its thumbnail recovery feature.
Why you should choose Stellar Repair for Photo
- Quickly repairs an unlimited number of photos at a time
- Preview repaired photos
- Extracts thumbnails of severely corrupt photos
- Supports all types of cameras and storage devices
- Available for both Windows and Mac systems
Steps to repair half of the picture missing, grey box in photos or greyed-out Photos
- Download Stellar Repair for Photo and connect the storage media to the computer


- On the home screen of the software, select Add File option

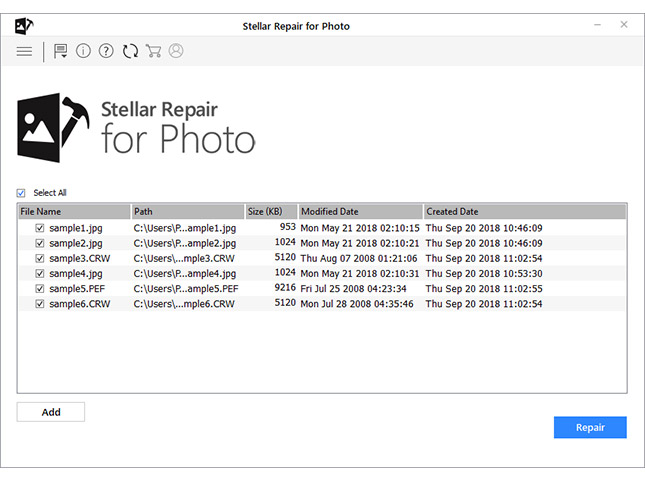
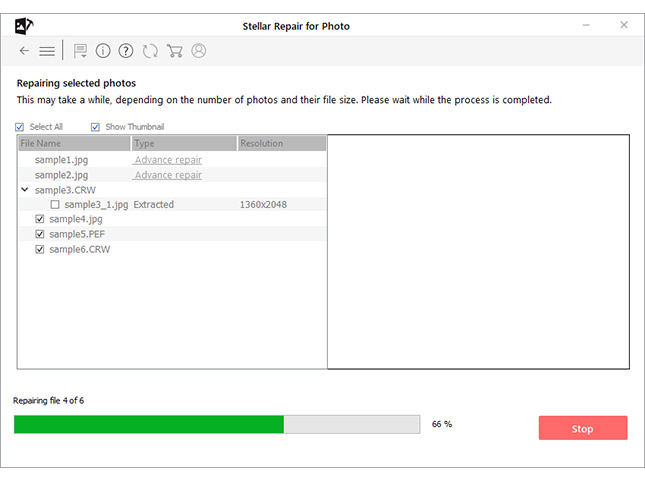
- Select the files for repair and click Repair

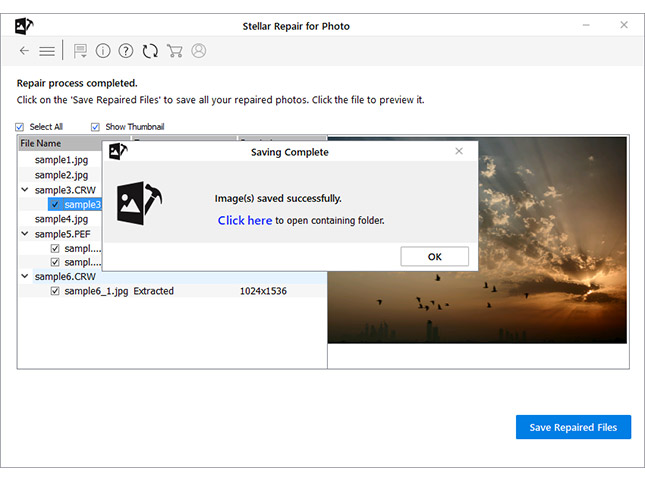
- Save your repaired photos to the desired location

4. Repair half grey Photo with Command Prompt
Command Prompt fixes minor corruptions in pictures on Windows PC. Try this fix to resolve missing parts in photos.
Steps to repair with Command Prompt
- Type and search for CMD in Windows Start
- Right click Select Run as Administrator
- Open the command prompt, type sfc/scannow, and hit Enter
- Once the scan and repair process finishes, restart your PC
View your pictures again, the problem should be resolved.
5. Repair corrupt pictures with Hex Editor tools

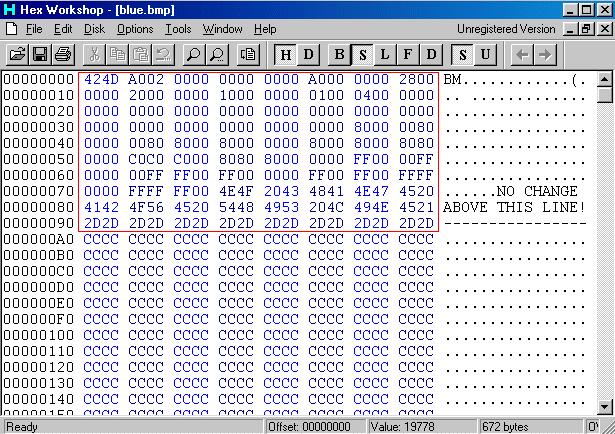
HxD, Hex Workshop, or Cygnus are Hex Editor programs that are used to change the binary data of corrupt files. Also known as Byte Editor, this method is for more technically inclined users who have knowledge of ASCII encoding. You can change the data which is in form of 0 and 1. Even a single wrong byte in a picture can cause corruption in the image and make it distorted. Choose Hex Editor to repair pictures that show grey boxes or display partially, only when you are familiar with binary coding.
6. Open greyed-out files in Image Editor
Try fixing the issue by opening the half-grey picture in an image editing software like Photoshop or Photoshop Elements. Make some minor changes and ?Save As? the photo to the same location, overwriting the original file. Most of the time this is helpful, as it writes the missing data in the image file, which might be absent in the original file.
Conclusion
The grey box in photos or greyed-out photos problems can be easily fixed by Jpeg Repair software. The ability to repair missing header, invalid data or file structure, etc., in pictures make this software a preferred tool for image editors and other users compared to other options available in the market. Moreover, it is safe, incredibly easy to use, and fixes hundreds of photos in a few minutes.

