Summary: If you can’t update your Mac and see the message saying the “installer information on the recovery server is damaged,” you’re in the right place. We will provide you with several methods to get rid of the problem. As some imply resetting the Mac HD, mind installing software like Stellar Data Recovery Professional to restore important files on your Mac.


Contents
Based on the text of the message, we can conclude that there are corrupted files that the installer cannot read. In fact, everything is much simpler, and the problem is related to the installer files.
The “installer information on the recovery server is damaged” warning indicates that the version of the macOS you are installing is out of date and needs to be updated. This common failure is automatically resolved by replacing the installer with the latest version.
However, other solutions may save a lot of time and effort.
Why Does the ?Installer Information on the Recovery Server Is Damaged? Problem Occur?
Here is a list of reasons why the error “The installer information on the recovery server is damaged” may occur:
- Corrupted system files: software bugs, power failure, or disk errors.
- System configurations: network and firewall settings, inaccurate date and time.
- Malware or virus infections: can modify system files or cause disk errors.
- Hardware Issues: faulty hardware, overheating, or power surges.
How to Fix the ?Installer Information on the Recovery Server Is Damaged? Issue?
Here are several methods to deal with the “installer information on the recovery server is damaged” problem on your Mac.
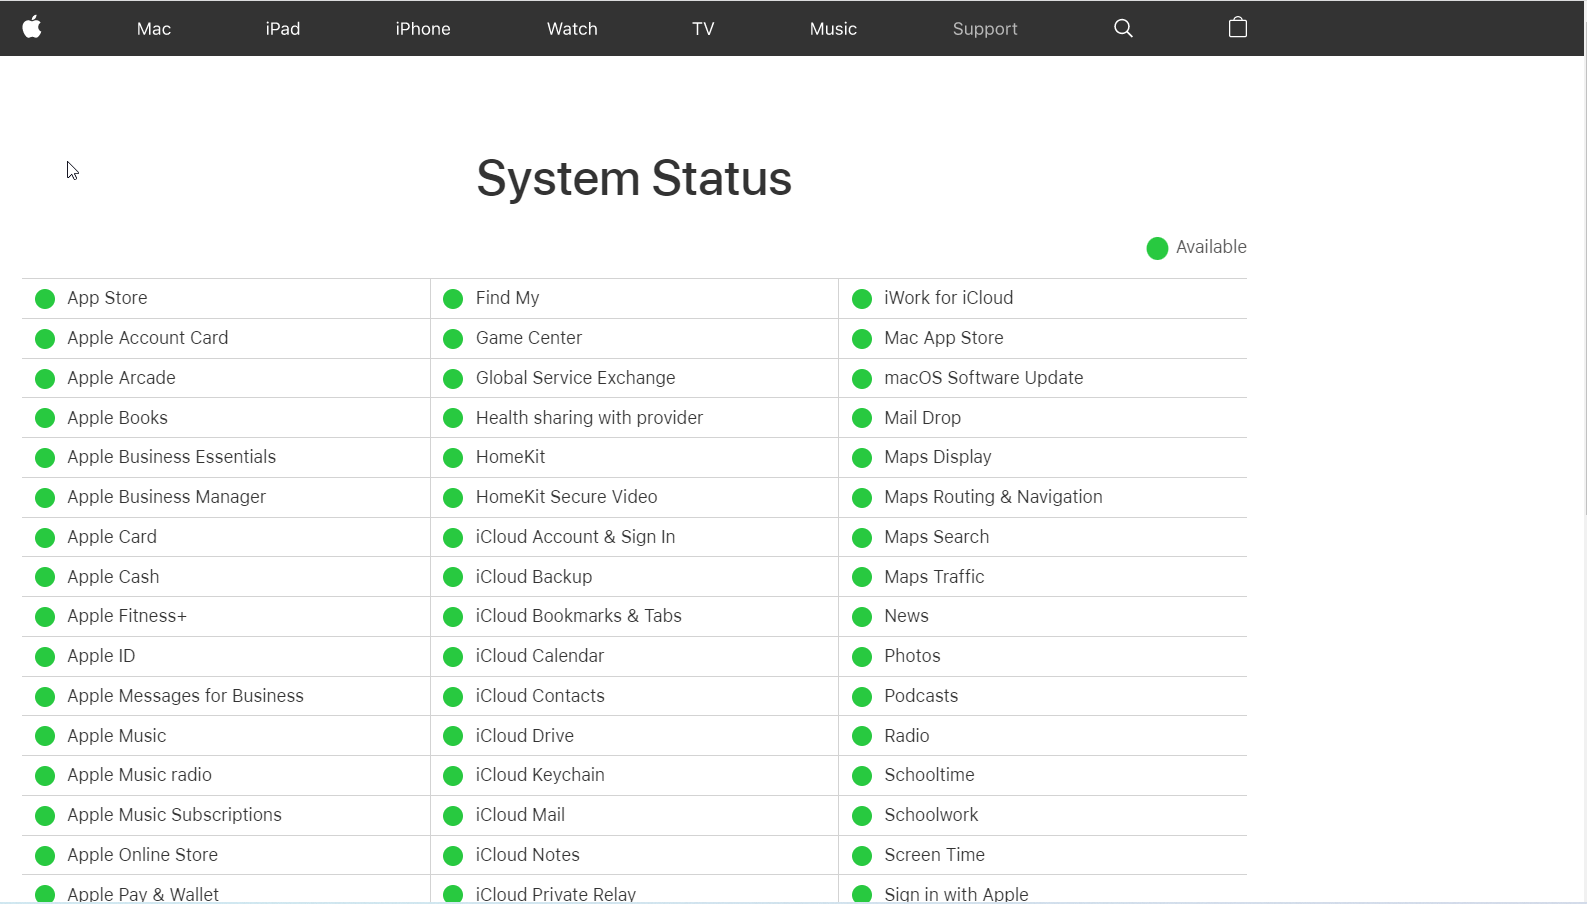
I. Check Apple Services
With Apple?s system status page, you can track issues with its online services. If you encounter an error message saying that “installer information on the recovery server is damaged,” it might be due to a problem with their servers. In that case, you’ll have to wait until they fix the problem to resolve the issue.

II. Check Internet Connection
Here are the steps to check your internet connection on your Mac:
- Find and click on the Wi-Fi icon from the menu bar.


- Check if the Wi-Fi network you’re connected to has a strong signal.
- If you’re not connected to Wi-Fi, move the tumbler to turn it on and select the needed network.
- If you’re connected to Wi-Fi but still experiencing issues, open Safari or your preferred web browser and try visiting a website.
- If the website loads, your internet connection is working properly. If it doesn’t load, try restarting your Mac or resetting your Wi-Fi router.
- If none of these steps work, contact your internet service provider for further assistance.
III. Change Date & Time
Sometimes, the issue is with outdated certificates. That’s why time on your Mac should be synchronized with the server to which your device is connected. You should double-check your date and time settings if it is the issue.
Here are the steps to repair the “installer information on the recovery server is damaged” error if the reason is the incorrect date and time settings:
- Run your Mac in Recovery Mode.
- When in Recovery Mode, click Utilities > Terminal.

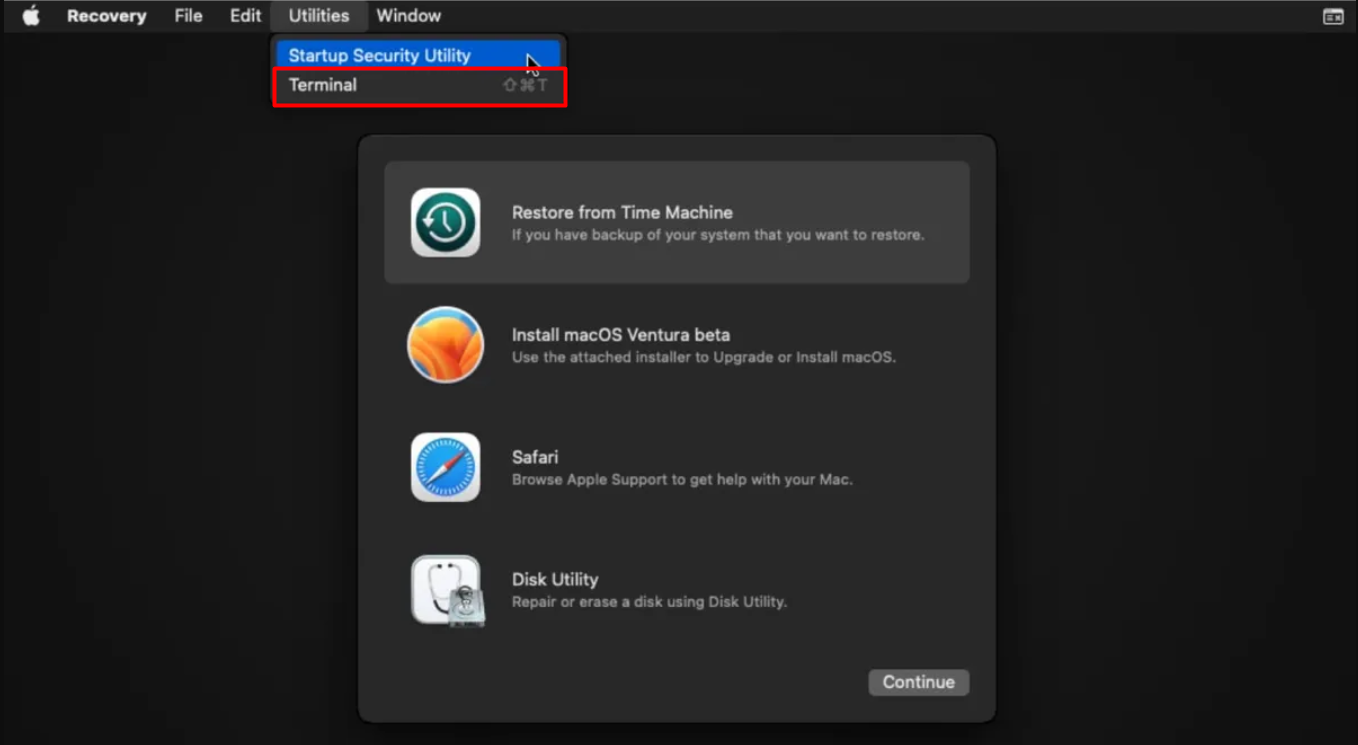
- In Terminal, type sudo ntpdate -u time.apple.com and press Enter.


If that didn?t work, follow additional steps:
- Go to Terminal.
- Type date in the command line > press Enter.


- If the date and time are inaccurate, use the command date 0305111523 to change them.


Note: replace data from the sample with the needed date&time in the format MM/DD/HH/MM/YY.
- Hit Enter and exit.
IV. Reinstall macOS
If previous methods didn?t work out, try to erase your Mac disk and reinstall macOS. Here is how:
- Create a backup of your files using Time Machine or external drives.
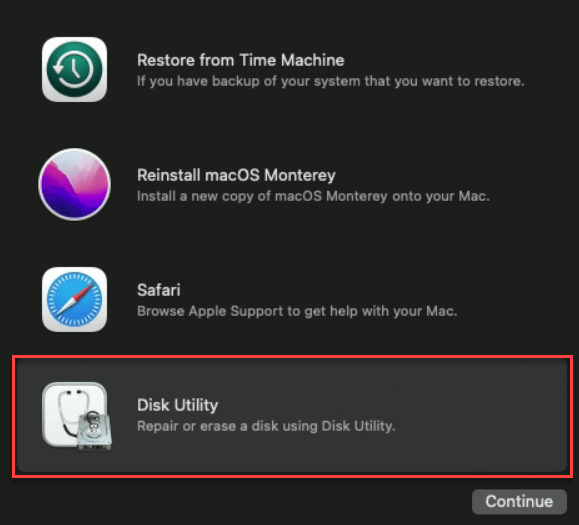
- Enter Disk Utility from Recovery Mode.
- For Intel-based Mac users, press Command + R.
- For Apple Silicon Macs, press and hold the Power key.

- Select the disk you need to delete > click the Erase button.
- In the window that appears, choose the APFS option to format the disk.


- Click Erase to confirm, and follow the prompts on your Mac?s screen to proceed.
When it is done, let?s recover your macOS system and files.
A. Restore from Time Machine Backup
To recover the macOS follow the next steps:
- Go to the Recovery Mode and select Restore from Time Machine backup.


- Follow the steps to finish the recovery.
B. Recover your files with Stellar Data Recovery Professional
After you recover the macOS and some of the files are still missing, try using Stellar Data Recovery Professional to get your files back. Here is how:
1. Download & Install Stellar Data Recovery Professional for Mac software.


2. Open the app and select the type of files you need to recover, and click Next.


3. Choose the location where the files were stored before they were lost or deleted. If you?re not sure, select the Can?t Find Volume option, and click Scan.


4. Wait for the scan to complete, once the scan is complete, you can preview the recoverable files in the scan results window.


5. Select the files you want to restore and click on Recover to start the recovery process.
V. Run macOS Installer via Terminal
If you see the “installer information on the recovery server is damaged” error message while installing a macOS update using the App Store, downloading the full version of the macOS installer might help.
Follow these steps to download the complete macOS Ventura update installer:
- Open Terminal from the Utilities in the Recovery Mode.
- Type the following command to run the full installer: sudo softwareupdate –fetch-full-installer [OS version].


- Press Enter and wait for the download to finish.
Wrapping Up
Now, you see that following the easy steps can fix the “installer information on the recovery server is damaged” error. You can check your internet connection, update your date and time settings, and erase and restore your hard disk. Always have a copy of your important files before repairing your Mac, and don’t hesitate to ask for help if needed. You can fix this issue and use your Mac without any problems with the proper solutions.
Read more:


