Summary: This post serves as a short and easy guide on the reasons why you are getting Zsh permission denied error that happens to appear in macOS Terminal and ways to fix it, as well as prevent the error from happening in the first place.
Contents
So, you are opening a file, and you have decided to do it with the help of the Terminal app. A moment later you see the Zsh permission denied error. How to fix that? Let us first take a look at the root of the problem itself.
What does Zsh Stand for?
The Zsh or the so-called Z shell is a Unix shell. It?s a macOS default shell designed on top of bash. In other words: it?s the default Shell in macOS (and a shell itself is the interface that provides access to an operating system?s services). Zsh is used more often than Bash (?bourne again shell?) since it is more powerful, and has an extended number of features.
What is Zsh Permission Denied Error?
The problem you are encountering appears when the Terminal cannot complete the task as it simply can?t access the file. Either the file is locked, the command has been formatted in a wrong way, or even the file permission is insufficient.
Ways to Fix the Zsh Permission Denied Error on Mac
A. Check Disk Permissions
Since we have talked about file permissions, let?s start with them.
To check disk permissions through Terminal:
1. Open Terminal and paste the following command: ls -l. Add a space after the command and do not press Enter for now.


2. Find the file you need to open > drag it into the Terminal window (this will not actually move the item, but will do the trick).
3. Press Return.
If the letters ?rwxr? appear before your username in the result string, it means you have the access to read, write, and execute the file. If there is only one sign, for example, ?r?, it means the file is read-only to you.
If you are checking disk permissions of the file through Finder:
- Find the desired file in the Finder window.
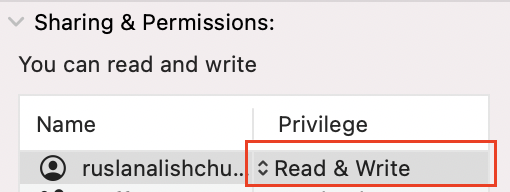
- Press Command + I to open the Get Info option. Find Sharing & Permissions at the bottom of the window.
- In case you see nothing beneath it, find the arrow and click it.
The permissions should now be visible to you. To have the necessary access, it should state ?Read & Write?.

B. Change the Ownership of the Directory to Solve Zsh Permission Denied
Let?s try changing the ownership of the directory:
Open Terminal again and use the command chown -R $USER:$USER /path/to/directory.
Where $USER is the currently logged-in user and /path/to/directory – a place you are writing it to.
C. Grant Access to the Disk to Terminal if it has No Full Access
If it is the case with Terminal, this might be another reason for the Zsh permission denied error.
To check if that?s true, and give them access to the disk, do the following:
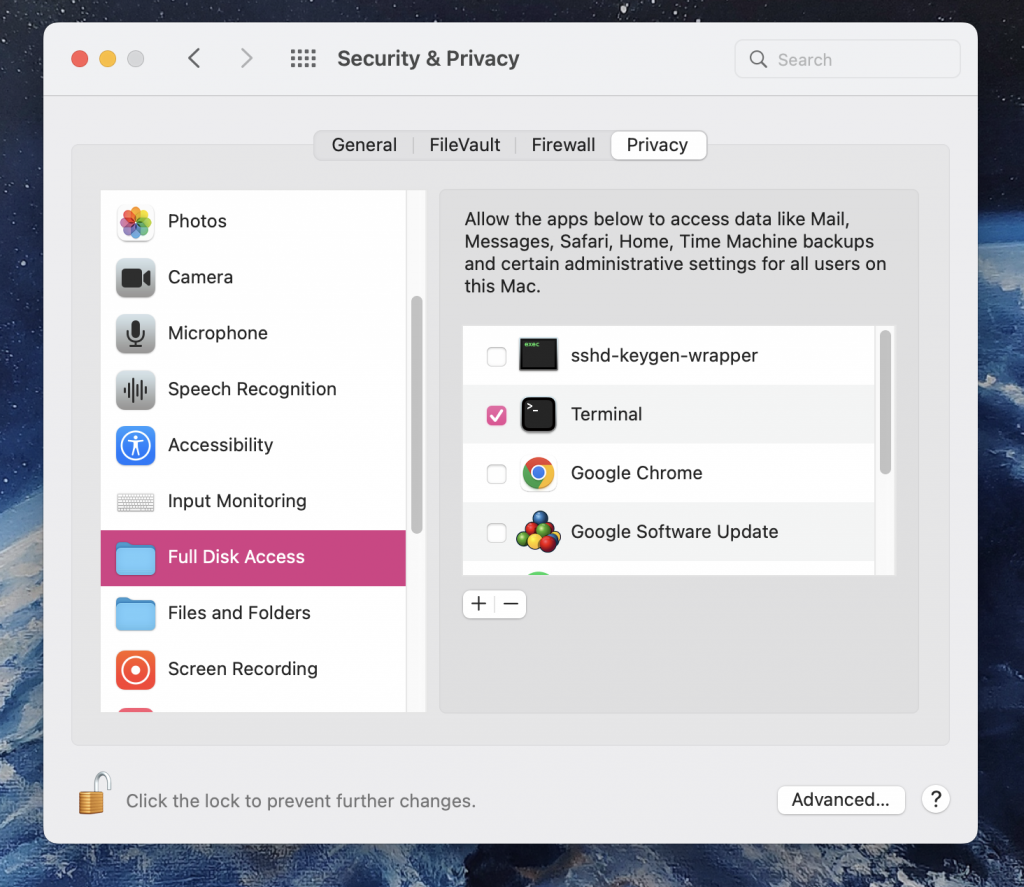
- Open System Preferences.
- Find Security & Privacy.
- Then choose the Privacy tab.
- Click the padlock in the left bottom corner > type your admin password to apply changes.
- From the list choose Terminal and tap the mark beside it to add it to the list of full access.

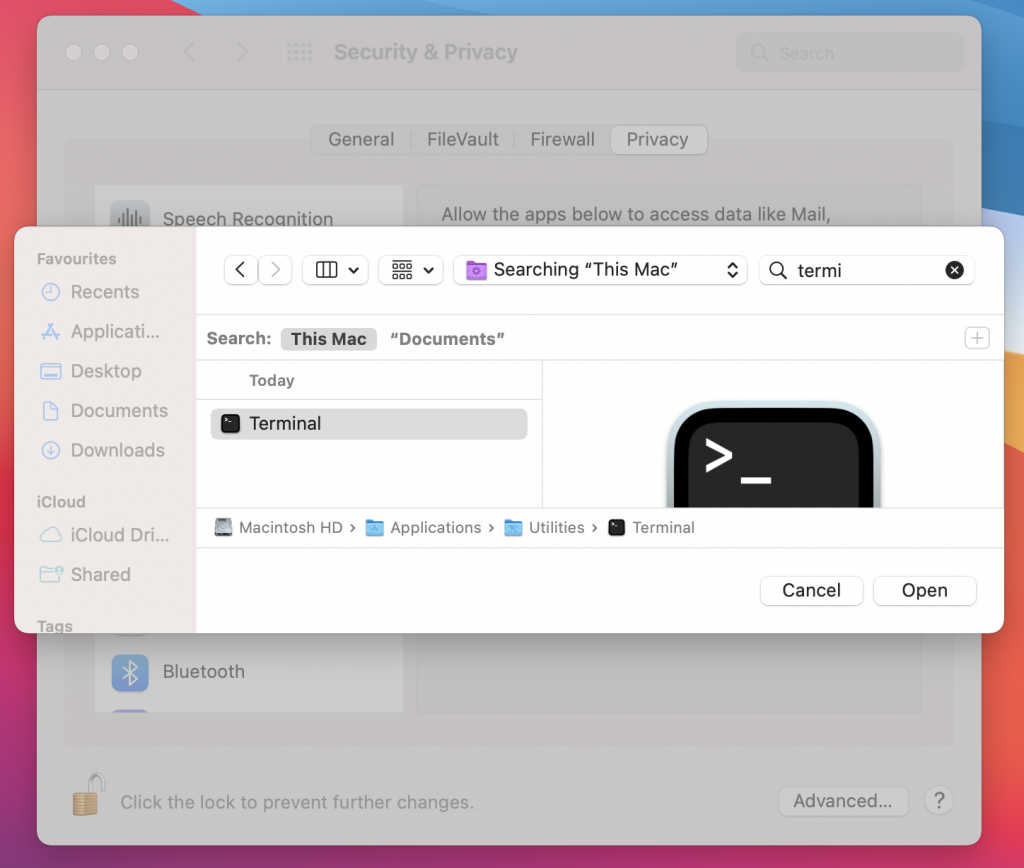
Note: If Terminal is not on the list (this may happen in the newest macOS versions), you?ll need to add it manually by clicking the + button and searching Terminal in the search bar. Next, you?ll need to quit Terminal to apply the changes.

D. Use a Sudo Command
If none of the above helped use the superpower ? a Sudo command. In simple words, a Sudo command stands for superuser do, when a permitted user gains super user privileges or executes a command as another user. Mind it will ask for the current (not the root one) user?s password when using the mentioned command for the first time.
Here are the commands you might try:
- sudo chmod 755 ~/Themes/ObsidianCode.xccolortheme
- sudo chmod 755 /dvtcolorconvert.rb


Is There a Way to Prevent Terminal Permission Denied Errors on Mac?
Yes, there are actually four of them. Read on to find out more.
Assign Permissions to Users and Groups
Give permissions to a number of users and groups to prevent issues with permission. To do this:
- Choose a file, folder, or disk, then open File > Get Info.
- Tap on the lock sign to unlock the item. If it?s asking for your admin?s name and password ? fill them in.
- From the Name column choose a user or group, this will open the popup menu > click the Privileged Setting option.

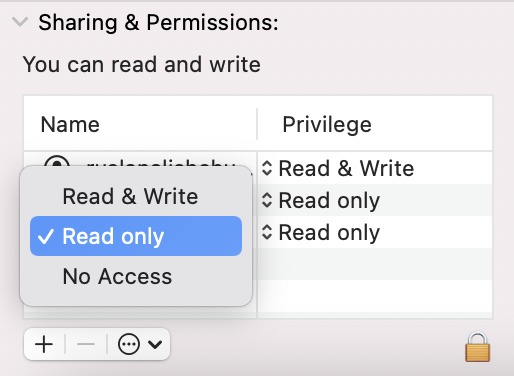
Here?s what each permission means:
- Read Only: you can only access the item without changing it.
- Write Only: a folder becomes a DropBox, where the user can copy an item and move it there without opening the file itself.
- Read & Write: permission to do both viewing and editing the file.
Grant Permissions to All Items in a Folder
Giving permissions to all items on a disk or in a certain folder means they will be accessed only by certain users:
- Select a directory (disk or folder) > then go to File in the menu bar.
- Click Get Info.
- Click on the padlock and type in your admin password.
- Check the bottom of the window >choose to Apply to Enclosed Items.
- Click OK for the necessary changes to apply.
Change the Owner of an Item
Issues with Zsh permission denied in Mac Terminal may also occur if the owner of an item is another user.
To change the owner of a file:
- Go to File of the chosen item > Get Info.
- Add the new owner with the Add (+) button, using the action pop-up menu.
- Then click Make [the chosen owner] as the owner of an item.
- Save changes.
Add or Remove a User or Group
Adding or removing a user or group can also resolve permission issues.
Here?s how to do so:
- Find the desired item.
- Go to File > tap Get Info.
- Look for Sharing & Permissions.
- Hit Add (a + sign) a user or group if you would like to add one, or click Remove (a – sign) a user or group to remove it.
- Click to apply changes.
It?s a Wrap
If you happen to decide to open a file not by double-clicking it, but by doing it with Terminal instead ? probably there is a reason why you have decided to use the less conventional way. Issues with accessing items this way are not uncommon, and we hope our simple guidelines will help you fix the error in no time, and with little effort. Since it is basically a permission issue, the first thing you would need to do is to check all possible permissions or check if the user you are logged under has sufficient access.
Read more:


