Network Attached Storage or NAS is a storage device which can be compared with ?File Server? connected to the network through which an authorized user can store and retrieve data. RAID-based NAS is fairly popular as a cost-effective, reliable, and scalable storage solutions among enterprises, small businesses, and individuals. RAID-based NAS allows users to add or remove storage drives from it as per the requirement.
Further, just like other storage media and RAID configurations, RAID based NAS is also not failure proof, no matter if it?s based on RAID 0, 1, 5, or 6 and Hybrid RAID .However, you can download STELLAR® TOOLKIT FOR DATA RECOVERY software to recover your lost data.
A RAID Based NAS Could Fail Due to Several Reasons:
- Power failure or Sudden power surge
- Overheating and Improper shutdowns
- Virus attack or Malware infection
- Incorrect setup or User Error
- OS errors
- Hardware controller failure
- System Failure, Multiple disk failure any in extreme cases Physical damage
A damaged or corrupt RAID based NAS can?t be accessed or repaired without formatting the installed hard drives. One needs to reconfigure everything on the damaged on NAS storage device to make it work again. This is the case of total disaster as the setup is completely destroyed along with data stored on a NAS drives.
In this guide we are going to explain, how you can get access to your RAID based NAS and recover data from NAS files before formatting, resetting, or re-configuring your RAID based NAS configuration.
Recover Data from NAS Hard Drive
RAID-based NAS data recovery is a complex process. Therefore, you need an advanced NAS Data Recovery Software such as Stellar Data Recovery Toolkit that helps recover data from a failed, damaged, or logically corrupt RAID 0, 5, and 6 level whether it?s on NAS or inbuilt.
The tool supports the recovery of NAS storages from different vendors such as Buffalo LinkStation and Terrastation, Iomega StorCenter, Synology, LaCie, QNAP and other Linux-based NAS devices.
Things You Need:
- Determine the RAID on which the NAS is based on, along with RAID parameters (most important)
- A PC running Windows operating system
- Stellar Toolkit For Data Recovery software (NAS Recovery Software)
- Free space (equivalent or more than the volume of recovered data from failed NAS drives) ? use external or Internal HDDs
- SATA to USB converter or enclosures for connecting NAS drives to PC for NAS RAID recovery. If the system has vacant SATA connectors, connect NAS RAID drives to those SATA connectors
Follow These Steps for NAS RAID Recovery:
1. Power off the RAID NAS and then remove all hard drives from it. Note the sequence in which they are aligned in the rack.
2. Connect all NAS RAID drives to Windows PC via USB or SATA. Remember to connect all drives at one time.
3. Install and run Stellar ToolKit For Data Recovery software on the system.


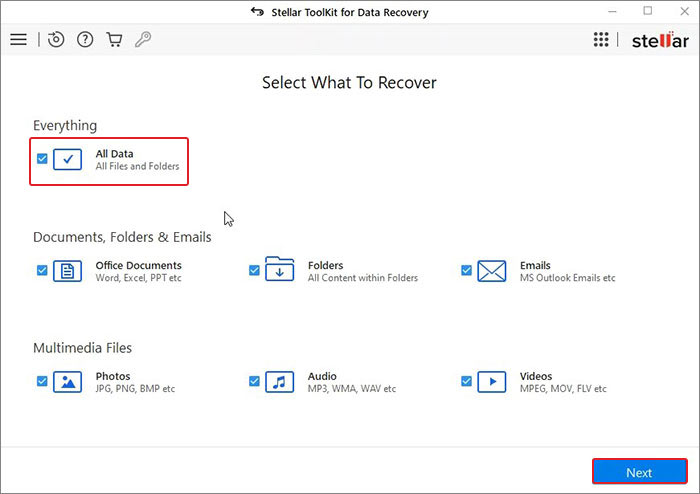
4. Select what to recover ? photos, audio, videos, documents, emails or other files and folders.

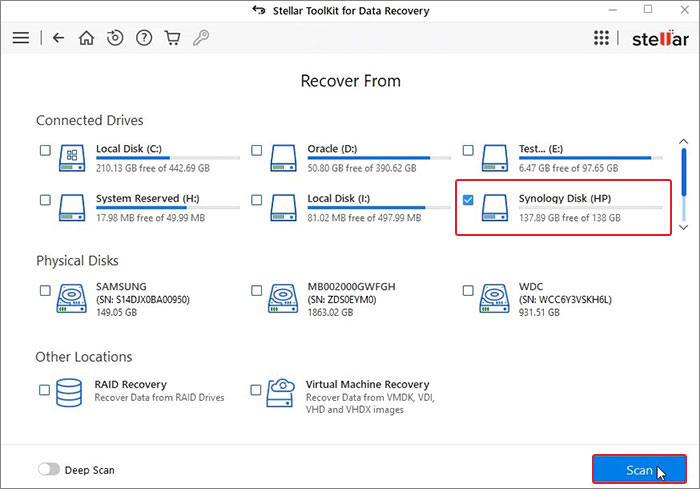
5. Next, under Connected Drives, select Synology Disk and click Scan.

6. The scanning process will start.

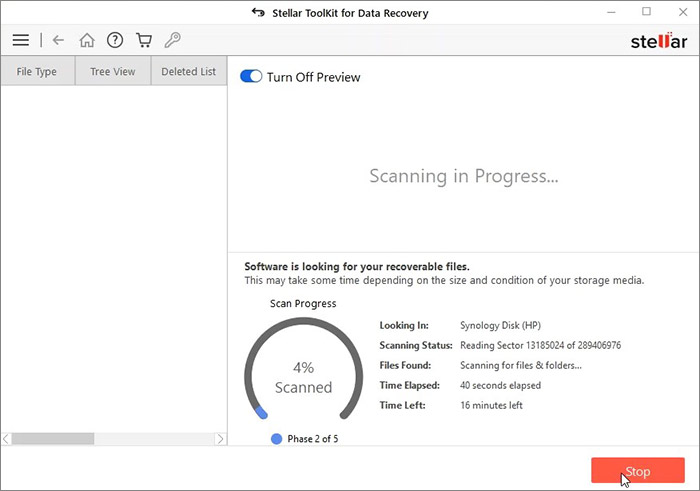
7. After scanning, the software will show you the results on the screen.
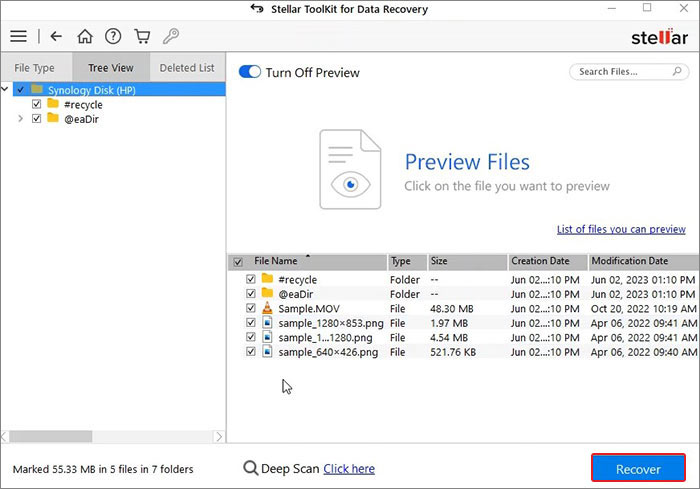
8. Select the files. You can see the preview of the files you want to retrieve.
9. Click Recover to proceed.
10. Now, select Browse to choose a storage location. (Choose a different drive volume or an external media drive.)
11. Finally, select Start-Saving to save the recovered files.
12. The files will be saved at the chosen location.

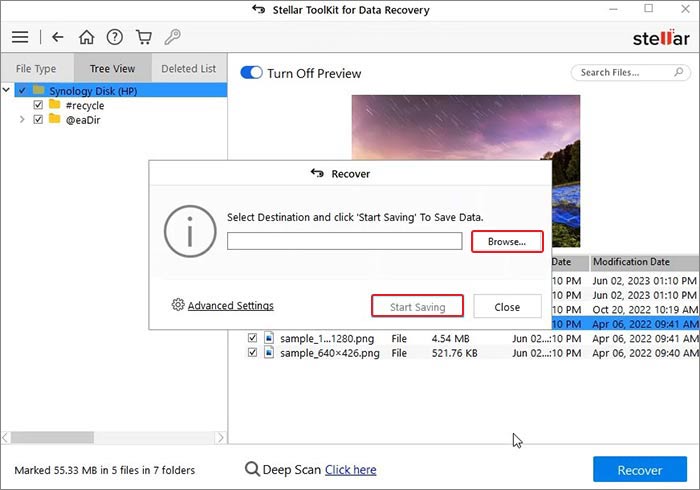
16. Click the checkboxes of the files or folders that you want to recover. Then click the ?Recover? button. A pop up appears.
17. Click the ?Browse? button to select a specified location for data saving.


Note: Make sure not to select the drive in RAID NAS array (now connected to your PC). Select an external HDD or internal hard drive with enough storage space to save recovered data.
18. Click the ?Start Saving? button to save (recover) the selected files and folders at the specified location.
After recovering all data, start reconfiguring your NAS storage by formatting the drives. Copy the recovered data to RAID NAS and start using your NAS storage like before.
Always create a backup of your important data whether it?s stored on a NAS RAID storage device or your computer. Backups make recovery process much faster and save you from losing important files and documents.
Conclusion:
We discussed why a RAID based NAS storage device fails and how one can quickly recover from such data disaster. Daata recovery from nas drive is a complex process, therefore, it?s important that you handle a damaged or corrupt RAID based NAS drives carefully for nas recovery process using a reliable and smart NAS recovery tool such as STELLAR® TOOLKIT FOR DATA RECOVERY.


