Summary: In this post, we will see the best free ways to perform deleted file recovery on Mac. These free methods give you a fair idea about how file recovery works on macOS & how you can recover permanently deleted files in any data loss situation. Meanwhile, if you don't have time to read this post and want to recover your deleted data on an immediate basis, you can download the Stellar Mac Data Recovery Software free version to see if it works for you or continue to read this post.

![How to Recover Deleted Files on Mac [100% Working]](https://www.stellarinfo.com/public/frontEnd/images/product/free-download-mac-blue-button.png)
Contents
- Recover Deleted Files from Trash
- Restore Permanently Deleted Files by Using Time Machine
- Recover Deleted Photos from the Photos App
- Recover Deleted Emails from the Mail App
- Restore Deleted Multimedia Files from iTunes
- Retrieve Deleted Files from the Notes App
- Recover Deleted Files on Mac without Time Machine
- Final Thought
Do you regret trashing your favorite movie, photo album, or documents out of your Mac? Oh well, that?s a whim we all play out a tad too often. But then, technology has made it possible to recover deleted files with surprisingly easy tricks and the best Mac data recovery tools. The following section describes the best tips to recover your deleted files on Mac without paying any buck.

Recover Deleted Files from Trash
Trash is the place where your deleted files are stored temporarily and safely. Trash can hold the deleted files as long as you don?t empty them or remove them via the ?Delete Immediately? option in Mac.
Your chances of recovering deleted files from Mac would be null if you chose to empty the Trash without restoring your files to the original location.
Follow these steps to perform deleted file recovery from Trash:
1. Go to Trash ![]()

2. Use Search Box to enter the filename or file extension so that the Trash folder directly reveals your files from the pool.

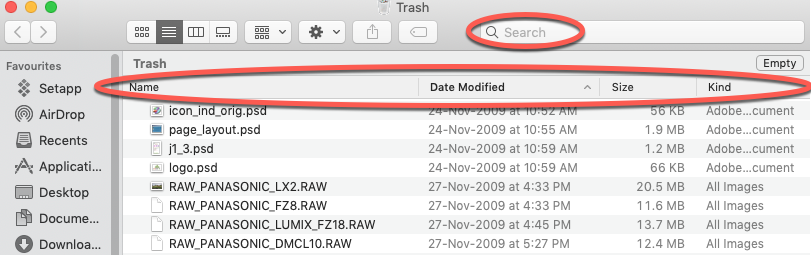
3. Once you have identified the files for recovery, select them, right-click and choose ?Put Back? for immediate file recovery.


Recovering deleted Mac files from Trash is easy, but it requires suitable action after deleting a file.
Read Article: Recover Files Deleted after Emptying Trash on Mac
Restore Permanently Deleted Files by Using Time Machine
Time Machine ![]()
The functioning of the Time Machine
Time Machine takes incremental backup of files?hourly for the past twenty-four hours, daily for the past month, and weekly for everything older than a month. When the backup drive is full, Time Machine removes the oldest weekly backup.
Restore Deleted Files Using Time Machine
When you empty your Trash, macOS deletes the Trash records permanently. If you have set up an external hard drive as a Time Machine backup drive, you can recover permanently deleted files.
The steps are as follows:
1. From the macOS menu bar, click Time Machine > Enter Time Machine.
2. Click the up arrow to navigate to the time before the deletion of files.
3. Locate the files from the backup Finder window.
4. Click the spacebar to preview a file, select the deleted files, and click Restore.

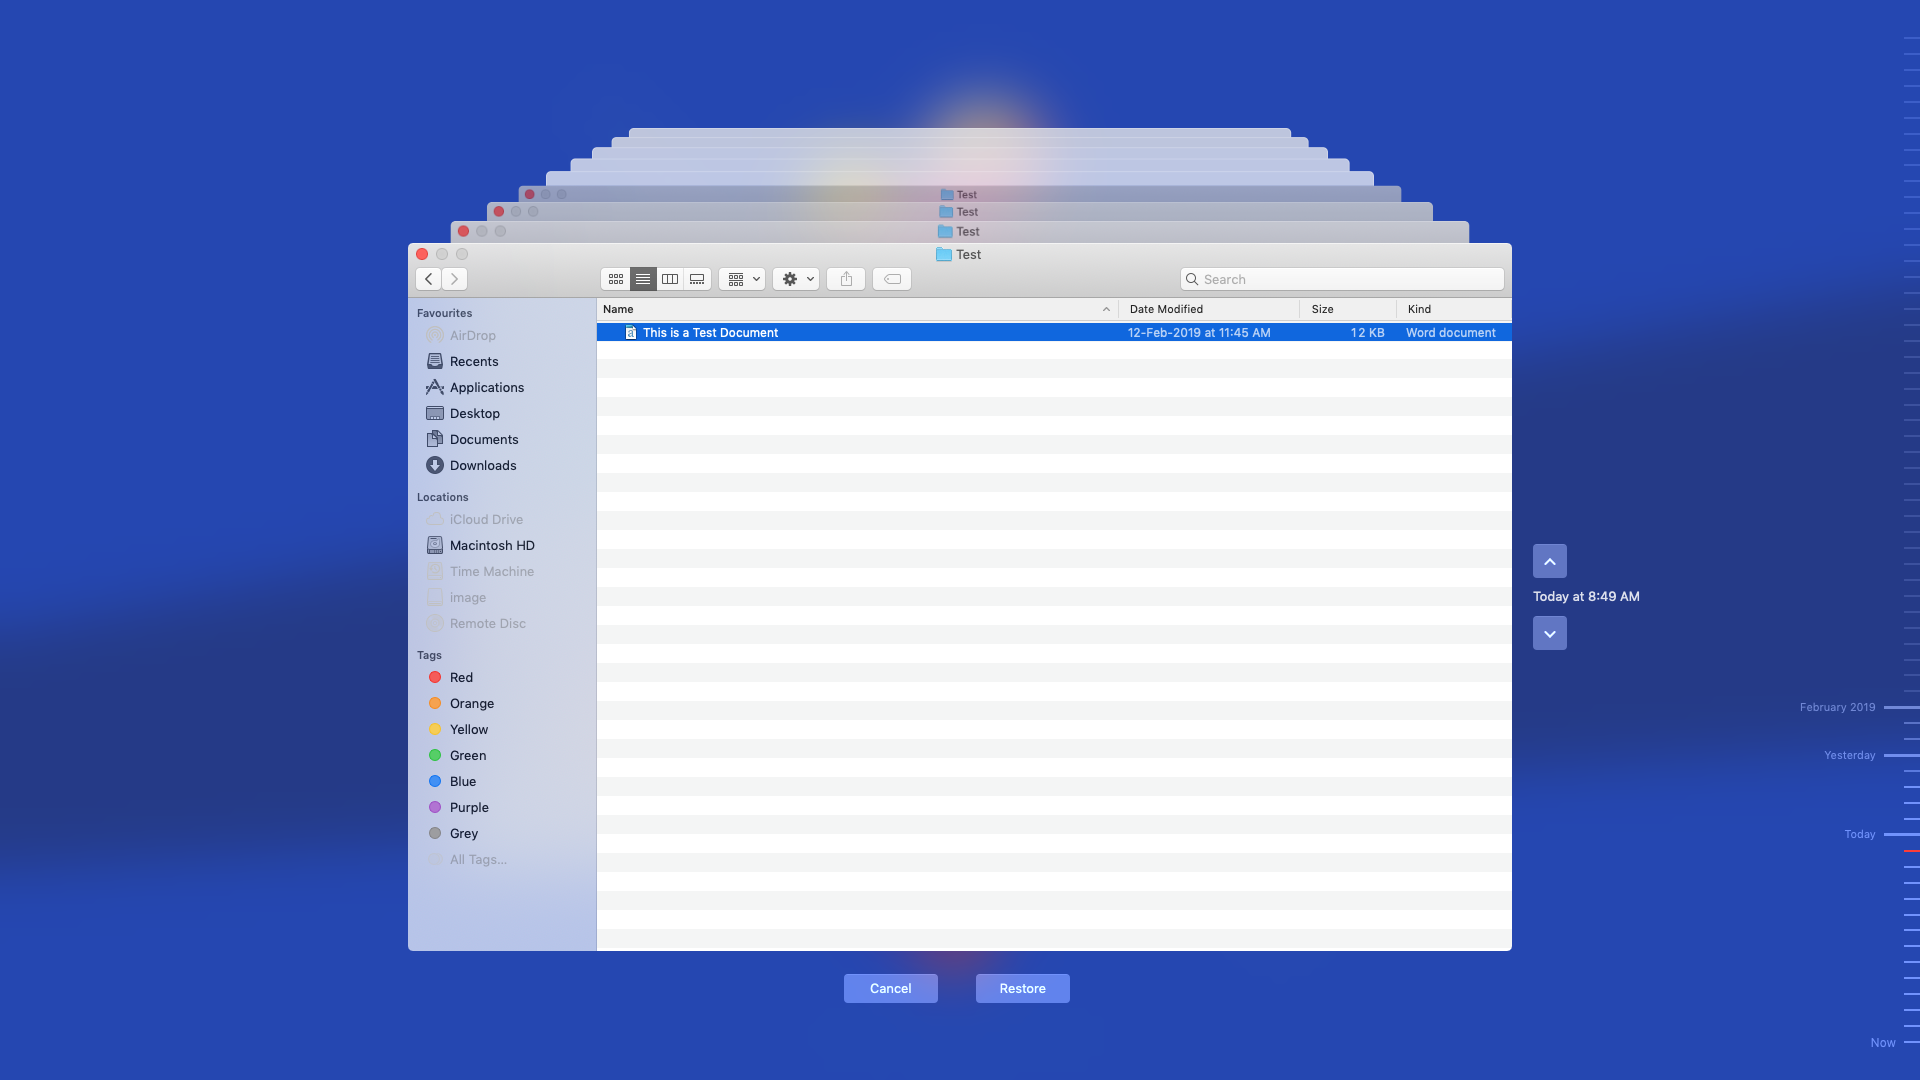
5. Open your current Finder to view the restored files.
Recover Deleted Photos from the Photos App
Photos ![]()
In case you have accidentally deleted photos from the Photos app, then employ the following steps to restore them:
1. Open Photos, select Albums from the left pane, and double-click Recently Deleted.
2. Select the deleted photos and click Recover from the top-right corner.

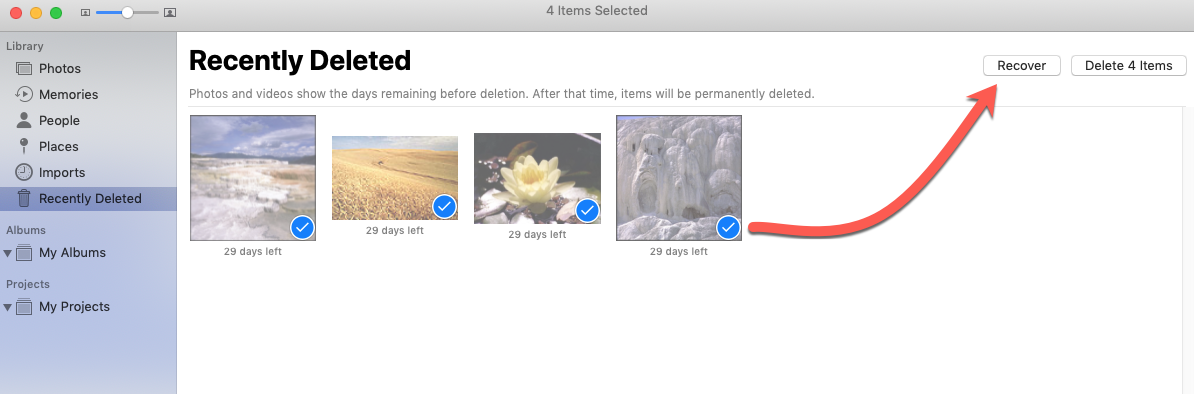
There you go; you have recovered your deleted photos for free.
Note: After 30 days of grace period for recovery, you cannot restore the deleted photos from the Photos app. But you can use Time Machine backup to restore your lost photos.
Recover Deleted Emails from the Mail App
Mail app ![]()
If you?ve deleted an email, you can recover it with these steps:
1. Open your Mail app and click Trash from the left pane.
2. From the list of deleted emails, select the one you require and drag it to your Inbox.
That?s it; you have restored your deleted emails free of charge.
If your deleted email is not found in the Trash, then the Mail app may have automatically removed it from there after the elapsed time. Or you may have deleted the email from Trash as well. In both cases, Time Machine is the only way to get your lost email back.
Also Read: Recover deleted emails from Apple Mail.
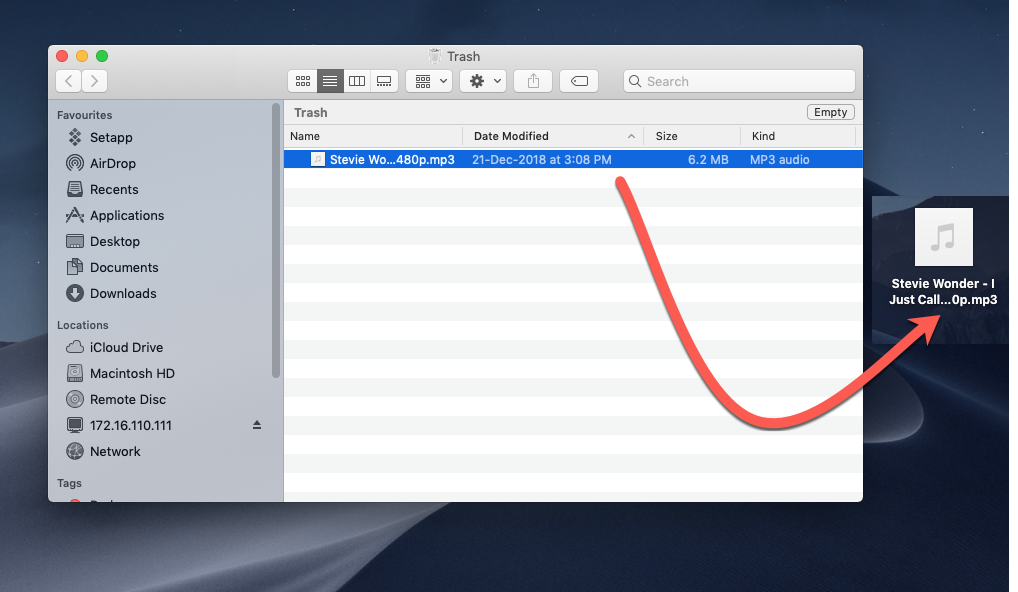
Restore Deleted Multimedia Files from iTunes
When you delete a multimedia file from iTunes ![]()


1. To recover a deleted multimedia file, you can look in iTunes Media or Trash.
2. Once you find your deleted file, you can drag it to the iTunes icon present in Dock to re-import it into your iTunes.

3. If the file is not present in either the iTunes Media or Trash, you either re-download it from the iTunes Store or restore it from Time Machine.
Retrieve Deleted Files from the Notes App
Like in Photos, when you delete a note, the application removes it and keeps a record in ?Recently Deleted? for 30 days.
To recover a deleted note for free, perform the following steps.
1. Open the Notes app and click on the Recently Deleted section present on the left pane.
2. From the list of recently deleted notes in the middle pane, secondary click on the required note file and opt for Move to > On My Mac > Notes.

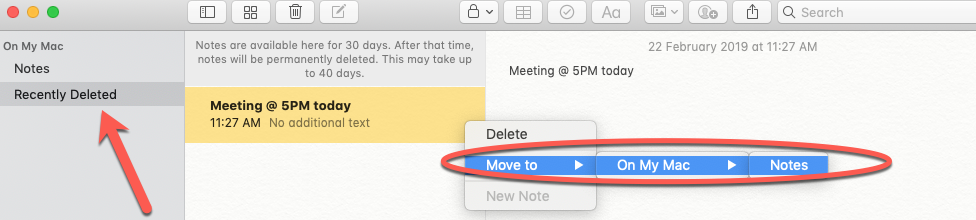
The note is now present in your Notes section.
If you have deleted the note from the ?Recently Deleted? section or if the recovery grace period is over, you must restore your lost note by using Time Machine as usual.
Recover Deleted Files on Mac without Time Machine
Time Machine is repeatedly advocated as a last resort to recover data on Mac. However, the truth is, Time Machine can fail to recover deleted Mac files if they are corrupt/damaged or were never backed up.
So, in all practical situations, Mac data recovery software is an absolute necessity for recovering deleted documents, photos, videos, iTunes, and emails. It?s the actual last resort to save your precious data.
Utilities like the Stellar Data Recovery Free Edition for Mac find relevance in critical data loss situations, such as no Time Machine backup, emptied Trash, erased/formatted storage drive, corrupt drive?s file system, data flushed out due to the passage of retention period, and more.
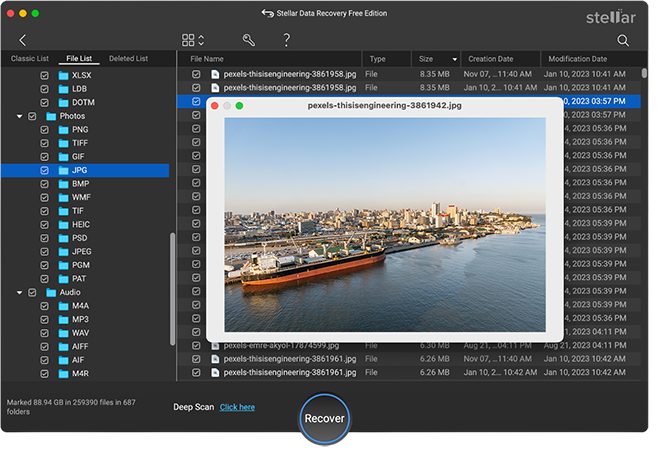
Software method to recover your deleted Mac files in 3 Steps
1. Download and install *free trial of Stellar Data Recovery Free Edition on your Mac.


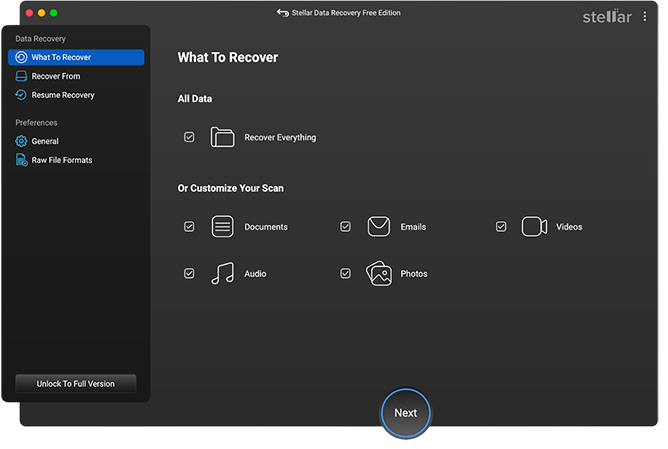
2. Scan a storage drive from which you would like to recover deleted files.

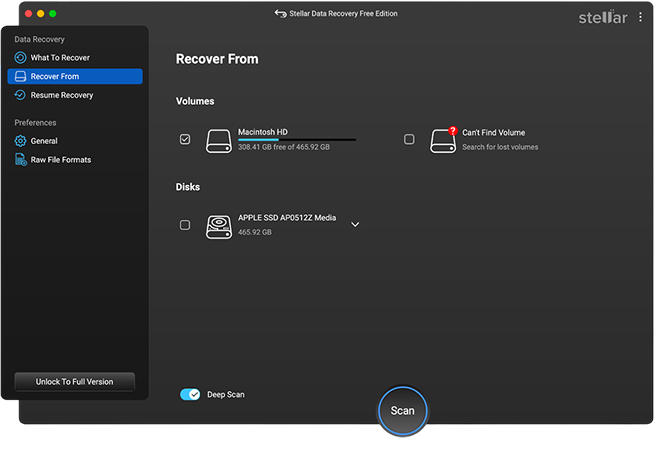
3. Preview your files and recover them conveniently to a distinct drive location.

*Free Edition of the Stellar Data Recovery software allows you to save 1 gigabyte of files without the need for activation or any fee. Upgrade to the Professional version if you want to restore more files and create a recovery drive for crashed Mac.
Final Thought
Whenever you use Photos, Mail, iTunes, Notes, or other specialized apps on Mac, look for the native or free data recovery options viz. ?Trash? and ?Recently Deleted? to recover the deleted items. But these apps hold the deleted data only for a limited time, so restore them soon after deletion.
On the other hand, you can look for the deleted items in the Trash straight away if you are on Finder or Desktop. If the Trash doesn?t have those files, open Time Machine and search for the files from the latest time before deletion and click Restore.
When none of the above free data recovery options help, go for a trial of Mac data recovery free edition software. Download, unzip & install it on your MacBook, iMac, or Mac Pro/mini. Then, launch it to select, scan and preview the recoverable files. And once you are satisfied with the recovery result, activate the software to save all the recovered data.


