Summary: Microsoft 365 or Office 365, also referred to as Exchange Online, supports Public Folders. In this article, you will learn methods to migrate Public Folders from your on-premises Exchange Server 2013, 2016, or 2019 to Office 365 or Microsoft 365 by using the Public Folder Migration Script and an EDB to PST converter software, such as Stellar Converter for EDB.


Although various companies are shifting toward SharePoint Online, Teams, and automation in their Office 365 or Microsoft 365 tenant, Public Folders are still very much used by companies to store different kinds of data. Also, the Public Folders in Office 365 (Exchange Online) are still supported and used. Migrating a mailbox from on-premises Exchange Server 2013 or 2016 to Office 365 or Microsoft 365 would not be a difficult task, but it might be a little bit trickier and more complicated to export and import Public Folders into Office 365. In this article, we will be going through the process of migrating Public Folders from Exchange 2013 to Office 365 or Microsoft 365. For Exchange Server 2016, the process is same.
Procedure to Migrate Exchange 2013/2016 Public Folders to Office 365
First, you need to download the Microsoft Scripts that can help you in the migration process. These can be downloaded from here.

Also, you need to download Pre-Migration Scripts from: here


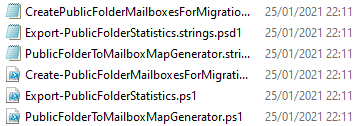
After the PowerShell scripts are downloaded, you can store them in the C:\temp folder to work on them.

Now, you need to prepare your local Exchange Server 2013 or 2016 for the process. Using a global administrator in Office 365 or Microsoft 365 tenant, get the domain to add to your local server as an accepted domain.
New-AcceptedDomain -Name PublicFolderMigration -DomainName mycompany.onmicrosoft.com


It is to be noted that not all Public Folders are compatible. You need to rename the Public Folders which contain any backslash or forward slash in the name. If you have many Public Folders, it will take a lot of time but by using PowerShell, you can automate this part.
Get-PublicFolder -Recurse -ResultSize Unlimited | Where {$_.Name -like "*\*" -or $_.Name -like "*/*"} | Format-List Name, Identity


This should not return any results if you do not have any folders with a slash. All you need to do is rename the folders if any are found. Next, you need to know if there were any attempts of migrations, done from your staff, from an Exchange Server which was inherited from another company.
Get-OrganizationConfig | Format-List PublicFoldersLockedforMigration, PublicFolderMigrationComplete, PublicFolderMailboxesLockedForNewConnections, PublicFolderMailboxesMigrationComplete


To start migration, the Public Folders status need to be ?False?. If any folders are marked as ?True?, you need to change the status of those to ?False?.
Set-OrganizationConfig -PublicFoldersLockedforMigration:$false -PublicFolderMigrationComplete:$false -PublicFolderMailboxesLockedForNewConnections:$false -PublicFolderMailboxesMigrationComplete:$false


Once you got the above cleared up, take a snapshot of the current structure of your Public Folders which you can use after the migration to compare the results.
Get-PublicFolder -Recurse | Export-CliXML C:\Scripts\structure.xml


Now, check if there are any current migrations running. If there are any, you need to remove them.
Get-PublicFolderMigrationRequest | Get-PublicFolderMigrationRequestStatistics
Get-MigrationBatch | ?{$_.MigrationType.ToString() -eq "PublicFolder"}


The above command should return nothing.
The below given Export-ModernPublicFolderStatistics command will export the statistics of the Public Folders to a CSV file.


.\ModernPublicFolderToMailboxMapGenerator.ps1 -MailboxSize 25GB -MailboxRecoverableItemSize 1GB -ImportFile .\pstats.csv -ExportFile C:\Scripts\map.csv


This will create the mapping file from the statistics CSV you just exported.
After connecting to Exchange Online via PowerShell by using the Connect-ExchangeOnline, you need to create empty Public Folders at the destination by using the below command.
$localmapping = Import-Csv C:\scripts\map.csv
$MailboxName = ($mappings | Where-Object FolderPath -eq "\" ).TargetMailbox
New-Mailbox -HoldForMigration:$true -PublicFolder -IsExcludedFromServingHierarchy:$false
$ MailboxName
($localmapping | Where-Object TargetMailbox -ne $ MailboxName).TargetMailbox | Sort-
Object -unique | ForEach-Object { New-Mailbox -PublicFolder
-IsExcludedFromServingHierarchy:$false $_ }
This will create Public Folders in your Office 365 tenant.
The next step is the migration process. You can launch it from the local Exchange Server by using the below script to get the credentials of the destination tenant.
.\Sync-ModernMailPublicFolders.ps1 -Credential (Get-Credential) -CsvSummaryFile:sync.csv

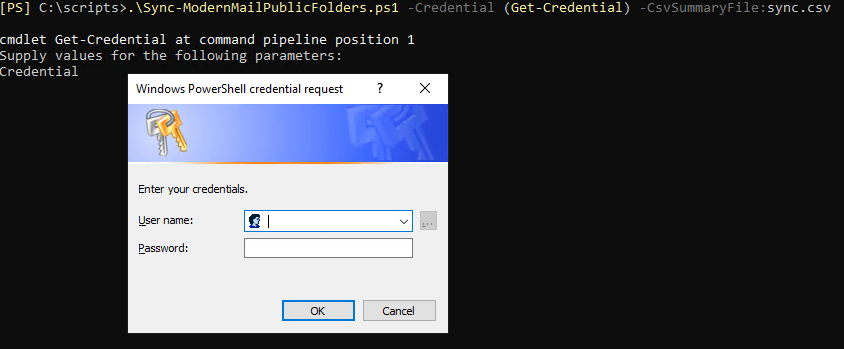
Enter the credentials of either the Global Admin or the user which has full access to Public Folders. After this, you need to set up the process.
$Source = "mycompany.onmicrosoft.com"
$PfE = New-MigrationEndpoint -PublicFolder -Name PublicFolderEndpoint
-RemoteServer $Source -Credentials $Credentials
[byte[]]$bytes = Get-Content -Encoding Byte C:\scripts\map.csv
New-MigrationBatch -Name PublicFolderMigration -CSVData $bytes -SourceEndpoint
This will set up the migration process but not start it.
To start the process, you need to run the below command.
Start-MigrationBatch PublicFolderMigration
Once the process is started, you need to lock the on-premises Public Folders by running the below command.
Set-OrganizationConfig -PublicFolderMailboxesLockedForNewConnections $true


Although the change is instant, it might take up to 2 hours until it is propagated to all the users. Once this time has passed, you can finish off the migration by using the Complete-MigrationBatch Public Folder Migration in the Exchange Online PowerShell.
After all the Public Folders have been migrated, you need to unlock them by using the below command in the Exchange Online PowerShell.
Set-OrganizationConfig -RemotePublicFolderMailboxes $Null -PublicFoldersEnabled Local


As you can see, this is a lengthy and complicated process that could have a number of fault points. It will take a considerate amount of time to complete and is not a hundred percent neat. As an alternative, you can look at third-party applications, such as Stellar Converter for EDB. The application can migrate public folders from exchange 2013 to Office 365 or Microsoft 365 as well as from Exchange 2016. The software can open the EDB file of any size and of any version of the Exchange Server. It can export Public Folders to PST or directly to an Office 365 or Microsoft 365 tenant.


