
Contents
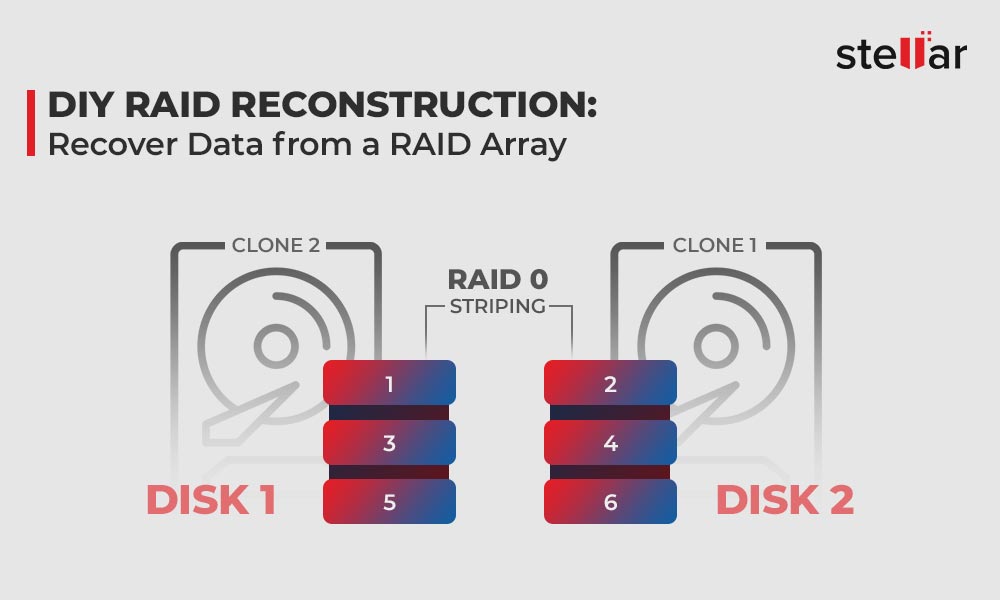
RAID reconstruction or RAID rebuilding is a process of restoring a broken, corrupt, or inaccessible RAID array to its normal working state. When a disk fails in RAID 5 or RAID 6 array, reconstruction is usually done by replacing the damaged or failed disk. However, in case of RAID 0, multiple disk failure, and corruption, reconstruction is done with the help of RAID reconstruction software.
The software emulates the RAID controller and helps you reconstruct a corrupt RAID 0, RAID 5, and RAID 6 array. This helps you access and save inaccessible data from a broken RAID array to a new disk.
Risks Associated With Physical RAID Reconstruction
1. Unexpected Errors
An unexpected error during the rebuild process could lead to RAID failure and permanent data loss situations. It may arise due to interruption caused by disk read/write error, fragmentation, sudden power failure, insufficient power supply, and drive’s error handling, etc.
2. Longer Rebuilds
With the increase in RAID level, there is an increase in the storage complexity due to parity bits, which means longer rebuilds. When you replace a failed or damaged disk in a RAID 5 or RAID 6 array, the RAID controller tries to reconstruct and copy the data to a spare drive. This process could take a while and during this time, especially if the RAID is using higher capacity disks, you should avoid using RAID until the rebuild is complete.
3. Overheating
Overheating is common during RAID rebuild when you replace a failed disk. This happens due to insufficient ventilation or cooling setup. Also, if the drives are fragmented, it increases the disk usage for a longer duration. The drive needs to run at the highest speeds to retrieve data, which can cause another drive to fail or stop working temporarily due to overheating. This could lead to errors that may cause permanent data loss.
A DIY RAID recovery software not only helps you avoid these risks but also eliminates the chance of errors that may lead to data loss as the software automatically detects the correct RAID parameters in case you enter or provide wrong parameters for RAID reconstruction. Moreover, you can always go back and rebuild the RAID again in case of any error, which isn’t possible otherwise.
Steps to Reconstruct RAID Array and Recover Data
Follow these steps to reconstruct and recover data from a RAID.
Step 1: Stop Using the RAID
If a drive in the RAID has failed, avoid using the RAID. Do not apply any hit-and-trial methods such as running CHKDSK on inaccessible RAID as it may lead to permanent data loss.
Turn off the RAID server or system, take out the drives, and connect to a Windows PC or Laptop via SATA or SATA to USB converter cable/enclosure.
Step 2: Create Disk Image or Clone Drives
Open the Disk Management tool and check if the RAID drives are recognized. In case a drive isn’t recognized, check the cable and connector. Also, ensure adequate power supply to disk by connecting the charging adapter if you are using a Laptop.
Also, assign a drive letter to the disk if not already.
Though you can’t access data from RAID disks just by connecting the drives to a PC, you can check the drive health status and clone the disk if the disk health is poor by using Stellar Data Recovery Technician software. Cloning a failing disk will help you avoid permanent data loss and recover data in case a drive fails during RAID data recovery.
To check disk health and clone disk, follow these steps.
Step 3: Reconstruct RAID and Recover Data by Using a RAID Recovery Software
Before you begin, keep an external drive(s) or spare storage media ready to save recovered RAID data. You can’t save recovered data on the connected RAID drives as it will lead to data overwriting.
1. Download, install and launch Stellar Data Recovery Technician (if you haven’t already)


2. Select ‘All Data’ and click ‘Next’

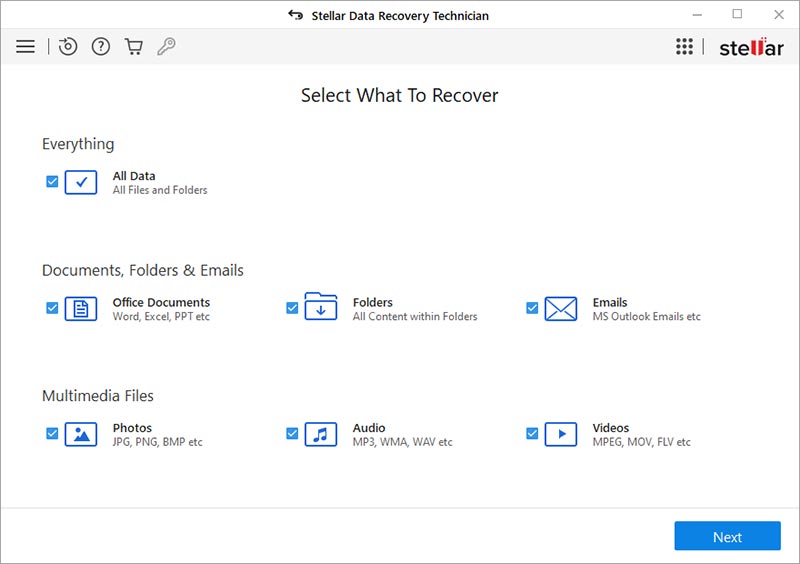
TIP: You may also go to ‘Advanced Settings>Add Header’ to add a custom or uncommon file format to recover it. This feature of Stellar Data Recovery Technician helps you to recover virtually any file format.
3. Select ‘RAID Recovery’ and click ‘Scan’

4. Click on the RAID tab—RAID 0, RAID 5, or RAID 6.
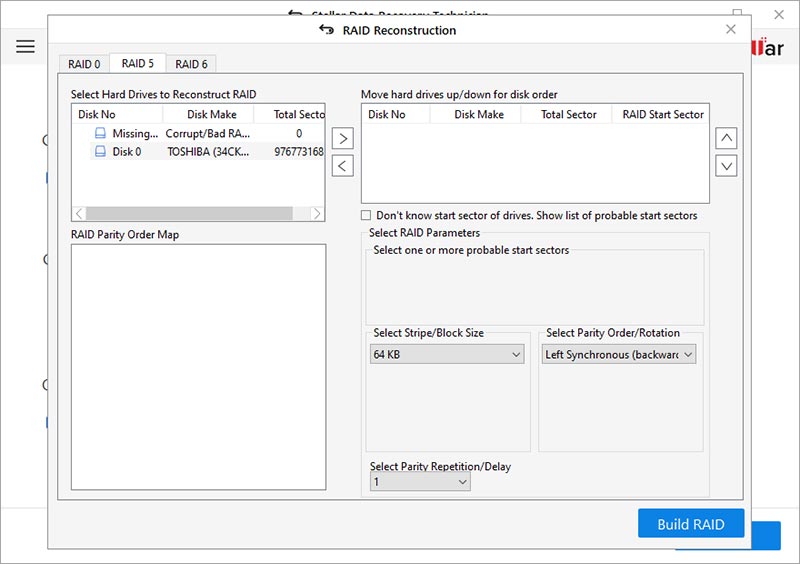
5. Using the arrow buttons, move all RAID member disks to ‘Move hard drives up/down for disk order’ list box.
6. Use the up-down arrow buttons to arrange disks in the sequence as they were in the RAID array.
7. Then enter or select the required RAID parameters from the options. You may choose ‘Don’t know …’ option if you don’t remember or know the RAID parameters—required for virtual RAID reconstruction.

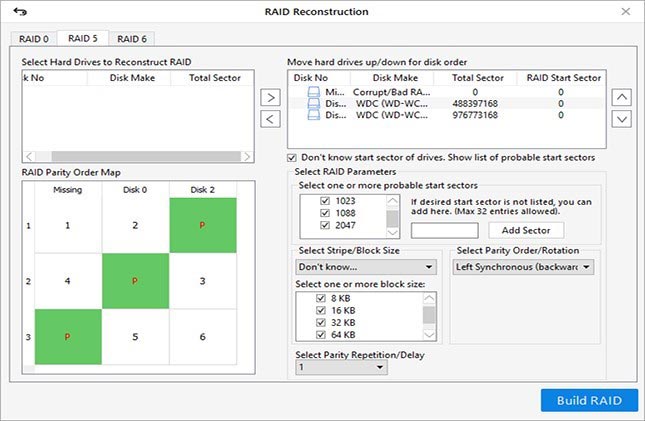
8. Click on ‘Build RAID’ button.
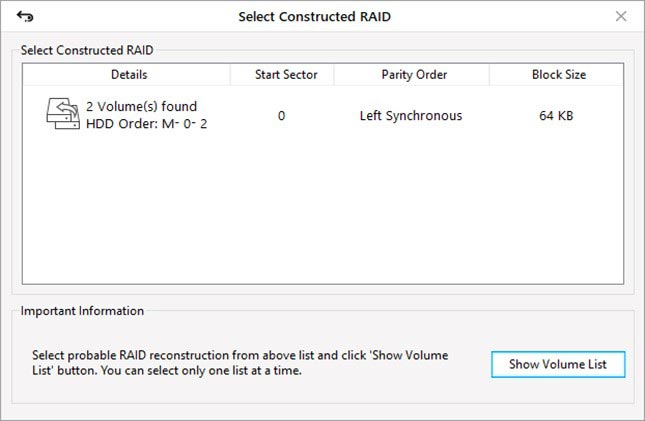
Based on the provided RAID parameters, the software constructs a virtual read-only RAID. In case if entered parameters are wrong, the software intelligently detects the RAID parameters and builds a few probable virtual RAID construction.
9. Select the constructed virtual RAID and click on the ‘Show Volume List’ button.
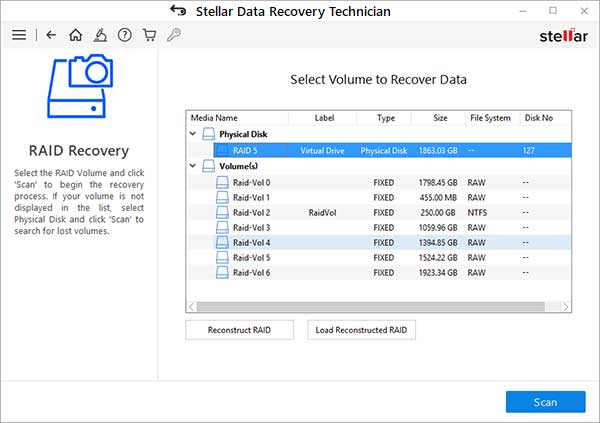
10. Select the RAID volume and click ‘Scan’

11. If the files are not found in the initial scan (Quick Scan), click on the ‘Click Here’ link at the bottom-left to begin ‘Deep Scan.’
12. After the scan, you may preview files such as documents, photos, videos, audios to verify the data before saving.

13. Select the files or folders that you want to recover and click on the ‘Recover’ button.
14. Click ‘Browse’ and select the external drive. Do not choose the RAID member disks as save location.
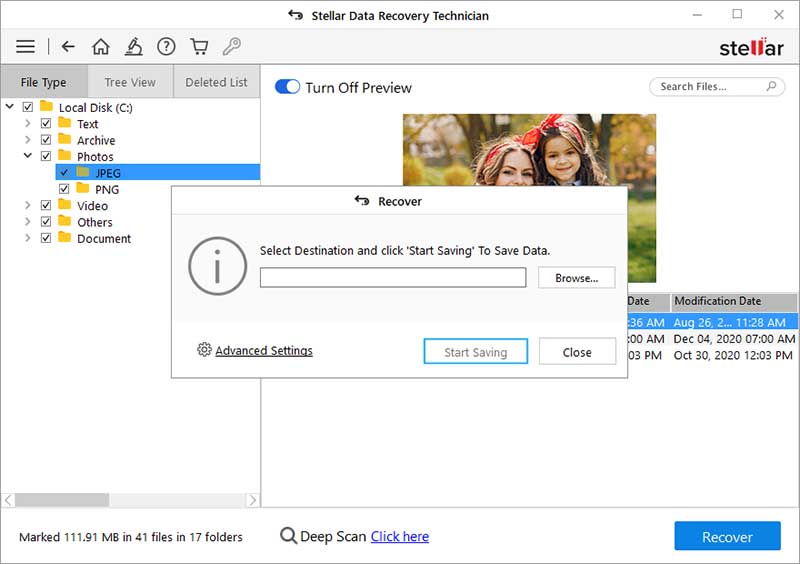
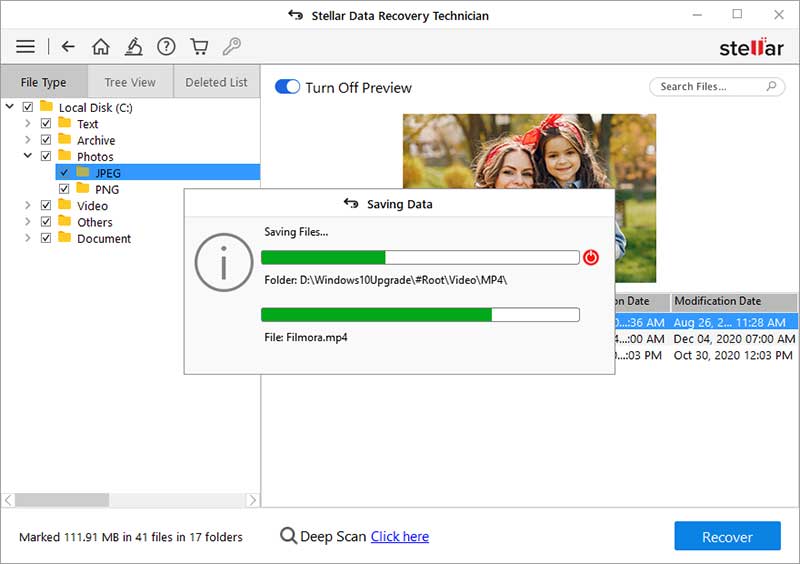
15. Finally, click on the ‘Start Saving’ button to start saving the recovered files from the reconstructed RAID array.
Once you have saved all your data after virtual RAID construction, you may go ahead, format all the RAID member disks and rebuild a fresh RAID array. Keep a note of all the RAID parameters. They come handy in RAID reconstruction and recovery situations.
Conclusion
RAIDs are highly complex storage solutions, which connects one or more physical drive to form a single logical volume for data storage. This logical arrangement may break or get corrupt.
You can rebuild a RAID by replacing the failed drive with a new one. However, to reconstruct a logically damaged RAID and multiple disk failure, it is critical to use a RAID data recovery software. This will help avoid unexpected errors that may arise during RAID reconstruction. Software such as Stellar Data Recovery Technician automatically detects RAID parameters and constructs a few probable RAID configurations for recovery. It emulates the RAID controller and helps you copy inaccessible data from a broken RAID to a new disk.
The RAID reconstruction software is also equipped with a drive monitor tool that actively checks disk temperature and health status along with SMART parameters. Also, provides an option to clone disk to create a copy of RAID drive, thereby facilitating safe and secure data recovery from a damaged RAID 0, RAID 5, and RAID 6 levels.