Summary: Deleted important files by mistake but need to have them back asap? We’ve all done that — you’re not alone. This handy guide will navigate you through various manual and automatic methods to restore those deleted files on your Mac. Just choose the one that suits you better!

![5 Ways to Recover Deleted Files on Your Mac [2024 Guide]](https://www.stellarinfo.com/public/frontEnd/images/product/free-download-mac-blue-button.png)
Contents
- 1. Recover Deleted Files on Mac Using the ?Undo Action?
- 2. Recover Deleted Files on Your Mac with the ?Put Back? Option
- 3. Recover Files on Mac with Time Machine
- 4. Recover Deleted Files on Mac by Checking the Recently Deleted Folder
- 5. Recover Deleted Files on Mac by Using a Data Recovery App
- Wrapping Up
Contrary to popular belief, you can recover permanently deleted files on Mac. Luckily, there are multiple ways to ?undelete? data on your Mac ? you can either try manual methods or use software designed specifically for this purpose. Let?s take a closer look at five tried-and-tested ways.
Jump through these sections to learn how to retrieve deleted files on Mac by:
- Using the ?Undo Action?
- Checking the Trash Bin
- Using Time Machine
- Checking the Recently Deleted folder
- Running a trusted data recovery app
1. Recover Deleted Files on Mac Using the ?Undo Action?
If you have just deleted a file on your Mac, you can immediately try the so-called Mac undelete method or ?Undo Action.? This option will save you some time rummaging through all of the items sent to the Trash.
Here?s how to recover deleted files on Mac with the help of the ?Undo? option:
- Open Finder or click anywhere on your Desktop.
- Click on the Edit option in the menu bar.
- Choose the Undo Move of ?name of the file.?


Note: If you have deleted multiple files at once and the document you need to restore was one of them ? you?ll see an option to undo multiple files. Just go with it.


2. Recover Deleted Files on Your Mac with the ?Put Back? Option
Every Mac file recovery guide will recommend you check your Trash bin along with the ?Undo Move? method. And for a good reason, as the file might not have been deleted yet.
If you have recently moved an item to the Trash and don?t remember emptying the Trash Bin shortly after that, do the following:
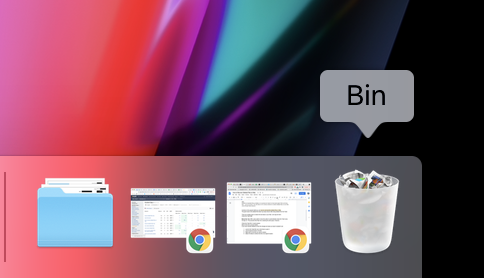
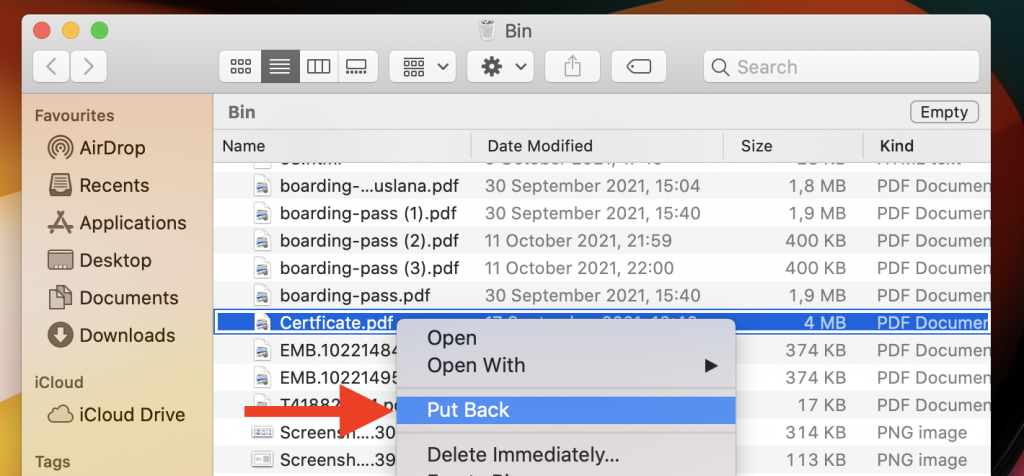
1. Look for the Trash Bin icon on the right in the Dock to open it.

2. Look through the items and locate the deleted ones.
3. Right-click on the file you want to restore.
4. Select Put Back to retrieve the file to its original location.

Try this: Many Mac users prefer to have the option to automatically empty the Trash every 30 days on. However, it may backfire when recovering files after emptying Trash. That?s why you may consider turning it off. To do this, open Finder > go to Preferences from the menu bar > Advanced tab > untick the Remove items from the Trash after 30 days option. But don?t forget to empty the Trash once in a while to free up space on your Mac.
What to do if you have emptied the Trash? The good news is the deleted file doesn?t go away forever after being deleted from the Trash. The erased item is stored on the hard drive until your Mac overwrites the deleted data. At this point, you should stop taking any actions on your computer and get down to recovering items using any of the following steps.
3. Recover Files on Mac with Time Machine
If you?re familiar with Time Machine and how it works, let’s recover emptied Trash from one of the previous backups.
Recovering deleted files on Mac via Time Machine goes like this:
1. Plug in the Time Machine backup drive.
2. Open the folder where the deleted file was stored before. For example, Documents or Downloads.
3. Access Time Machine from any of these locations:
- System Preferences
- Spotlight
- Launchpad
- Menu bar

4. Navigate through the timeline using the arrows on the screen and find the backup you want to restore > click Restore.
5. Check if the file has been restored to its original location.
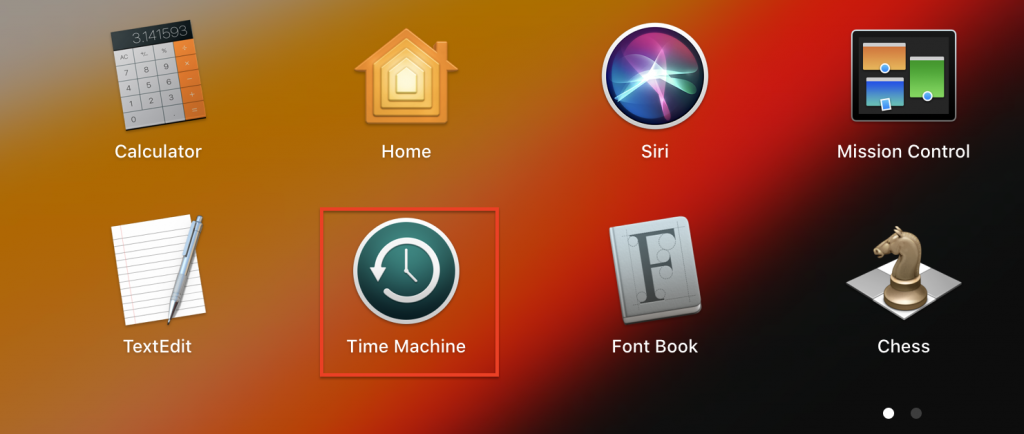
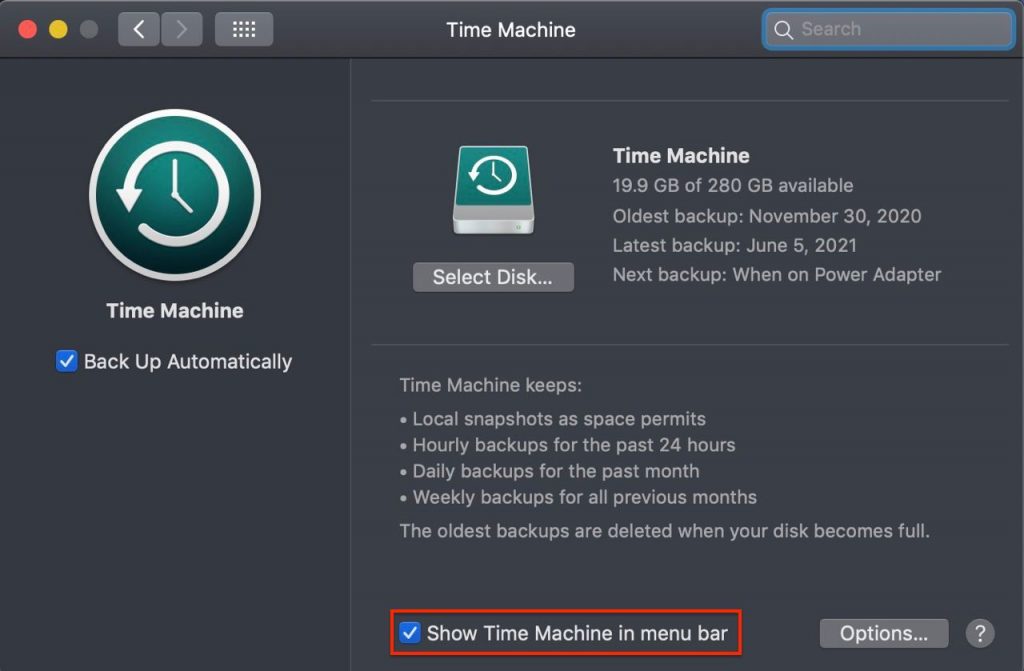
You should try this: Add Time Machine to the menu bar to access it quickly. To do this, go to the Apple Logo > System Preferences > Time Machine > tick the box next to the Show Time Machine in the menu bar option. Now you can enter the Time Machine or open its preferences with just two clicks.

Related Reading: How to set up Time Machine on Mac?
4. Recover Deleted Files on Mac by Checking the Recently Deleted Folder
You must have restored deleted photos on your iPhone from the Deleted Recently folder plenty of times. The same applies to some built-in macOS apps and some third-party software. They have the same algorithm and store photos, notes, voice memos, and other files 30 days after deletion.
To recover deleted files, let?s check the Recently Deleted folder:
1. Open the app with the missing item and look for a Recently Deleted folder.
Here?s what it looks like for the Photos app:

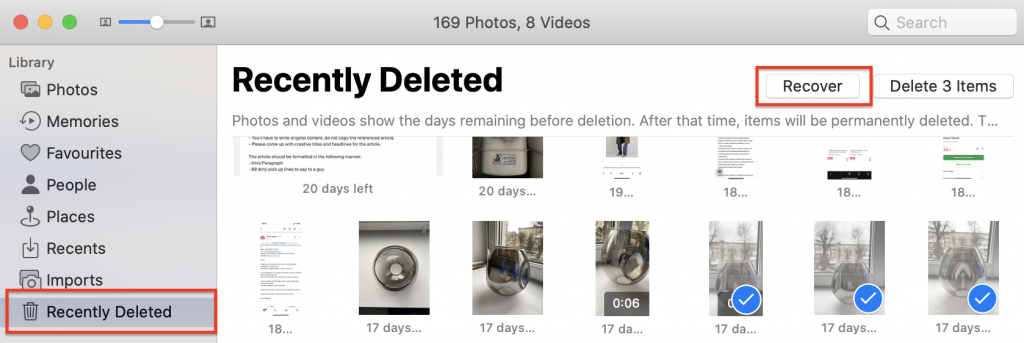
2. Pick the photos you want to recover and click the Recover button in the right upper corner of the window.
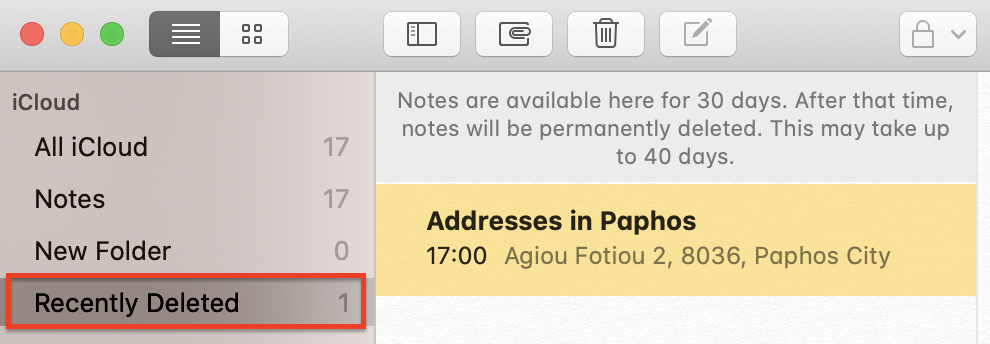
Try the same for other apps, like Notes or Voice Memos.
1. Navigate to the Recently Deleted tab in the sidebar on the left in the Notes app. Right-click the note and choose Move to > select a destination.

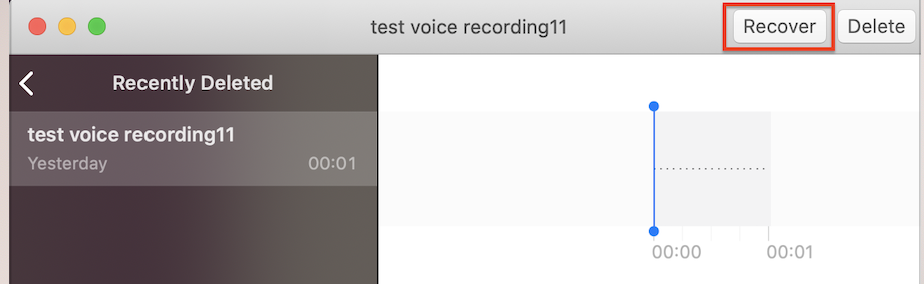
2. Look for this folder > click on the memo you want to restore > click the Recover button in the Voice Memos app.

5. Recover Deleted Files on Mac by Using a Data Recovery App
Sometimes restoring files from Trash doesn?t work correctly. For instance, you don?t use Time Machine and have already emptied the Trash. In this case, try delegating this task to a trusted Mac file recovery software like Stellar Data Recovery. This handy tool received 4.6 stars on Trustpilot and is compatible with the latest macOS Ventura. Use it to recover numerous file types, including videos, photos, documents, and so much more.
Let?s see how to recover deleted files on Mac with Stellar Data Recovery:
1. Download and install the Stellar Data Recovery app.


2. Open the app > choose what files to recover > hit Next.


3. Choose a volume in the Recover From window > press Scan.
4. Assign Full Disk Access (if prompted in the latest macOS versions. If not ? move to the next step). Click the Open Security and Privacy button.
5. Unlock the padlock in the left-bottom corner > tick the checkbox next to StellarDataRecovery in the Privacy tab > quit and reopen it.


6. Start the scan and wait for its results (it took less than two minutes in my case).
7. Navigate through the app and look for the files you want to restore > hit Recover.
And that?s it! It took me less than 5 minutes to set up the app, run the scan and bring the accidentally deleted files back to their original location.
Wrapping Up
Not finding a necessary file on your Mac does seem like the end of the world. The good news is, there are multiple ways to recover deleted files on Mac. Try any of the above-mentioned manual solutions or download a top-rated app, like Stellar Data Recovery, to find deleted files and other documents on your Mac.
Related reading:


