Summary: Did you mistakenly delete a file that you needed? Such situations are quite every day. This article will tell you how to recover files using Mac default utilities and restoring software like Stellar Data Recovery Professional.


macOS Sonoma is the most recent release of the Apple operating system. It is integrated with all of the most recent features, some of which were previously absent in earlier versions of macOS, as well as upgrading features that were already present to make using a Mac more satisfying.
Nevertheless, regardless of how advanced an operating system may become, there is always the risk of data loss.
This article overviews five effective methods to retrieve lost data on macOS Sonoma.
Data Loss Reasons on macOS Sonoma
You could end up deleting or misplacing your important files or folder for any of the following reasons:
- An unstable internet connection or a power outage could cause problems during the software upgrade.
- Keeping one’s files in a location incompatible with the macOS Sonoma operating system.
- During the process of upgrading, data was accidentally deleted.
- The drive became corrupted.
- An update was disrupted.
How to Recover Files on macOS Sonoma
Below is a list of some of the best methods available to recover files on the macOS Sonoma update.
I. Recover Files with Stellar Data Recovery Professional
Stellar Data Recovery Professional is the most effective method for retrieving lost or deleted files on a Mac. It is possible to recover files even if they have been formatted, deleted, hidden, corrupted, or broken. It supports both internal and external drives, SD cards, USBs, and other storage devices. It is possible to quickly and effectively repair and recover the data regardless of the state in which it is currently stored.
The following steps need to be taken in order to recover your files:
1. Download and install Stellar Data Recovery Professional.


2. On the screen “Select What To Recover,” choose to Recover Everything or select the needed file types.


3. When you have chosen the needed file types to recover, click the Next button.
4. Select the disk where to do a search for the lost data and click on Scan.


5. After the scan, perform a preview of the files, choose the required ones, and click the Recover button.


7. Click Save after you have selected an external hard drive to store the recoverable files on.
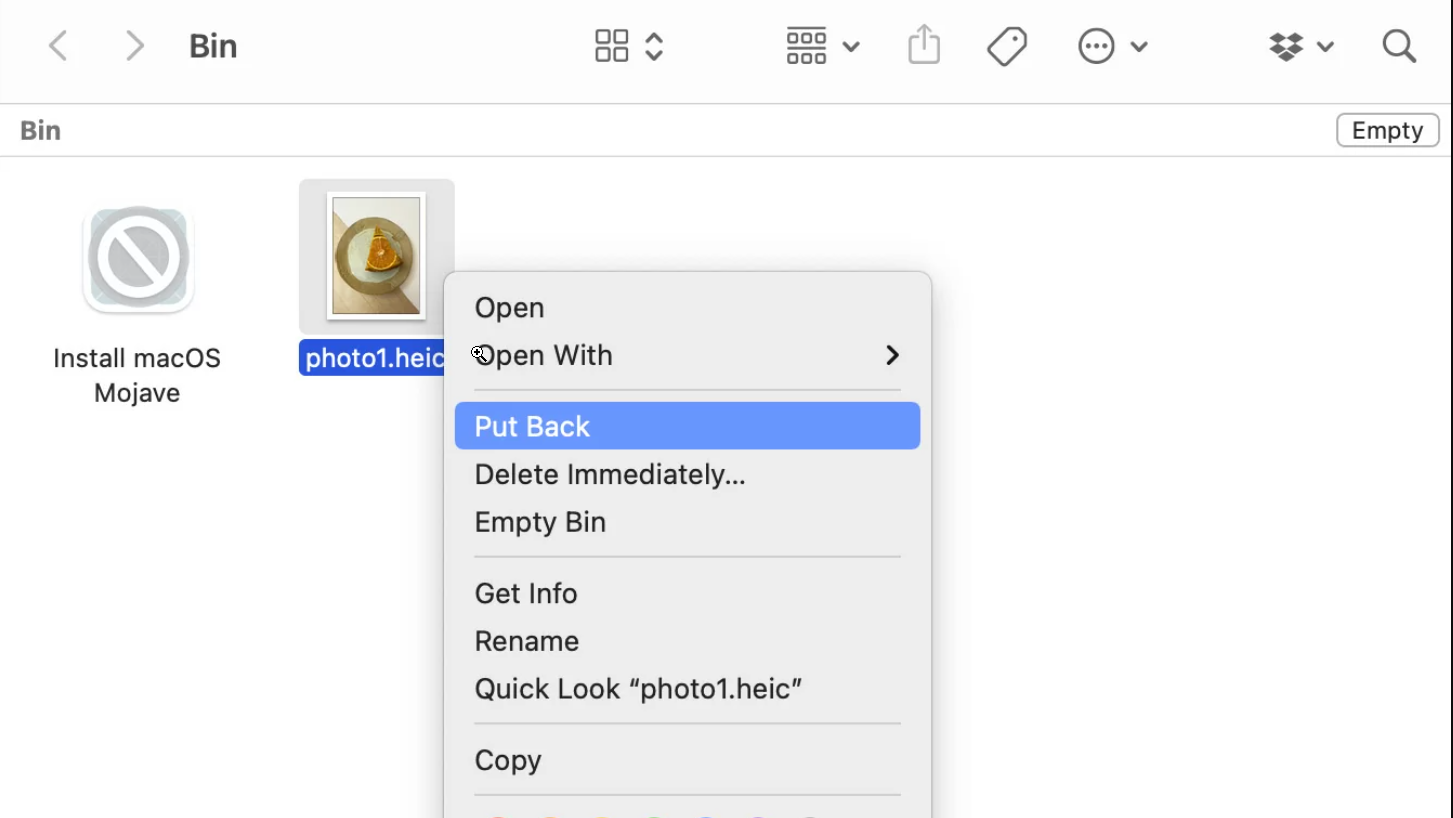
II. Recover Deleted Files from Trash
The Trash folder on your iMac or MacBook is where you’ll most likely find all the files and folders you’ve deleted.
So the next option available to recover files that have been deleted is to recover them from the trash on the Mac:
1. Launch the Trash on your Mac.
2. Pick out the documents or folders that you’d like to have restored.
3. Right-click the file to bring up a menu, then select Put Back.

III. Recover Files Using Undo Function
If you have removed any files from any folder by mistake or even the folder itself, this method is for you. The option to undo deletion will allow you to restore it to its previous state quickly.
To get your files back using this function follow the next steps:
1. From the menu bar, select the Edit option.
2. Choose Undo Move of?

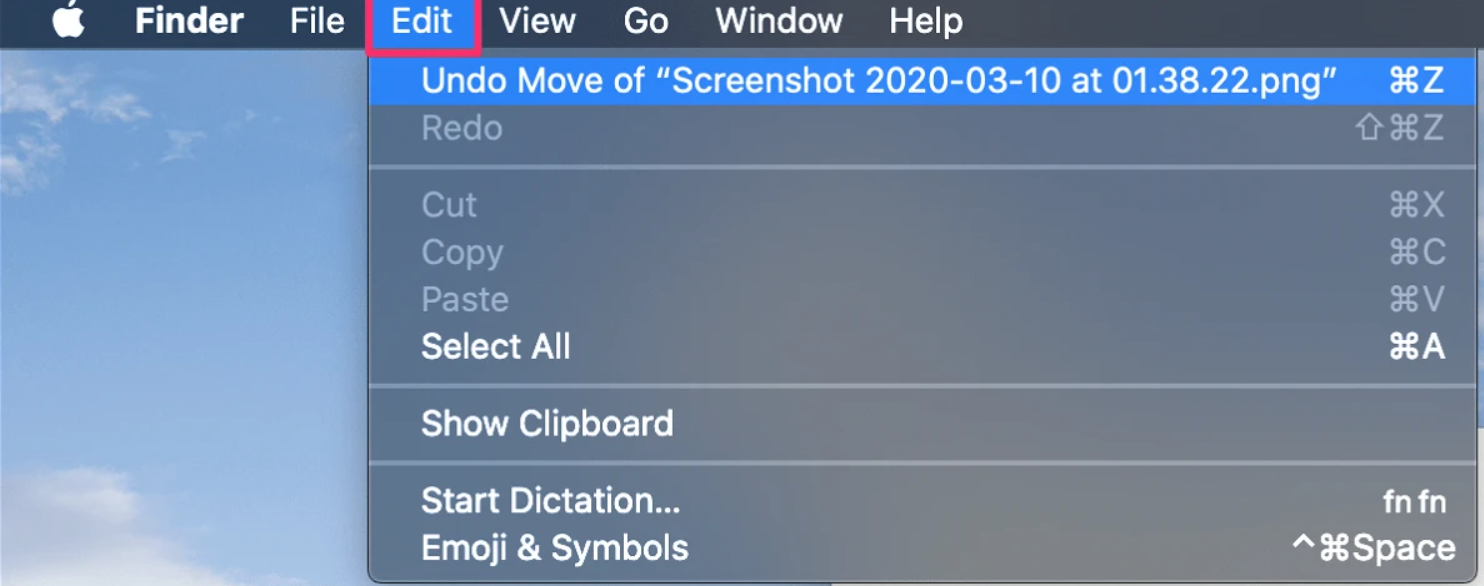
To recover a file that has been deleted, you can do the same thing by pressing the Cmd + Z keys on your keyboard.
IV. Recover Files via Time Machine
Time Machine is a default Apple utility to automate the process of creating backup copies of critical data. It can be brought back to life and used if you have irretrievably deleted or lost your files for some other reason.
If you make it a habit to create backups on a regular basis, then you can attempt to restore a backup file on macOS Sonoma using the Time Machine.
Here’s how to use your Mac’s Time Machine to make backups:
1. Connect the Time Capsule or external hard drive.
2. Go to Apple Menu > System Settings > General > Time Machine > Add Backup Disk to start Time Machine.

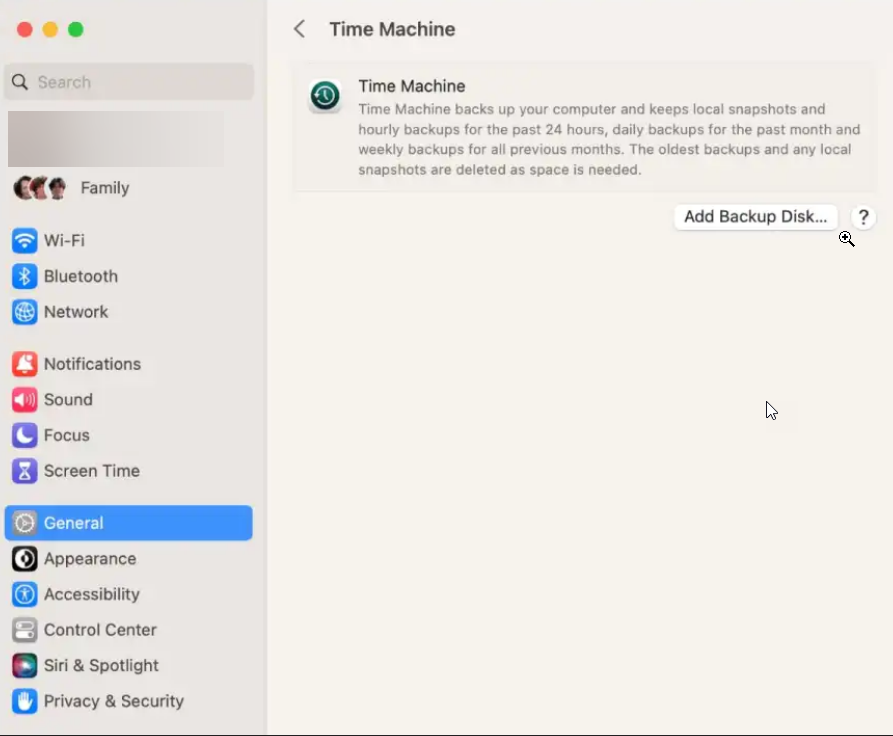
3. Click the Use Disk button after choosing the backup disk you want to use.
Done. The most recent backup of your system is now in Time Machine.
In case you need to restore your files from Time Machine, you need to do the following:
1. Enter Recovery Mode.
2. When you are in Recovery Mode select Options > Continue.
3. Choose Restore from the Time Machine Backup option.

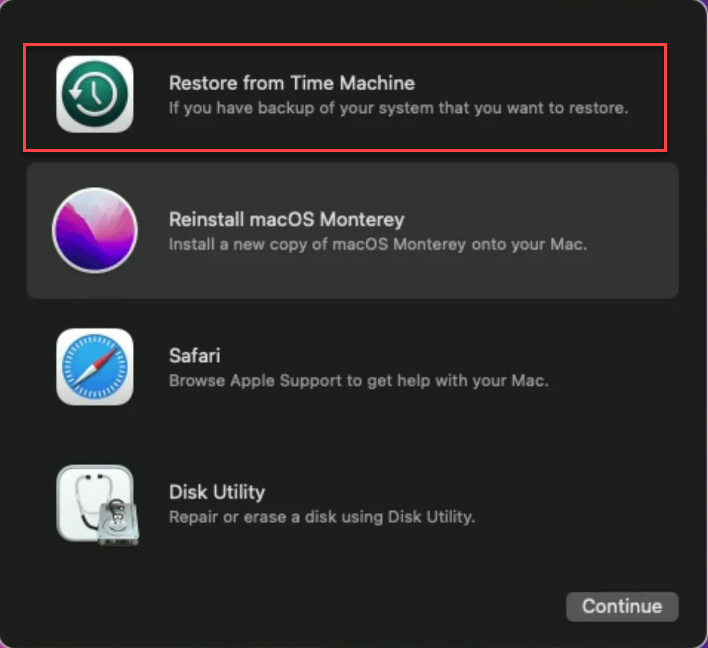
4. Follow the onscreen instructions to restore the needed macOS version.
V. Recover Deleted Files Using Terminal
The terminal is a command line interface for Mac computers that is used to issue instructions to operating systems so that they can carry out specific tasks.
To restore files using Terminal, do the following:
- Launch the Finder application as the first step. To open the Terminal, navigate to the Applications folder on your computer, then click the Utilities button.
- When in Terminal, type the command cd.Trash and hit Enter.
- Enter ls -al ~/.Trash and hit Enter.
- When you see the list of files type mv XXX../
Note: Replace XXX with the name of the needed file.
You will see that the files that you deleted have been successfully restored to their initial location.
When you use the Terminal application, you won’t be able to retrieve large amounts of your data in a single operation, which is one of the most significant drawbacks of this program. Only one file at a time can be recovered using the Terminal’s functionality.
Wrapping Up
The introduction of new features, enhancements to the device’s performance, improvements to the system’s stability, and the elimination of bugs are all outcomes of upgrading the operating system. On the other hand, just like any other software, it comes with a new set of bugs, which can be both irritating and infuriating.
Even though it is highly unusual, it is still possible that after updating Mac’s operating system to macOS Sonoma, some of the user’s files could become corrupted or vanish entirely. However, there is no need for alarm because the methods described above should assist you in recovering files that have been deleted from your Mac.
Read more:


