Summary: Have you accidentally deleted or lost valuable Logic Pro files? This sounds like a great loss but don't give up. This blog shares the best methods to recover deleted Logic-Pro files on Mac. Download the free Mac data recovery software to recover up to 1 GB deleted Logic-Pro files.


2. Recover Deleted Logic Pro Files Using Free Mac Data Recovery Tool
Logic Pro X is the latest version of Digital Audio Workstation (DAW) and MIDI sequencer that generates the Logic-Pro files. The software creates Logic Pro projects that include audio files with .logic extension. Logic Pro X supports a variety of audio file formats of Apple, viz. WAV, AIFF, AAC, ALAC, MP3, REX, RCY, SMF, CAF, PCM, SDII, MIDI, and others.
When you have accidentally deleted your Logic-Pro files and emptied the Trash, no need to worry, read on to learn the two best ways to get back your lost Logic Pro Project files on macOS.
1. Restore Lost Logic Pro Files with Time Machine
As you are aware, Time Machine is the default backup application on your Mac. You can set an external hard drive as the Time machine backup drive. And the Time Machine app will take an incremental backup of your start-up disk.
Steps to restore the Logic-Pro files from the Time Machine backup
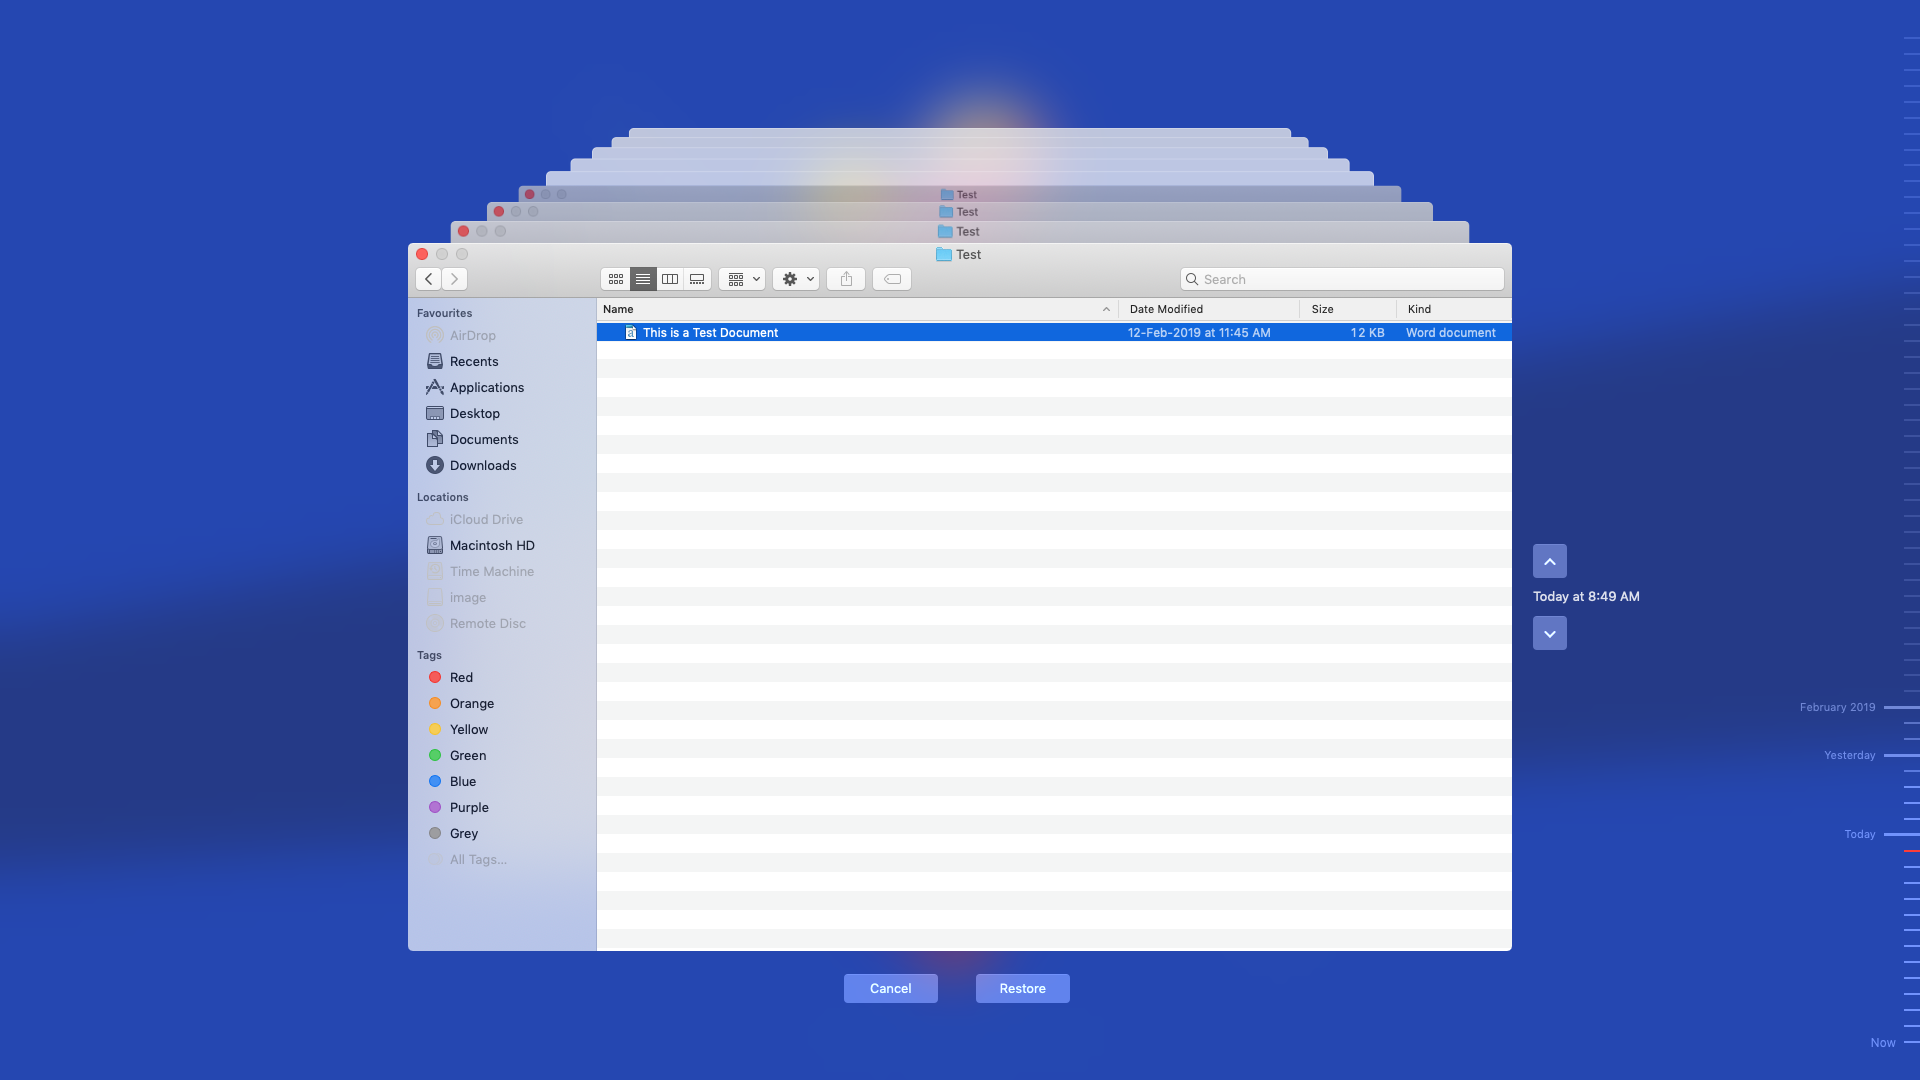
Step 1) Open a Window for the file you wish to restore. For instance, if you have stored your Logic-Pro files in the Documents folder, then open the Documents folder.
Step 2) Ensure your Time Machine backup drive is connected to your Mac. From the top Menu Bar, go to Time Machine > Enter Time Machine.
Step 3) Use the Timeline located at the edge of the screen to find your deleted Logic-Pro file in a particular time and date when it was present.
Step 4) Use the up and down arrow on the screen to find when the data changed in the folder. You can also use the search bar to find the file you are looking.
Step 5) Before retrieving the file, you can preview it by selecting the file and pressing Space Bar.
Step 6) Select the required Logic-Pro files and click Restore. To use other options, control-click the files.

2. Recover Deleted Logic Pro Files Using Free Mac Data Recovery Tool
When Time Machine backup external drive is not set-up or the backup is outdated, then you need to use a free Mac data recovery software to retrieve deleted Logic-Pro files on your Mac.
Steps to recover deleted Logic-Pro files
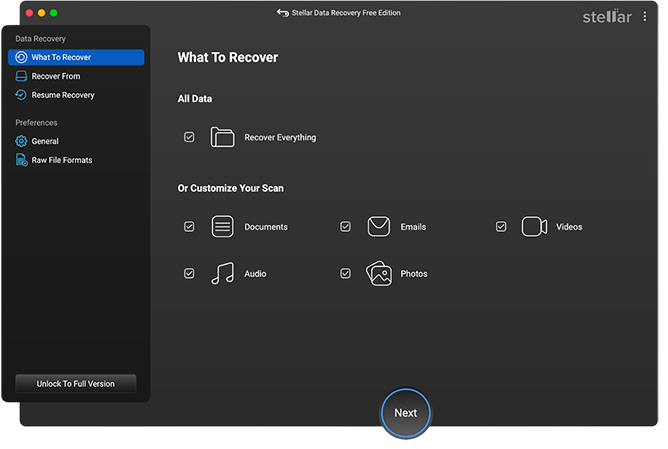
Step 1) Download and install the *trial version of Stellar Data Recovery Free Edition for Mac on your MacBook or iMac.


Step 2) Select a specific file type or recover everything, then click Next.

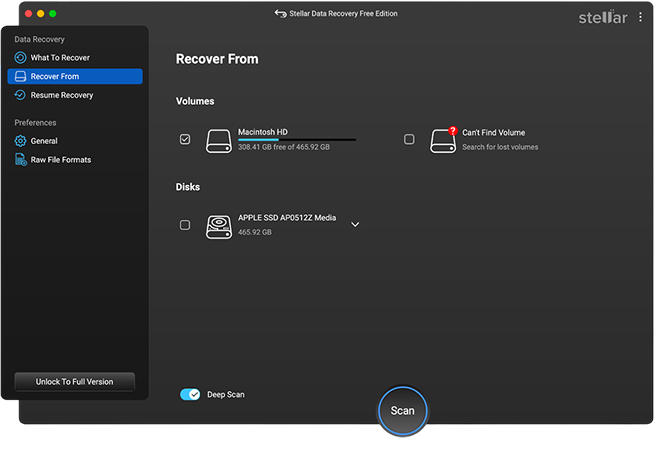
Step 3) Select the location to perform recovery, then click Scan. Use Deep Scan available at the bottom-left corner if your drive is formatted or corrupt. Deep Scan will take more time but the scan result would be more comprehensive.

Step 4) After the scan completes, select the Logic-Pro files and click Recover. If required, you can use the Search tab to find all your Logic-Pro files.

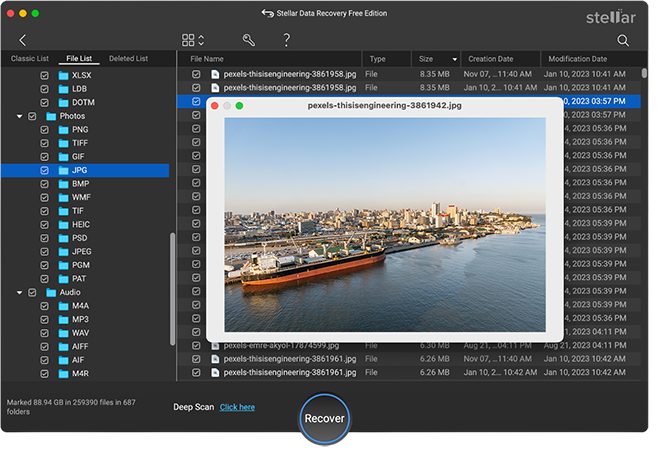
Step 5) Choose a distinct drive location to save the files and click Save.
Note: Stellar Data Recovery Free Edition for Mac allows free scan, preview, and up to 1 GB data recovery. To save all your recoverable files, you need to activate the software.
Stellar Data Recovery Professional for Mac supports most of the Logic-Pro files, including WAV, AAC, AIFF, ALAC, AAC, MP3, and MIDI. In case any Logic Pro supported files are not listed?such Core Audio Format (CAF), Sound Designer I and II (SDII), ReCycle (REX, RCY), and Standard MIDI files (SMF)?use the ?Add Header? feature to add them to the software.
Conclusion
Always maintain a Time Machine backup to avoid any data loss situation. But you may forget to connect your Time Machine backup drive to take an incremental backup of your data and realize this only when you have deleted some essential Logic-Pro files.
Don?t panic. Use the Stellar Data Recovery Free Edition for Mac software to scan, preview, and recover up to 1 GB of deleted Logic-Pro files. Only when you are satisfied with the result and wish to save all the files to your Mac, go ahead and activate the software.


