Summary: If you are experiencing Exchange 2013 mailbox database corruption or damage issues, this blog will help you recover the database. It explains the stepwise process for Exchange 2013 database recovery via backup and Windows Server Backup (WSB) and Exchange 2013 recovery database method.


Contents
Exchange Server is one of the most widely used mail servers in both small and large enterprises. It stores and maintains all information of Exchange user account such as emails, contacts, calendars, tasks, journals, etc. in the Exchange database (EDB) file in the form of users? mailboxes.
However, when the EDB file gets corrupt or damaged, all its data becomes inaccessible. This may bring businesses to a halt, if not fixed promptly, as users can?t communicate and exchange emails or other valuable data. Such a situation of failed Exchange 2013 database can cause unnecessary downtime, resulting in loss of revenue and reputation.
To turn such an unfavorable situation into a favorable one, it becomes necessary for the Database Administrators (DBAs) to execute Exchange recovery process quickly to recover the inaccessible Exchange 2013 database mailboxes with minimal downtime.
One of the most common and reliable methods is to recover Exchange mailboxes from restored backup. In this blog, you will get to know the process of restoring Exchange Server 2013 database by using Windows Server Backup (WSB) and then recovering the mailboxes via eseutil commands and recovery database.
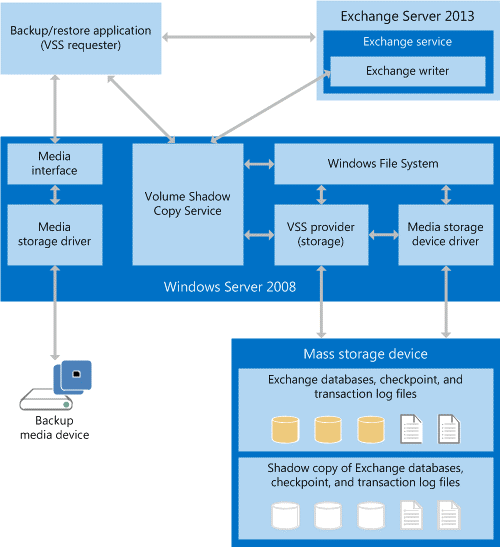
Restore Exchange 2013 Mailboxes via Windows Server Backup (WSB)
The complete method to restore Exchange mailboxes by using Windows Server Backup is already explained in our previous post. Follow the guide to leverage WSB to restore Exchange 2013 EDB. Then follow the given steps to mount and recover the mailboxes from restored Exchange backup via Eseutil command line.
Alternatively, try an Exchange recovery tool such as Stellar Repair for Exchange to recover and repair mailbox database in Exchange 2013.


Recover Exchange 2013 Mailboxes from Restored Exchange Backup
Below are the steps to recover mailboxes from the restored Exchange 2013 Server database:

Step 1: Ensure Folder Path Location of EDB and Transaction Log File
The first step that you are required to do is provide the folder path location where the Exchange database and log file needs to be restored. There should be enough storage space on the disk for storing the recovered EDB and log file.
Step 2: Check Database Shutdown State ? Dirty or Clean
You must verify the health of the restored database file as to whether it is in Clean Shutdown or Dirty Shutdown state. To do so, you will have to run the command as indicated below:
eseutil.exe /mh E:\Recovery\RDB.edb | select-string ?State:?, ?Log Required?Step 3: Ensure Clean Shutdown State
Check the shutdown state,
eseutil /mh DatabseNameIf the Exchange database displays Dirty Shutdown state, you will have to perform ?Soft Recovery? to change shutdown state to Clean Shutdown. To do so, run following command,
eseutil /R RB03 /L ?E:\logFileFolderPath? /D ?E:\EDBFolderPath?RB03 is transaction log prefix.
If the Exchange database is already in a clean shutdown state, you can proceed to the next step without performing Soft Recovery.
Step 4: Create ?Recovery Database? in Exchange Server 2013
Exchange 2013 Recovery Database (RDB) is a distinct type of Exchange mailbox database that allows you to mount any database from backup. The RDB must be given a unique name. You should use location of the recovered log files for ?LogFolderPath? parameter. For ?EdbFilePath? parameter, you should use name and path of the database file. Here, the name of RDB is RDB0. To create Recovery Database, use the following command:
New-MailboxDatabase -Recovery RDB01 -Server MBX01 -EdbFilePath E:\Recovery\RDB.edb -LogFolderPath ?E:\Recovery?Step 5: Verify Database Mount State
After creating the Recovery Database, you should verify if the database is in mounted state. This can be done by using the following command:
Get-MailboxDatabase -status RDB01 | fl MountedStep 6: Mount the Database
If the database isn?t mounted, use the following command to mount it,
Mount-Database RDB01 ?VerboseStep 7: Check Database Mount State
After mounting the database, you can check the status with the below command,
Get-MailboxDatabase RDB01 -status | fl MountedStep 8: Verify Mailbox Statistics of the Restored Database
Run the following commands:
Get-mailboxstatistics -database RDB01 This command should be used to find all the mailboxes present in the Recovery Database.
Get-MailboxStatistics -Database RecoveryDB | ?{$_.DisplayName -like ?xxx?} | fl DisplayName,MailboxGuid,DisconnectDate This command should be used to find particular mailboxes that are present in the Recovery Database on the user account or GUID.
Step 9: Next, the mailboxes must be restored using Exchange PowerShell commands as per the requirement. Specific commands can be used for restoring the entire mailbox, restoring the mailbox using GUID, restoring the source mailbox to a different user mailbox, and restoring the mailbox email in a separate folder (Restore) in the user mailbox.
Step 10: : Next, the status of the mailbox restoration must be checked in the user mailbox on all the restored emails with the following command:
Get-MailboxRestoreRequestStep 11: : Finally, you should remove the ?Completed? mailbox Restore with the use of following PowerShell command:
Get-MailboxRestoreRequest -status Completed | Remove-MailboxRestoreRequestRating by MVP:
![]()

![]()

![]()

Conclusion
To check if the process has successfully recovered the mailbox data, you should access the target mailbox in Outlook or Outlook Web App. If data is present, it means that the Exchange 2013 database recovery process was successful and has been able to recover the mailboxes.
However, if the Exchange database recovery process fails to provide you the desired result, you can then leverage Stellar?s Exchange Recovery software. This tool seamlessly recovers damaged Exchange database mailboxes and its data items. Also, it effectively handles almost all corruption issues and saves the recovered data in a healthy PST file.
It can also retrieve users? mailboxes to live Exchange and Office 365 environment. And, it is compatible with Exchange Server 2019, 2016, 2013, and other lower releases.


